Easter
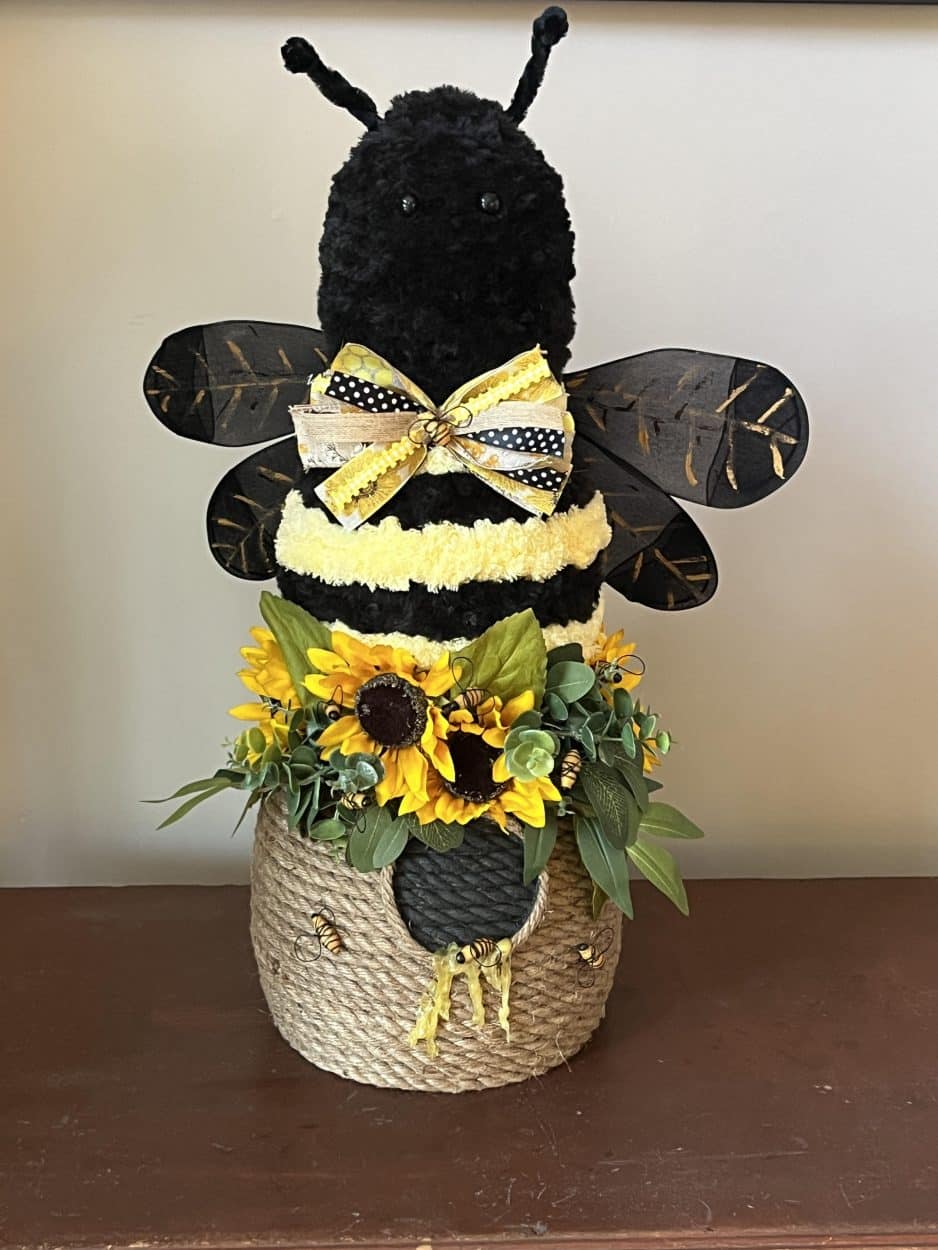
Stackable Bumble Bee and Beehive
17
Apr
Apr
f you like decorating with bees and beehives for the summer you are going to love this stackable bumble bee sitting on top of the beehive! Every year a buy a few sets of the stackable eggs from Dollar Tree plus and try to come up with something new to create with them, last year I made a chick for Easter, a set of scarecrows for fall, and a set of snowmen for winter so I wanted to do something for summer this year and I came up with this bumble bee sitting on top of a beehive.
Materials I Used:
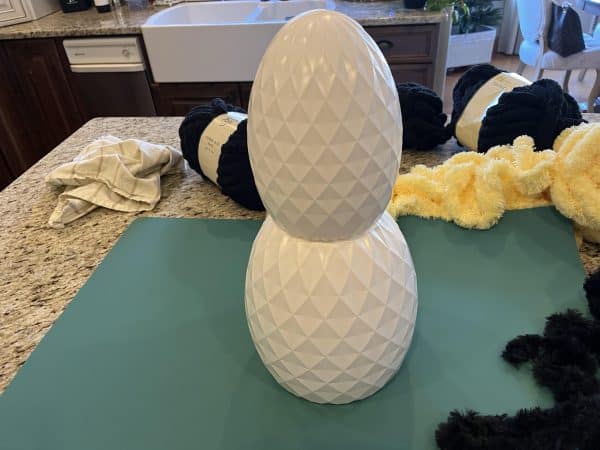
- 1 set of stackable eggs from Dollar Tree
- 1 skein of Loops & Threads fluffy chenille yarn in the color Lemon Citron
- 1 skein of Loops & Threads faux fur yarn in black
- 3 ply jute cord (hobby lobby item #1059294)
- 1 9.5 ft decorative nautical rope (Dollar Tree)
- 16 gauge wire ( I purchase this in the garden section of Walmart)
- 2 pair of black pantyhose from Dollar Tree
- 2 .59 solid black eyes (hobby lobby item #62208)
- 4 .59 black chenille stems (hobby lobby item #124560)
- Sunflower stems and greenery stems of your choice
- Bumble bee picks ( I have these in my shop if you need to purchase any)
- Auto Body hot glue sticks (Amazon) These glue sticks are optional to use for the honey you can also use regular hot glue sticks and just paint the honey a golden yellow.
- Hot glue gun and glue sticks
- Gold metallic craft paint
- Black craft paint
- Black electrical tape
- 4″ or 8″ black zip tie
- Scissors
- Wire cutters
- Paintbrushes
- Either a handmade or boughten bow

Wrapping the bumble bee body with yarn
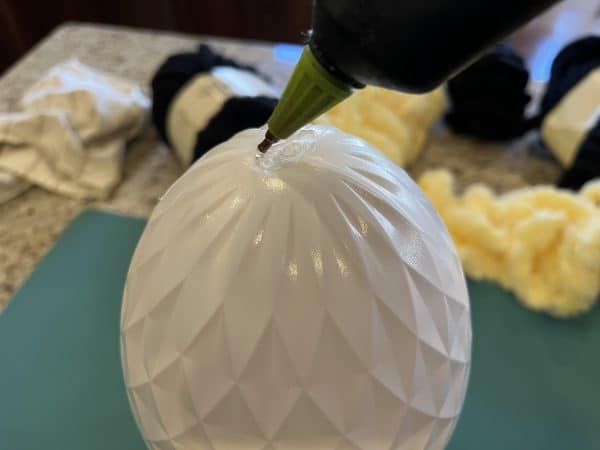
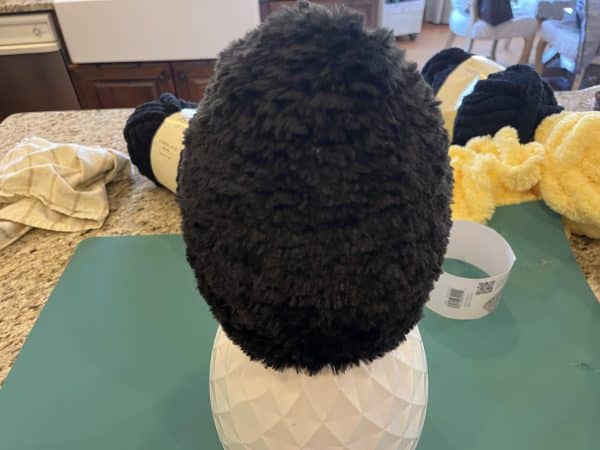
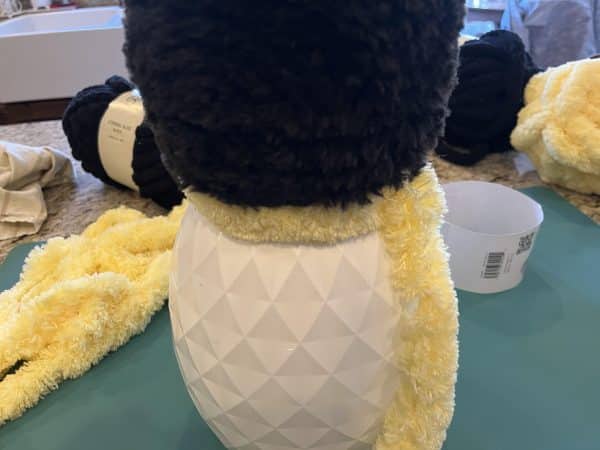
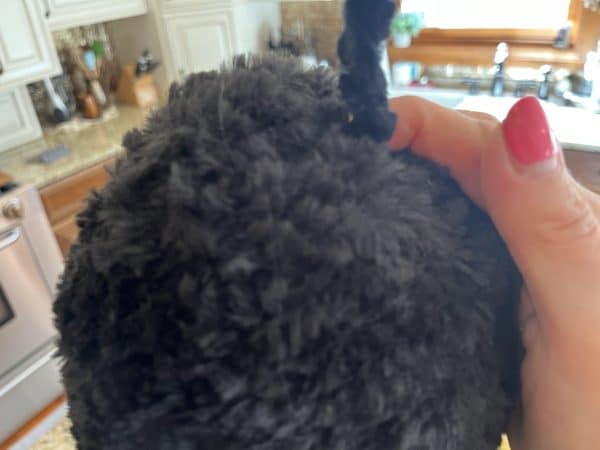
The first step is to snap the top and middle pieces of the stackable egg together then you are going to start covering the head of the bee with your black yarn. I used the faux fur black yarn but you can use any chunky black yarn you would like. Start by adding hot glue to the top of the small egg then glue down the end of your yarn and start wrapping in a circle. You are going to keep adding hot glue around the egg and wrapping around the black yarn until you reach the bottom of the head just before the head and body snap together. Trim off excess and glue down the end of the yarn.
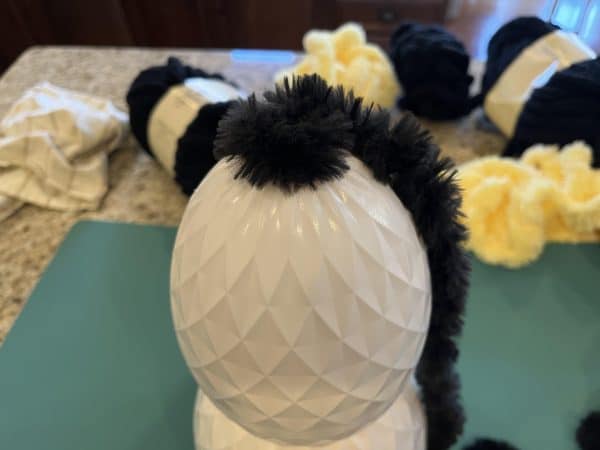
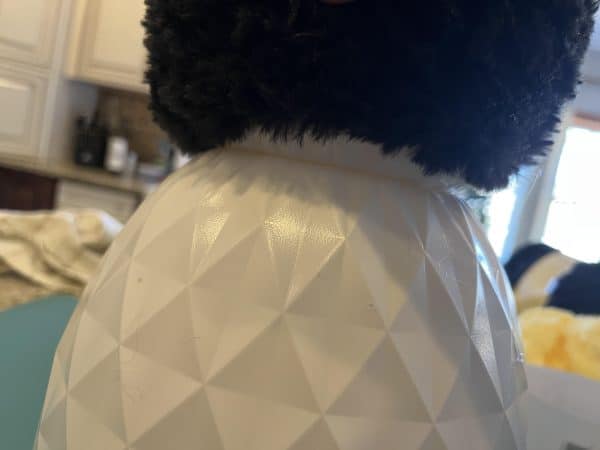
I stopped wrapping the black yarn on the head right before the two eggs snap together because I thought the head was starting to look too large. You are now going to start the yellow yarn right under where you ended the black yarn, I always start and finish the yarn colors in the same place which will be the back of the bee so you won’t see where you have changed the yarn colors. Start by adding hot glue and glueing down the end of the yellow yarn then add hot glue around the egg and glue down the yarn, I like to keep the rows of yarn as close together as I can so you won’t see any color of the egg underneath. Continue adding hot glue around the egg and glueing down the yarn pushing the rows together. I did 4 rows of yellow yarn. Trim off excess and hot glue down the end making sure you ended where you started the yellow yarn.
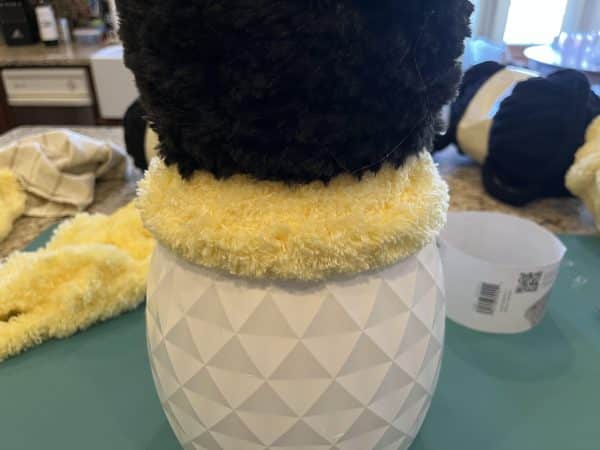
Next you are going to glue and wrap 3 rows of black starting and ending the yarn on the same side of the egg that you started and ended the yellow. After wrapping the black you are going to glue and wrap 3 rows of the yellow.
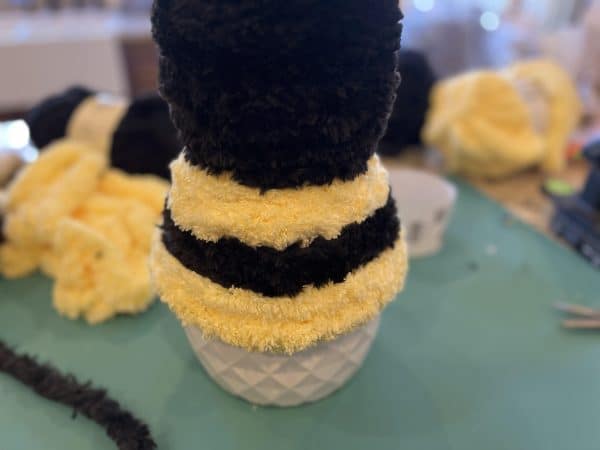
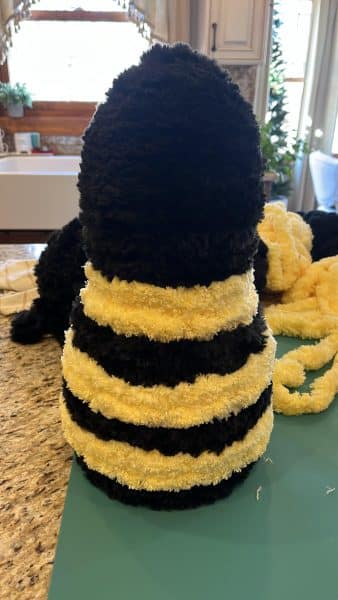
Continue hot glueing 3 rows of each yellow and black yarn around the bee body altering the colors until you reach the bottom of the body.
Wrapping the beehive
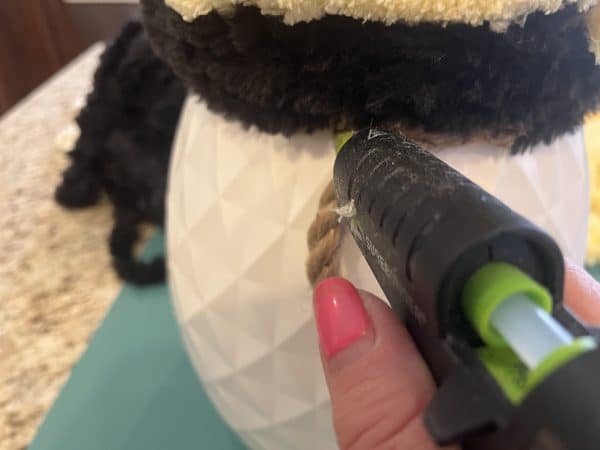
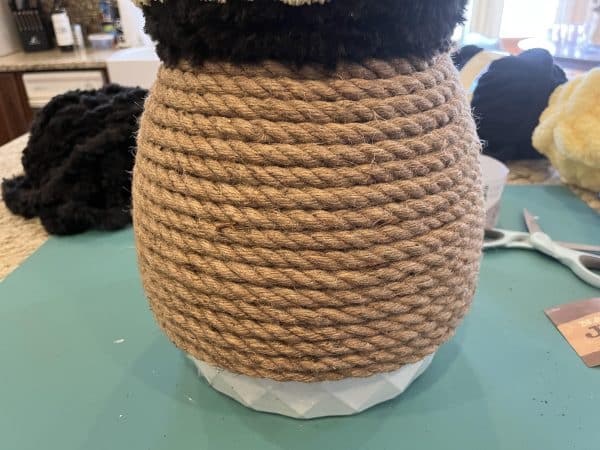
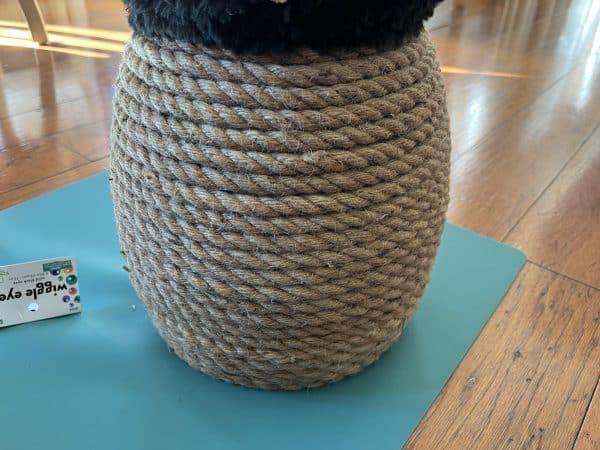
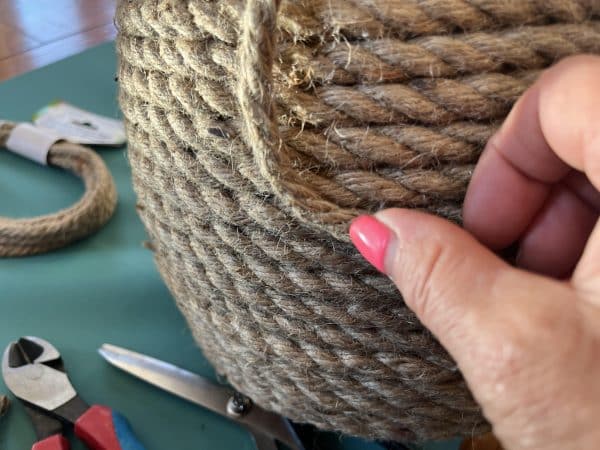
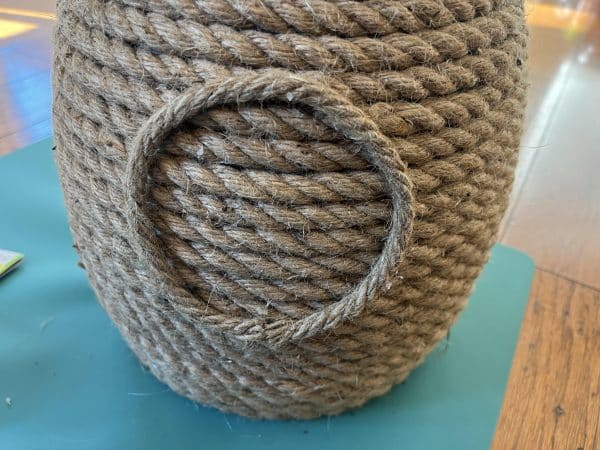
Before you start wrapping the beehive you are going to snap the bee onto the bottom piece of the egg. Once you have them snapped together you are going to add hot glue at the top of the egg and glue down the end of the 3ply jute cord. Add hot glue around the egg and glue around the jute cording continue working your way around and down the egg making sure you push your rows of jute together as you work your way down to the bottom. When you reach the bottom, cut off the excess and glue down the end of the jute.
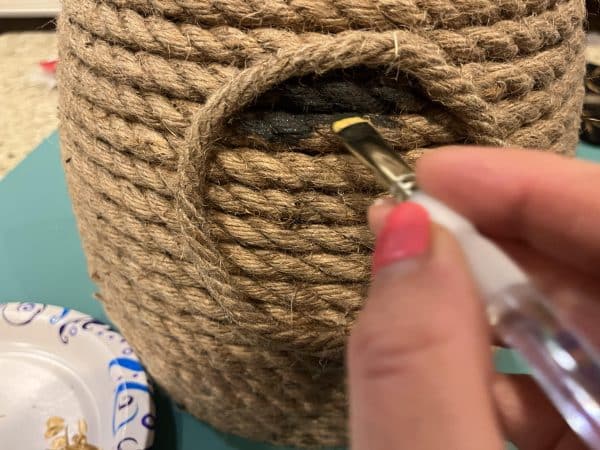
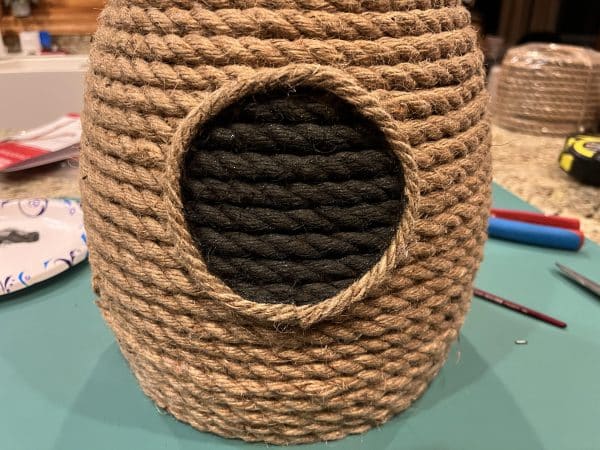
Adding the beehive opening
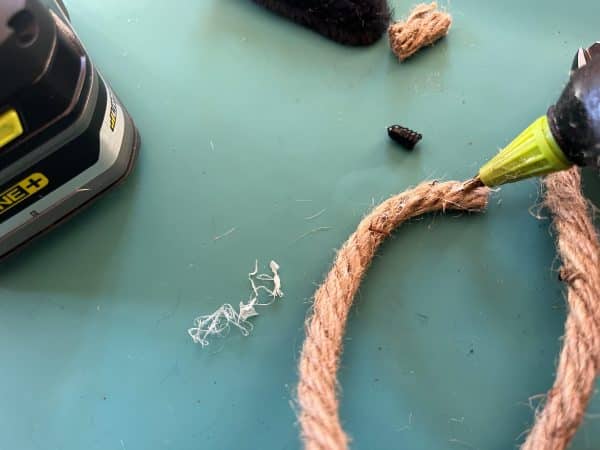
Using the nautical rope from the dollar tree form a round opening on the front of the beehive, deciding how big you want your opening then cut the nautical rope to size.
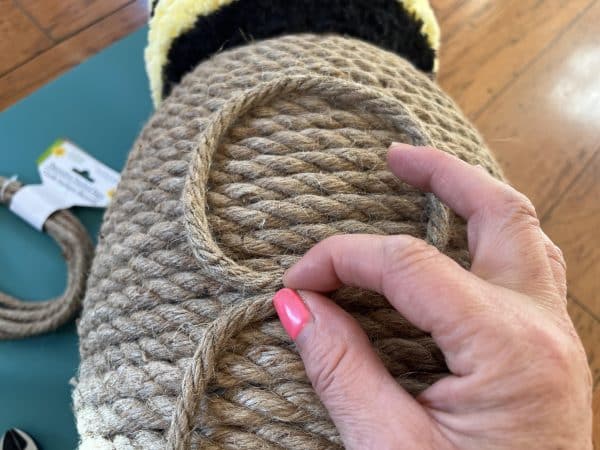
Add hot glue to one end of the rope and glue onto the front of the beehive. I added hot glue to a small section of the rope at a time and glued down until I had the rope circle formed and all glued down.
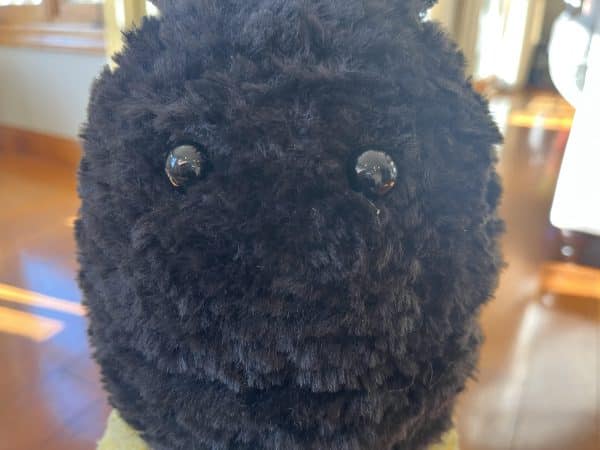
Adding the eyes
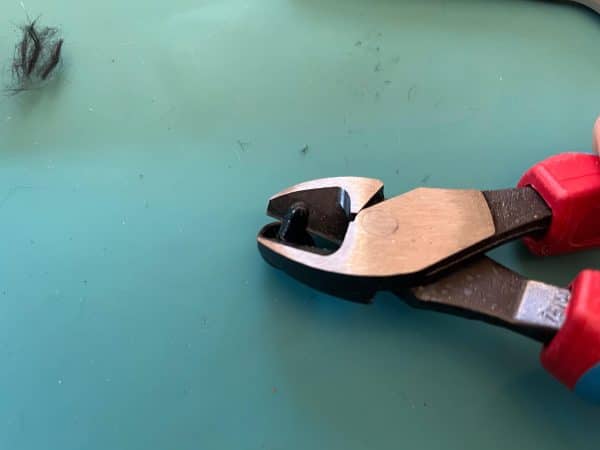
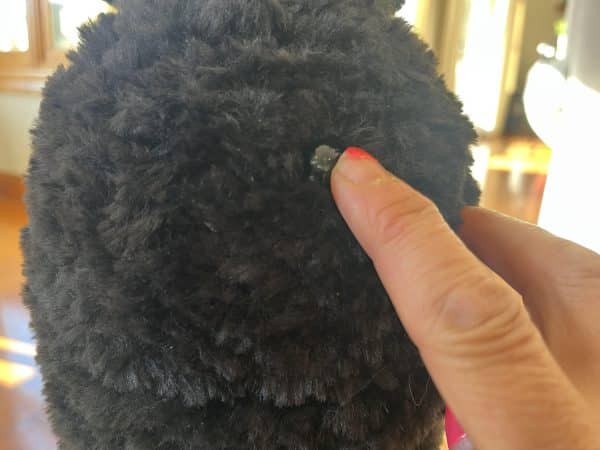
Using a pair of wire cutters cut the backs off the two eyes, getting as close to the eye as possible.
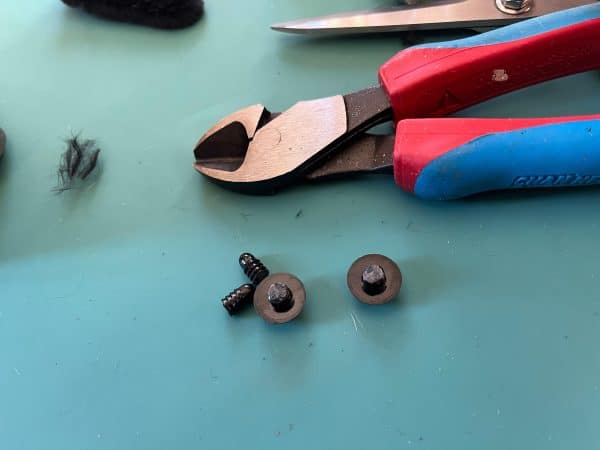
Place the eyes onto the bee to see where you think they will look good. Add hot glue to the back of the eye and glue into place repeat this step with the second eye.

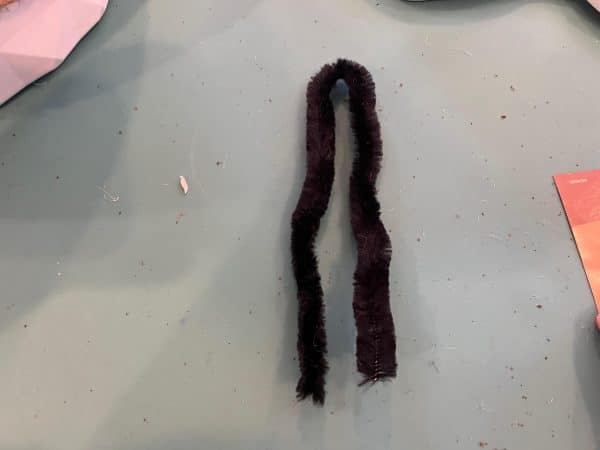
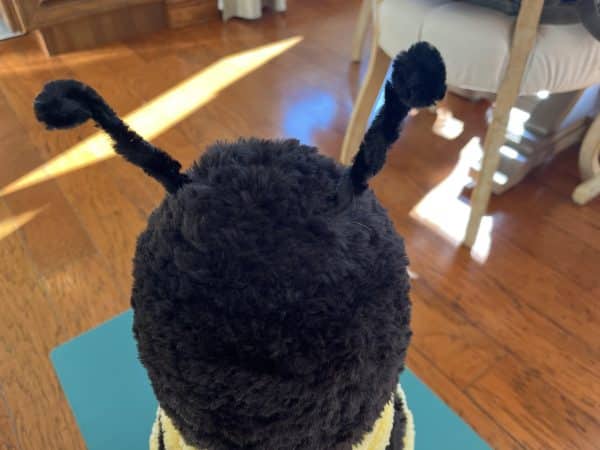
Adding the antennae and stinger
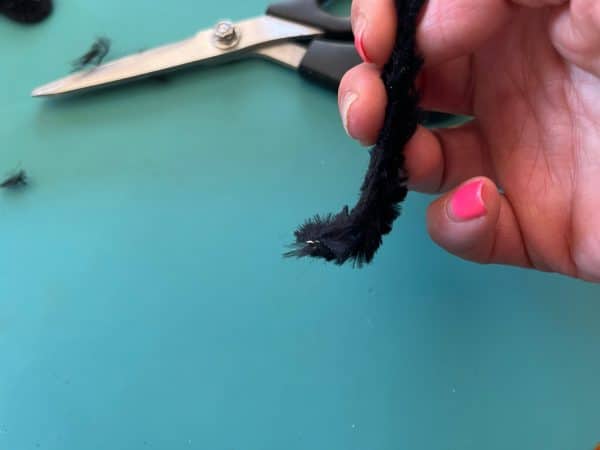
Take one black chenille stem and fold in half then twist together. Next bend the flat ends about a half inch or so to make a flat end then roll the other end a few times (see photo’s below). This is going to make one of the bees antennae. Repeat these steps with a second black chenille stem.
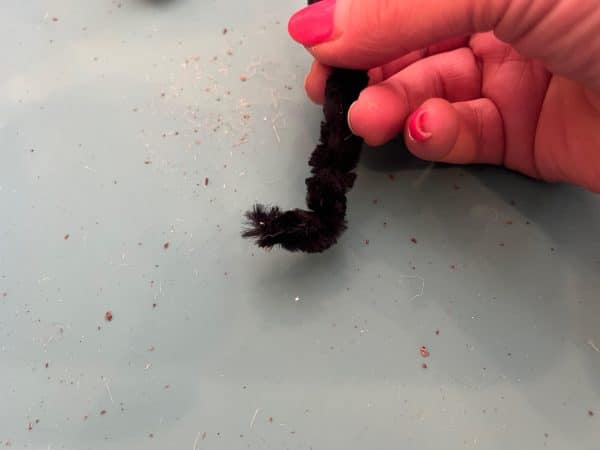
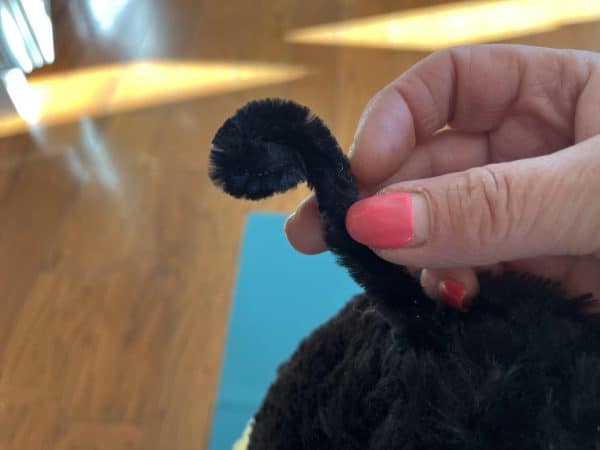
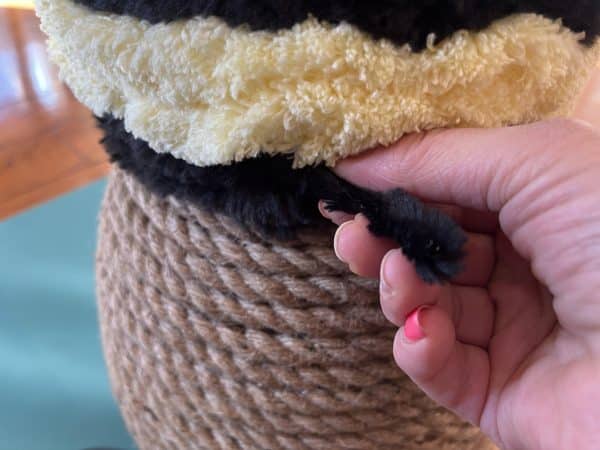
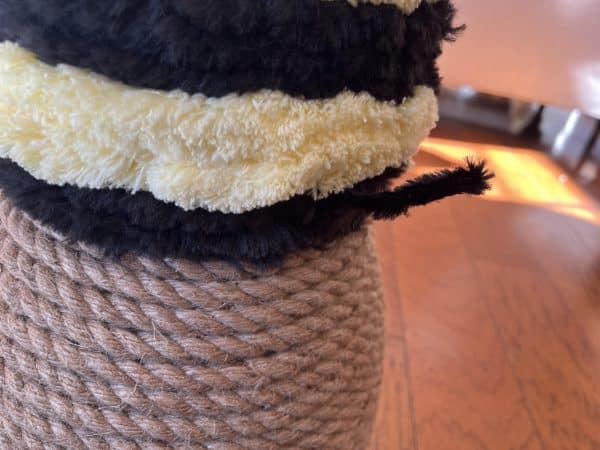
Add hot glue to the bottom of the flat bend section and glue into place on top of the bees head. Repeat this step to the second antennae.
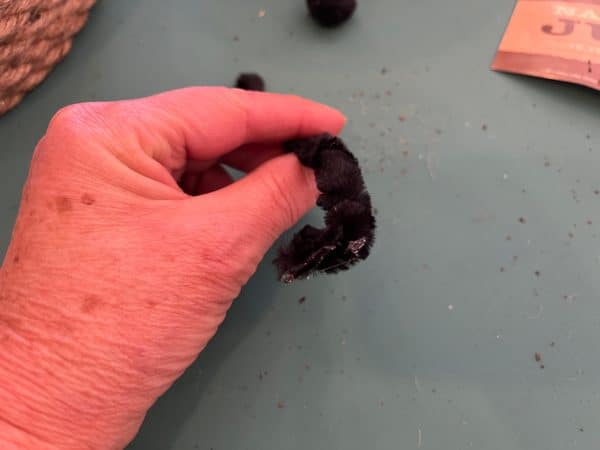
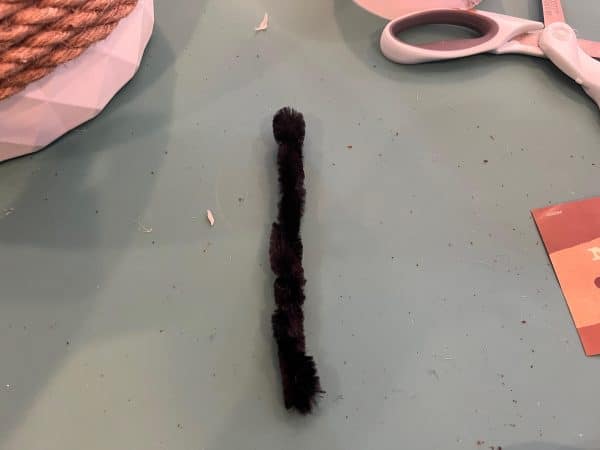
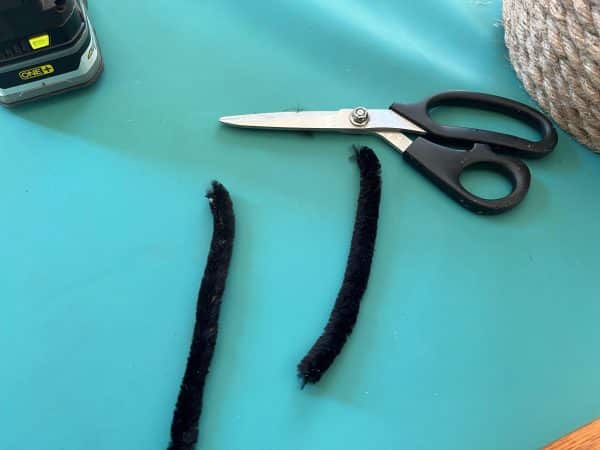
To make the stinger take another black chenille stem and cut it in half. Take one half and fold in half then twist together, then bend the end about a quarter inch so it is flat.
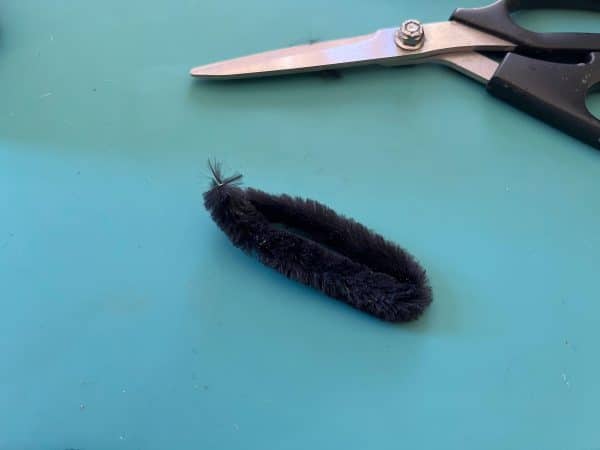
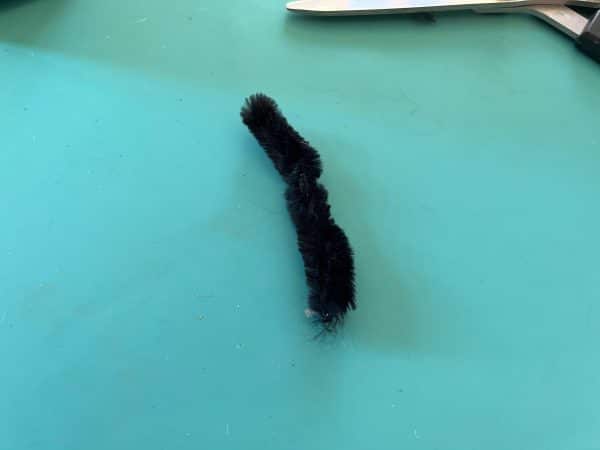
Add hot glue to the flat end and glue onto the back of the bee.

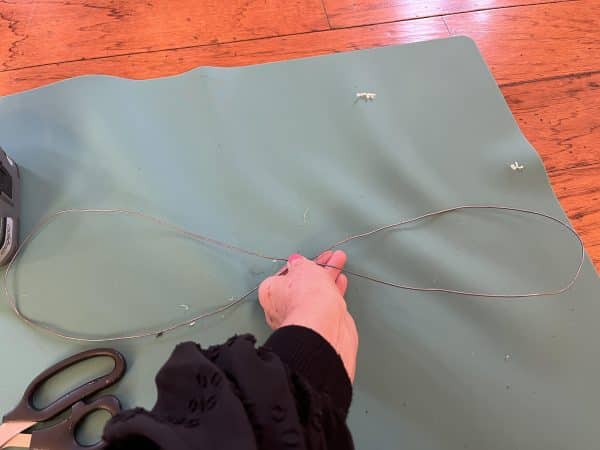
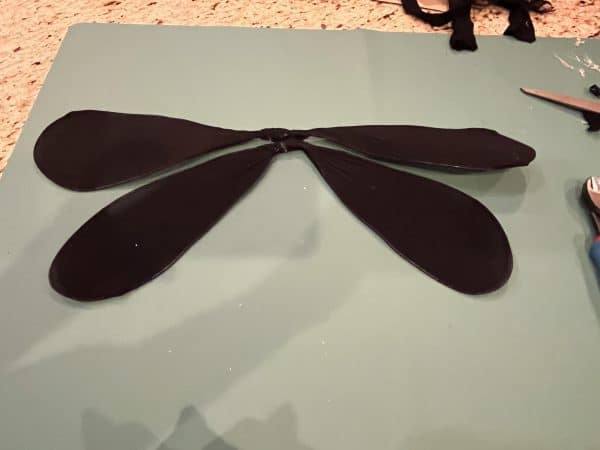
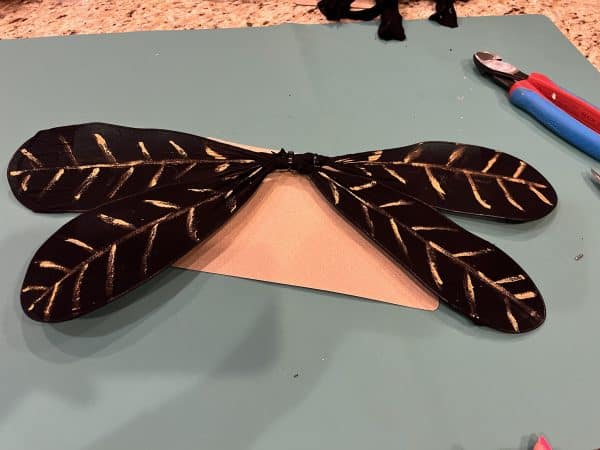
Making the bee wings
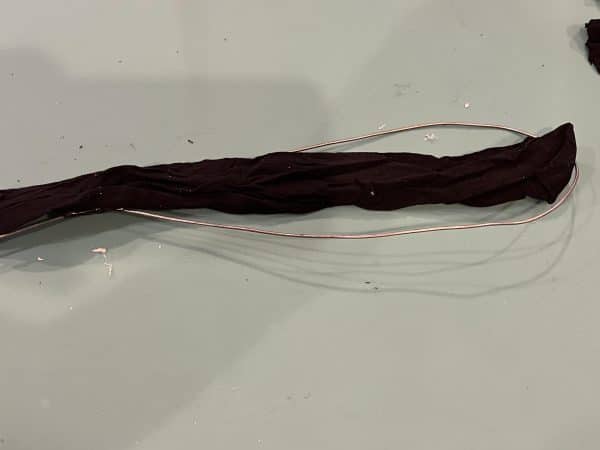
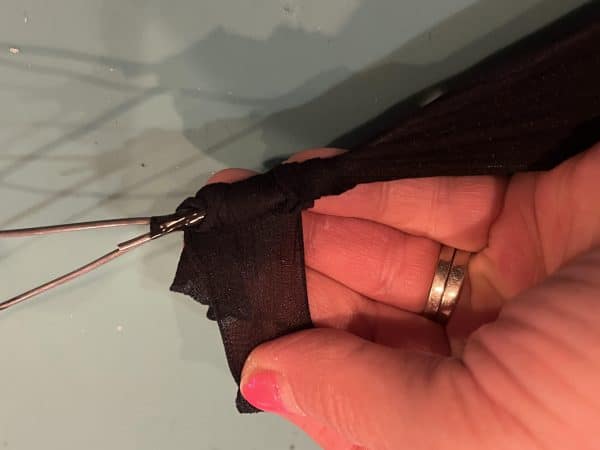
Using the 16 gauge wire you are going to form one set of the bee wings. You are going to want to hold the wings up to the back of the bee to see if they are the size you want. Once you have the first set to the size you like, cut the wire then using the black electrical tape to the ends to form the wings (see all photos below).
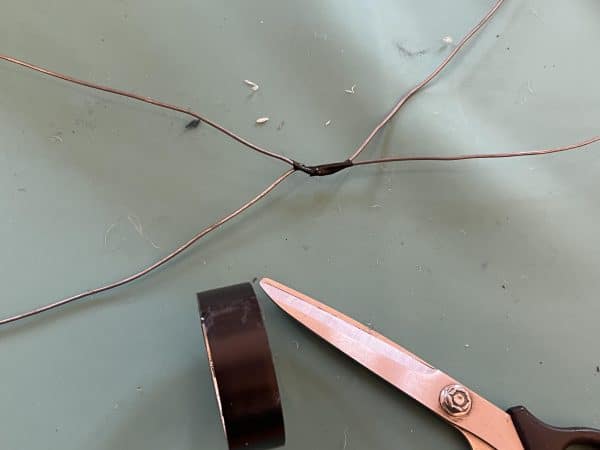
Form and make a second pair of bee wings using the same process. You can make the second set the same size or a little smaller it depends on the look you are after.
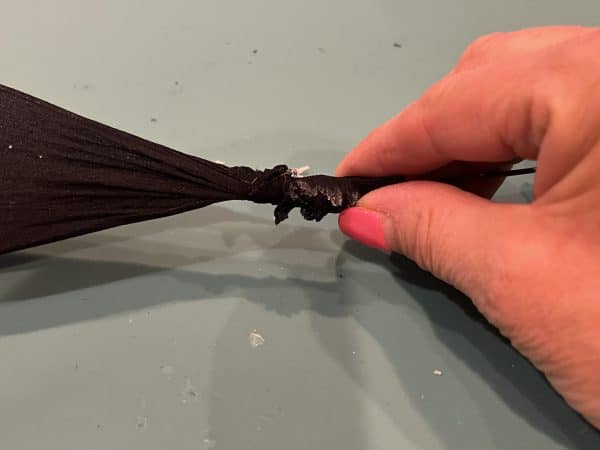
Next you need to cover the wings with the black panthose. Lay one leg of the pantyhose with the foot at the curve of one side of the wing, cut the leg of the panthose long enough to cover the one side of the wing. Repeat this step with the other leg of the panthose to the other side of the wing.
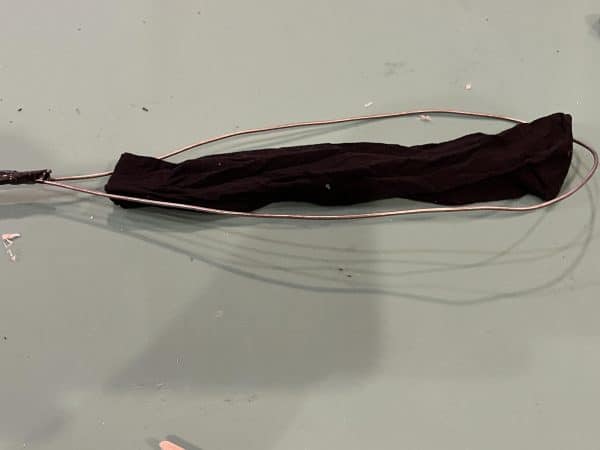
Next cover one end of the wing by sliding one piece of the panthose over the end of the wing. Pull the panthose tight to the center of the wing, if there is too much fabric at the center cut some of the pantose off at the end. After you have it tight add some hot glue in the center of the wing then wrap the end of the pantyhose around tightly adding hot glue as needed. Repeat these steps to the other side of the wing meeting the two ends in the middle of the wing.
Repeat the above steps to the second set of wings.
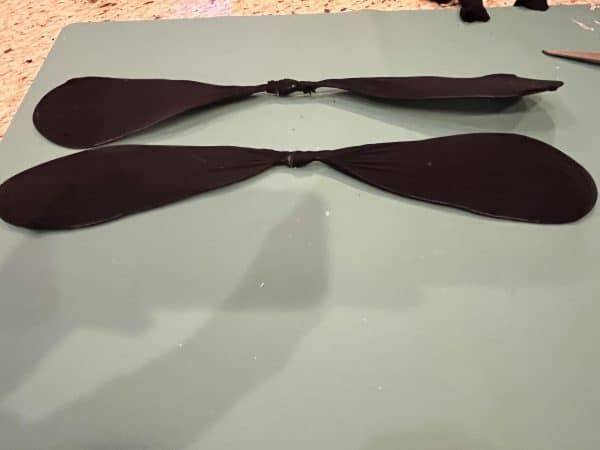
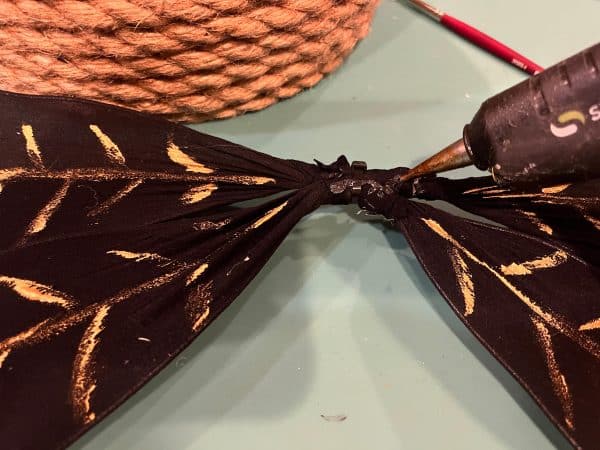
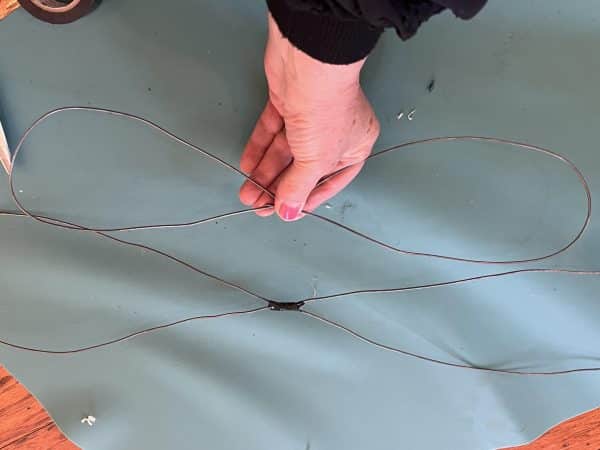
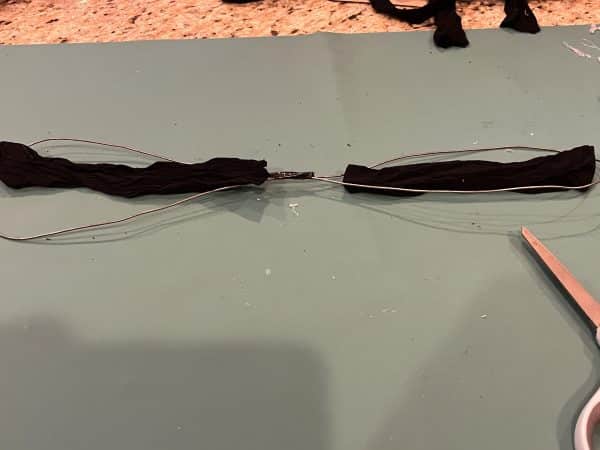
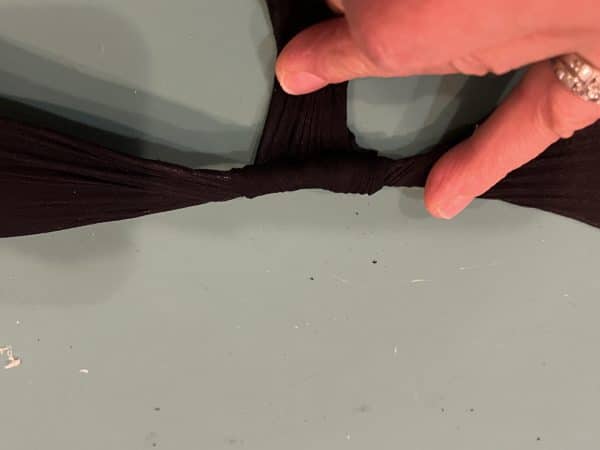
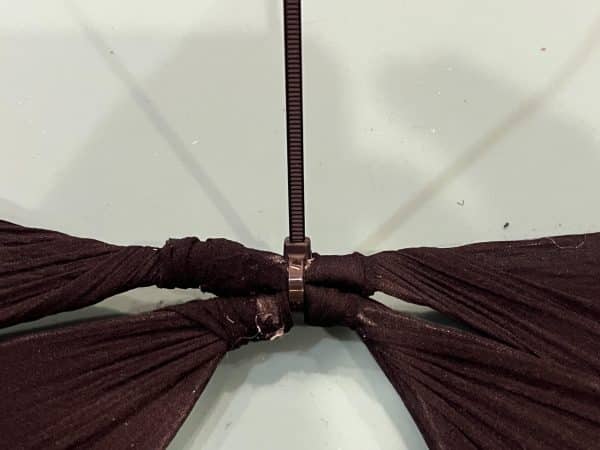
Place the two sets of wings down one above the other, if you made one set smaller place that set under the larger set. Zip tie the two sets of wings together at the center. Bend the two ends of the bottom set of wings downward a little.
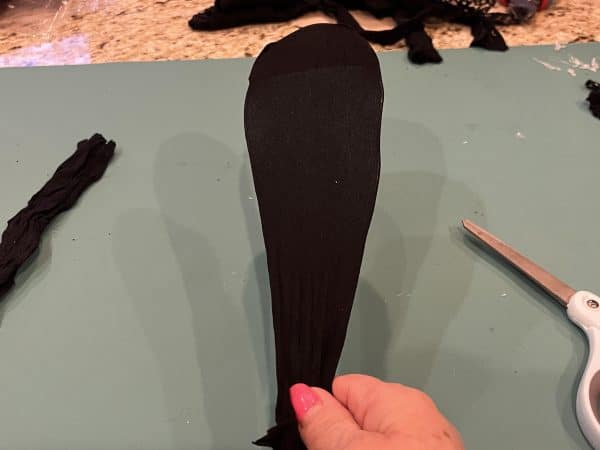
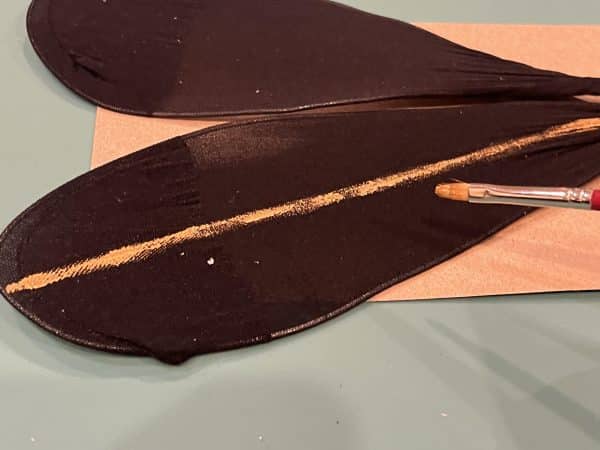
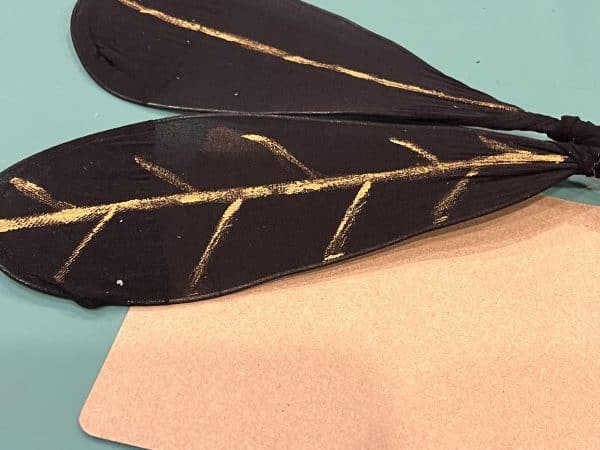
Using gold metallic craft paint and a paintbrush paint lines onto the fronts and backs of both sets of wings. Set aside to dry.
Adding all the touches to the bumblebee
The first thing to do is paint the inside of the circle on front of the beehive black.
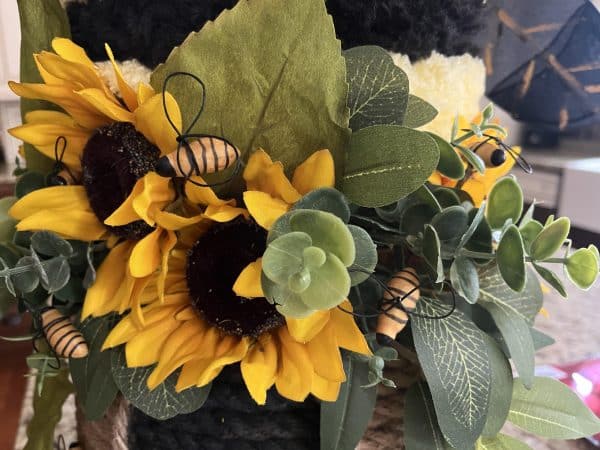
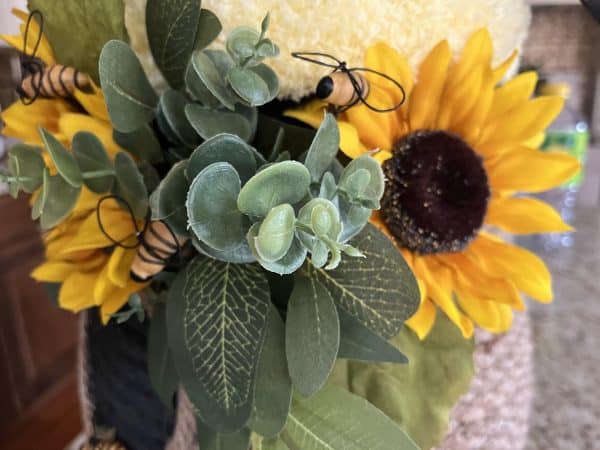
Trim all your floral and greenery picks down then holding up between the bumblebee and beehive to see how you would like them placed. Once you have an idea of how you want the greenery and florals placed you can start adding hot glue to each stem and glueing them on, you may need to trim down the stems more before adding the glue and attaching. I only added the greenery and florals in the front and around the sides I did not add them to the back. You can also hot glue some bees into the greenery.
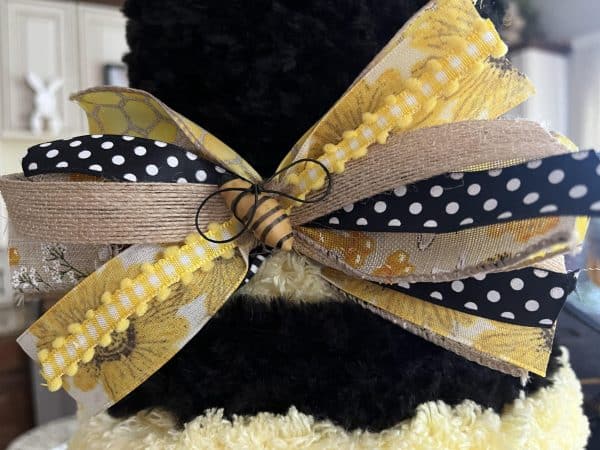
I made a messy bow for my bee which is just taking pieces of ribbon and layering them then zip tying them all together in the middle. Add hot glue to the back of your bow and glue in place. For a finishing touch to my bow I hot glued a bee to the center.
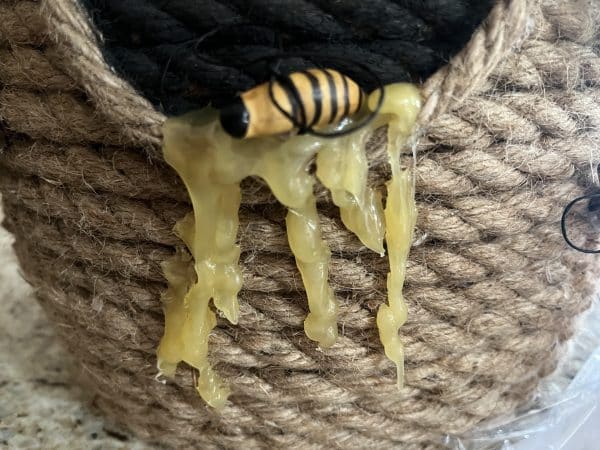
I am so sorry I forgot to take photos of adding the automotive hot glue as the honey but I am sure you will understand the directions without the photos. To add the honey you are just going to keep adding the automotive hot glue at the base of the circle opening. Keep adding the hot glue so it will drip down the beehive. I added a bee to the honey while it was still hot. If you are using regular hot glue it is applied the same way but after the glue has dried you can paint it with yellow craft paint.
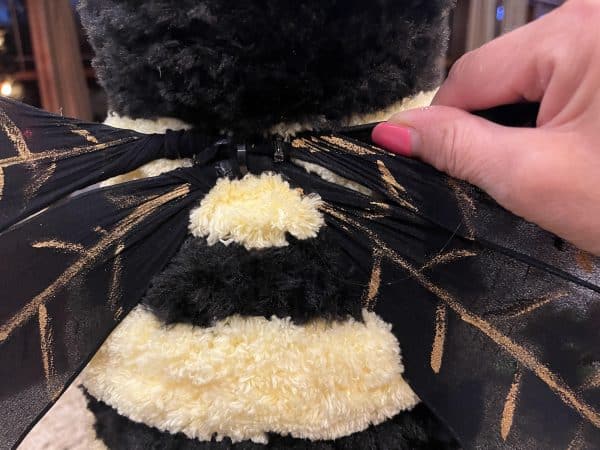
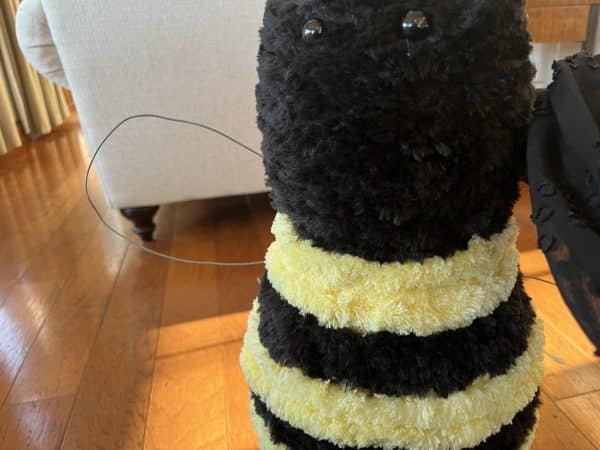
Attaching the wings
To attach the wings you are going to add a good amount of hot glue to the center of the wings then glue them to the back of the bumblebee. If they same a little floppy and some more hot glue and hold them in place until the glue dries.