Dollar Tree, Flowers, Home Decor, Outdoors, Spring
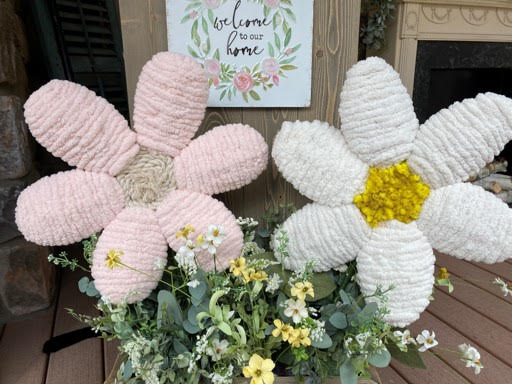
DIY Dollar Tree Decorative Flower
Mar
Did you but any of the 3 tinsel hanging eggs from the Dollar Tree? I bought a few sets of them knowing I wanted to do something else different with them. After looking at them for a few days I thought they would make great petals for a flower so that is exactly what I did and I think it just came out beautiful. If you do not have any of the tinsel eggs or can not find them I have made a petal pattern from one of the eggs so you can cut 6 of them from cardboard and use as your petals I am sure it will work just as well.
Here is a list of what you will need:
- Petal and Leaf Pattern
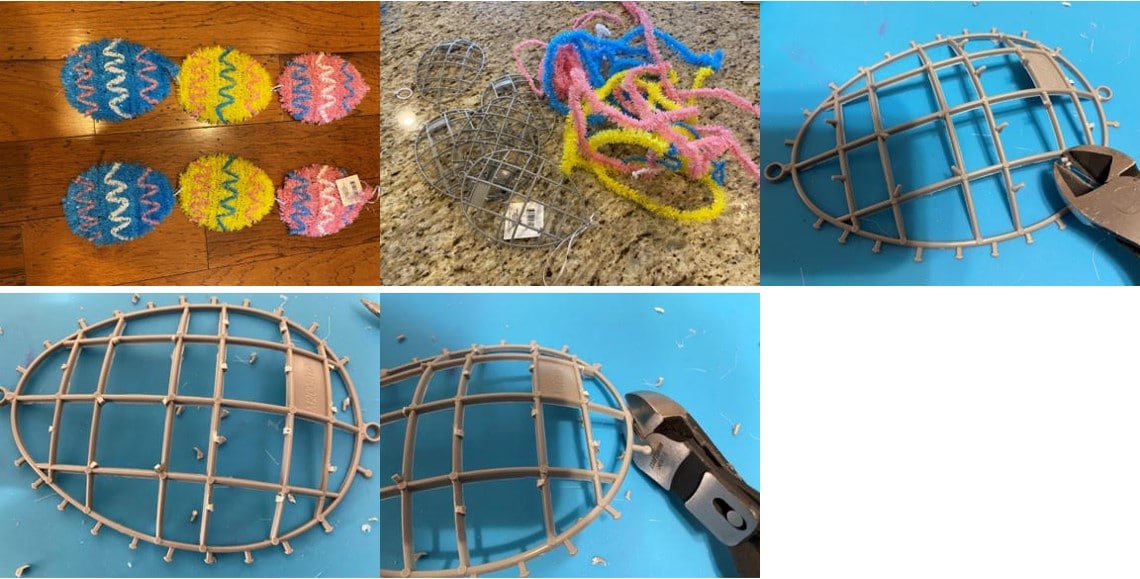
- 2 Sets of the 3 tinsel hanging eggs from the Dollar Tree
- 1- 7” Wood Circle (Walmart)
- I skein of chunky yarn ( I used the Yarn Bee Eternal Bliss Yarn from Hobby Lobby)
- Yellow loopy yarn for the center
- Dollar Tree cream rope from the Dollar Tree for center
- 3/8 dowel 22” long
- 2 pieces of 18 gauge green floral wire 18” long
- Green Floral Tape
- Painters Tape
- Jute Twine for hanger
- Scissors
- Wire Cutters
- Scissors
- Gorilla Clear Grip Adhesive
- Hot Glue Gun and Glue Sticks
- Drill and Drill Bit
Preparing and Covering the Petals
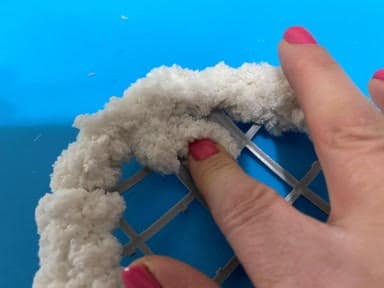
The first thing you will need to do is print and cut out the pattern pieces. If you do not have the tinsel eggs you can use the petal pattern to cut out six egg petals from heavy cardboard. You will wrap the cardboard eggs with the chunky yarn and hot glue. If you have the tinsel eggs remove the tinsel from all six eggs. Using wire cutters cut of the little nubs on top of the eggs and the round hanger from each end of the eggs.
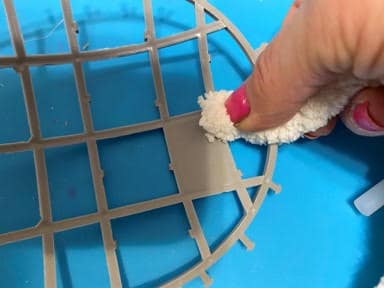
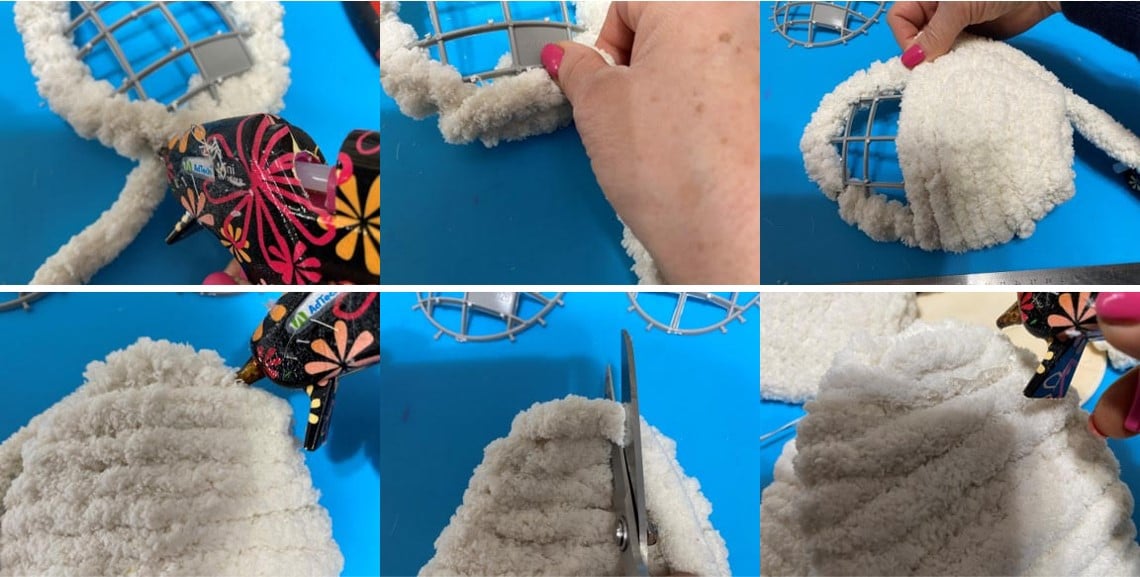
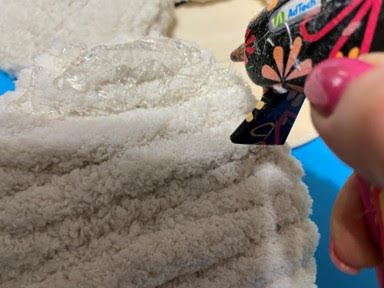
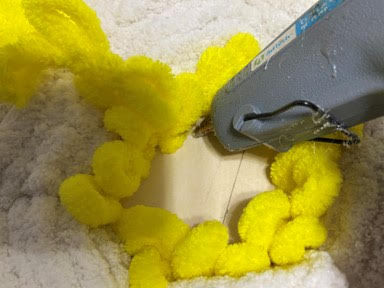
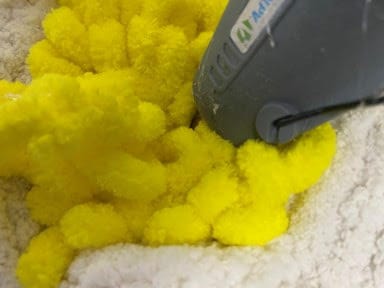
If you are using chunky yarn cut a 36” piece this should be enough to wrap around the outside of the egg if you are using a thinner yarn you will need a longer piece. Add hot glue to one of the bars on the back of the egg and glue down the end of the yarn. Start wrapping the yarn around the outside ring of the egg. Make sure you wrap the bottom and top of the egg so it is totally covered the sides are ok if you see some of the ring you will be wrapping yarn around the sides again. When you get back to where you started add hot glue to the back of the egg and glue down the end of the yarn.
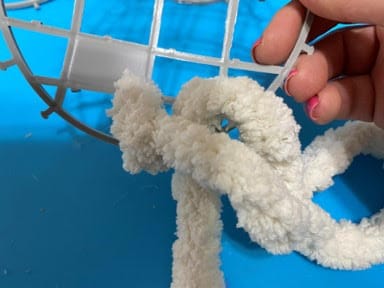
Next add hot glue on top of the yarn on the back and glue down the end of the yarn. Add a drop of hot glue on the yarn on the side wrap the yarn around to the front add hot glue to the front of the egg glue down the yarn. Add a drop of hot glue on the side wrap around to the back. You can now keep wrapping up the egg without adding glue. After every three rows or so push down the yarn to make sure the egg is getting covered. When you get two or three rows from the top start gluing down the yarn as you did on the bottom. You do not add yarn on the top. Cut the yarn and glue the end on the backside. Repeat these steps to the other five petals (eggs).
Adding the Hanger and Petals
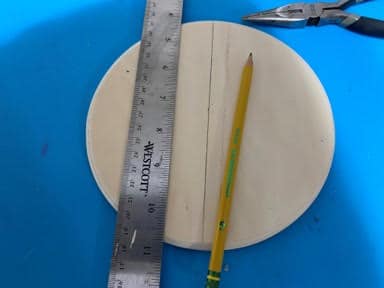
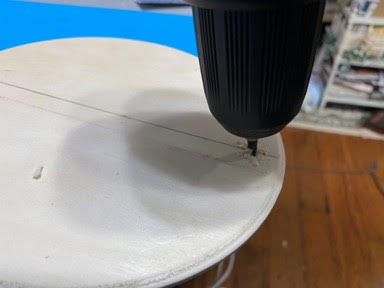
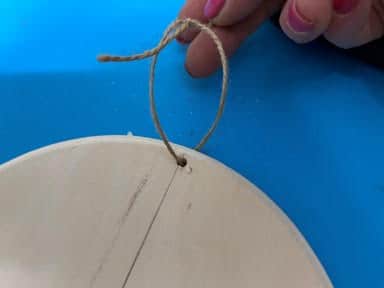
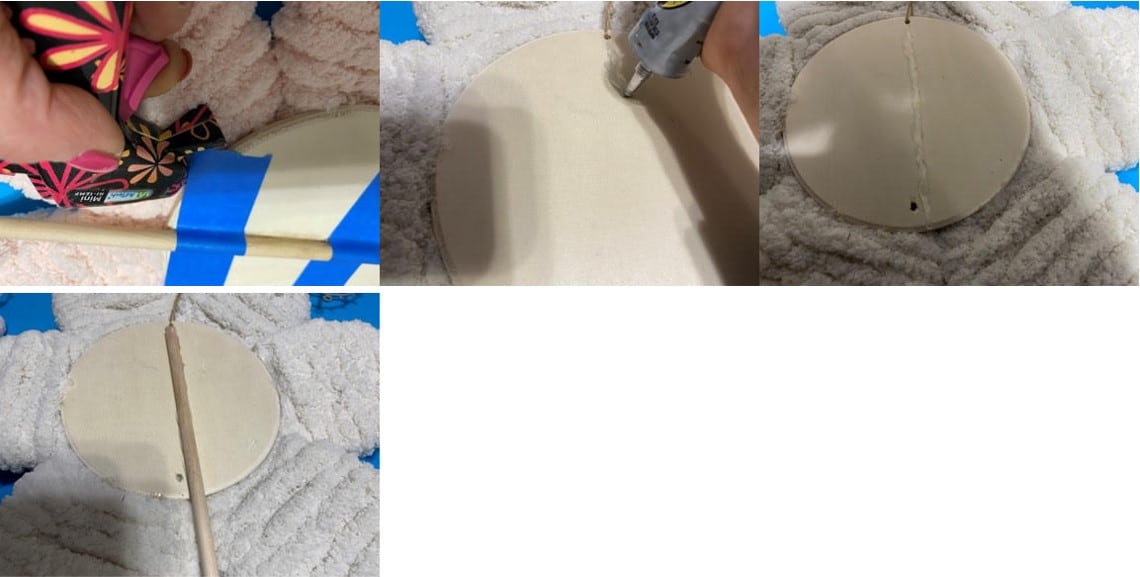
Mark the center of the 7” circle then draw a line down the center. About ½” in from the edge drill a hole on the line. Feed a piece of jute twin through the hole make a loop and double tie a knot. This will be the hanger.
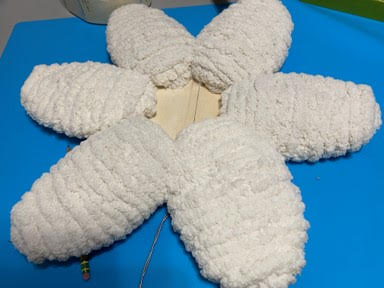
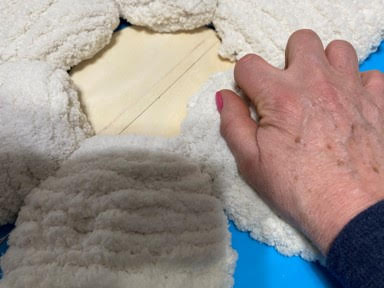
With the narrow end of the petal facing inward set two petals at the top of the wood circle one on each side of the hanger about 1 1/2 inches of the petal on the wood . Place one in the middle of the circle on each side then place the last two on the bottom. Lift one petal at a time add hot glue to the back of the petal and glue down to the wood. Hold the petal in place for a minute while the glue hardens.
Adding the Center of the Flower
On my cream flower I used a yellow loopy yarn and on the pink flower I used the cream thicker rope from the Dollar Tree. Add some hot glue on the wood circle next to the petal glue down the end of the yarn or rope. Keep adding hot glue and gluing down working your way around in circles until you have all the wood covered. If you are doing the rope leave the end piece a little longer after gluing down then undo the rope. If you are using loopy yarn cut all the loops so it looks fluffy. I didn’t like how bright the yellow looked so brushed the yarn with some coffee stain mixture.

Attaching the Stem
Turn the flower lover add hot glue under the petals to give them extra hold. Next lay the dowel down the middle of the wood circle to see where you want it to be glued down. Add a line of gorilla clear grip adhesive place the dowel down on top of the glue. Tape the dowel down with painters tape and let dry for about a ½ hour or so.
Making the Leaves
Trace and cut out two leaves on a double layer of green felt. Lay one leaf down add a line of hot glue down the middle day down one of the floral wires place a second leaf on top and glue down. Fold back on side of the leaf add hot glue down the edge of the leaf and glue down. Repeat this step to the other leaf.

Attaching the Leaves
Once the glue on the stem as dried enough you can now add the leaves. Start by holding the wire of one of the leaves to the dowel to see where you want the leave to be placed. Bend the wire slightly at the leaf so the leaf is going outwards. Next start wrapping the dowel behind the petals with floral tape continue down the dowel stopping where you want to add the leaf. Holding the leaf to the dowel continue wrapping the floral tape down the until you reach the end. Cut the tape. Repeat these steps to the other leaf. I wrapped the dowel a third time so you couldn’t see the wires through the tape. Let the glue attaching the stem cure for 24 before hanging your flower or adding it to an arrangement.
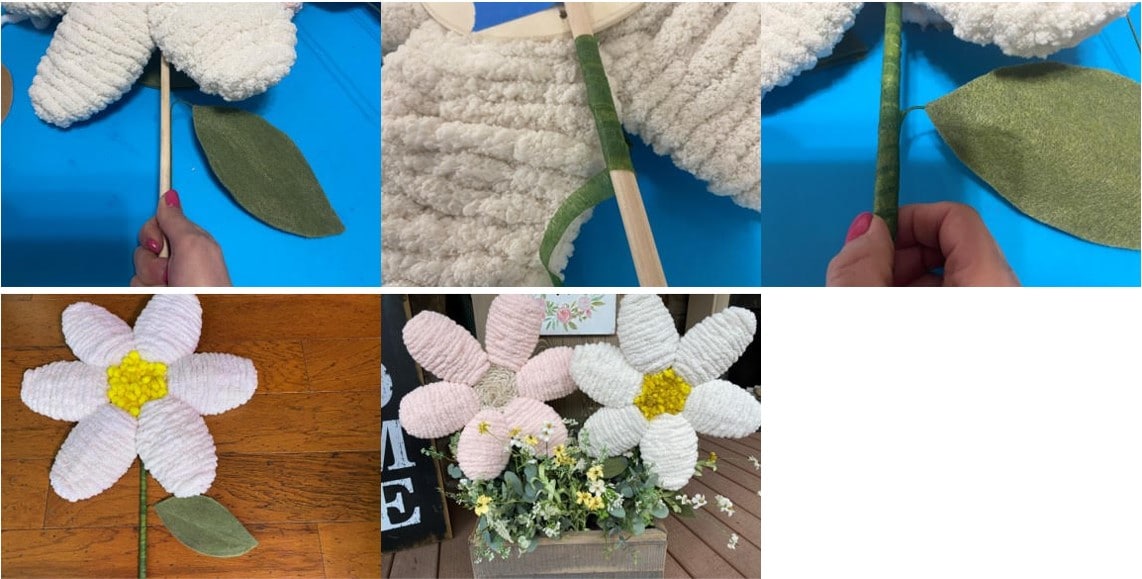
I hope you enjoy making these adorable flowers. I added them in my porch flower box but then decided to hang one on each of my porch flower boxes, I wish I took a photo of how cute they look. I also looks really adorable hanging on the front door but I am working on a bigger flower for the door.
Love these. Beautiful.
The flowers are great a great addition to your porch
They are beautiful that came out so nice
Love them
Love these flowers 🌼. I will be making a couple .
Thank you for the drawing. I was not able to find the tinsel eggs. I love the way you put it on the flower box you and your husband built. You make awesome crafts thank you for sharing. I learn so much from you. I’m always telling people about your site.
I love this need to make this. Thank you
I love all your Projects, I think this one is my favorite.
You always have great refreshing ideas!!!
These are adorable. They are nice and thick flowers.
I love all of the crafts you make you and your sister’s are all wonderful
Thank You so much
Can’t wait to make these, thanks for the print out and the inspiration ❤
How awesome of you to share the directions. These are beautiful!!!!
You are so sweet thank you!!!