Fall, Home Decor
DIY Fall Raffia Wreath
Aug
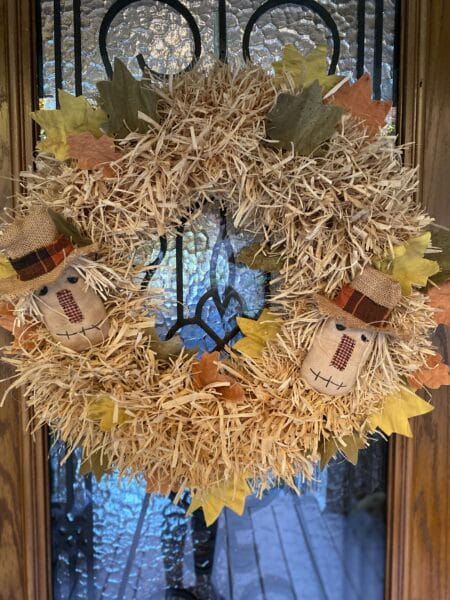
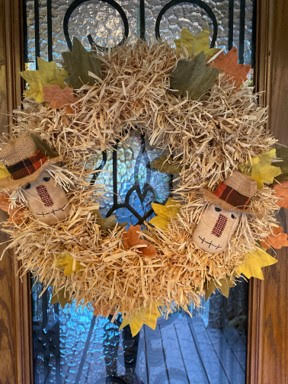
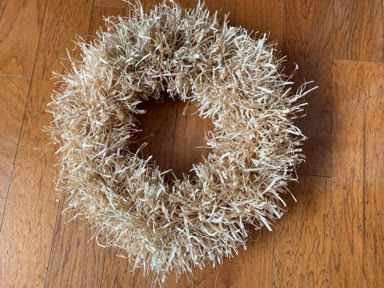
I just love Fall and I wanted to create something new for my front door. I seen this wreath on Hometalk and I new I just had to make it. I just love how it turned out and I gave it a little extra touch by making the leaves and the small scarecrow heads. If you would like to make your own leaves I have a video on my Facebook page on how I make them. I also have a blog for the scarecrow heads that includes the pattern. Doesn’t it scream Fall?
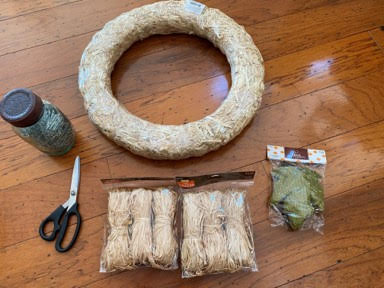
Materials You Will Need:
- 4 Packages of Raffia A Total Of 12oz. ( I got mine at Hobby Lobby in the Fall section)
- 18” Straw Wreath
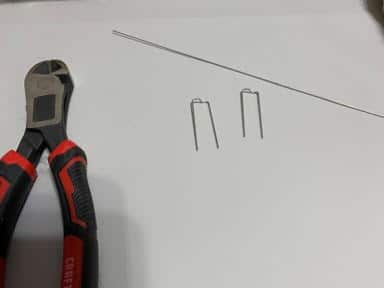
- 1 Package of Floral U Pins Size 1 ¾” Long by ½” Wide (Hobby Lobby in the Floral section)
- Scissors
- Piece of Floral Wire
- Wire Cutter
- Embellishments Of Your Choice
- Hot Glue Gun and Glue Sticks
Adding The Raffia
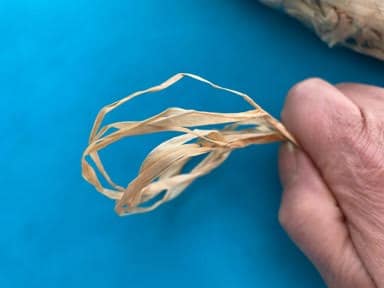
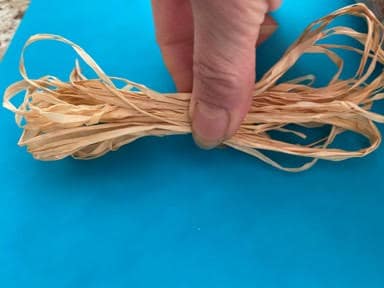
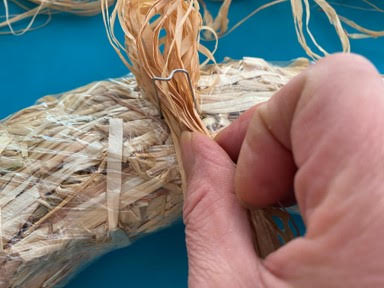
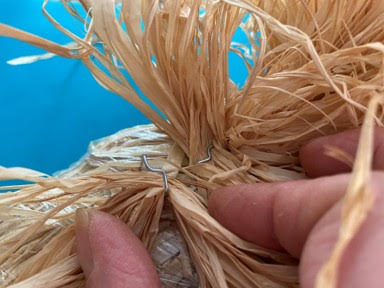
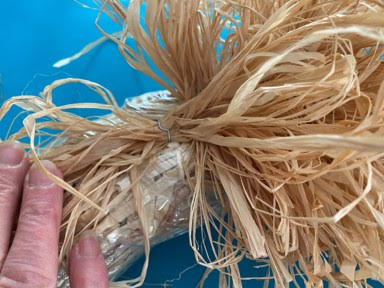
I suggest working with on bunch of raffia at a time. Leave the plastic on your straw wreath or it will become messy. Undo one bunch of raffia take 4 or 5 strands then starting at one end fold the end down about 6” making a loop continue 6” folds down until you reach the end. Next take a floral U pin place it over the middle of the raffia. You are now going to place the raffia vertically on the front of the wreath in the in the center. Push the floral U pin into the wreath. Take another 4 or 5 strands of raffia and fold the same way as you did the first one. Place the floral U pin in the center and place right next to the vertical one and push in the floral pin. You want the one end of the horizontal raffia to go over the middle of the vertical placed raffia. Take another 4 or 5 pieces of raffia folding the same way. Place the floral pin in the middle then fold back the one side of the horizontal raffia and place the raffia vertically right next to the horizontal one. Push in the floral pin. I like to cut my loops at this time and fluff up the raffia.
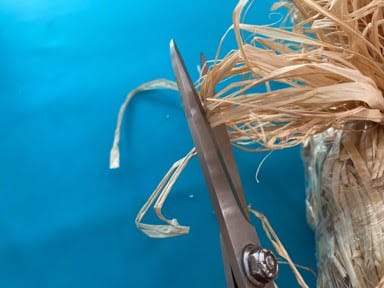
Continue making the raffia bundles and adding them to the wreath rotating horizontally and vertically just as you did the first three bundles. Work you way around the whole wreath. Cut the loops and fluff as you go.
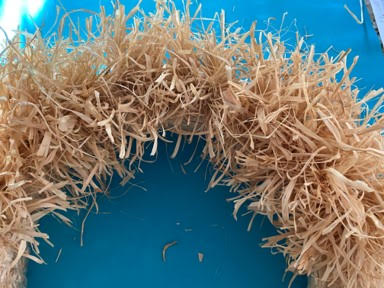

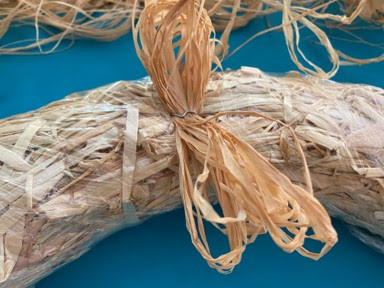
Now that you are done with the front of the wreath it is time to work on the outside of the wreath. Take 4 or 5 strands of the raffia and fold just like you did for the front but this time make your folds about 4” instead of 6”. Place the floral U pin in the center place vertically on the outside of the wreath and push in the floral pin. Continue working your way around the outside of the wreath just as you did the front alternating vertical and horizontal. Work you way around the outside of the wreath until it is fully covered. Make sure you are cutting the loops and fluffing the raffia as you go. Once your wreath if fully covered you can trim and long hanging raffia pieces.
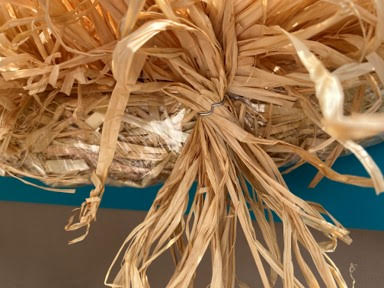
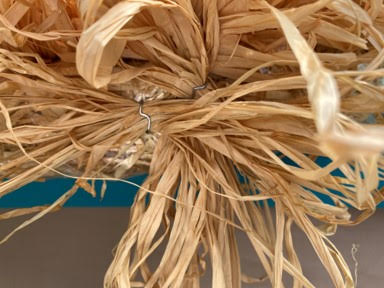
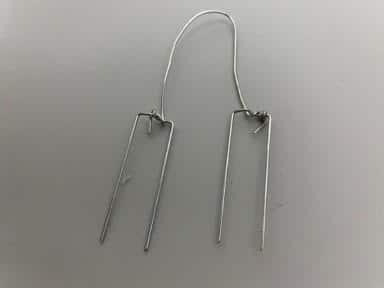
Adding The Hanger
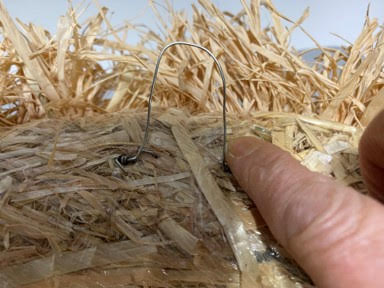
I didn’t measure how long of a piece of floral wire I used but I am going to say cute a 12” piece just to be safe. Take one floral U pin wrap one end of your wire around the middle of the pin. Form a U with the wire then take a second floral pin and wrap the other end of the wire around the middle of the second U pin. This is going to be your hanger to hang your wreath. Add hot glue to the ends of one floral pin then push into the back of the wreath. Add hot glue to the second floral pin and push into the back of the wreath. You now have your hanger. Trim off any excess wire. I do not have any photos of adding the hot glue because I did this after my hook fell out on me when I went to hang it lol. Live and learn.
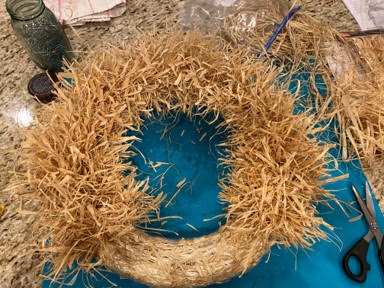
You are now ready to add any embellishments you would like to add to your wreath. Dollar Tree and Hobby Lobby sell some pretty burlap leaves in different colors that would look beautiful added to this wreath. I hope you enjoyed make the wreath I know it is time consuming but you have to agree the outcome is well worth it.