Home Decor
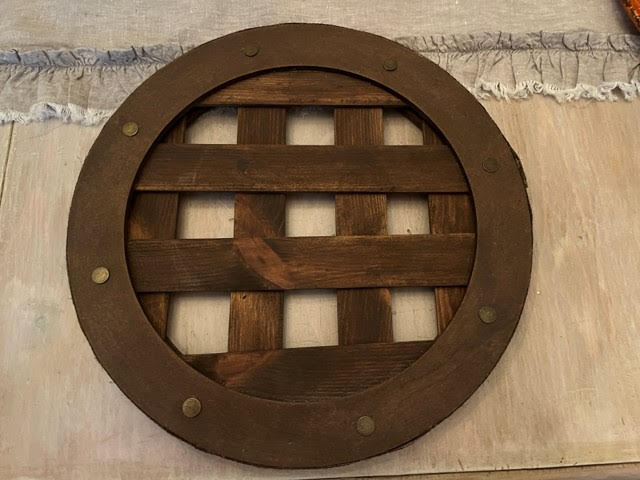
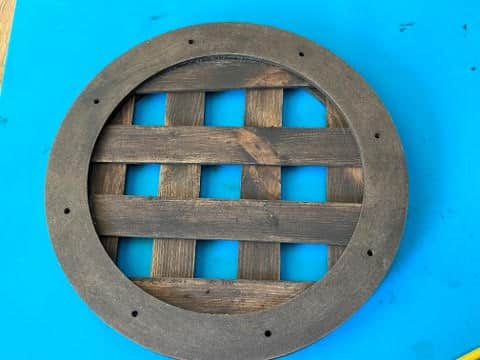
Wooden Round Lattice Charger Plate
Aug
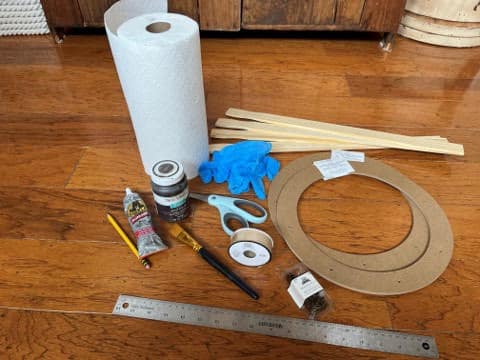
Materials you will need for 1 Charger Plate
- Two 12” Floral Craft Rings ( Michaels Item #1191518481068)
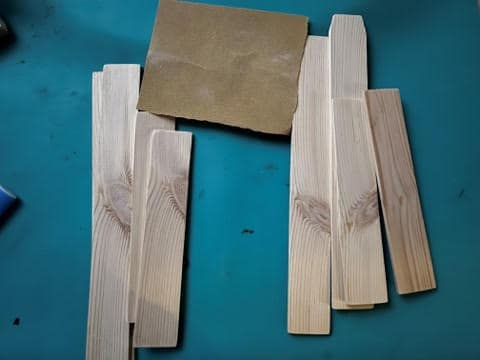
- Four 5 gallon paint sticks (Home Depot)
- 39” piece of 7/8” natural jute ribbon, (Hobby Lobby Item #205302, one roll of ribbon will give you enough for 3 charger plates).
- 8 Decorative tacks, Antique Bronze, (Hobby Lobby item #2156693). One package will be enough for 6 charger plates.
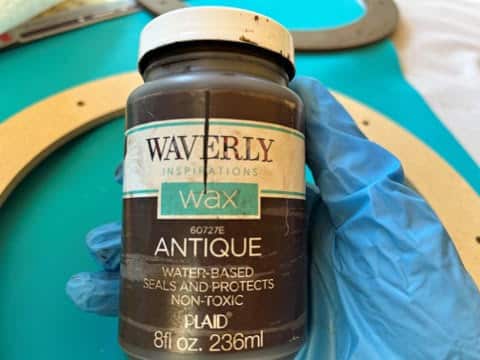
- Waverly Antique Wax (Walmart)
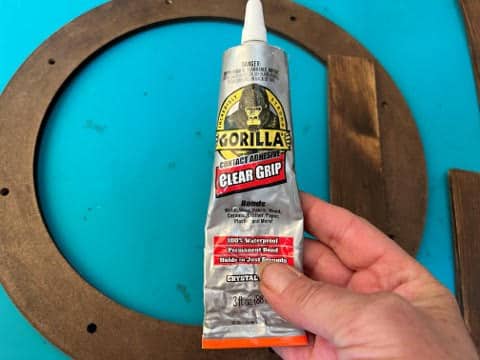
- Gorilla Clear Grip adhesive
- Saw
- Measuring tape or ruler
- Pencil
- Scissors
- Paintbrush
- Sandpaper (120 grit)
- Latex gloves
- Paper towels
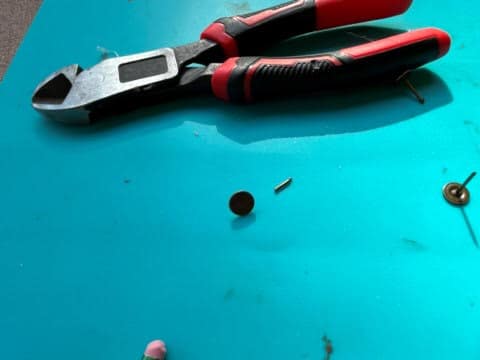
- Wire Cutters
Cutting and Staining
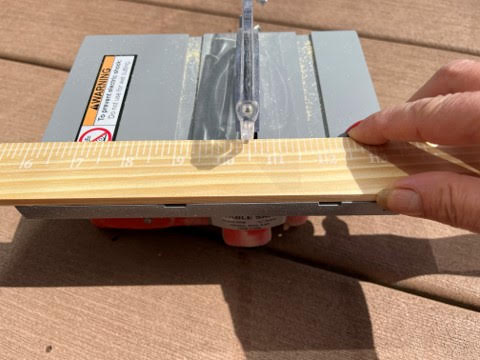
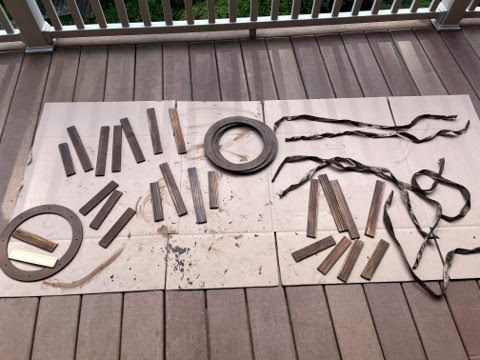
The first thing you will need to do is measure and mark each of the 5 gallon paint sticks 10.5” up from the bottom. Using a saw cut each paint stick. Next take the four top pieces of the paint sticks and measure and mark 7” up from the bottom. Using a saw cut each paint stick. You should now have four 10.5” pieces and four 7” pieces. I forgot to take a photo of measuring and marking the paint sticks. Give all 8 paint stick pieces a light sanding, the numbers should sand right off.
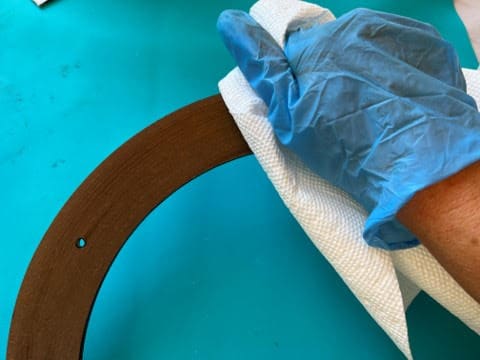
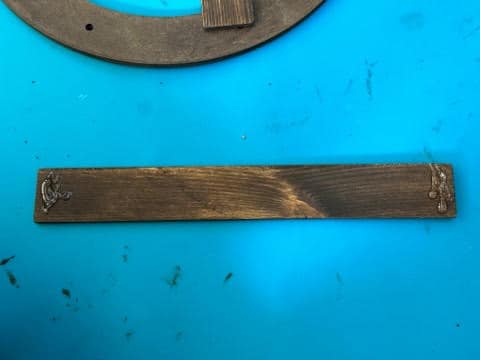
For the next step you are going to want to wear some latex gloves so your hands do not get all stained. Doing one paint stick piece at a time brush the Waverly antiquing wax on then wipe off with paper towel. You need to stain all sides of the stick then let dry. Repeat this step to the other 7 paint stick pieces. After they have dried I did not think they were dark enough so I did a second coat of the antiquing wax, wiping off with a paper towel again then letting them dry.

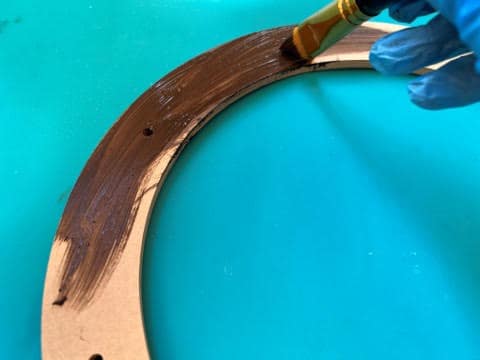
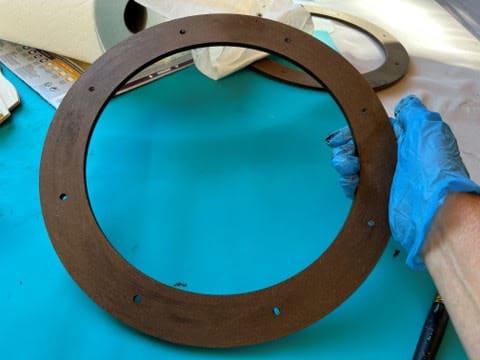
While your paint stick pieces are drying you can now stain the two 12” floral craft rings the same way you did the paint sticks. Again I did a second coat of the antiquing wax on the floral craft rings also. Let dry.
Staining The Ribbon
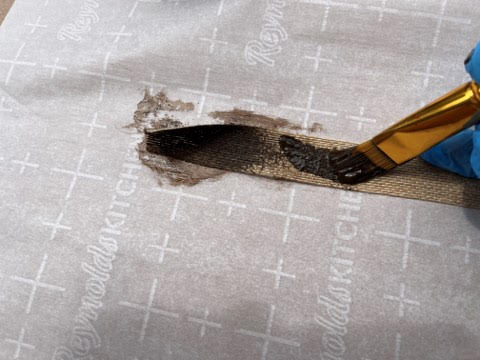
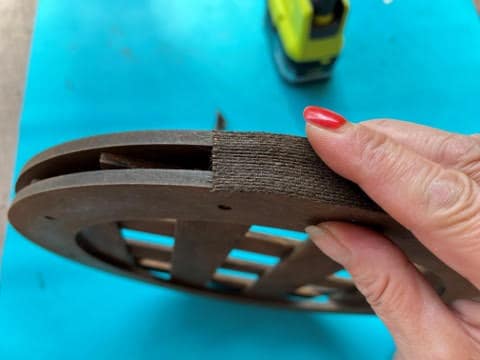
Cut a 39” piece of the 7/8” Natural Jute Ribbon. You are now going to brush one side of the ribbon with the Waverly antiquing wax you do not need to wipe the wax off the ribbon. Let dry. The ribbon will curl up while drying but doing worry it will flatten out when you attach it to the charger plate. You will only need to do one coat of the wax on the ribbon. In the below photo I am working on more then one charger that is why you are seeing so many pieces lol.
Assembling The Charger Plate
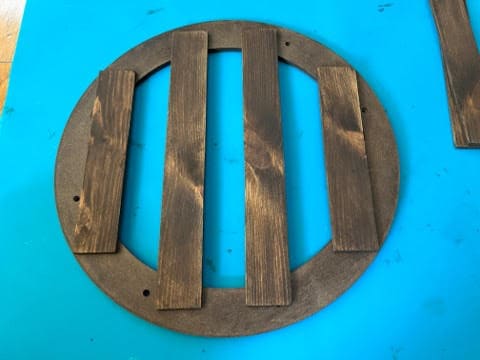
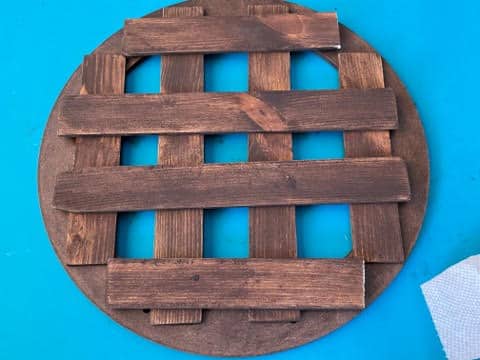
To assemble the charger plate lay down one of the 12” floral craft rings next take one of the 7” pieces of paint sticks set it on top of the ring on the left side, you want it partly on the ring and partly covering the center of the ring. Now take 2 of the 10.5” pieces of paint sticks and place them in the center of the ring, try to space them out evenly from the one on the left. You can measure the spacing but I just eyeballed the spacing. Lastly place your last 7” paint stick piece on the right side the same way you did the left side. Check your spacing in-between all four pieces to see if you need to adjust (see photo below)
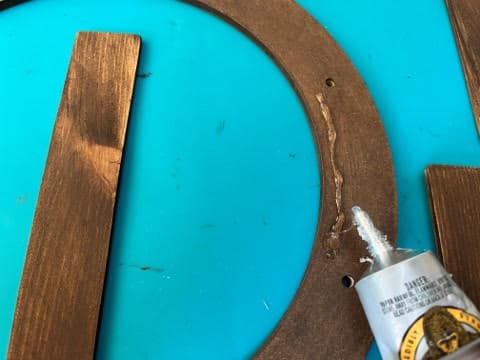
It is time to glue the paint sticks pieces to the craft ring. I am going to tell you it is easier to pick one piece up at a time and add the gorilla adhesive to a single piece then gluing them down without them already set in place. My photo’s show attaching them one at a time without having them set in place. Ok now that you have your pieces set in place pick up one of the end pieces add gorilla clear grip adhesive to the ring where you paint stick is going to be on the ring, do not add it close to the edge of the ring because it run out from under the paint stick when pressure is applied later. Now pick up one of the center pieces add the adhesive to each end of the paint stick piece where it will touch the craft ring then glue into place. Repeat these steps to the last two pieces.
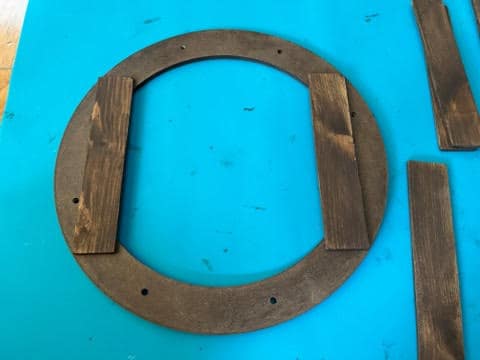

Next take the other 4 paint stick pieces and place them on top of the ones you just glued down but this time place them in the opposite direction. Start with the 7” piece and place it on top of the ends of the two middle pieces and work your way down with the two 10.5” pieces then ending with the last 7” piece, see photo below.

Next pick up one piece at a time and add the gorilla clear grip adhesive to the pieces on the first layer where you top layer piece touches, I hope this is making sense. Move down the row picking up each stick adding the adhesive then gluing back down.
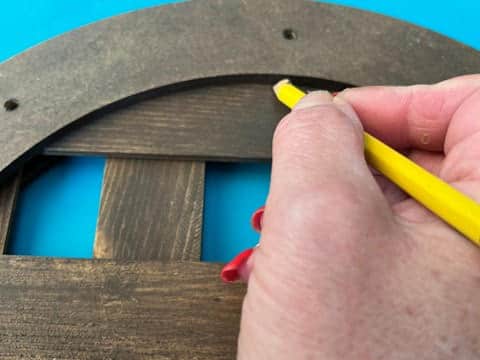
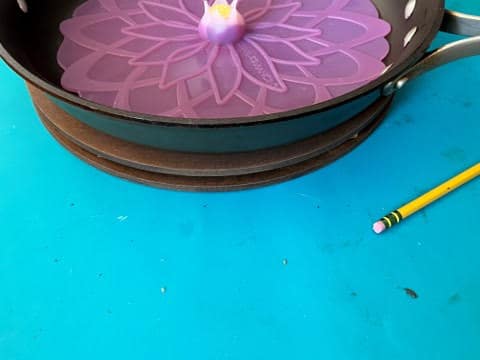
Take the second 12” floral craft ring and place it on top making sure it is even all the way around. Next using a pencil draw a line around the inside of the ring on to your paint stick pieces, see photo below. This is going to help you see where you are going to add the adhesive. Remove the top floral circle then add the gorilla clear grip adhesive onto the paint sticks on the outer side of the line you just drew. You do not want to add the adhesive close to the pencil line, see photo below. Place the second floral craft ring back on top checking to make sure it is even all the way around. To help make sure everything adheres well place a heavy object on top of the charger plate, I used a heavy frying pan which was perfect because it is also round. Let set for at least two hours then remove the heavy object and check to see if you can pick up the charger without any pieces moving around. The gorilla clear grip adhesive usually tacks up very quickly so you can move the item around without it falling apart but check it just to make sure. If it moves at all place the object back on top and let set another hour.
Adding The Ribbon & Tacks
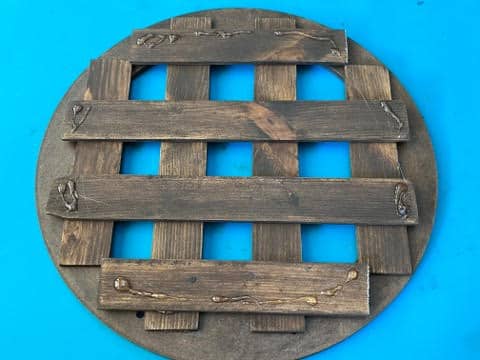
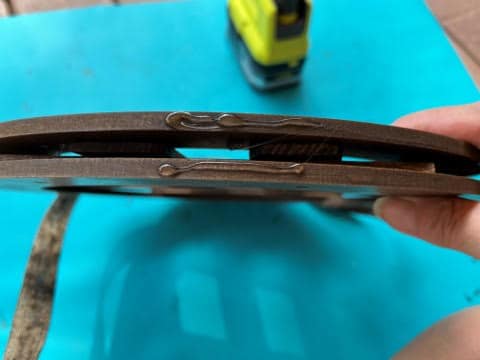
To attach the ribbon to the charger you will need a hot glue gun and glue sticks, I believe I forgot to put this under materials you will need. Add a small line of hot glue to the outer edge of each of the floral rings then glue down the end of your ribbon. Keep adding small lines of hot glue and gluing the ribbon on until the ribbon is attached all around the charger plate.
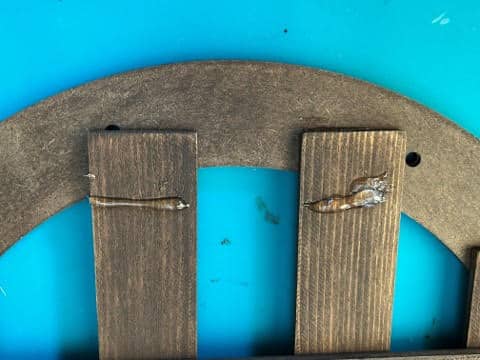
To add the tacks to the eight holes in the floral ring on top of the charger plate first decide which side of the charger plate you want the top to be next take a tack and try to put it in the hole, 6 of my tacks went right in but I had to cut a few. If any of the tacks to do go right in see how much of the nail part of the tack you need to cut and using a pair of wire cutters cut the nail end of the tack. Place back into the hole to make sure it will go right in. Once you have the tack the right length you can either add a small amount of hot glue into and around the hole then glue in your tack or you can also use the clear grip adhesive to glue the tacks in. I decided after making two chargers I would use the adhesive to glue in the tacks. Work your way around the charger gluing in the tacks.

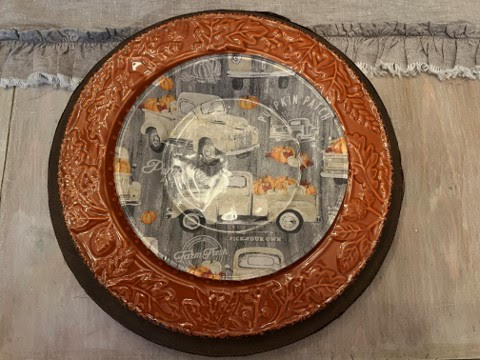
Your wooden round lattice charger plates are now ready to place you dishes on top of. I hope you think they look as amazing as I do and give them a try. I just love how they look with my fall dishes on top of them.