Dollar Tree, Easter, Home Decor, Spring
DIY Dollar Tree Candle/Trinket Holder
Mar
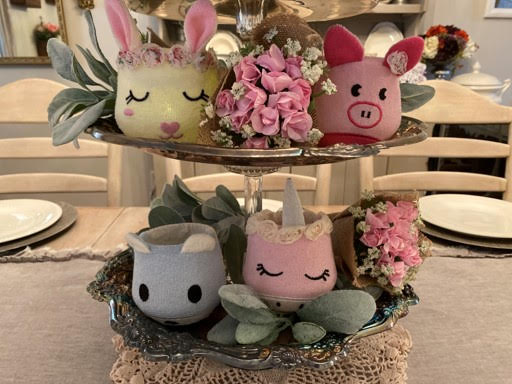
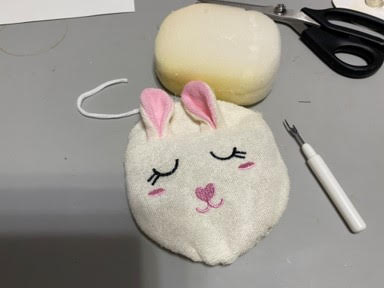
If you have been following The Crafty Decorator you know I am always looking through catalogs and magazines for ideas. I came across a tree tiered tray decorated for Easter and on the tray was the cutest glass bunny. It looked like a glass or a glass candle holder painted white with a painted bunny face and burlap bunny ears. I knew I could make this myself so off to the Dollar Tree I went looking for something glass I could paint and as I was walking around the store I found these animals sponges as soon as I seen the bunny one I thought I could use this to cover a glass. I grabbed all four of the different animals sponges then went looking for something I can use as the insert and I found a glass candle holder that I thought could work so needless to say I bought a few and home I went to create these adorable little candle/trinket holders. I am going to use the bunny on my three tiered tray and the others I am going to send to my grandchildren to put in their rooms. How cute would these be hold their trinkets or baby needs. I put a tea light in my bunny one and I just love it. They only take about 10 minutes to make one.
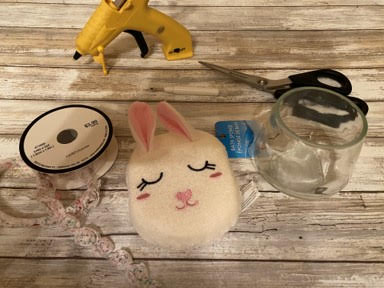
Here is a list of what you will need:
- Animal Bath Sponge (Dollar Tree)
- 3.5” diameter by 3.07” high glass candle holder (Dollar Tree)
- Hot glue gun and glue sticks
- Ribbon (Optional)
- Scissors
- Seam Ripper
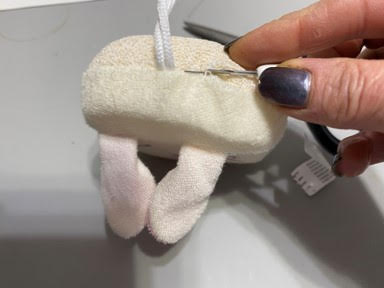
Preparing the Sponge
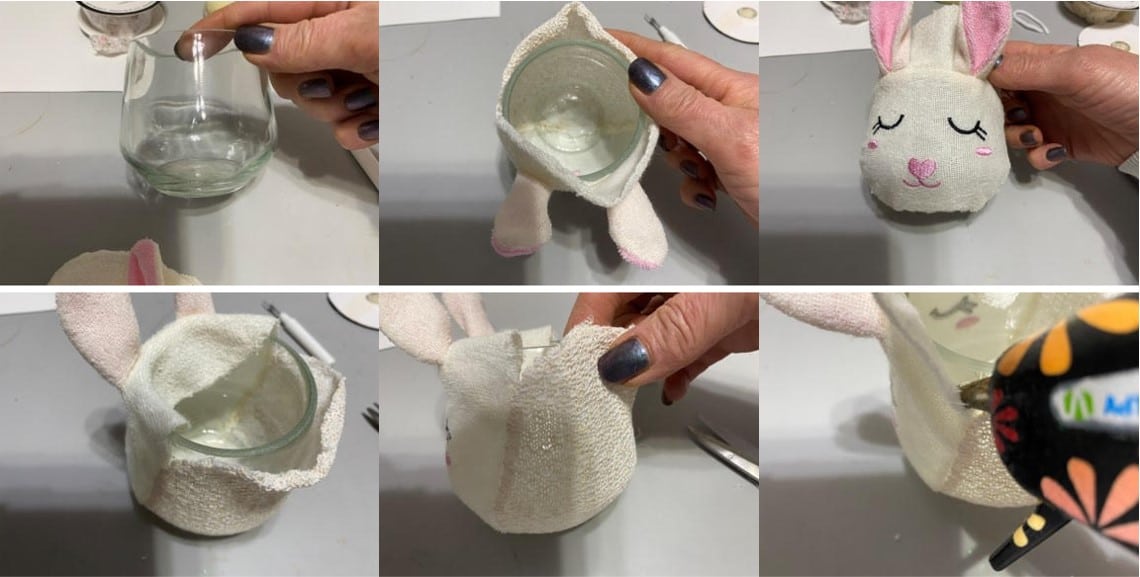
Using a seam ripper open up the top of the sponge. You are going to open the top and a little down each side of the sponge. Remove the hanger, sponge and any lose threads there may be.
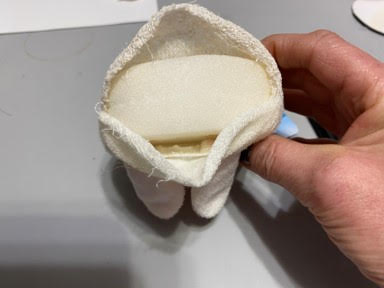
Covering the Candle Holder
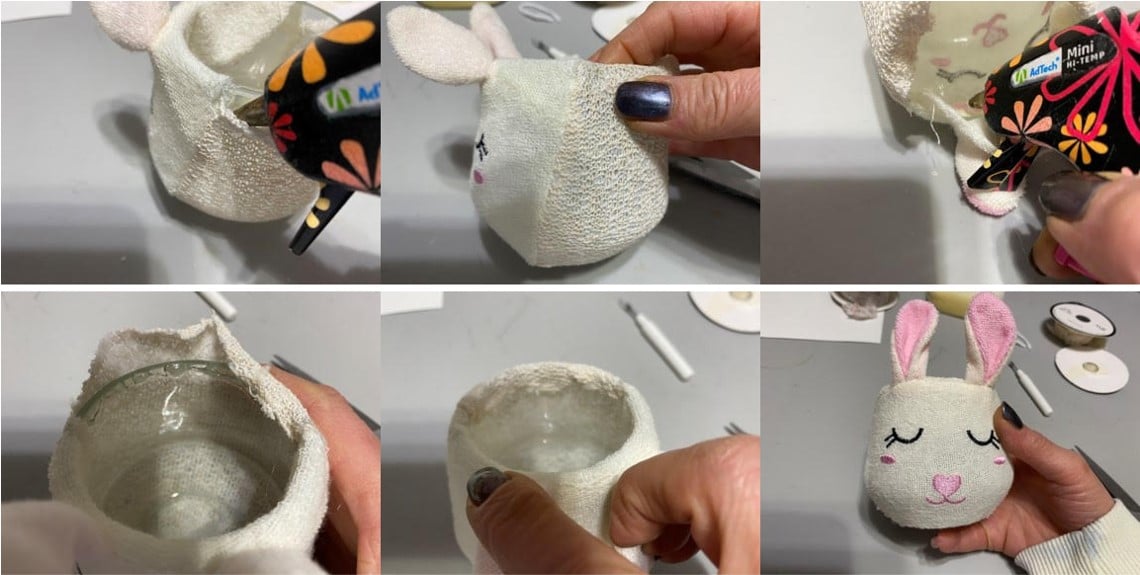
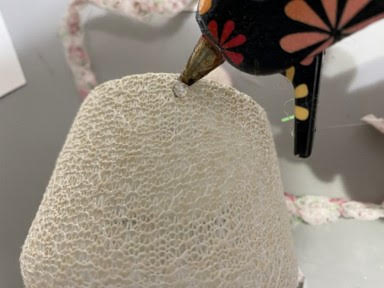
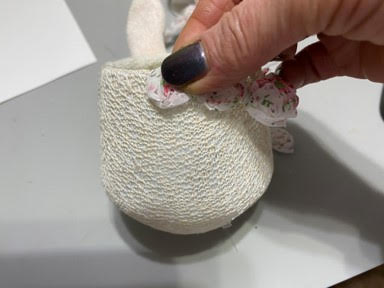
Place the candle holder inside the animal cover and slowly slide the cover up the candle holder. You may have to work a little to get it all the way up, don’t worry if it opens up a little more on the sides. Pull the cover until the ears are at the top of the candle holder. Trim off any threads hanging on the sides. You are now going to close up the sides. Starting with the front of the cover and a small amount of hot glue under the side piece pulling upwards glue the piece down. Next add some hot glue next to the first piece then pull the back piece up and over so the two pieces are now touching then glue into place. Tuck the extra fabric in the middle down into the candle holder. Glue the other two sides of fabric like you did the first two. Add hot glue under the extra fabric that is in the middle of the candle hold and glue down. Repeat this step to the extra fabric in the back. I posting a photo of the label on the candle holder just incase you need it.
Adding the Ribbon
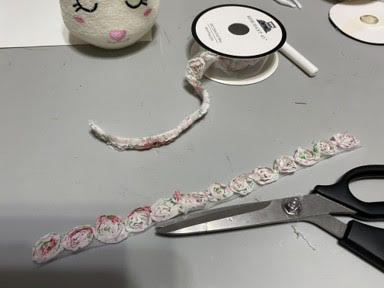
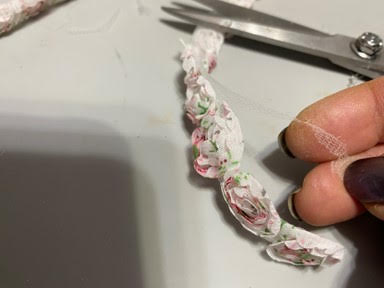
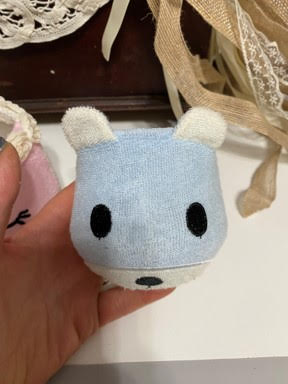
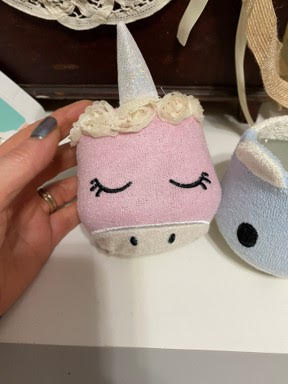
Adding the Ribbon is optional. I added the ribbon to the rabbit and the unicorn. I did not add any ribbon to the bear and I only added one flower to the pigs ear. I used a floral ribbon from Hobby Lobby. This ribbon is small flower on a mess so I measured how much ribbon I needed the I trimmed off the mess from both sides of the flowers. Starting at the back add hot glue at the top of the candle holder and start gluing down the ribbon. Work your way around the candle holder gluing down the ribbon.
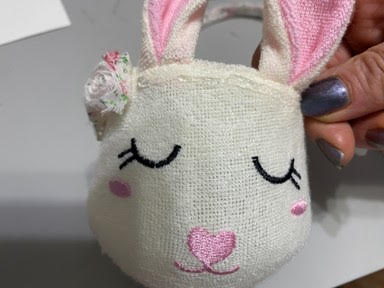
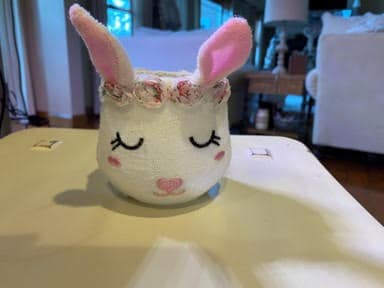
You are now finished. How easy was that and are they not just adorable. You can add a timer tea light inside or you can use them to hold little trinkets.
These are all just great. Two of my neighbors are having little girls real soon so I am trying to make two of them.
Now that’s thinking outside the box – genius and very cute
Sherry these are too cute! I love how you Imagine beyond and come up with the cutest ideas! Thank you😊
I don’t see any post of the bottom of the candle holder so I can’t try and find one. Do you have the picture so I can look on the store for the exact one? Thank you.
Following. I can’t find it either. Thanks,
These are so sweet. I walked past them hanging on an end cap of them hanging and thought they’re cute. But you made them so adorable and now ready for many uses. I really love the things you make. And the easy way you teach/show us step by step ❤️
i dont see pic of bottom of candle holder for size and number
I cannot find these candle holders anywhere! Ugh!