Dollar Tree, Flowers, Home Decor, Outdoors, Spring
DIY Dollar Tree Flower Door Hanger

Apr
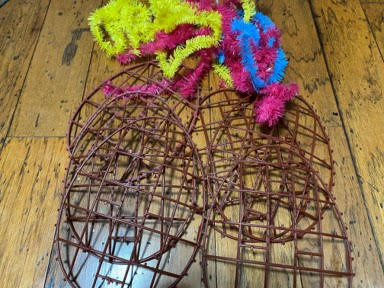
I bought the large tinsel eggs from the Dollar Tree not knowing what I was going to do with them. I kept looking at the tinsel eggs trying to decide I wanted to do something different with them and then a flower just popped into my head. I am just loving how it turned out, it make a great statement on my front door. If you like the bee’s I have on the flower you can see how I made them on my blog page. I hope you love the flower as much as me and give it a try. If you do not have the tinsel eggs I am including a pattern for the petal that you can use to cut them out of cardboard to make the flower.
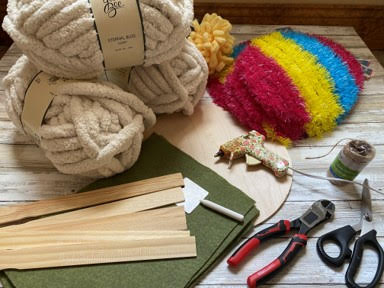
Here is a list of what you will need:
- Petal and Leaf Pattern
- 6 Dollar Tree Large Tinsel Eggs
- 12” Wood Circle
- 3 Skeins of Eternal Bliss Chunky Yarn (Hobby Lobby)
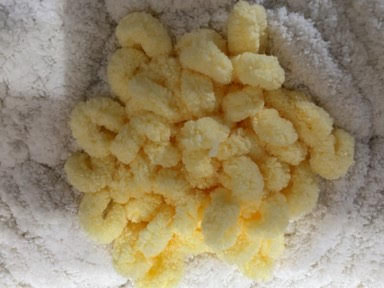
- 1 Skein Yellow Loopy Yarn (Joann’s)
- 6 – 12” x 9” Green Felt Squares
- 6 – 1 Gallon Wood Paint Sticks
- Jute Twine
- Drill and Drill Bit
- Wire Cutters
- Scissors
- Piece of White Chalk
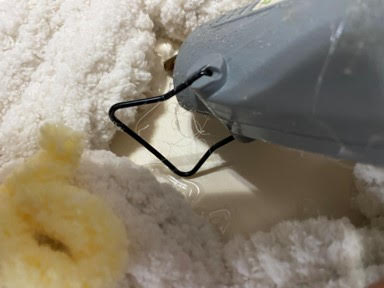
- Hot Glue Gun and Glue Sticks
Making the Petals
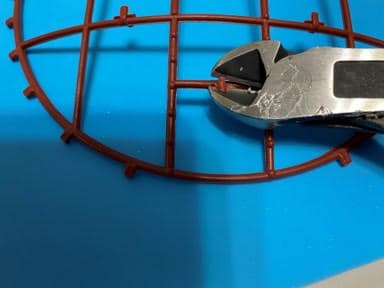
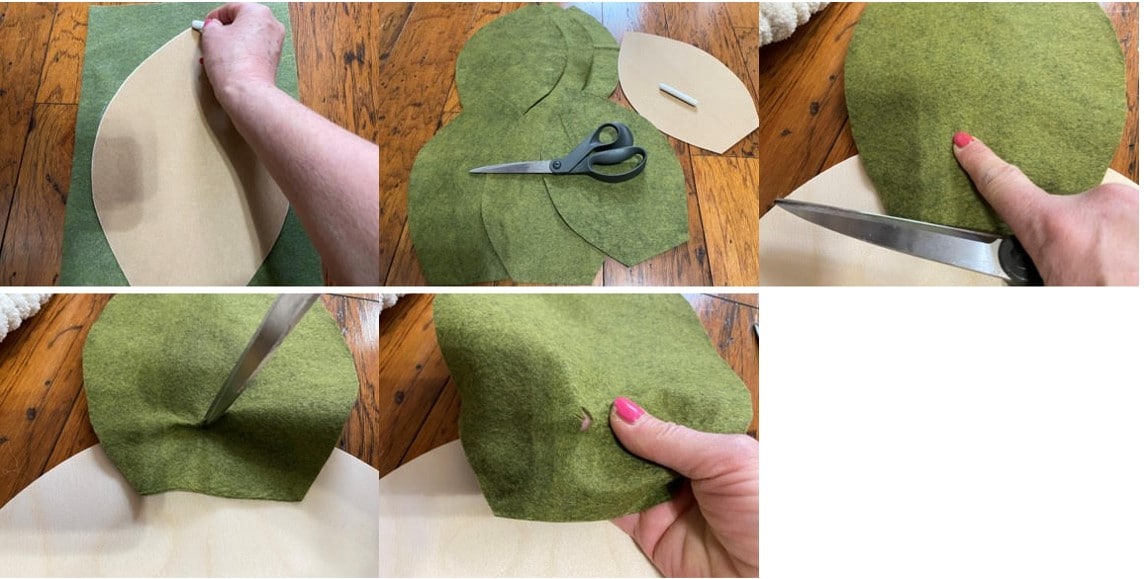
The first thing you will need to do is print and cut out the pattern petal and leaf. If you do not have the tinsel eggs you can use the petal pattern to trace and cut out 6 petals from a heavy cardboard. I you have the tinsel eggs remove the tinsel from all six eggs. Using wire cutters clip off the 11 nubbies on the front of each egg, see photo’s below.
Measure and cut a 64” piece of chunky yarn. Add a small amount of hot glue to one of bars on the back of the egg glue down one end of the yarn. Start wrapping the outside of the egg you want to make sure the bottom and top of the egg are wrapped well so you do not see any of the plastic it is ok to see some plastic on the sides you are going to cover that when you wrap again. Once you have wrapped the outer edge of the egg add hot glue to the end of the yarn and glue to the back of the egg. If you are using cardboard glue a piece of chunky yarn around the outside of the cardboard.

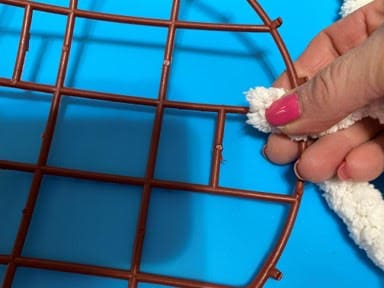
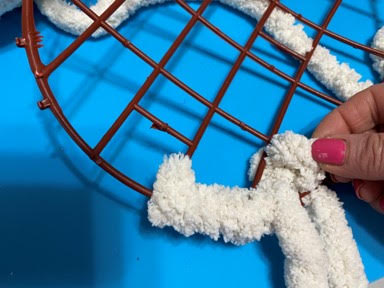
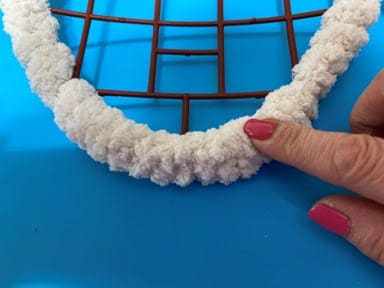
Next add hot glue to the inside of the yarn where you just ended and glue down the end of the yarn. Add hot glue on the side and across the front of the egg and wrap the yarn around. Add hot glue the side of the egg and wrap the yarn around now you can continue wrapping the egg without add hot glue. Push down on the yarn every couple of rows to make sure the plastic of the egg is all covered. Do not pull the yarn to tight when wrapping or the egg will bend inwards. When you are two rows from the top of the egg glue down the yarn on the last row finish off by cutting the yarn and gluing the end to the back of the egg. Repeat these steps to the other five eggs.
Attaching the Petals
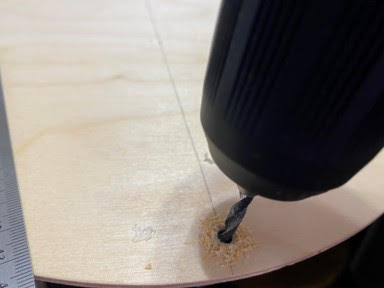
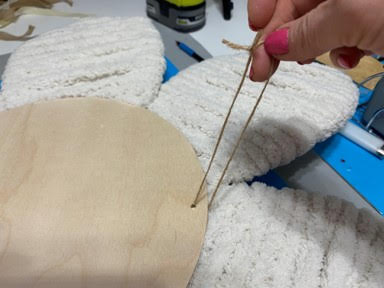
The first thing you need to do is drill a hole in the wood circle about a ¼” from the end. Next place a piece of jute twine through the hole make a loop and tie a double knot. This will be the hanger for your flower.
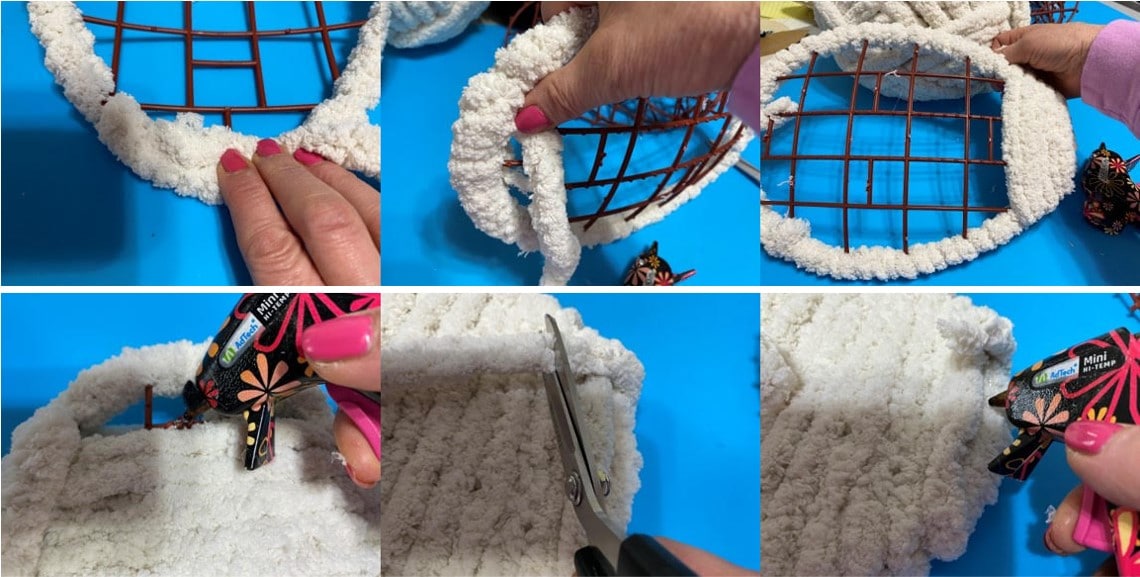
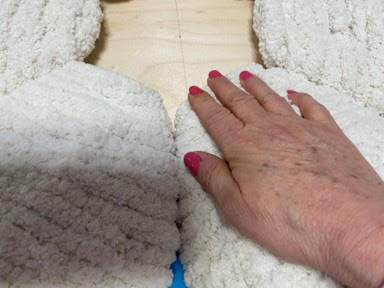
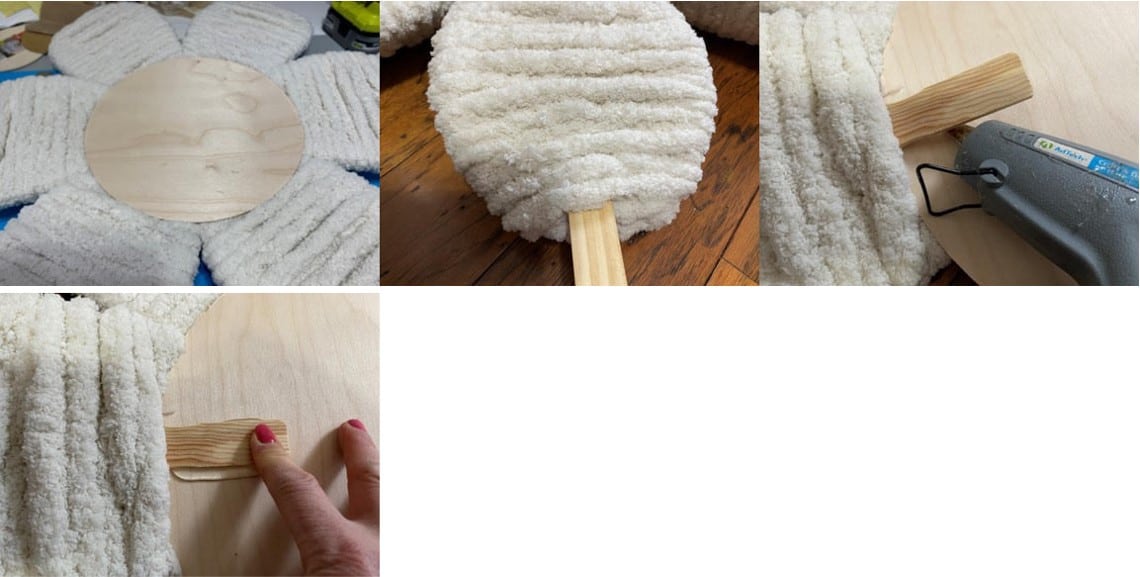
The narrow part of the petals is the part that will be placed onto the wood circle. Place a petal on each side of the hanger you just added. Next place one petal on the right and left side of the circle then place the last two at the bottom. Lift one petal at a time add hot glue onto the wood circle then glue down the petal. Repeat this step with the other five petals.

Turn the flower over. Take a one gallon paint stick slide the handle end under the back side layer of yarn. Slide the paint stick down the petal until the handle end comes out the bottom onto the wood circle. Add hot glue under the handle of the paint stick and glue down to the wood circle. Repeat this step to the other five petals.
Making and Attaching the Leaves
Trace and cut out six leaves from the green felt pieces. With the back of the flower still facing up place one leaf between every two petals. You want about 2 ½” of the bottom of the leaf on the wood. If you want to make sure you have them placed where you like them you can pin them in place turn the flower over and adjust the leaves as needed. The leaf that is over the hanger you will need to make a hole in the leaf where the hanger is. Feel where the hanger is through the leaf take the scissors and cut a small hole in the leaf feed the hanger through the hole. When you have the leaves in place lift one leaf at a time hot glue the bottom of the leaf to the wood circle then glue the sides of the leaf to the petal. Repeat this step the other 5 petals. I am not sure how but I must have forgotten to take photo’s of the gluing down of the leaves.
Adding the Center of the Flower
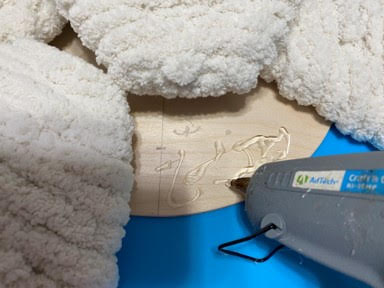
With the flower facing upright add hot glue next to one of the petals glue down the loopy yarn with the loops facing up. Continue adding hot glue around the center and gluing down the yarn until you have the whole center filled in with the yellow loopy yarn.
Your flower is now ready to hang on your front door. I made a second one and hung it on the wall of my front porch. I hope you enjoyed making the flower. If you don’t want to use it outside how cute would this flower be in a little girls room.
Do you have a pattern for the bee I want to make them for my card club to go with the beehive I made last year need in 2 weeks
I came here looking for the bee pattern as well. Too cute.
I would also like the bee directions please
What would you suggest to use if you can not find the egg frames anywhere?? I really really would like to make this but need an alternative to the egg frames. Thank you!
I’m going to try using a thick cardboard or foam and use the flower petal pattern to cut the shape out.
Hi Melinda,
Yes you can certainly do that I have the pattern for the petals on the blog for the flower for this reason. Have fun making the flower send photo’s when you are done.
Me too, me too, 😂
I’d love to learn how to make your 🐝
Would love to get ideas regarding how to make bees, pigs and elephants for outdoor displays. Since Corona Virus , to get the younger kids to go for walks, rather than sit indoors all day, the town has had a few town wide scavenger hunts with different themes.
Need bee pattern
I enjoy watching you do your diy’s. You explain everything you do that makes it great trying to do. The project you are doing.
Just beautiful can you make them print able
Hit the 3 little dots up in the corner it will give you that option to download then print
Can you make the directions print able?
How did you make the bee? Would like to make one.
Which Bee I have done two
So cute and the bees are cute too. Do you have a tutorial for any of the bees that you have made? Thank you.
I have one for the bee’s made with the embroidery hooks I only have a video for the bee’s made out of the yarn
Looking for bee pattern please help thanks
Absolutely love this 🥰🥰🥰