Dollar Tree, Fall, Home Decor
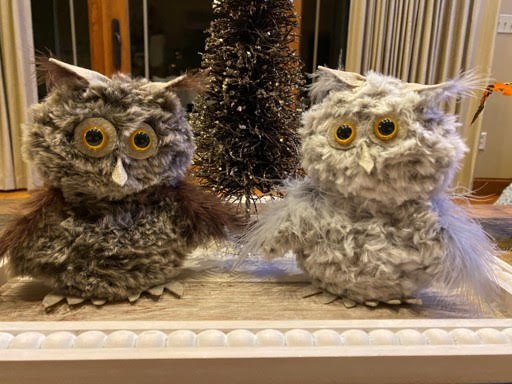
DIY Dollar Tree Owl
Oct
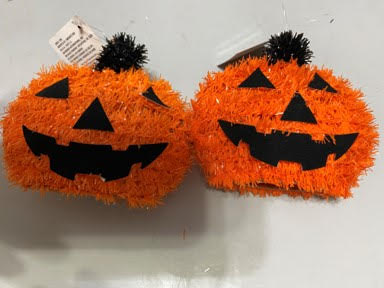
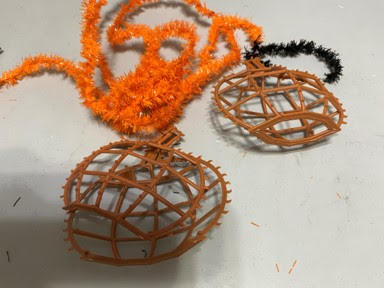
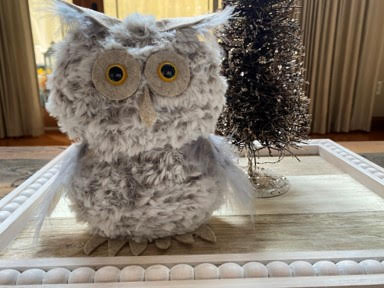
I have to confess I buy way to many of one item at the Dollar Tree. I purchased 2 cases of the 3D tinsel bunny heads at Easter time to make bunnies but I still had left overs so I decided to try my hand at an owl and I have to say they just came out adorable! I know not everyone is not going to have the bunny heads laying around so my followers told me about the 3D tinsel pumpkins Dollar Tree has out for Fall and Halloween. After searching a few Dollar Trees I finally found the pumpkins and tried my hand at the owl with the pumpkins and they turned out to be perfect for the owl. I have included a pattern for the feet, ears, eyes, wings and beak. I hope you give these adorable owls a try.
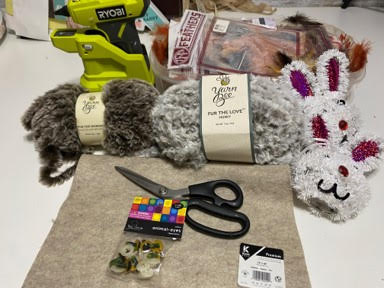
Materials I used:
- Owl Pattern for his body parts such as his feet, beak, wings etc.
- Two 3D tinsel bunny heads or two 3D tinsel pumpkins from the Dollar Tree
- Yarn Bee Fur The Love yarn in the color Husky or Fur The Moment yarn in the color Chocolate Brown or any other colors you would like
- Piece of Heavy felt in the color Sandstone or color of your choice
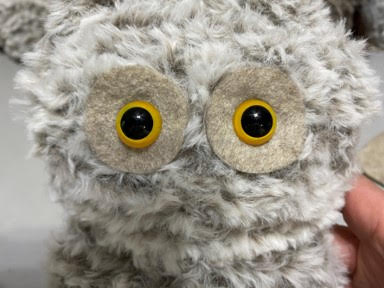
- 15mm animal eyes in the color yellow
- Feathers in your choice of color (optional)
- Four 4” zip ties
- Hot glue gun and glue sticks
- Pencil
- Scissors
Forming The Body
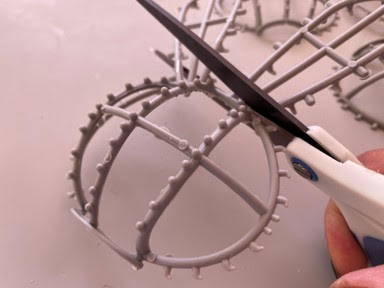
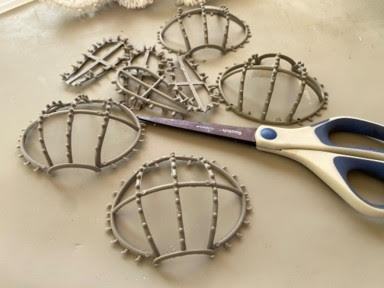
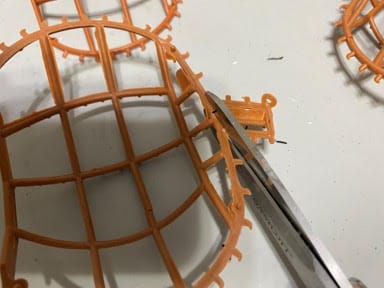
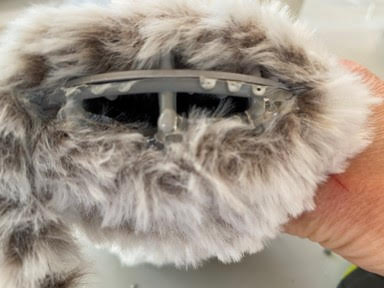
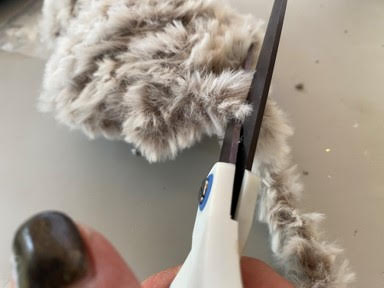
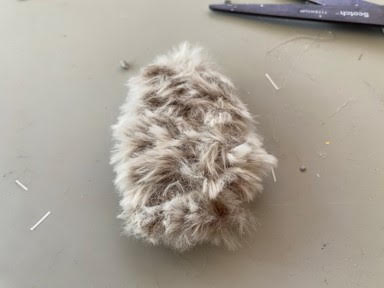
You are going to start by removing all the tinsel from the 2 bunny heads or 2 pumpkins. Separate your pieces. If you are using the bunny heads you are going to cut off the ears right at the top of the head using your scissors. If you are using the pumpkins you are going to cut off the stems right at the top of the pumpkins using your scissors.
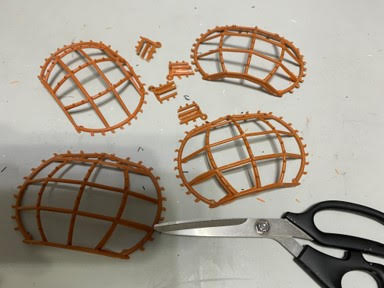
Next you are going to put your pieces back together. I found it is better to add a line of hot glue across the top of one piece then put them together.
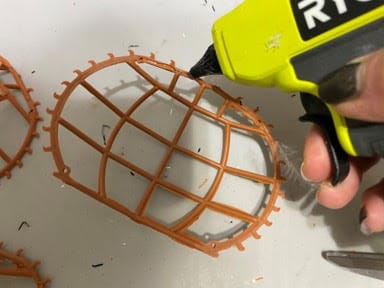
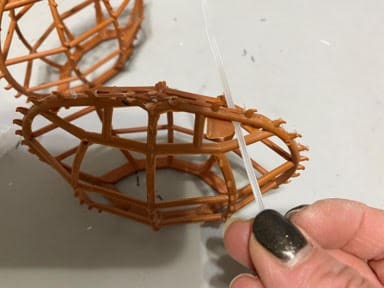
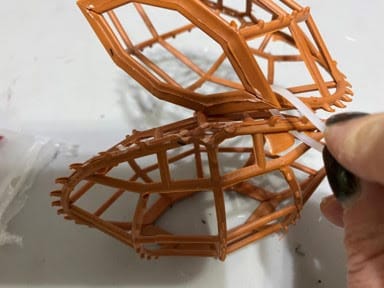
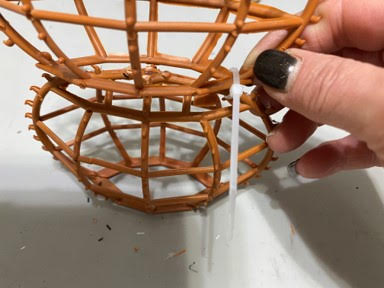
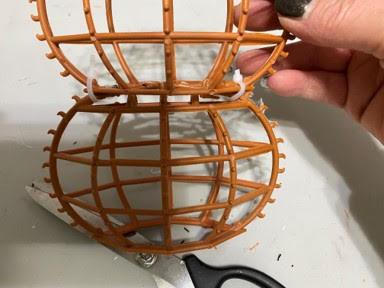
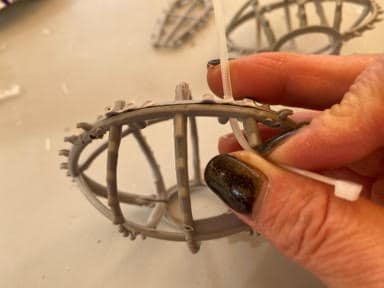
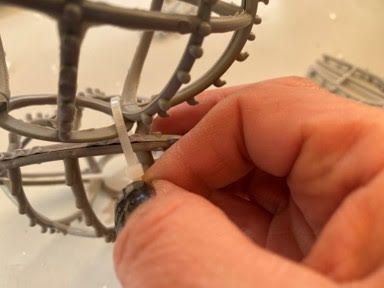
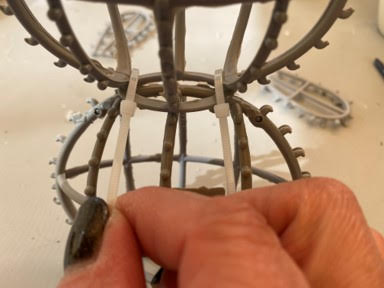
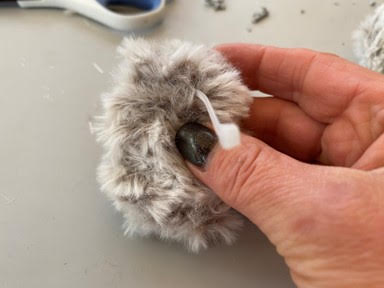
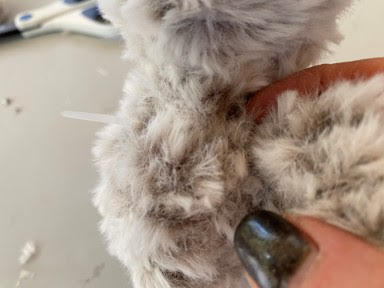
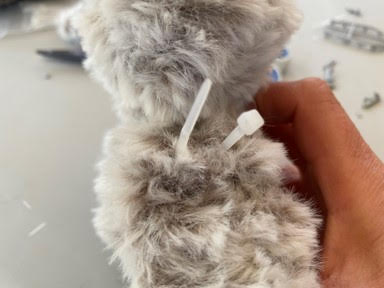
To attach the two pumpkins or bunny heads together place one pumpkin or bunny head on your work surface then take one 4” zip tie feed it through the top right side of the pumpkin or bunny head (see photos) then place your second pumpkin or bunny head with the bottom on top of your first pumpkin or bunny head (see photos). Feed your zip tie through the second pumpkin or bunny head on the right side (see photos). Zip tie together but do not pull real tight. Repeat these steps with a second 4” zip tie to the left side. Pull both zip ties tight. Trim off excess zip ties.

Bunny Heads
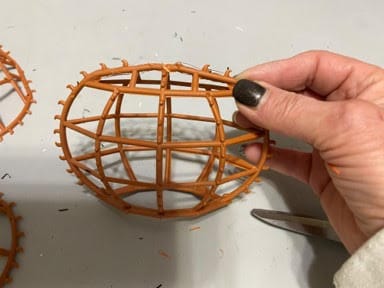
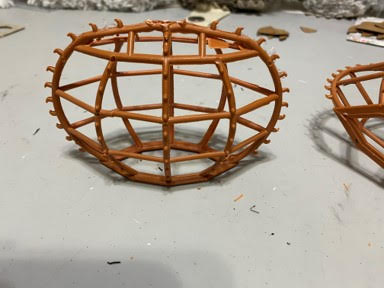
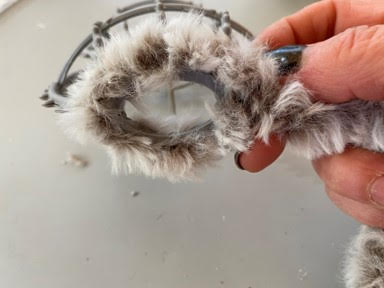
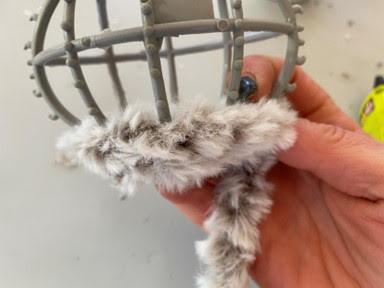
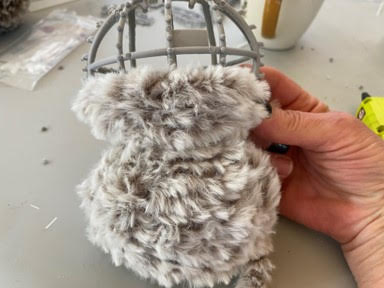
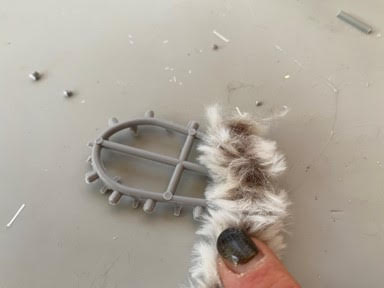
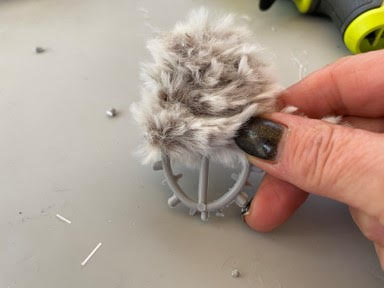
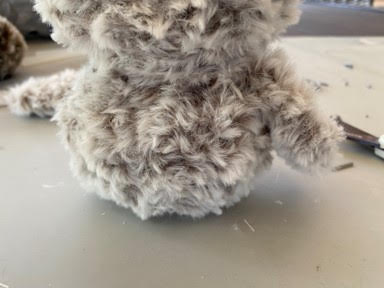
To start wrapping the yarn you are first going to add a line of hot glue around the bottom outer edge of one side then glue on your yarn. Repeat these steps to the other side. You are now ready to start wrapping your yarn around your owl body. While wrapping make sure you are pulling the yarn tight as your go. When you reach where the two pieces are connected together wrap your yarn around two or three times to fill in the space then continue wrapping up. When you reach the top of the head you are going to want to start adding hot glue to hold the yarn in place. End by adding a line of hot glue across the top of the head attaching the yarn then trim and glue down the end of the yarn. The photos below are of the bunny heads but the pumpkins are done the same way.


Making and Attaching Body Parts
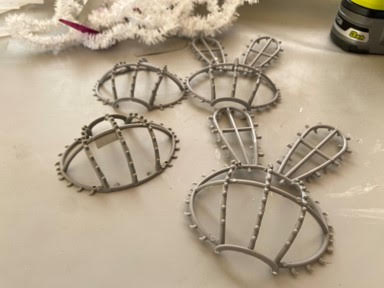
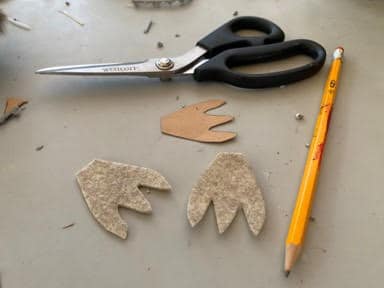
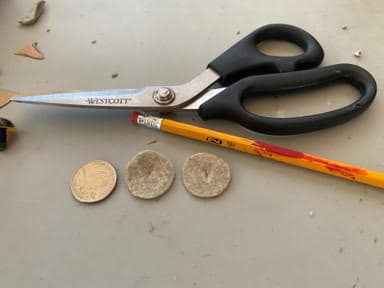
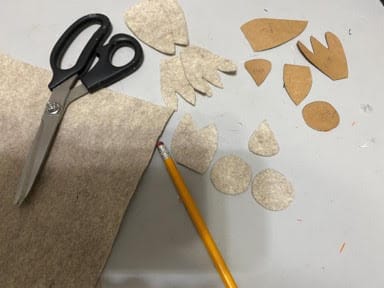
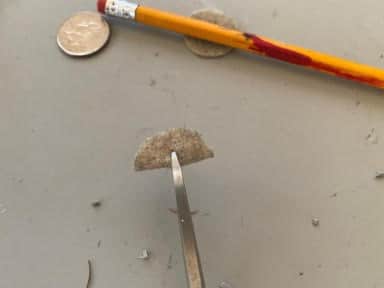
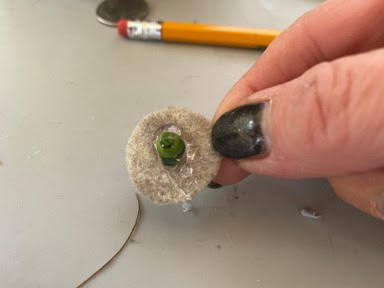
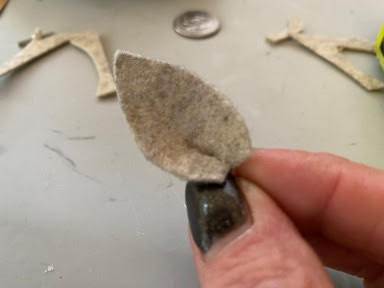
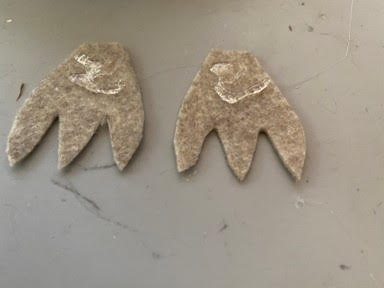
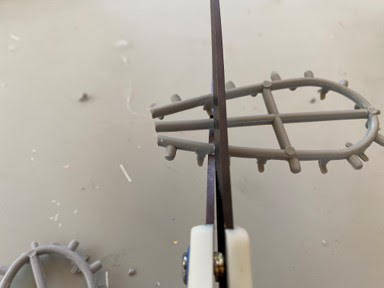
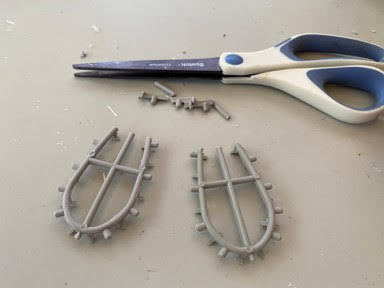
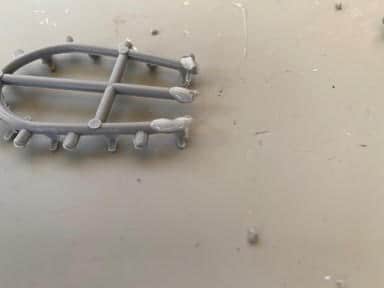
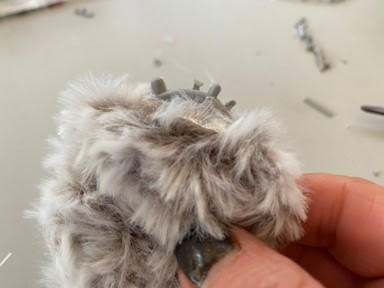
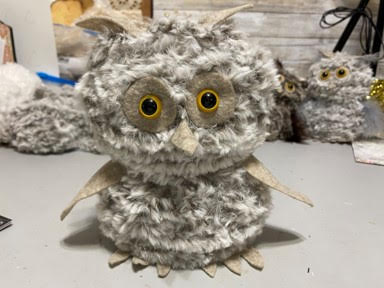
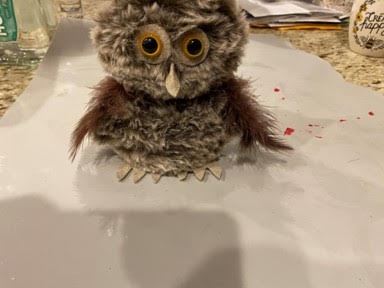
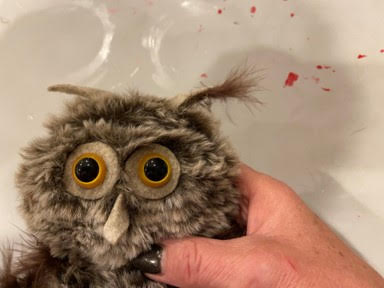
The first thing you are going to need to do is print and cut out the pattern pieces. The pattern has two parts one section is for the bunny heads and one part is for the pumpkins. There are two because the pumpkins make a bigger owl so you will need bigger body parts. If you are using the bunny heads I forgot to add that you will need to use a quarter to make the eye parts. Trace the quarter and cut out two pieces from the felt for the eyes. Cut out your pieces for the owl following the directions on the pattern.
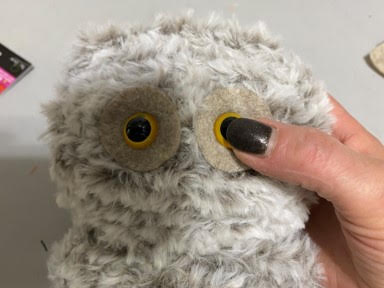
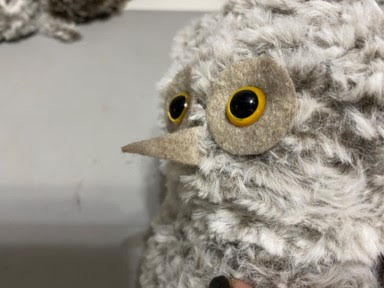
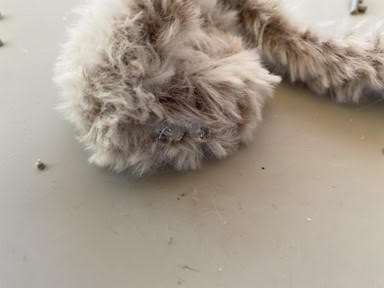
To attach the eyes the following directions are the same whether you are using the bunny heads or the pumpkins. Start by folding one of the eye circles in half the using your scissors make a small cut in the center of the fold. Repeat this step to the other circle. Next insert one of the 15mm animal eyes through the hole of each circle. Place the eyes onto the owl where you think they look good. Remove one eye add hot glue to the back then glue into place. Repeat to the other eye.

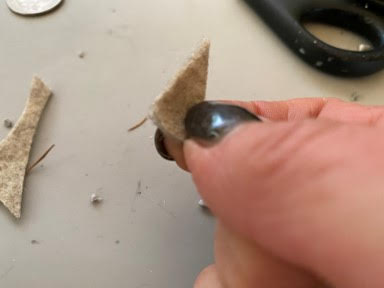
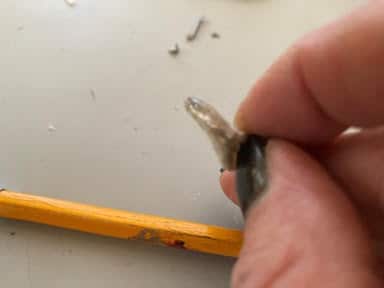
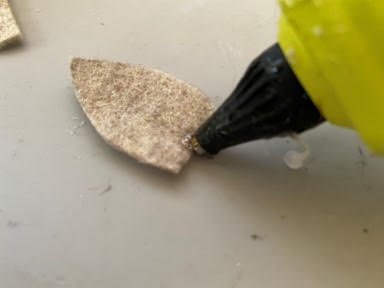
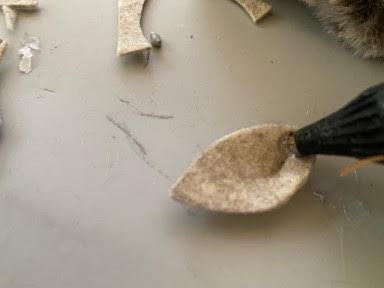
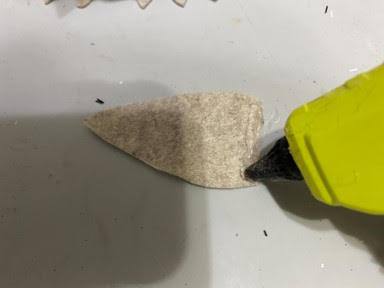
To attach the beak the directions are the same for both the bunny and the pumpkin forms. Add a small drop of hot glue in the center bottom of the beak then pinch closed. Place the beak on the face to see where you would like the beak. Remove the beak add a small amount of hot glue then glue into place.
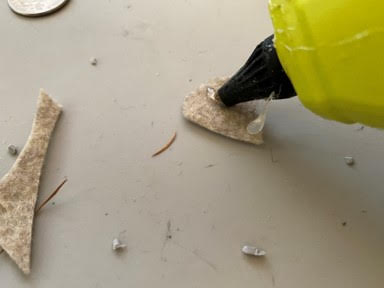
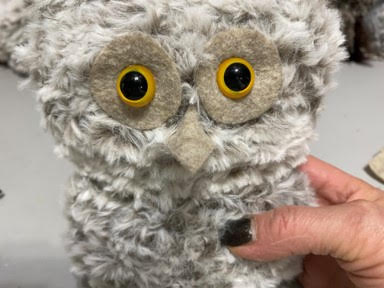
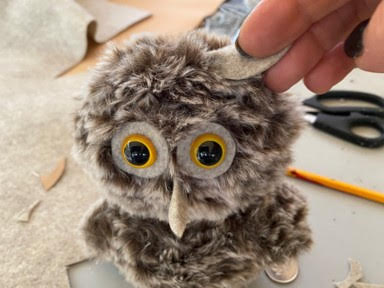
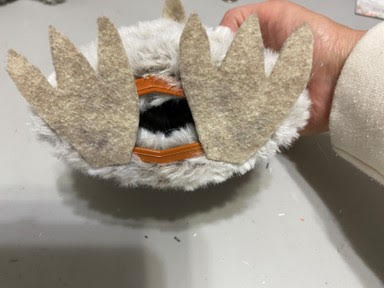
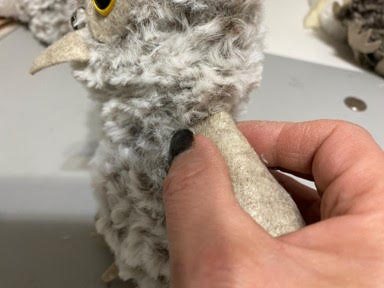
To attach the ears the directions are the same for both the bunny heads and the pumpkins. Add a small drop of hot glue in the center bottom of the ear and pinch closed. Repeat steps to other ear. Place the ears onto the owl to see where you would like them. Owl ears do not stand straight up the slant to the side of the head (see photos). I placed each ear on the top of the head about in the center of each eye. Once you have decided where your ears should go add hot glue to the bottom of the ear and glue into place make sure you glue the ear so it is slanted to the outside of the head. Repeat this step to the other ear.
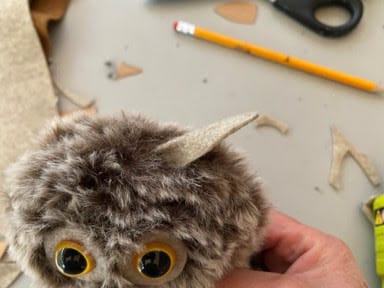

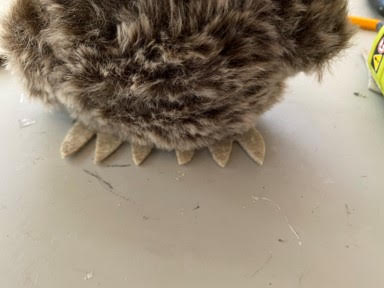
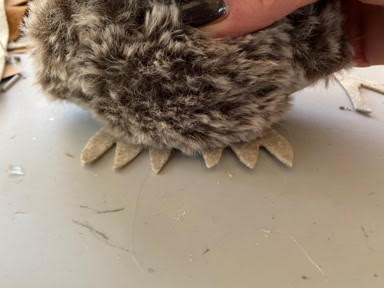
To attach the feet the directions are the same for the bunny heads and the pumpkins. Place your two feet down onto your work surface then sit your owl on top of the feet, adjust the feet until you think they look good. I place my fingers on the front of the feet then lift the owl. Next add hot glue to the feet then place your owl down on top of the feet gluing the feet to the owl.
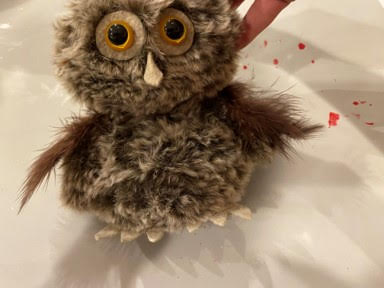
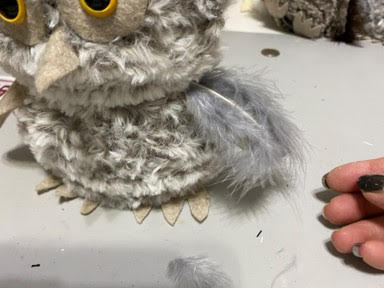
If you used the bunny heads to make the owl you are going to use two of the ears you cut off earlier. Hold one the ears up to the side of the owl body from the neck down to decide how long you want the wings to be. Once you have decided how long you want the wing using your scissors at the top of the wing which is really the bottom of the ear cut off how much you need to get the length you want. Cut the second wing to the same size.
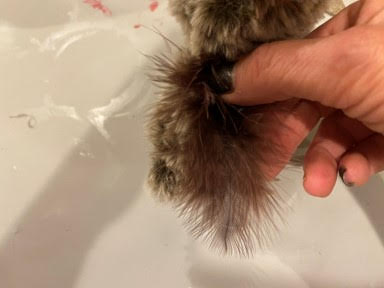
Next add hot glue across the top of one wing and glue down your yarn. Turn the wing over and repeat this step to the other side. Next start wrapping your yarn around the wing pulling the yarn tight as you go. When you reach the bottom of the wing you will need to start adding some hot glue to hold the yarn in place. You are going to finish by adding hot glue across the bottom edge of the wing glue down the yarn trim and glue down the end of the yarn. Repeat these steps to the other wing.

To attach the wings you are going to take a 4” zip tie insert the end through the wing on the right side of the middle bar in the wing. You can feel the middle bar in the wing. Next insert the end of the zip tie into the side of the owl body behind the bar at the side of the owl bring up through the other side then through the wing on the left side of the middle bar of the wing. Pull the zip tie tight attaching the wing to the body. Cut of excess. Repeat these steps to the other wing on the other side of the owl.

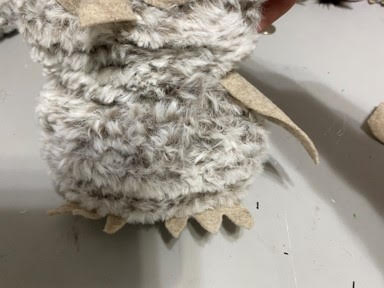
If you used the pumpkin forms to make the owl you are going to attach the felt wings you have cut out. To attach the wings add a line of hot glue across the top of one of the wings then glue to the side of the body just under the neck (see photos). Repeat this step to the other wing on the other side of the owl body.
Attaching The Feathers
This step is optional you may like the owl without feathers. The following directions are the same for either the yarn wing or the felt wing. To attach the feathers to the wings hold a feather on top of the wing to see if you need to trim the feather. I like using the fluffy part of the wing so I trim of the flat end piece. Trim the feather if needed. Add a small amount of hot glue to the end of the feather that is at the top of the wing then glue feather to the wing. You may want to add more then one feather to a wing depending how large your feathers are. Repeat this step to the other wing.
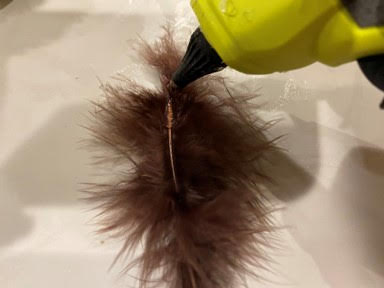
Next you are going to add a small piece of feather inside each ear. I use the small pieces I trimmed off the feathers for the wings. Add a small line of hot glue inside a ear then glue in a small part of a feather. Repeat this step to the other ear.
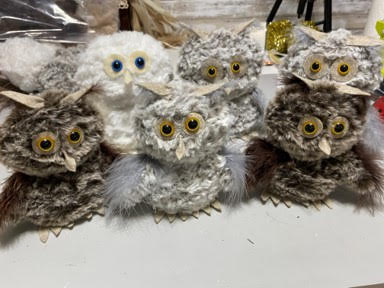
You are now finished with your owl. I hope you enjoyed making him. I made a whole family lol. You can also make a winter owl using white fur yarn. Winter owls do not have large ears so I did not add ears to mine. As I was typing up this blog I just thought about using one of the larger owls as a tree topper because it has the opening on the bottom. How cute would he be as a tree topper?
love the owl wish I could get all the supplies to make these we didn’t have any of the pumpkins love watching you, glad you don’t wiggle around and talk a lot about nothibg thanks again
You are so sweet thank you. One of our friends here made her owl out of 2 round tinsel ornamanets from the dollar tree. She trimmed a little of one on the bottom to make him stand but he came out just adorable.
Adorable! But what other supply can you suggest to use if you dont have bunnies or pumpkin forms.
One of our friends here made her’s out of 2 round tinsel ornaments from the dollar tree. She had to trim a little of the bottom of one to make him stand but he came out adorable.
These owls are adorable, thank you for the tutorial.
Thank you so much!
The owls are darling. Bought everything to make them but will have to wait until they do Easter again. No pumpkins and no bunnies. Bummer
I’m in the process of making an owl for my daughter who is crazy about them. I’ll try to send a photo of it when it’s done.
Yes please send me a photo I am so glad you are making the owl.
Ihave everything but feathers can’t wait to start I love your hand made animals .
Yay I am so glad you are making the owl they come just adorable.
Love them so adorable and professional looking, will definitely make!! I love how you 3 sisters craft differently yet amazing !!! You all are so gifted, special and fun always , love you guys ! God bless you all , your parents must be so proud, how much love you all spread in the tough world with so many lonely older folks stuck at home. I am blessed to have a big family and kids as well like you guys.
Love the owl’s they’re so adorable 🥰 okay now Sherry send me one of them please lol 😂