Home Decor, Thanksgiving
DIY Primitive Pilgrims
Oct
I just can’t believe Fall is here already. Halloween is just around the corner and Thanksgiving will be here before you know it. If you have been following The Crafty Decorator you know I had purchased handmade primitive pilgrims in Lancaster and sold them in my store. I am unable to buy them again so I decided to show everyone how we can make them and I just love how they turned out. I just love making crafts that I can sew but I know some of you do not sew so I always try to also show how to glue them instead. If you are not sew and would like to try gluing them you can watch the video on my Facebook page where I show how to glue the pilgrims.
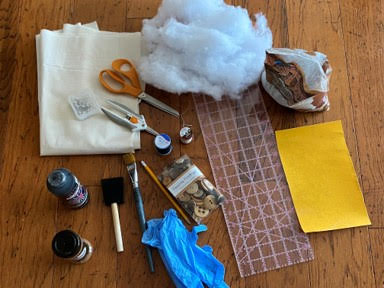
Materials You Will Need:
Primitive Pilgrims Pattern-
- Muslin
- Polyester Fiberfill
- Sewing Machine
- Thread in the colors Ivory, Black and Brown and sewing needle
- Reptile Sand or your choice for bean bag filling
- Black Paint
- Paint Brush
- Sponge Brush
- Fine Grit Sandpaper (220)
- Clear Ruler
- 2 Buttons of your choice
- Cinnamon
- Scissors
- Sewing Pins
- Pencil
- Rubber Gloves
- Coffee Stain Mixture
Sewing The Pilgrims
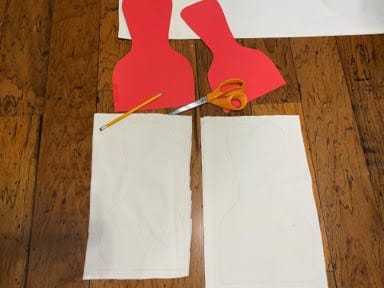
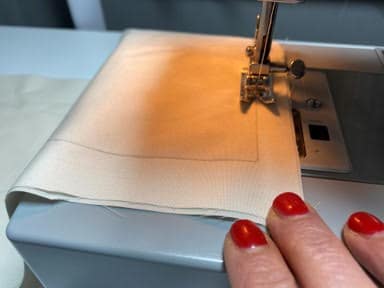
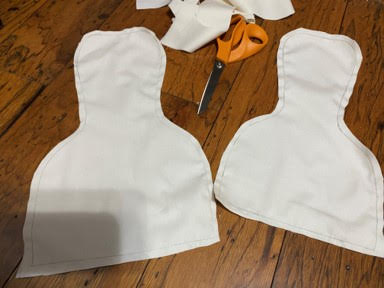
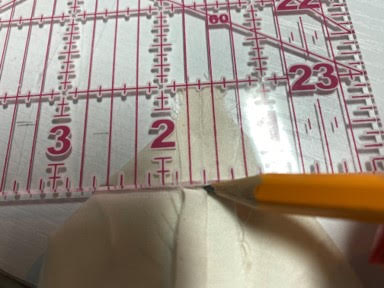
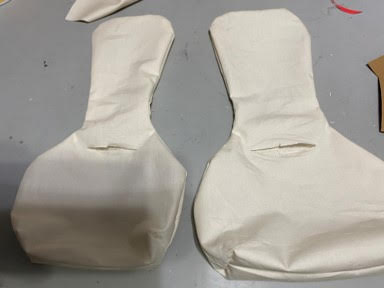
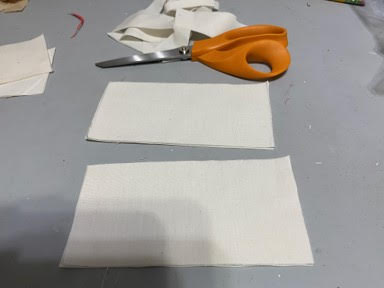
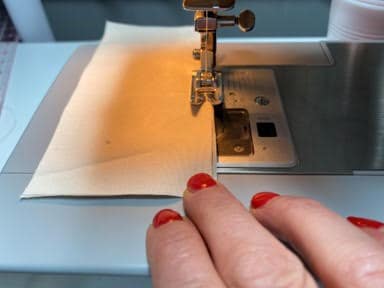
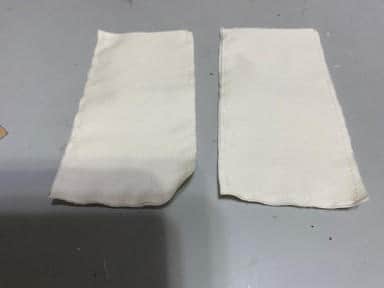
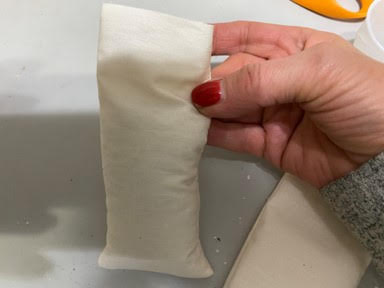
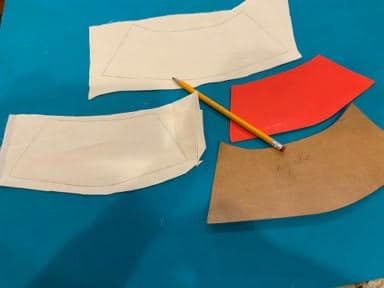
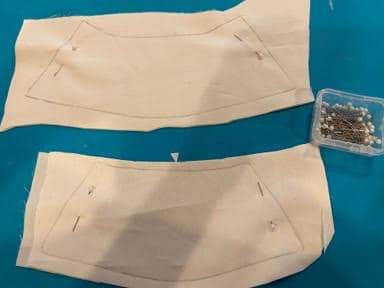
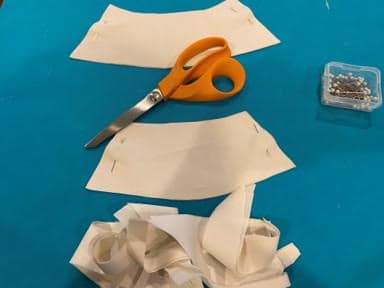
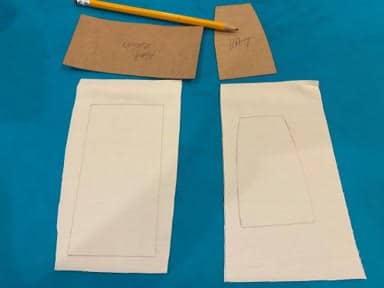
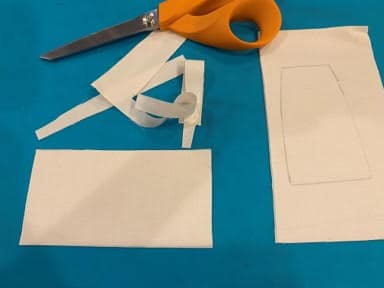
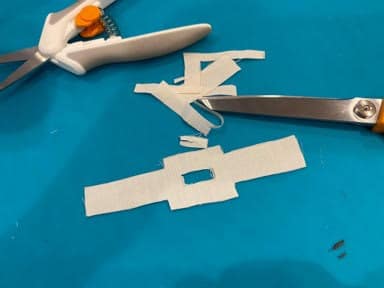
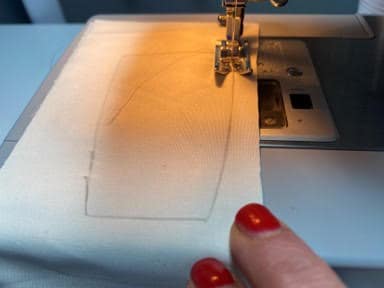
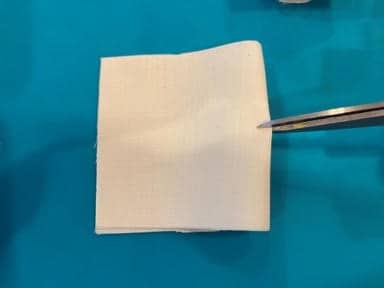
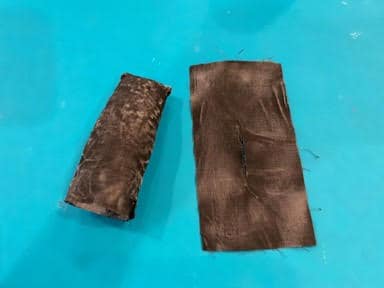
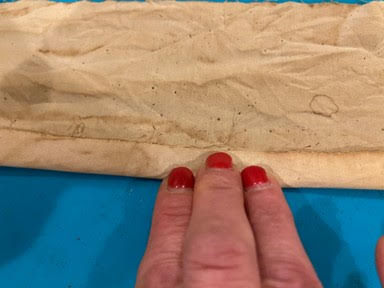
The first thing you will need to do is print and cut out the pattern pieces. After you attach the pilgrim bodies where indicated using a pencil trace the boy and girl pilgrim on a double layer of muslin. Next using the trace lines as your sew lines sew each pilgrim all the way around on your sewing machine. You do not have to leave an opening. After you have sewn the pilgrims cut them out about a ¼” from your sew line. Next clip around all curves, this will stop the fabric from puckering when you turn them Right Side out.

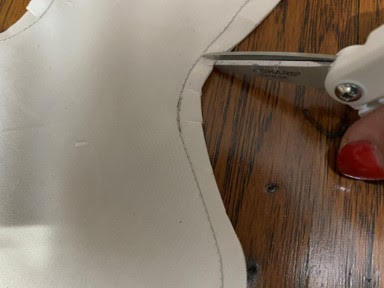
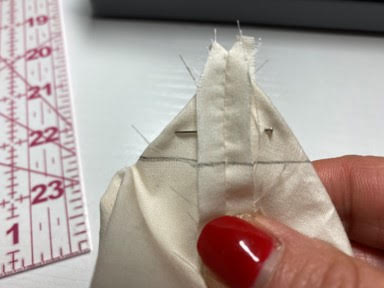
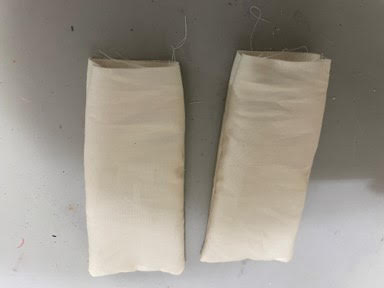
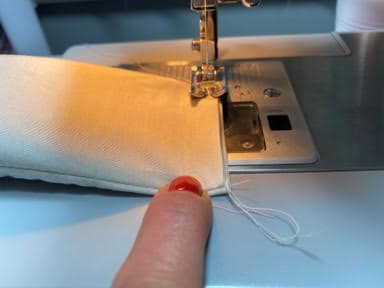
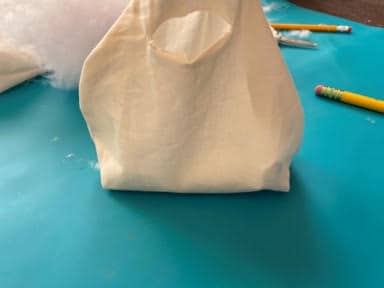
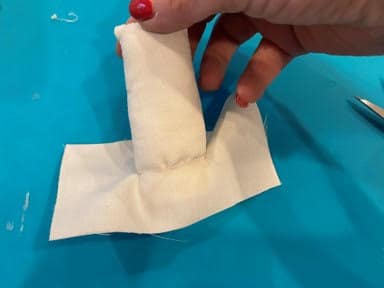
Ok now you need to do your box corners. I hope you can understand my directions I just learned how to do this myself lol. If you need a better explanation I have a video on my Facebook page showing how to do the box corners. The first step is to separate your two pieces of fabric on one side lining up your bottom seam with your side seam. Open up the seam allowance and make flat.
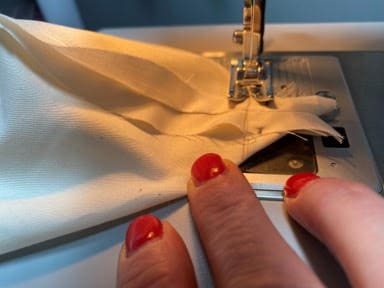
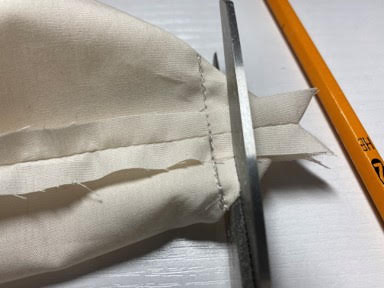
Using a clear ruler measure 1” down from the tip of the sewing (not the tip of the fabric) using a pencil draw a line across. Place a sewing pin above the line to hold in place. On your sewing machine sew across your pencil line making sure to backstitch on both ends. Next you are going to cut of the extra fabric about your sewn line leaving a ¼” seam allowance.
Repeat the above steps to the other corner. Do the box corners on both pilgrims.
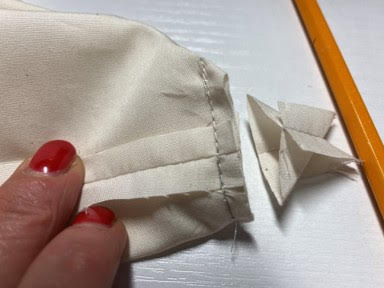
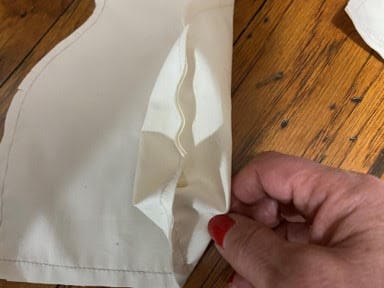
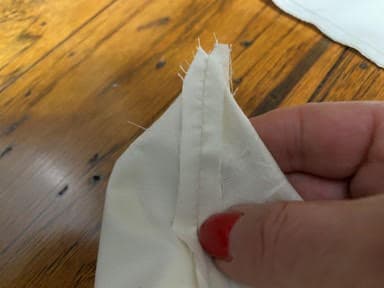
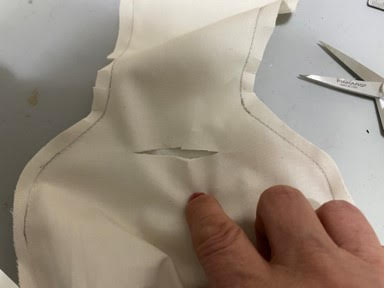
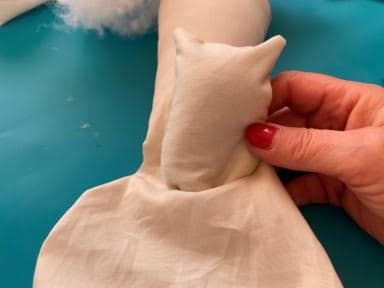
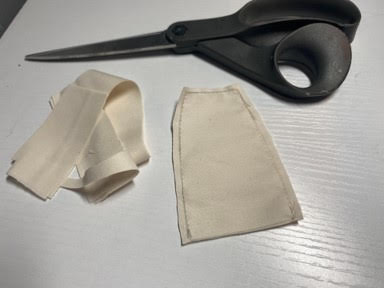
Next you need to make a cut for turning right side out. Separate the two layers of fabric with your fingers then on one of the layers pinch the fabric with you fingers in the center just below the neck and make a small snip with your scissors. Using your scissors make a slit across horizonal across the center. Turn right side out. Repeat these steps to the other pilgrim.
Making The Bean Bag
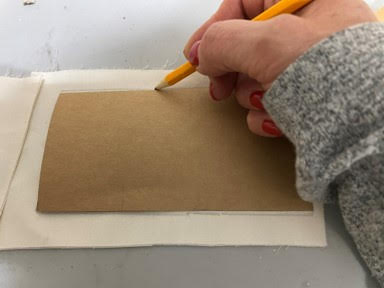
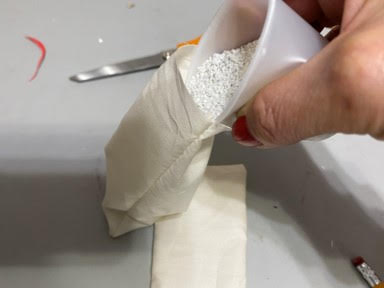
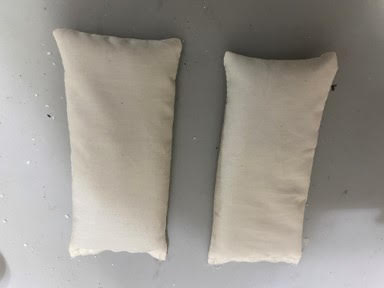
Using the bean bag pattern trace two on a double layer of muslin. Place a sewing pin on both ends of each bean bag then cut out on the trace line. On your machine sew up three sides of each bag. Turn them right side out. Fill each bag ¾ of the way with reptile sand or fill of your choice. Sew the opening closed on each bag.
Stuffing The Pilgrims
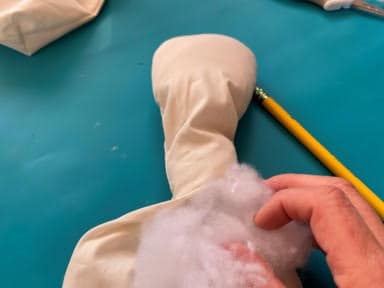
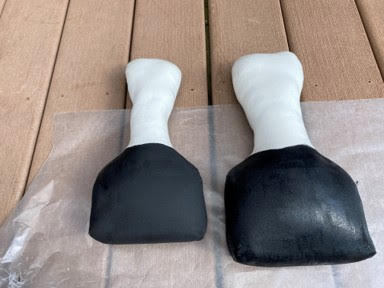
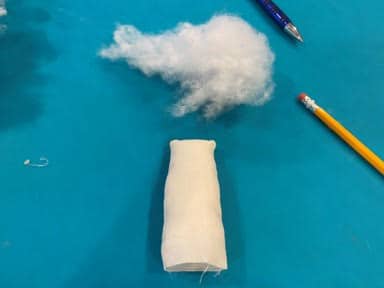
Now that you have turned the pilgrims right side out and made the bean bag it is time to start stuffing. Start by firmly stuffing the lead and neck then insert the bean bag through the opening down (if you need to make the opening a little larger just check a little more) to the bottom of the body. Make sure the bean bag is laying flat on the bottom. Take small amounts of stuffing and stuff on both sides of the bean bag then firmly stuff the rest of the body. Repeat these steps to the second pilgrim.
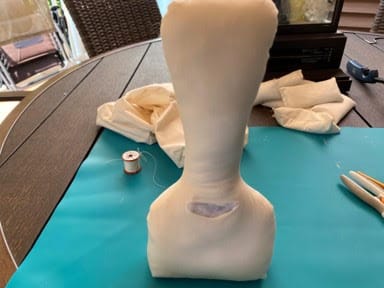

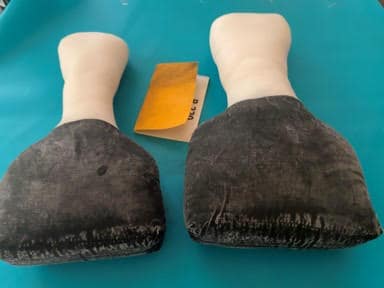
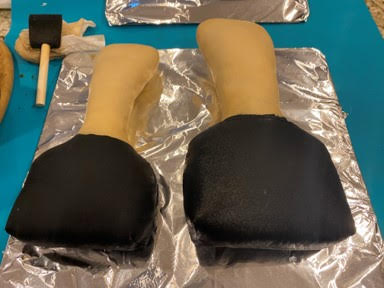
Painting and Coffee Staining Pilgrims
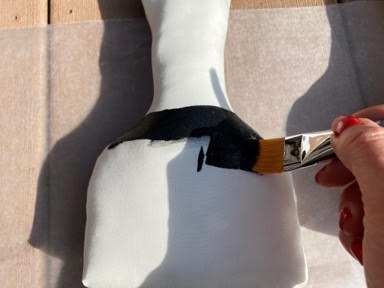
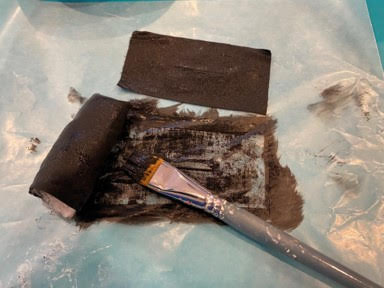
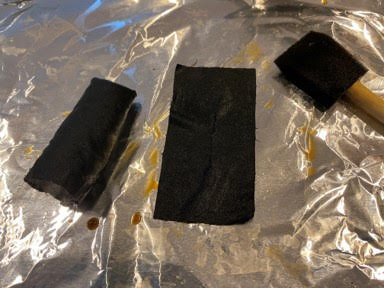
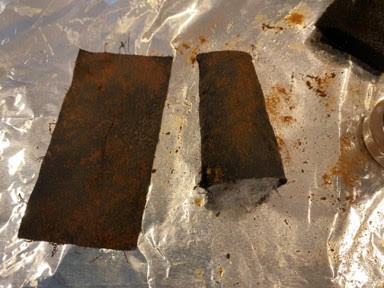
Using black craft paint and a paintbrush paint the body of each pilgrim below the neck at the shoulder blades. Let dry. If you are impatient like me you can place them on foil lined cookie sheet and place them in a 200 degree oven. Make sure you check them every five minutes or so until dried.
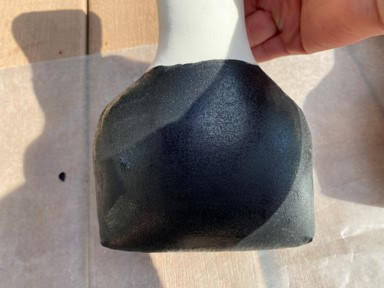
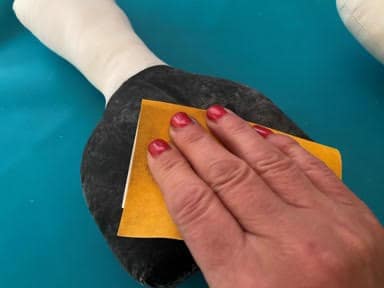
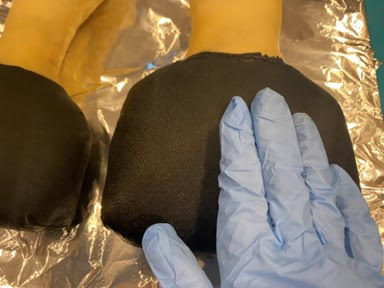
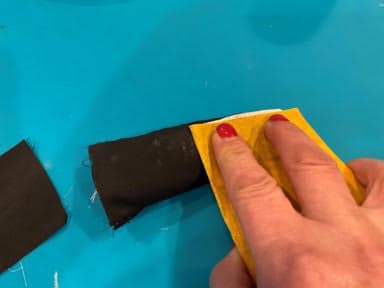
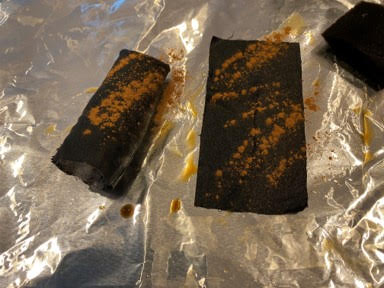
After the pilgrims have dried take a piece of fine grit sandpaper and sand the black painted part of the bodies. This will give them a worn primitive look.
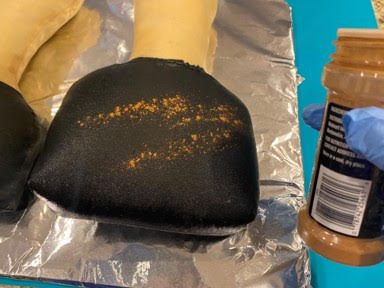
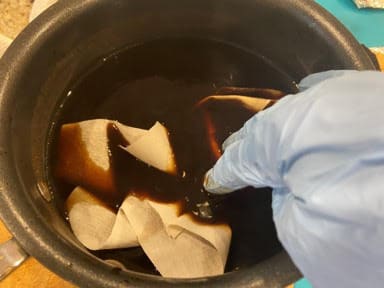
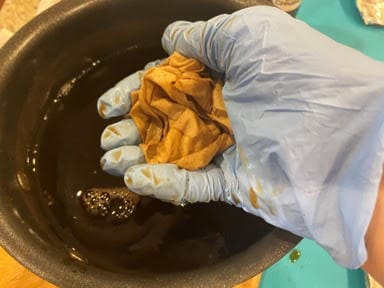
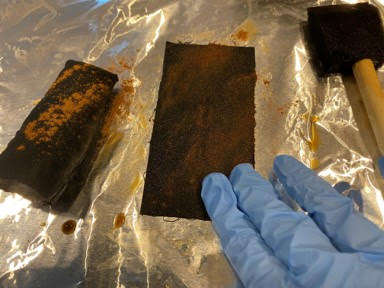
The next step is coffee staining. If you would like my coffee stain recipe you can find my blog on how I coffee stain along with my recipe on my website. You are going to want to wear a pair of rubber gloves so your hands do not get all coffee stained lol. Using a sponge brush cover the entire body of both pilgrims with the coffee stain mixture. I did not want my heads to be real dark so I blotted them with paper towels to give them a lighter look but that is up to you how dark you would like them.

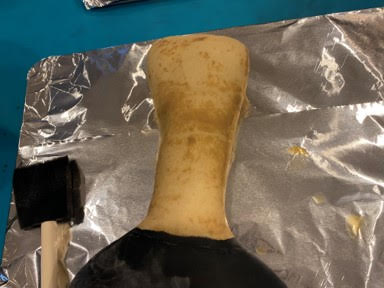
While the pilgrims are still wet sprinkle the painted part of the body with cinnamon and rub into the fabric. Do both sides of the body on each pilgrim. Let dry. Or you can dry in a 200 degree oven.
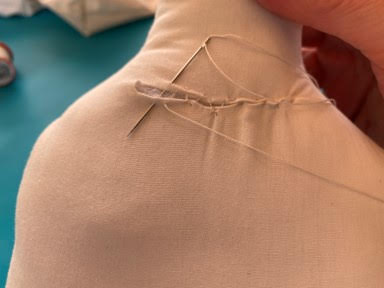
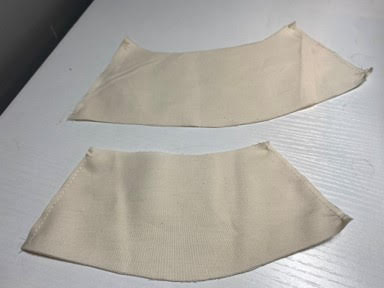
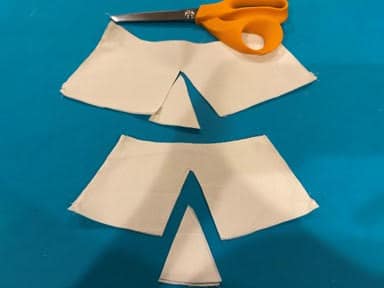
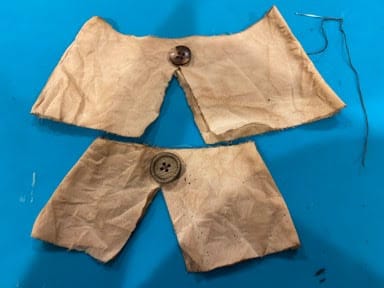
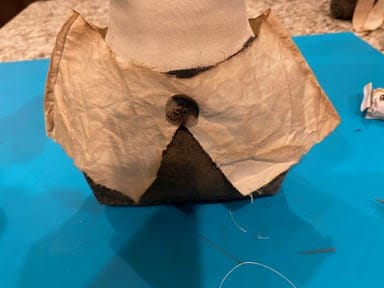
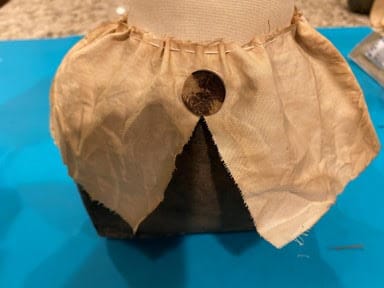
Making and Attaching The Collars
Using your collar patterns trace one boy collar and one girl collar on a double layer of muslin. Place a sewing pin on the left and right side of both collars then cut out on the trace line. On your machine sew the right and left sides of both colors. Remove the sewing pins. Draw a triangle in the middle of the collars where indicated on the patterns and cut out.

Wearing your rubber gloves place the collars in the coffee stain mixture then ring out in your hand. Let dry or you can dry them in a 200 degree oven.

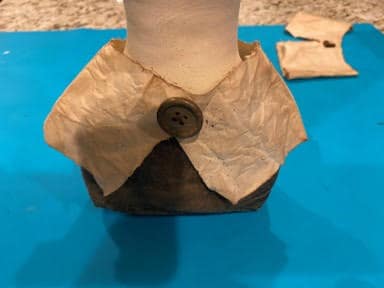
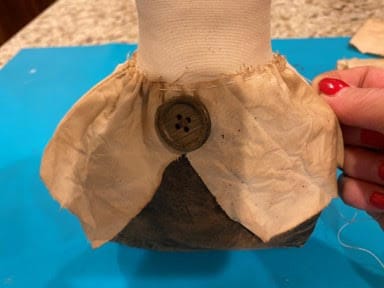
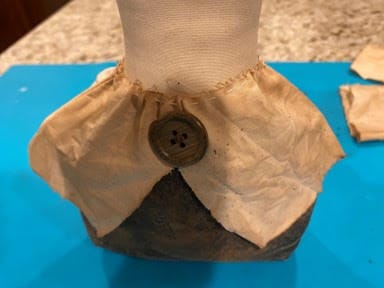
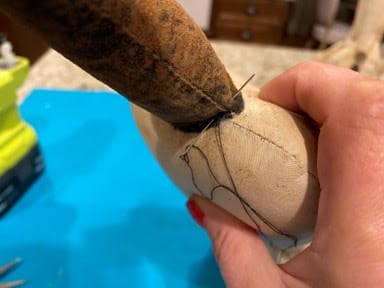
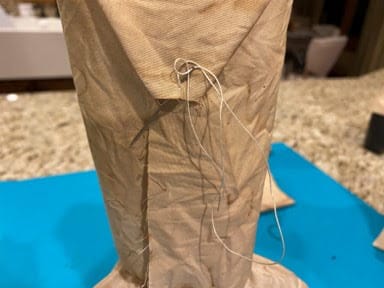
Now that the collars are dry sew a button onto one side above the triangle onto each collar. Place the girl collar over her head setting on her shoulders. Using a needle and cream thread do a running stitch around the top of the collar about a 1/8” down from the top. Pull slightly until it is tight enough around her neck and setting nicely on the shoulders. Knot off. Repeat these steps with the boy collar and boy pilgrim.
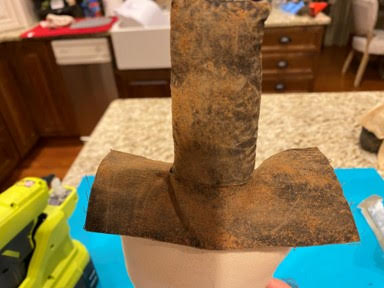
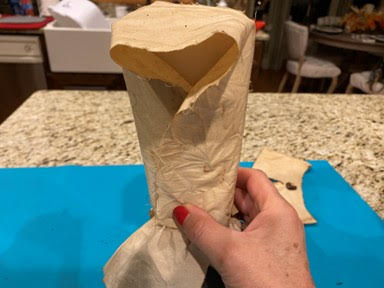
Making and Attaching The Hat
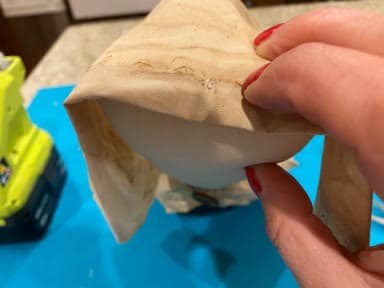
Trace the hat brim and hat band onto a single layer of muslin and cut out on the trace lines. Trace the hat onto a double layer of muslin then sew 3 sides on your machine. Cut out the hat leaving about a ¼” seam allowance. Turn the hat right side out and firmly stuff.


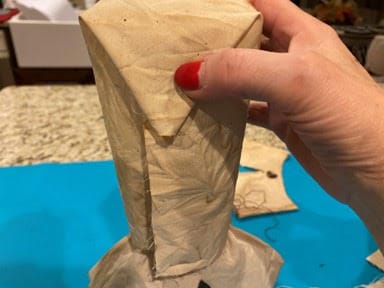
Fold the hat brim in half then using scissors make a small snip in the center of the fold. Next make the slit a little larger you do not want it to big. Slid the brim over the hat, you want a snug fit at the base of the hat. If you need the slit bigger just make it a little bigger at a time and keep sliding it over the hat until it fits snug at the base.

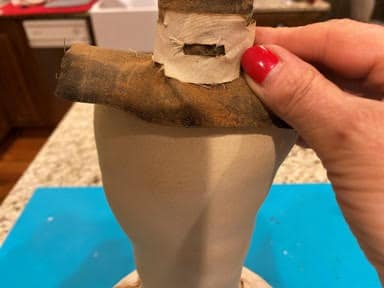
Using black craft paint and a paint brush paint the hat and both sides of the brim black. Let dry or dry them in a 200 degree oven. Once they have dried using your fine grit sandpaper sand the hat and brim to give them a worn look.
Time to coffee stain. Using a sponge brush cover the hat with your coffee stain mixture. Dip your hat brim into the coffee stain mixture. Place the hat band into the coffee stain mixture then ring out in your hand. While the hat and the hat brim are still wet sprinkle them with cinnamon and rub into the fabric with your fingers. Let all pieces dry or dry them in a 200 degree oven.
After all your pieces have dried place the hat on top of the boy pilgrims head in the center and using black thread and a needle sew the hat to the head all the way around the hat. Next slide the brim over the hat down to the base of the hat. The brim should stay in place because you cut it to be snug. Next place the band on the front of the hat, wrap the ends around to the back and sew to the back of the hat using cream thread and a needle.

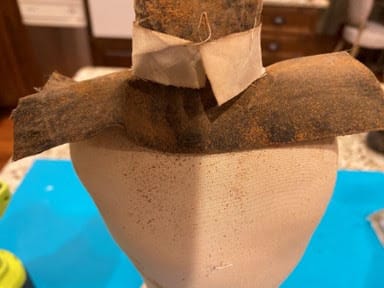
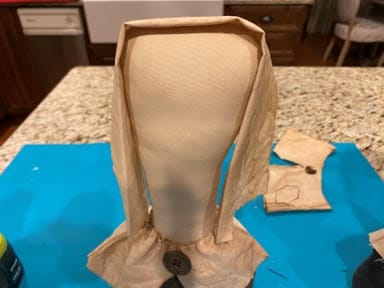
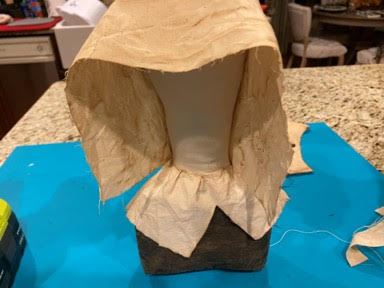
Making And Attaching The Bonnet
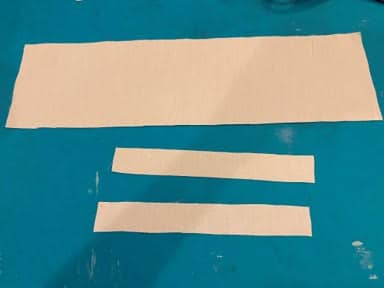
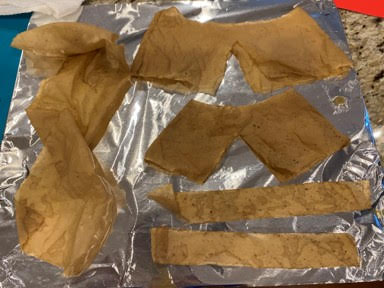
The first thing you will need to do is cut one piece of muslin 4 ½” wide by 16” long then cut two pieces 1” wide by 8” long. Next put them in your coffee mixture and ring out in your hand. Let dry or dry them in a 200 degree oven.
Now that your pieces have dried take the 16” long piece and fold your fabric upwards about a ½” along the 16” side. You can either press the fold with your fingers or a iron. Place onto the top of the head with the fold facing upwards making even on both sides of the head. Using cream thread and a needle tack in place at the top of the head.
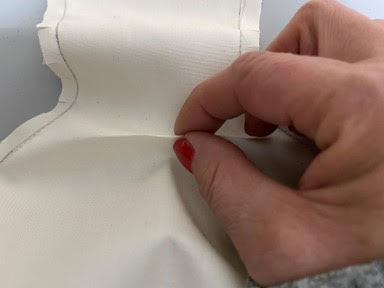
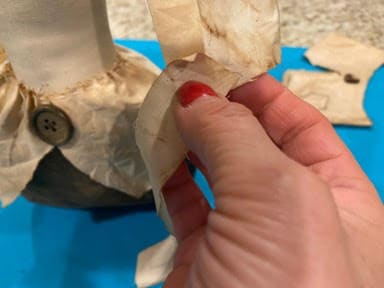
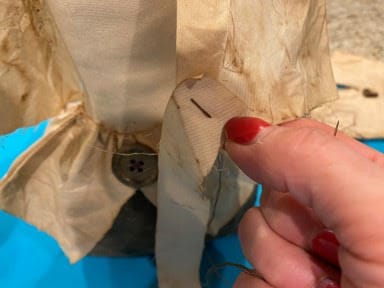
Next take one of the smaller strips and place at a slight angle at the front bottom of one side of the bonnet then using brown thread and a needle make one stitch attaching the strip to the bonnet then stitch to the side of the neck (see photo’s). Repeat with the second strip to the other side of the bonnet.
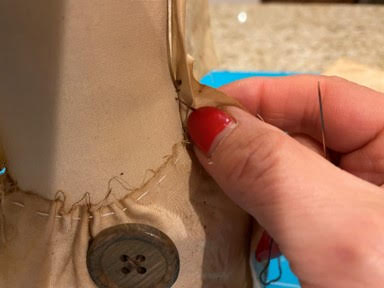
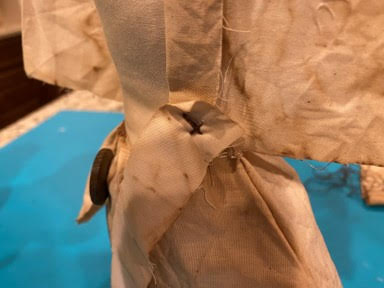
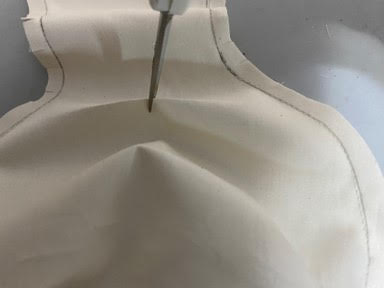
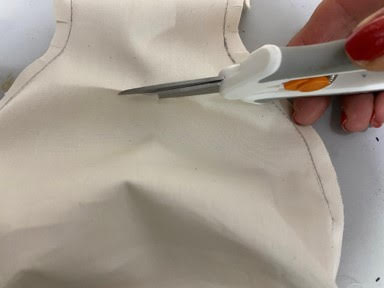
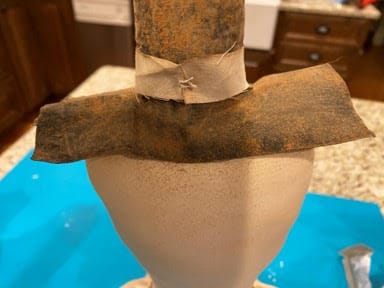
Turn the girl pilgrim around so the back of the head is facing you. Fold the sides of the bonnet overlapping them to the back of the head. Fold down the center, it should look like a triangle. Tack the center to the back of the head using cream thread and a needle. Next tack the two folded pieces at the bottom to the neck.
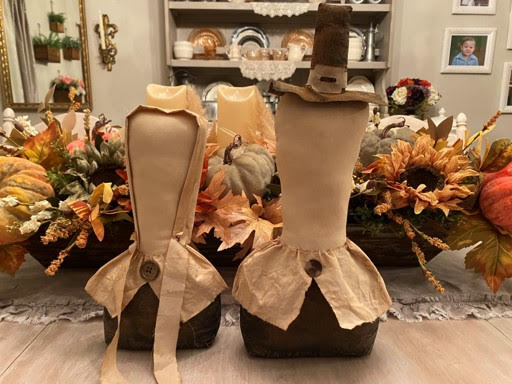
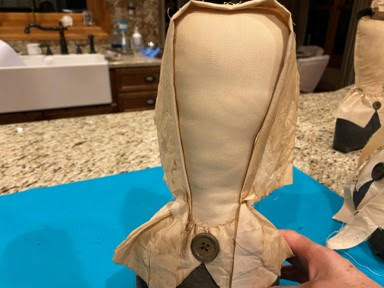
You are now finished with your primitive pilgrims. I hope you have enjoyed making them and enjoy using them in your Thanksgiving décor. They would be beautiful on your Thanksgiving Table.

I watched your video on how to make these and I am going to try and make them. I do sew but I am sure mine will not look as good as yours. I love all your video’s Sherry you are so patient in what you do and you also have wonderful taste decorating your home. I love watching you. Oh yes I made the outside chandeliers for my daughters and they loved them.
You are so sweet thank you so much! I am so glad you made the chandeliers I just love mine! I am sure your pilgrims will come out just amazing! I am so glad you sew, I want to make everyone into a sewer on person at a time lol