Easter, Home Decor, Spring
DIY Easter Chicks
Feb
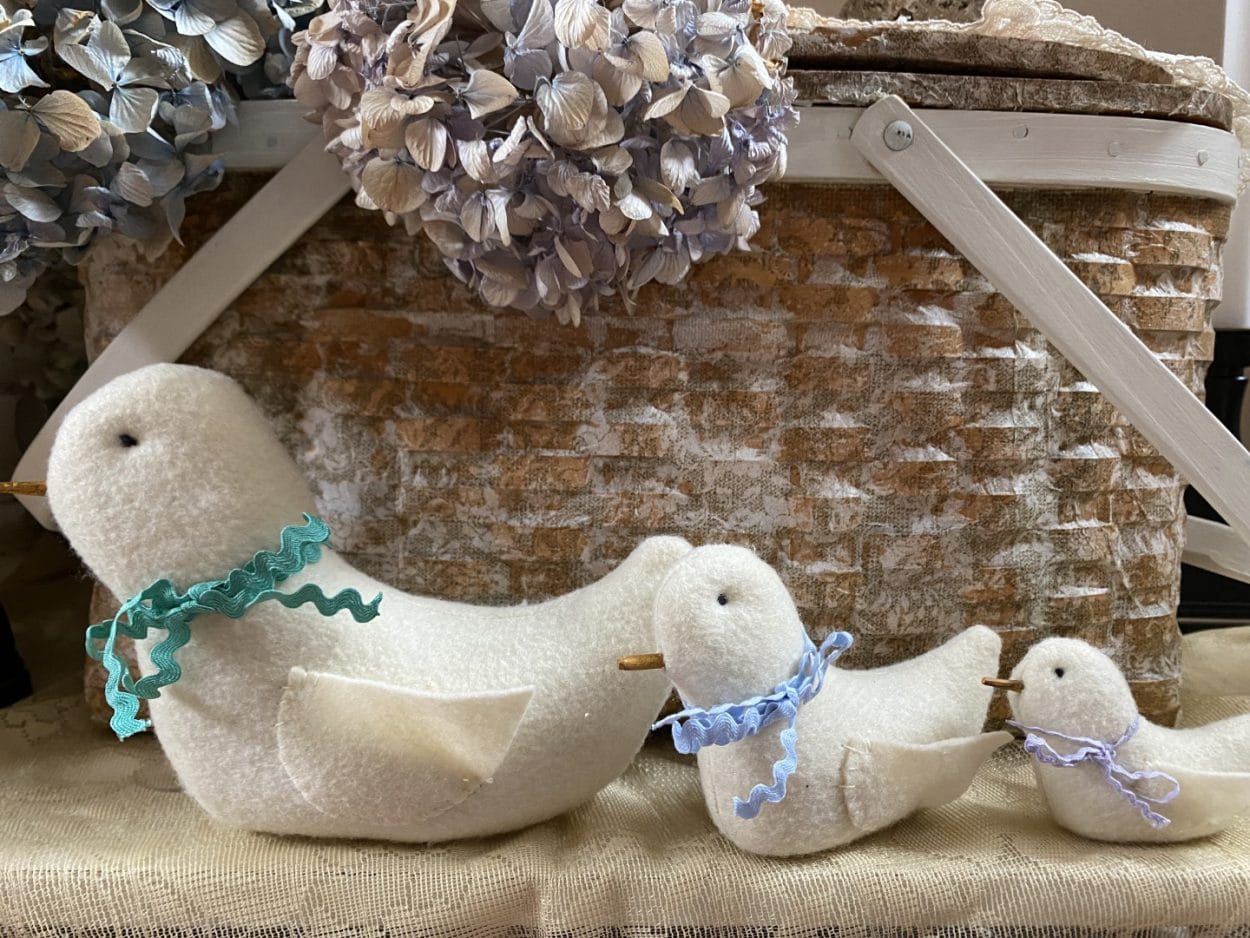
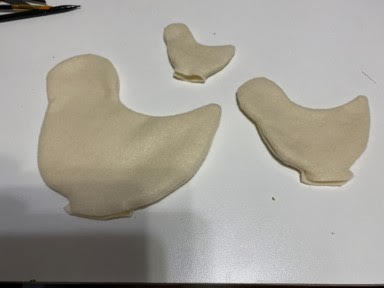
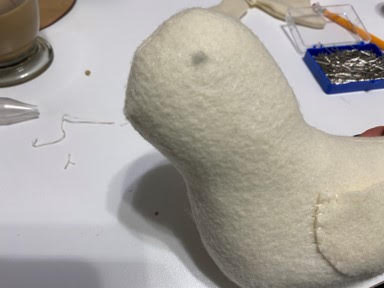
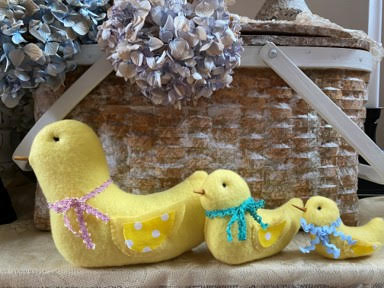
How cute are these Easter Chicks! I found the pattern for the smallest chick in an old craft magazine I had and I knew I had to make a family lol. You can use any fabric you would like to make this chicks. I used a cream felt to make the chicks in the above photo. Later you will see the chicks I made from a yellow fleece and a Dollar Tree bar mop towel that I colored. If you would like to see how I color the bar mop towels you can check my blog labeled how to dye a Dollar Tree Towel.
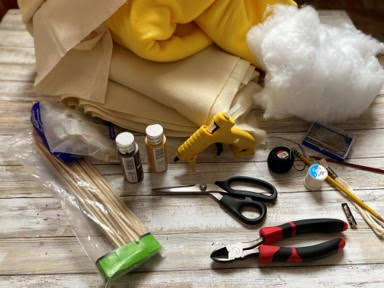
Here is a list of what you will need:
- Easter Chick Pattern
- Muslin
- Fabric Of Choice
- Ribbon Of Choice
- Polyester Fiberfill
- Sewing Pins
- Poly Beads or I used Aquarium Gravel
- Embroidery Thread to Match Fabric
- Black Embroider Thread and Needle
- Cream Thread and Needle
- Sewing Machine and Thread to Match Fabric
- Wood Skewers
- Brown and a Yellow/ Orange Craft Paints
- Paintbrush
- Scissors
- Pencil
- Hot Glue Gun and Glue Sticks
- Wire Cutters
Making the Chicks Body
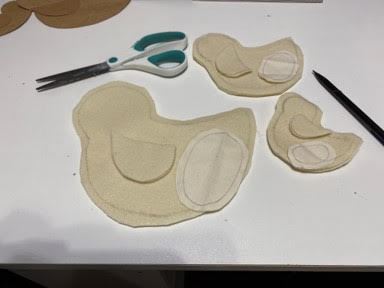
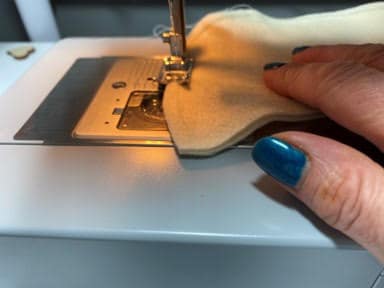
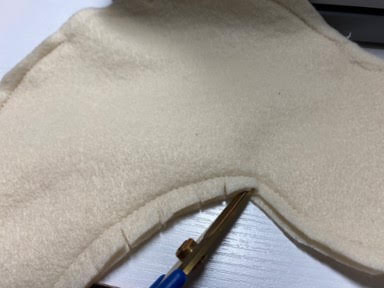
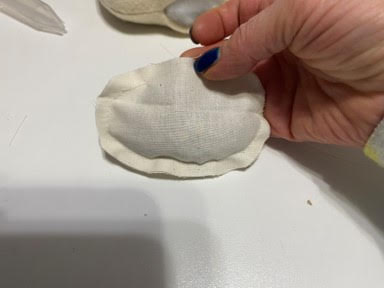
The first thing you will need to do is print and cut out all the pattern pieces. Place chick pattern onto a double layer of fabric. Trace and cut out about a ¼” from trace line, make sure you mark where you need to leave your openings. Pin pieces together. Place chick bottom onto a double layer of muslin trace and cut out about a ¼’ from trace line. Pin pieces together. Trace and cut out two wings on the trace line. Using the sewing machine sew the chick making sure you leave the openings indicated on the pattern. Snip curves and corners and turn right side out. Stuff firmly with polyfill leaving enough room at the opening to insert the bottom piece. Using the sewing machine sew the bottom together making sure you leave the opening. Fill with poly beads or aquarium gravel. Using cream thread and a needle stitch opening closed. You will do each of these steps for each chick.


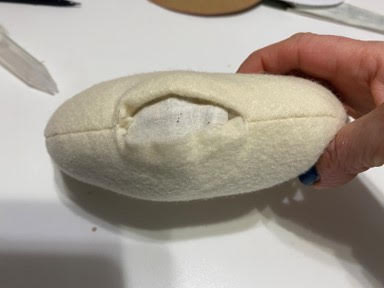
Take the bottom piece and insert into the bottom of the bird. Next stand up the chick to make sure it will stand on its own. Fold in the raw edges of fabric of chick body and using two strands of matching color embroidery thread stitch the opening closed. Your chick should stand upright.
Making and Gluing the Chicks Body
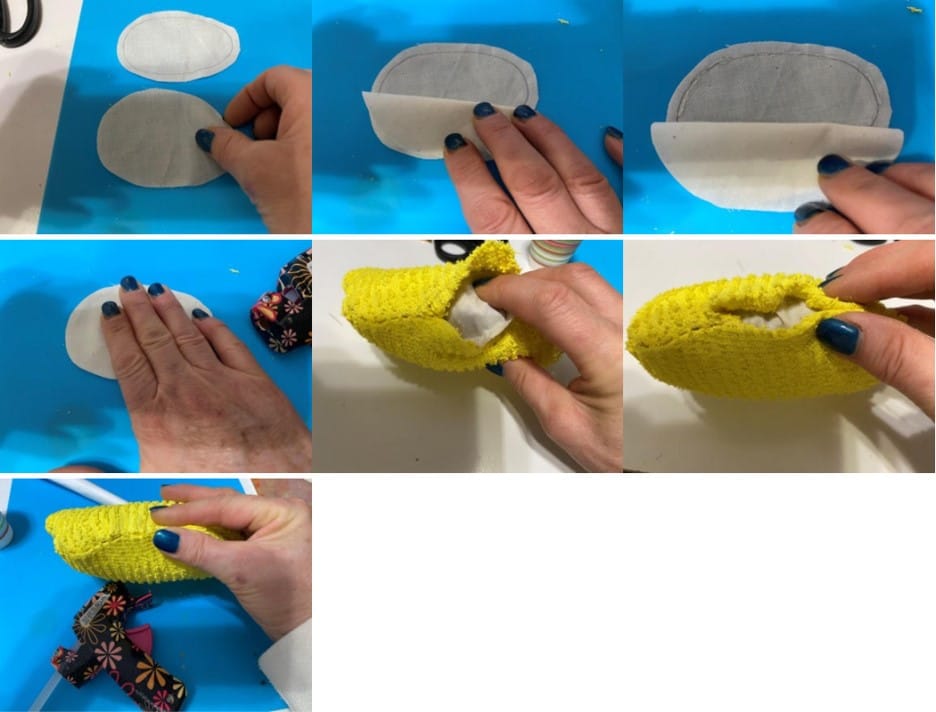
Place chick pattern onto a double layer of fabric. Trace and cut out about a ¼” from trace line, make sure you mark where you need to leave your openings. Place chick bottom onto a double layer of muslin trace and cut out about a ¼’ from trace line. Trace and cut out two wings on the trace line. Take your chick body pieces and lay down the body piece that has the trace line facing up. Lay the second body piece on top then fold back the head section of the top layer. Apply a small line of hot glue above and below the beak opening on the trace line and glue down. Continue to fold back the top layer applying hot glue to the trace line and gluing down. Make sure you leave the opening on the bottom of the body. Snip curves and corners and turn right side out. Stuff firmly with polyfill leaving enough room at the opening to insert the bottom piece.
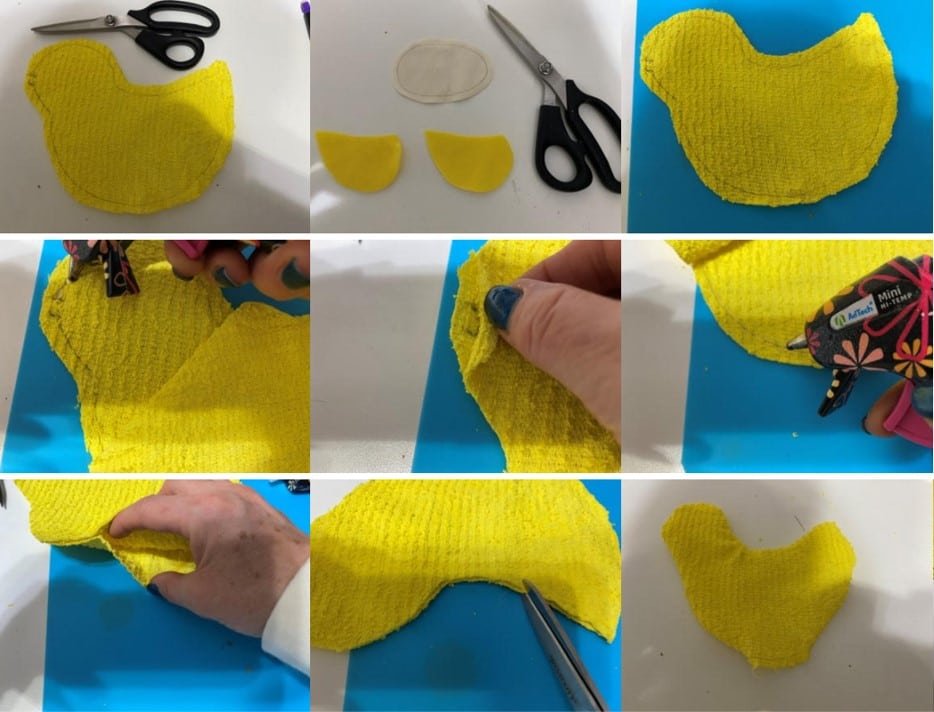

Take the two bottom pieces and lay down the piece with the trace line facing up. Lay the second piece on top. Fold back the top layer the apply a small line of hot glue onto the trace line and glue down. Continue gluing around leaving an opening to fill with poly beads. Fill the bottom piece with poly beads or aquarium gravel then glue closed. Insert the bottom into the bottom opening of the chick. Turn in the raw edges and glue the opening closed. The chick should stand upright on its own.
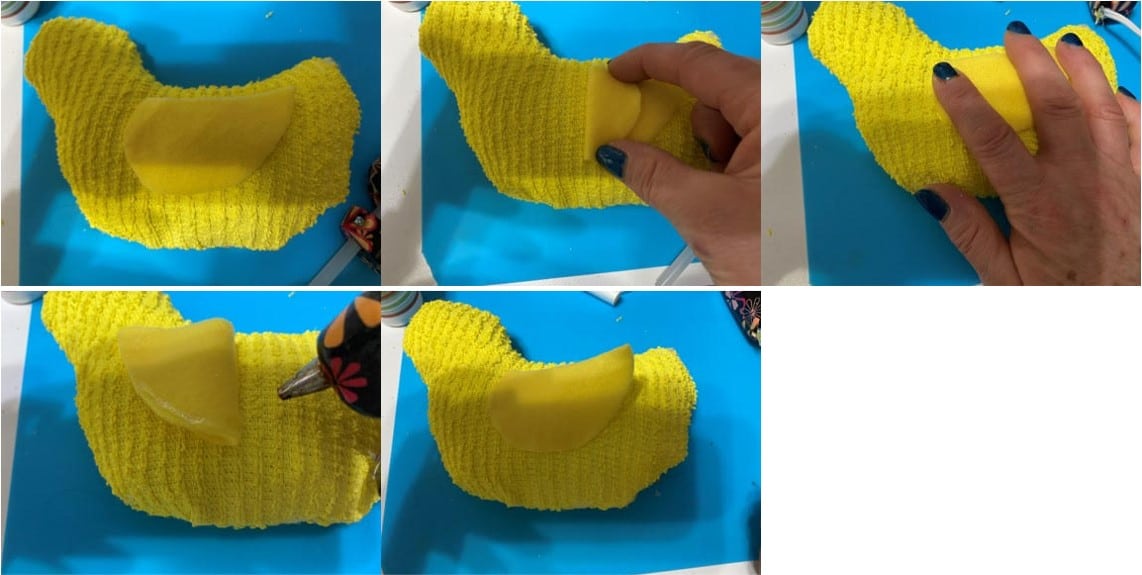
To glue the wings place one wing on the chick where indicated on the pattern. Fold back the front part of the wing add a line of hot towards the edge of the wing where the stitches are indicated on the pattern, glue down. Fold back the back part of the wing add a ling of hot glue where indicated on the pattern and glue down. Repeat this step to the other wing.
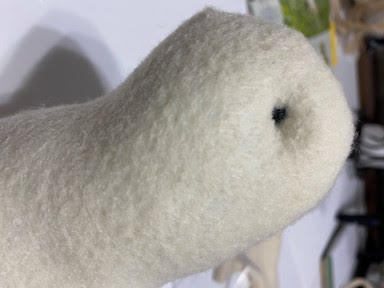
Adding the Eyes and the Beak
Using a pencil mark where the eyes are to go. Using six strands of black embroidery thread and needle stitch on the eyes. Make sure to draw the floss tight in order to form the slight indentations on the chick’s face.
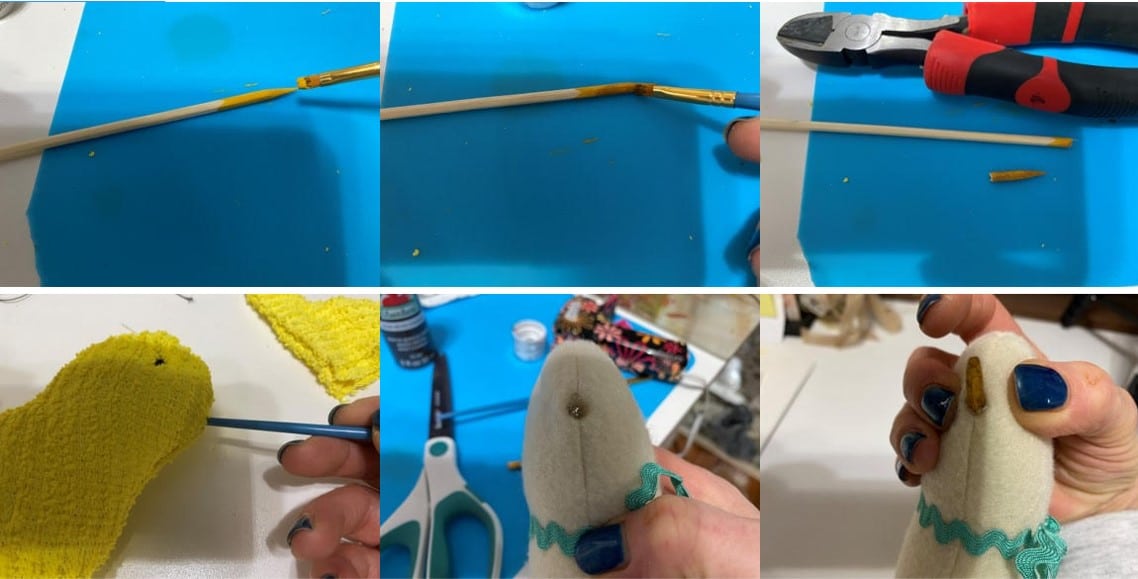
For the beak on the large and medium chick paint about a ½” of the tip of the wood skewer with the yellow/orange craft paint and allow to dry. Drybrush lightly with brown paint. Using wire cutters cut the painted part of the skewer. Using the handle end of the paintbrush open up the hole on the chick add a small drop of hot glue into the hole and insert the beak. For the small chick repeat the same steps but instead of a skewer use a toothpick.
All that is left is to tie some ribbon around each of the chicks. I hope you enjoyed making these adorable Easter chicks. Below you can see the two sets of yellow chicks I made using a fleece for one and the dyed dollar tree bar mop towel for the other. How cute would these be for a baby shower or make the big chick and tuck money in it’s wings for your child or grandchild for Easter.

loveeeeeeeeeeeeeeee these
Love your new blog
Can’t wait to try these amazing things
Thank you sherry!!!! You are so down to earth, just like a good friend
BLESS YOU & YOUR HUSBAND 😘❤️🙏🏻🙏🏻🙏🏻
Sherry, love watching you craft! You are a perfectionist which is so great! I’m pretty much the same way! Has to be just right.
These are adorable. Thank you for all you do to help us all craft and have fun. I love watching your videos and try to catch you live as much as possible.
You are such a talented crafter, thank you soooooo much for sharing your talent with everyone. You give me something to look forward to.
Just love your crafts.
Very creative, makes my home so very festive..
Thank you for letting us be part of what you do.
Hi Sherry. Love watching you craft. I did the snowflakes with the bags! Came out great! I also did some hearts from dollar store..those were pretty! Keep giving us great crafty ideas! Just love it! Thank You so much!
Love everything you do im going back and make everything you have love it all i know u cant pick us all but i do wish to win something in my life keep up goid work
I need the pattern for the baby chicks
Thanks so much for all you do and are. I had a problem printing the instructions. It comes up to 19 pages due to the way the instructions were laid out. It did not print the patterns with the instructions. Sad I bought all the stuff to make them. Excited
I love all the crafts you do. learning alot.
These are so cute, but would like to what looks like the fuzzy yarn chicks
I’ve seen them But would like to know how to make
We were talking about spool wheels for the large chick. Do you know what size spool? Thanks!
Really cute idea. I already did my DIY for this year but I can start on these chicks for nest year.