Home Decor, Valentines Day
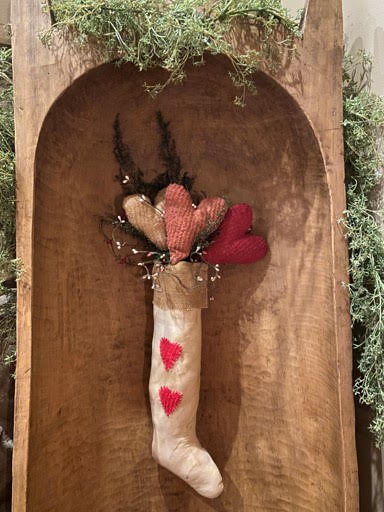
DIY Primitive Stocking With Hearts
Feb
If you love primitive’s you are going to love this stocking with hearts. Chenille fabric is expensive and the only color I can find locally is cream so I was trying to come up with an alternative fabric. I was in dollar tree one day and I looked over at the dish towels and as soon as I seen the bar mop towels I was seeing chenille so I bought a few and used them to make the hearts for this stocking. I will have a separate blog on how I colored them incase you would like to use them to make the hearts. The stocking is not just for Valentines Day it would be beautiful in your home décor all year long.
Here is a list of what you will need:
- Stocking Pattern
- Muslin
- Fabrics Of Choice in Red, Pink, and White or Cream
- 12” Long x 4”Wide Piece of Burlap
- Polyester Fiberfill
- Sewing Machine
- Sewing Needle
- Cream Embroidery Thread
- 3.8 in x 2.8 in x 1.9 in Floral Foam (Dollar Tree)
- Wood Skewers
- Preserved Moss
- Pip Berry Stems
- Sweet Annie or Greens of Choice
- 20 Gauge Wire
- Hot Glue Gun and Glue Sticks
- Wire Cutters
- Pencil
- Scissors
- Piece of White Chalk
- Ruler
- Coffee Stain (Optional)

Making the Stocking
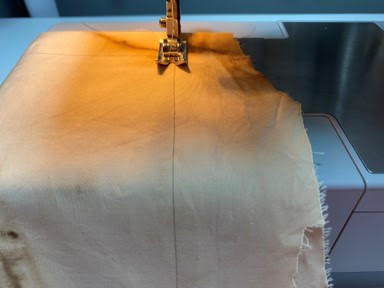
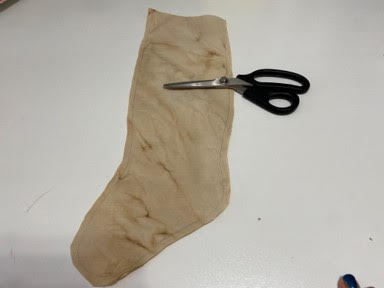
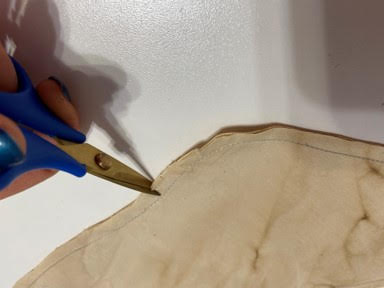
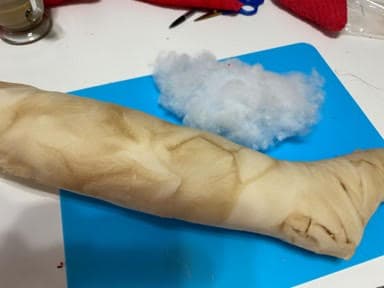
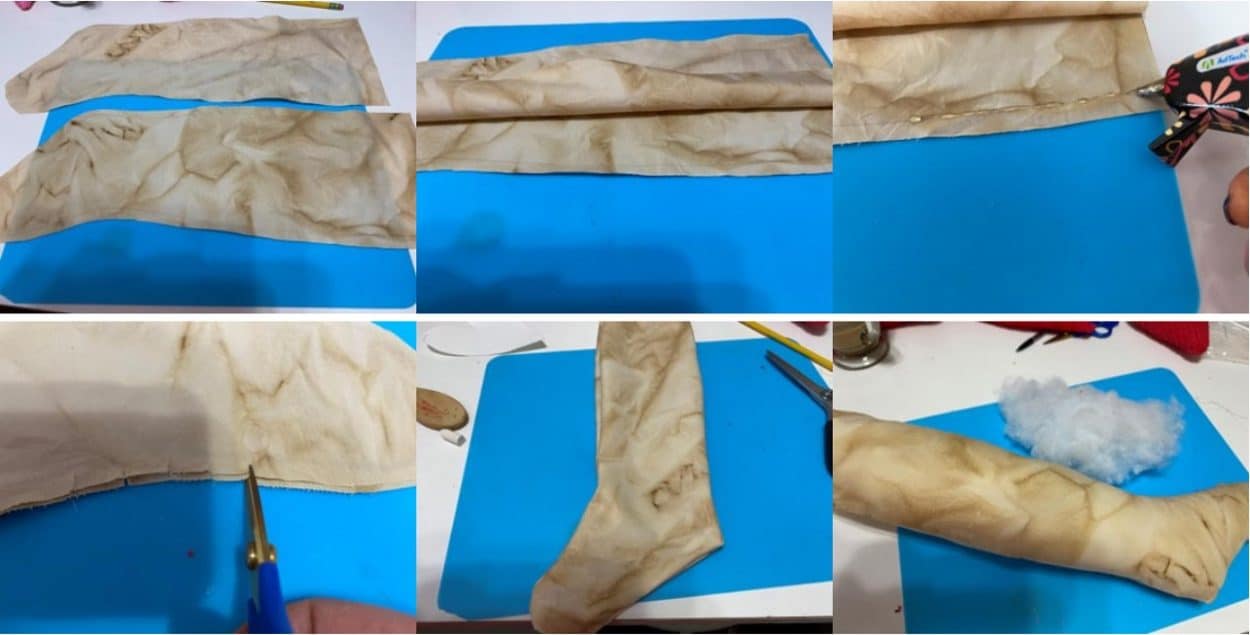
The first thing you will need to do is print and cut out the stocking pattern pieces. I coffee stained my muslin this is optional if you would like to coffee stain you can find my how to coffee stain along with my coffee stain mixture in my blog labeled how to color and coffee stain fabric. Trace the stocking onto a double layer of muslin then cut out about a ¼” away from the trace line. Sew up the stocking using the trace line as your sew line. Leave the top of the stocking open. Snip around the curves this will stop the fabric from puckering when turning right side out, be careful not to cut your stitches. Turn the stocking right side out. Stuff firmly leaving about 4” unstuffed at the top.

To glue the stocking instead of sewing.Trace the stocking on a double layer of muslin.Cut out about ¼” away from the trace line. Separate the two fabric pieces then lay down the piece with the trace line then place your second piece on top. Fold back one side of the stocking then starting at the top add a small line of hot glue and glue top piece down.I do a small section at a time.Work your way around the stocking adding hot glue and gluing down until you reach the top of the other side.Do not glue the top of the stocking.Snip around the curves of the stocking this will stop the fabric from puckering when you turn right side out.Turn the stocking right side out.Stuff the stocking with polyfill be carful you want it to me firm but you can’t stuff to hard or to much or the glue seam will come apart.
Adding the Burlap Trim and Hearts
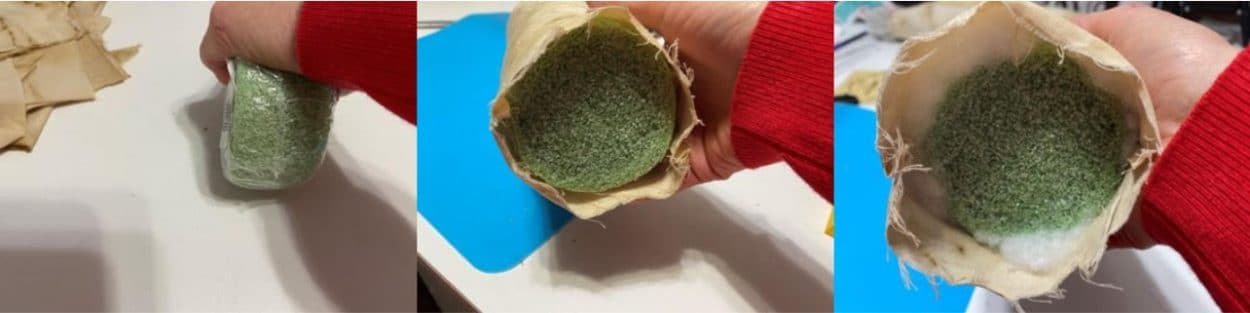
The first thing you will need to do is make your Styrofoam piece a little smaller you can do this by rolling the piece of Styrofoam on a flat surface pushing down with your hand. I leave the plastic on while doing this. Do this a little at a time then keep trying to see if it will fit into the top of the stocking. Once you have the Styrofoam the correct size you may need to add a little more stuffing in the stocking to bring the Styrofoam piece about a ½” away from the top of the stocking. Add stuffing around the Styrofoam to make it tight in the stocking.
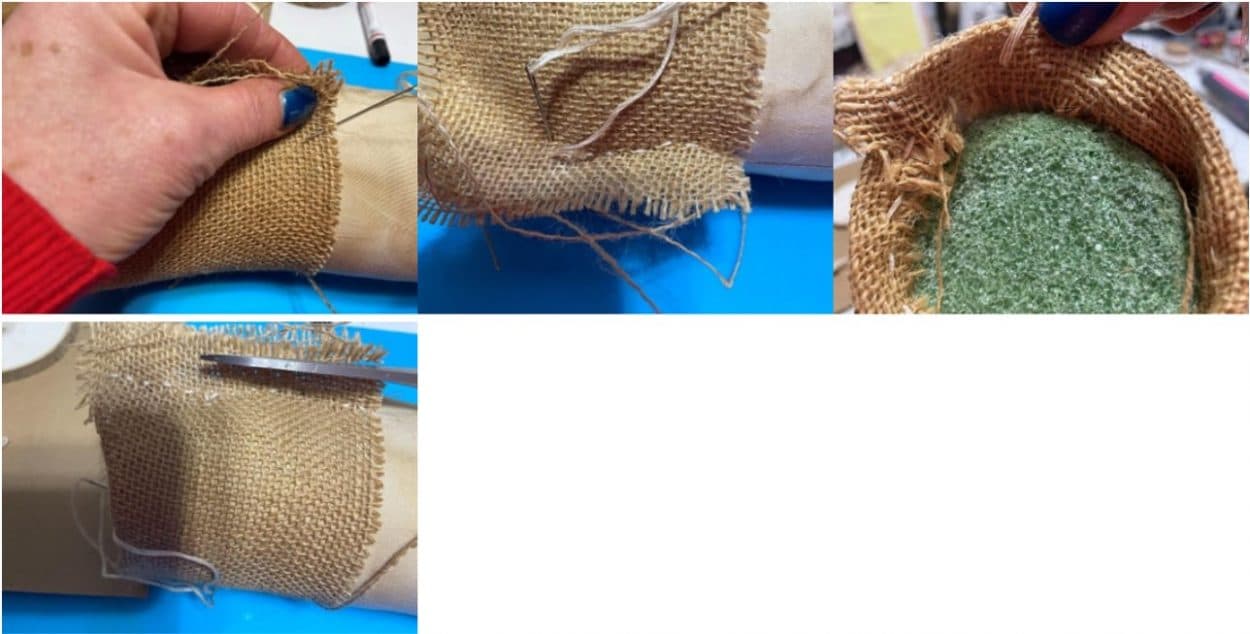
If you coffee stained the muslin you will also want to coffee stain the piece of burlap. Wrap the 12” x 4” piece of burlap around the top of the stocking leaving about a ½” overhang at the top of the stocking. Pulling the burlap tight with the two ends at the side of the stocking using cream embroidery thread sew the two ends together and to the stocking at the same time. Start sewing at the bottom catching the stocking as you sew up towards the top of the stocking. Once you reach the top fold in the burlap all around the stocking then continue to sew the burlap on the inside of the stocking. Knot and cut off excess. Trim off some of the excess burlap where the two ends are joined together.
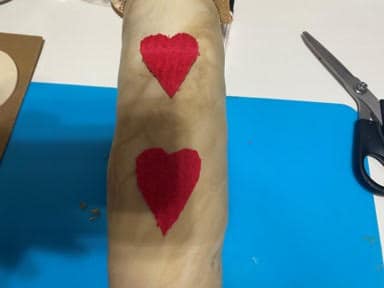
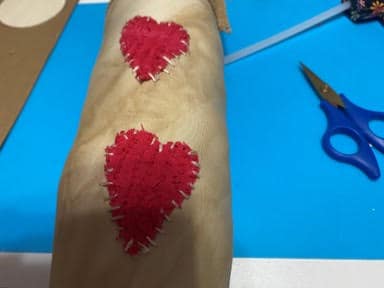
Cut out two of the small hearts from your red fabric. Coffee stain if you are coffee staining the stocking. Lay the hearts on the front of the stocking. Using cream embroidery thread stitch the hearts to the front of the stocking. See photo’s below.
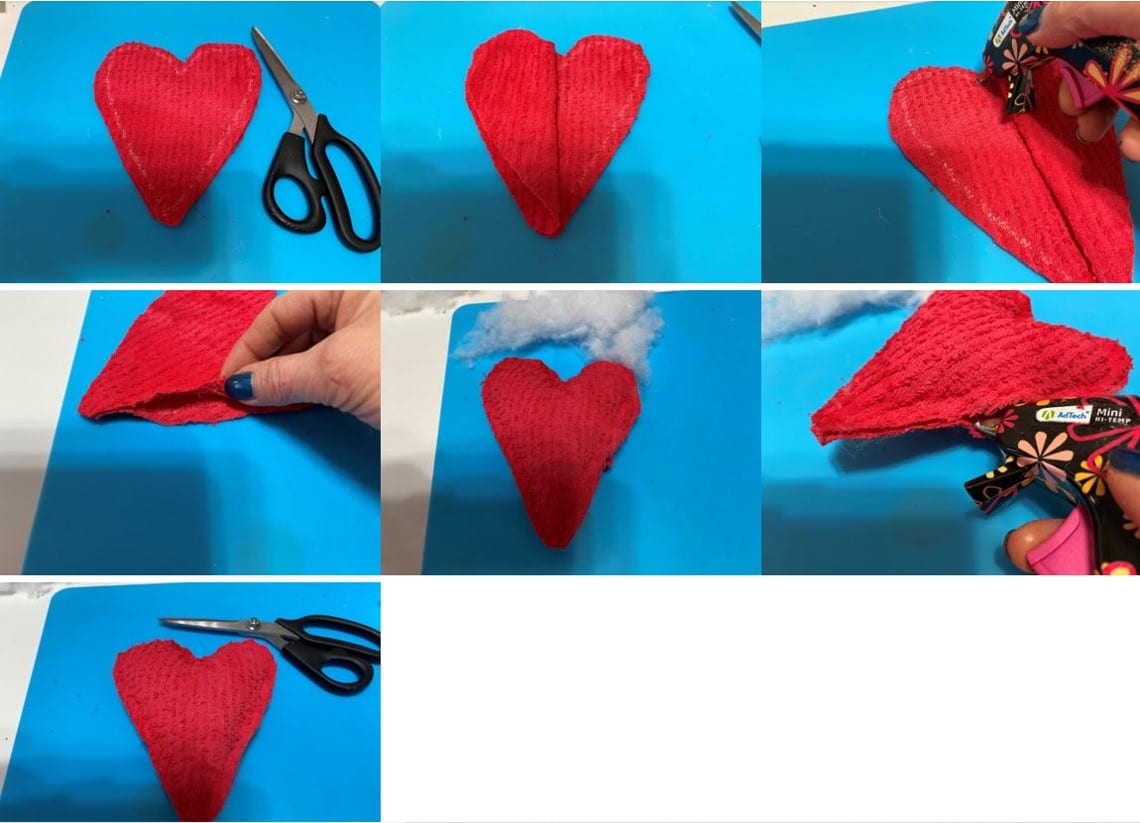
Making the Hearts
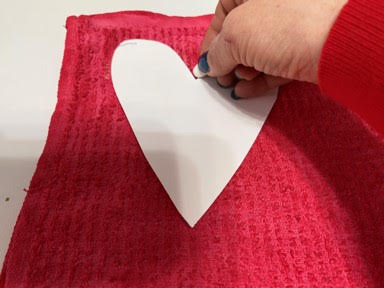
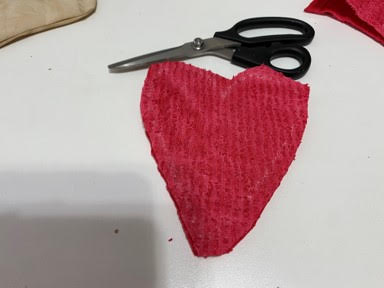
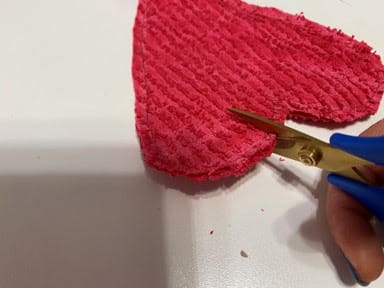
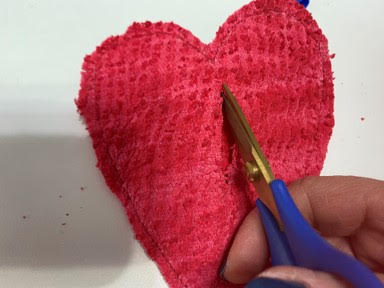
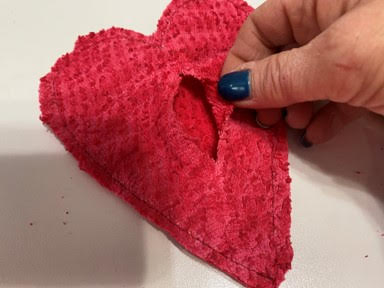
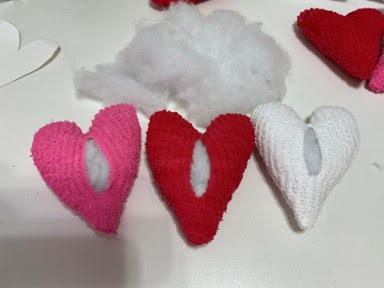
On a double layer of fabric trace and cut out one large heart from the three color fabrics you have chosen. Cut the hearts out about a ¼” from the trace line. On your machine sew up each heart on the trace line. You do not need to leave an opening. Snip around the curves this will stop the fabric from puckering when you turn right side out. Next make a slit through one layer of the heart. Turn right side out and stuff firmly. Using matching colored thread sew the opening closed.

If you would like to glue the hearts instead of sewing them trace a large heart on a double layer of fabric and cut out about a ¼” away from the trace line. You want one large heart of each of the three color fabric’s. Separate the two heart pieces lay down the one with the trace line facing up lay the second piece on top. Fold back one side of the top layer add a small line of hot glue and glue together. Fold back the other side this time only glue part of the top and part of the bottom leaving an opening in the middle for stuffing. Firmly stuff the heart and glue closed the opening. Repeat these steps to the other two hearts.
Filling the Stocking
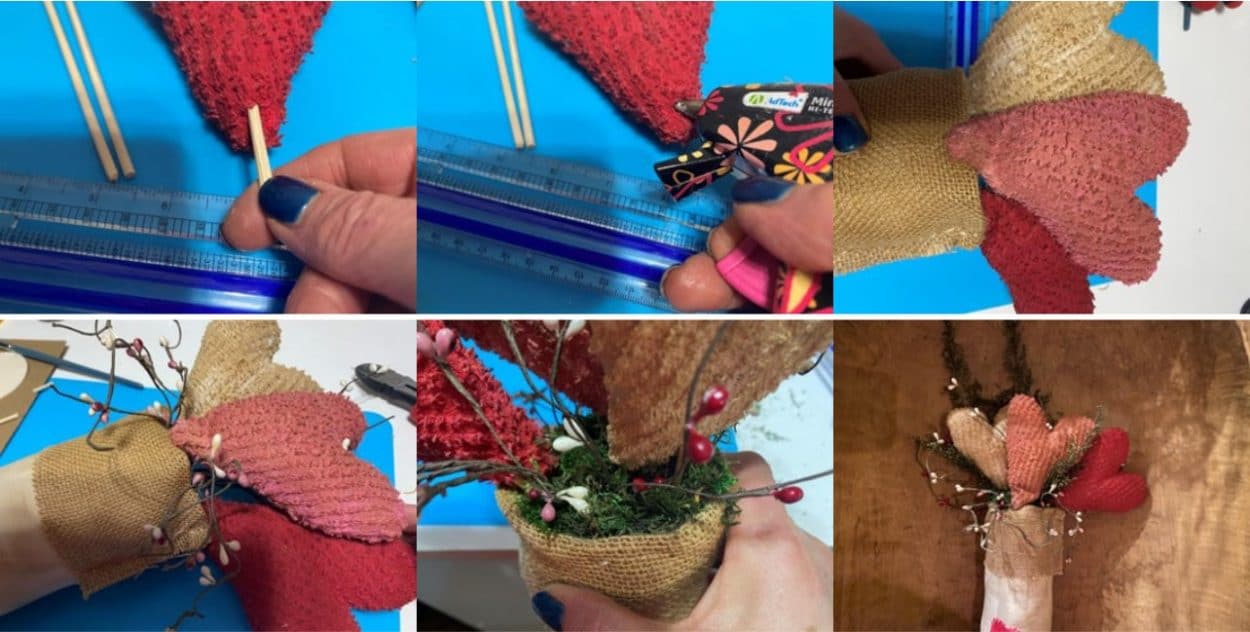
The first thing you are going to need to do is cut three 6” pieces from the wood skewers I used the wire cutters for this. Next using the point of a skewer poke a hole towards the bottom in the back of the hearts. Add a small amount of hot glue in the hole and insert the 6” piece of wood leaving about 3” sticking out. Repeat this step to the other two hearts. Insert the hearts into the Styrofoam the way you would like them. Add the pip berry sprigs then cover the top of the Styrofoam with the moss. Next add the sweet Annie or what ever greens you have chosen. Your are now finished filling in the stocking.
Adding the Hanger
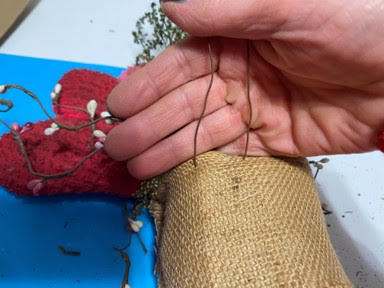
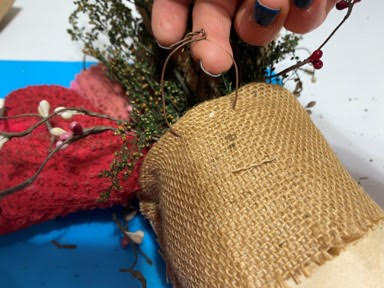
Cut a 6” piece of 20 gauge wire. Insert the wire through the back of the stocking then twist the two ends together forming a loop. You can cut off the excess or just bend it over. I just bent the excess wire over.
Your primitive stocking is new ready for you display in your home. Hearts are something you can leave out all year long so don’t feel this stocking is only for Valentine’s Day you can certainly use it all year long. I hope you have enjoyed making this primitive stocking.
Love the little hearts. Some us some of the pretty things you use in your home that you have made. It let us see how it will look in our home. THANKS. I watch U every day.
Hi Sherry,
Love all of your crafts and lives, and your blog is so nice & detailed. I really love this valentines stocking and I wish I had to do this but I might just push stuff aside tomorrow and with what I have on hand; I’ll make an attempt.
Shelley
love your crafts and watch you all the time. You are so wonderful . Thank you for all you do.
Thanks Sherry for finding the little hearts you made & put in the stocking. I love them they are so cute.
Beautiful! Luv this!
You put alittle sunshine in my day during this cold dreary winter weather. I love watching you and can’t wait from one craft to the next. You are just so talented!!! ❤️❤️❤️
Nice