Easter, Home Decor, Spring
DIY Wool Bunny
Jan
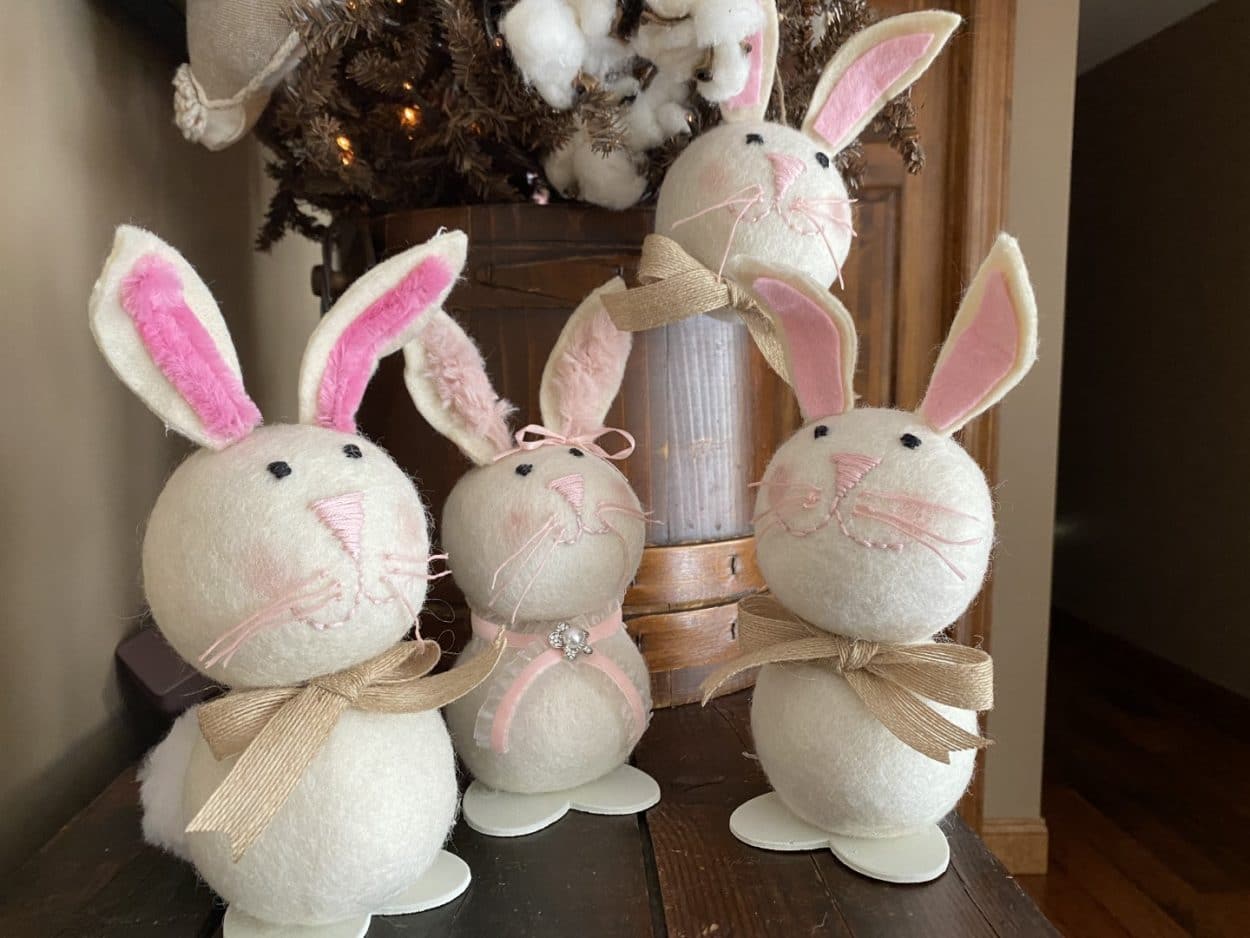
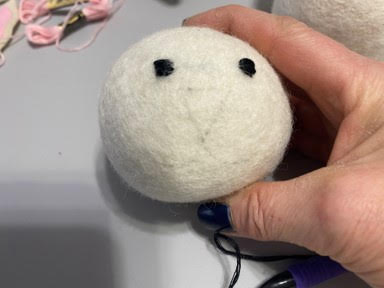
I know it isn’t even Valentine’s Day yet but I just couldn’t resist sharing this adorable bunnies I just finished making. If you have been following The Crafty Decorator you know I am obsessed with creating things out of wool dryer balls. You can make just the bunny head to use an ornament for your tree or add it to a wreath or make the whole bunny to use to decorate for Easter and spring. I just love how they turned out. In the above photo you can see the different materials I used for his ears. On one bunny I used pink felt for the inner year another bunny I used a thicker chenille pink pipe cleaner and the last bunny I used a pink fur yarn this one is my favorite.
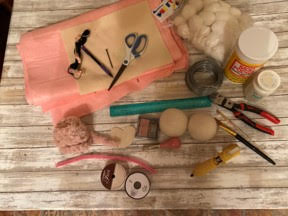
Here is a list of what you will need:
- Bunny Ear Pattern
- X-Large Wool Dryer Balls
- Cream Felt
- Pink felt
- Pink and Black Embroidery Thread
- Needle
- Pink Fur Yarn
- Extra Fluffy Chenille Pipe Cleaner
- 16 or 20 Gauge Wire
- 3” x 2 ½” Wood Heart
- Ribbon
- Waverly Chalk Paint in the color Plaster
- Mod Podge
- 2” White Pompom
- Large Nail
- Wire Cutters
- Hot Glue Gun and Glue Sticks
- Scissors
- Paint Brush
- Pencil
- Blush or Pink Paint
- Paper Towel
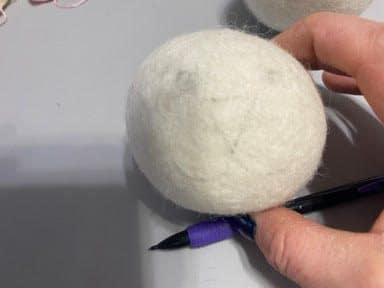
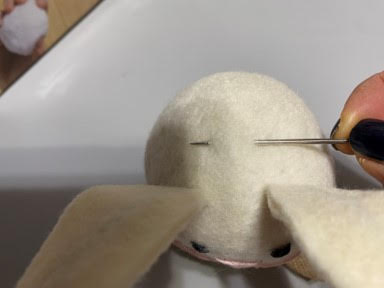
Stitching the Face
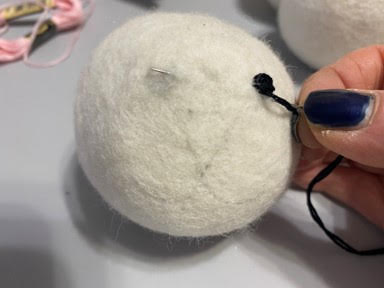
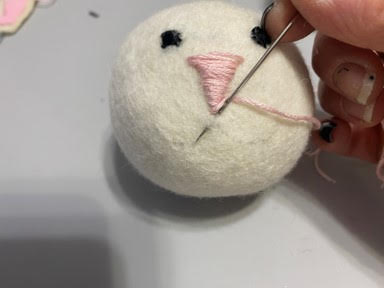
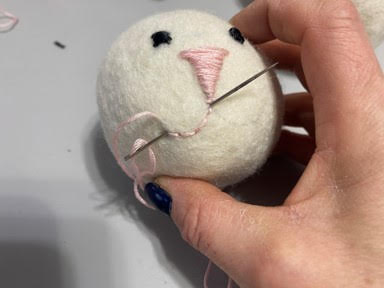
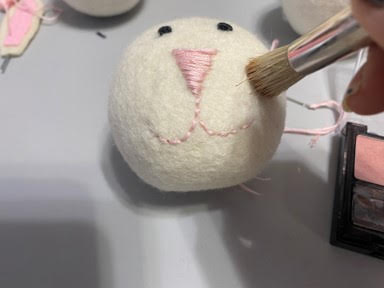
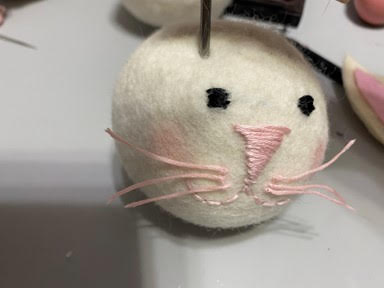
The first thing you need to do is print and cut out the pattern. You will also see an example of the face here. You can either use the face I used or make it your own and do a different face it is all up to you. Using a pencil lightly draw your face onto a wool dryer ball. Using black embroidery thread and a needle stitch on the eyes. I don’t end after one eye I just carry my needle under and over to where the next eye is going to be. Stitch on the second eye and tie a knot. I tie the knot on the front it is to hard to get the needle to the back of the head to tie the knot. Next stitch the nose and mouth on using pink embroider floss. I used blush to add rosy cheeks but you can also use pink paint just make sure to dab your brush on a paper towel until almost all the paint is off you don’t want to add to much paint to the cheeks.

Adding the Whiskers
To add the whiskers take pink embroidery thread and a needle, do not knot the end of the thread, on the right side of the face insert the needle towards the bottom of the nose but not next to the nose bring the needle over to the other side pulling the tread until the thread on the right is the length whisker you like. Tie a knot in the right side whisker so the knot is close to the face. Tie a knot in the right side whisker again making sure it is close to the face then cut to length, see photo’s below. Repeat this step adding two more sets of whiskers. You can look at the pattern face sample for guidance.
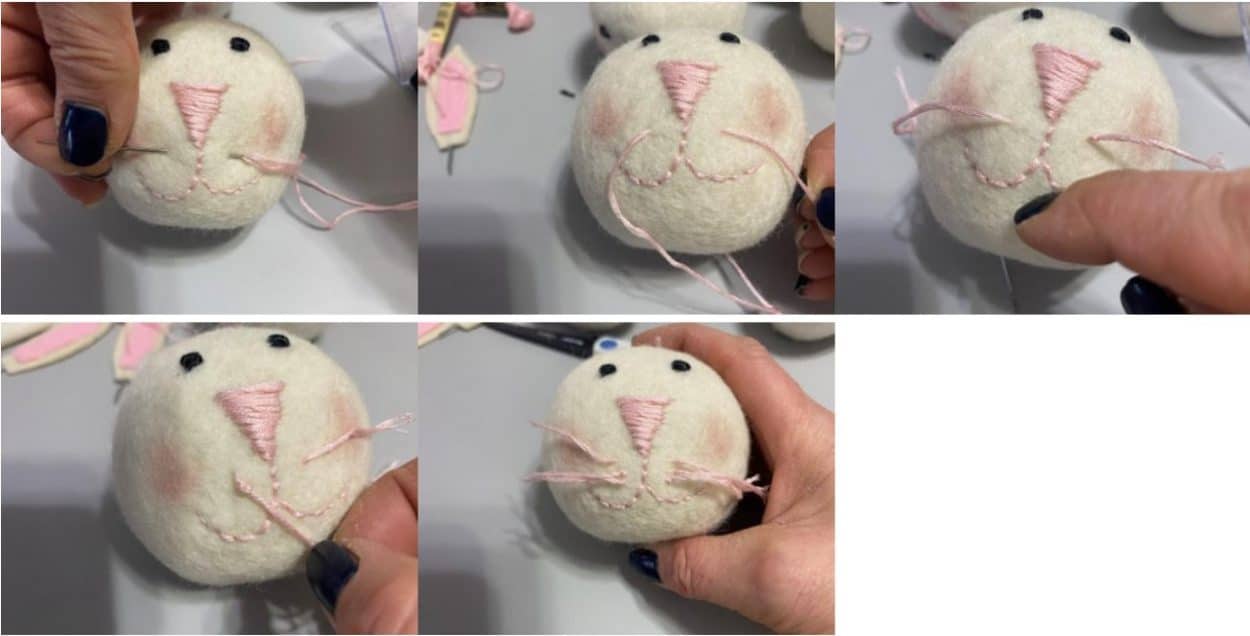
Once you have the whiskers done place a piece of paper towel under one side of the whiskers. Brush the whiskers with mod podge making sure you also dover the knots. This will make them stiff so they will stand straight out. Repeat this step to the other side, let dry.
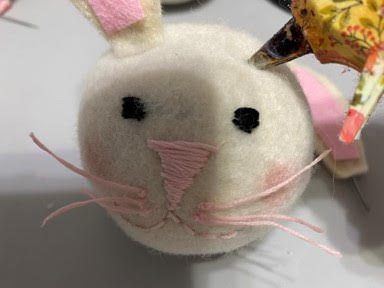
Making the Ears
Cut two 3” pieces of wire. Trace 2 of the bunny ears on a double layer of cream felt. Cut out on the trace line. Trace 1 bunny inner ear on a double of layer of pink felt. Cut out on the trace line. Lay one piece of the cream bunny ear down add a line of hot glue down the middle and place your 3” wire down making sure you leave about a ½” or so sticking out from the end of the ear. Place you second ear piece on top and glue down. Fold back one side of the bunny ear add hot glue and glue down, repeat to other side.
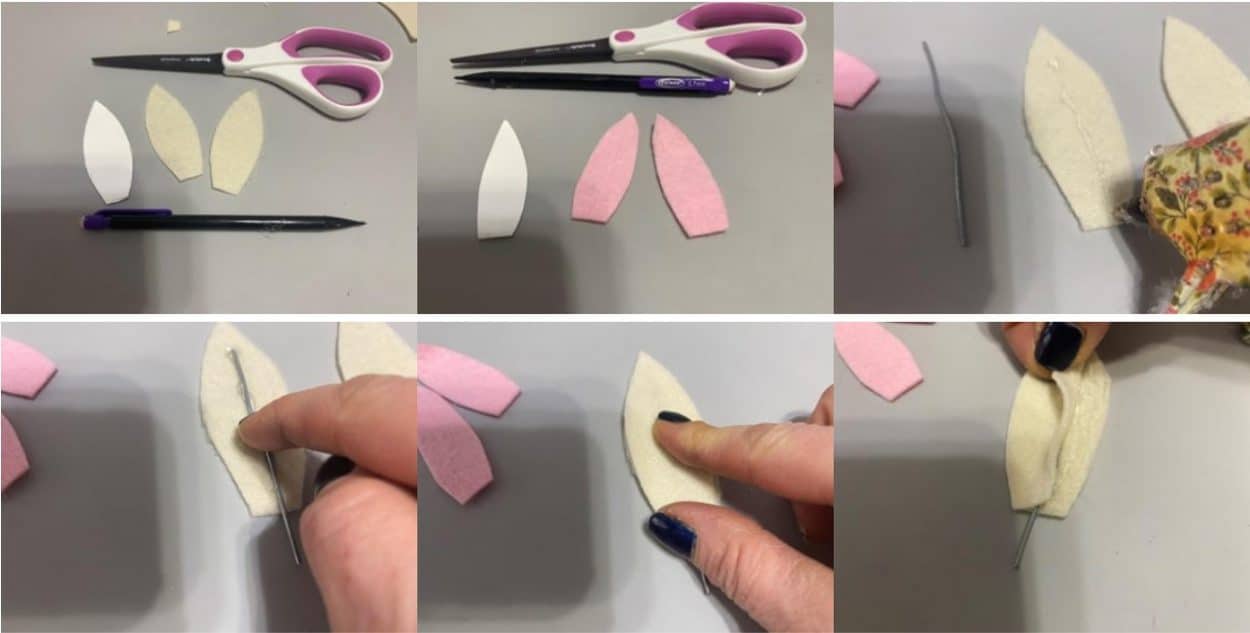
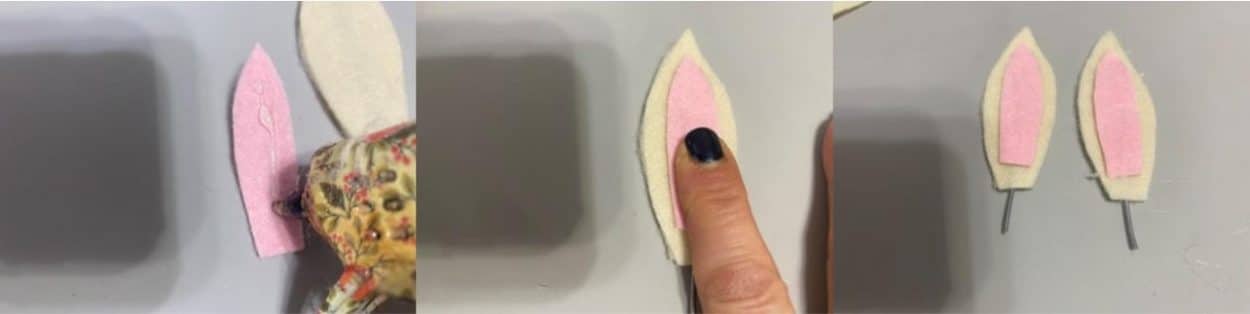
To add the felt to the inner ear lay down onto the ear to see how you want to glue down. Add a line of hot glue down the middle of the inner ear piece and glue onto the ear. Lift up the sides of the inner ear add hot glue and glue down. Repeat this step to the other ear.
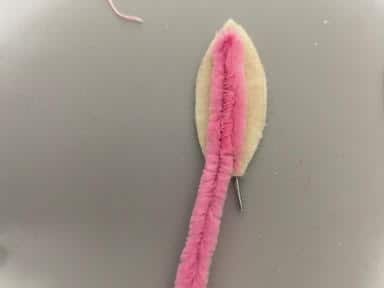
If you would like to use the chenille pipe cleaner as the inner ear piece place one end of the pipe cleaner at the middle bottom of the ear bend the pipe cleaner at the top of the each bringing it back to the bottom. Cut of the excess pipe cleaner. Add hot glue to the center of the ear and glue pipe cleaner into place. Repeat this step to the other ear. If you would like to use the fur yarn cut a piece of the yarn the length you will need then trim some of the fur off each side of the piece place on the ear to see if you need to trim anymore fur off. Add hot glue down the middle of the ear and glue into place.

Attaching the Ears & Body
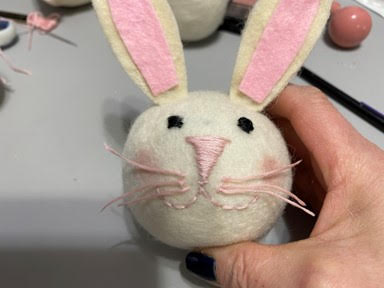
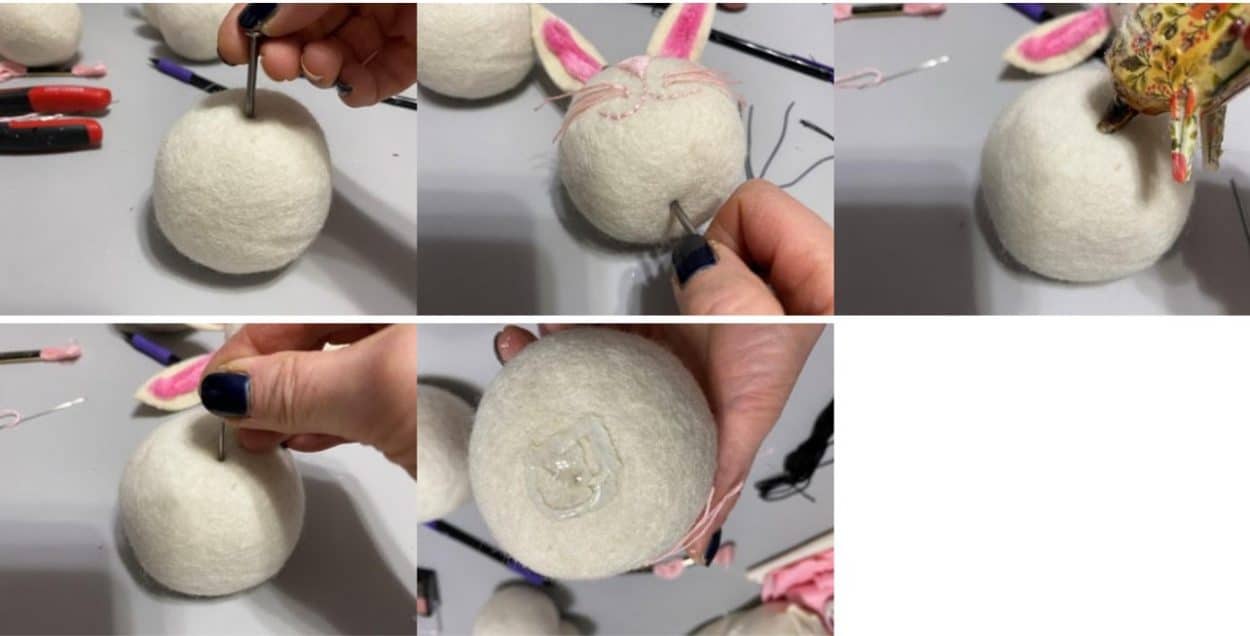
Hold ears on top of the head to see where you want to place the ears. To attach the ears take the large nail and make a hole in the top of the head where you are going to place the ear. I made the hole above the eye a little towards the middle of the head. Make the second hole for the second ear. Place the ears into the holes to make sure they are were you want then to be. Remove the ears add a small amount of hot glue into one of the hole then add one of the ears by inserting the wire into the hole. Repeat this step to the other ear.
To attach the body cut a 2” piece of wire. Using the large nail make a hole in the middle of your second dryer ball then make a hole in the bottom of the head in the middle. Insert the wire into both hole making sure the bunny looks right. Remove the wire add hot glue to the hole in the body and insert the wire. Add hot glue into the hole of the bunny head then add some extra hot glue all around the hole. Slide the bunny head onto the wire and glue down.
Adding the Feet and Tail
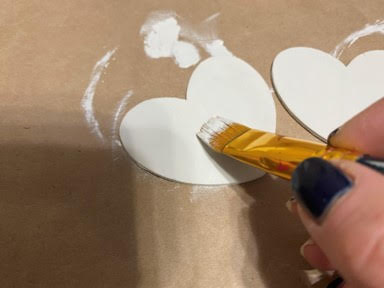
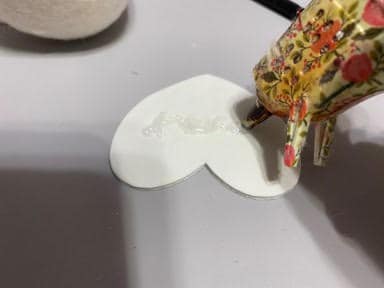
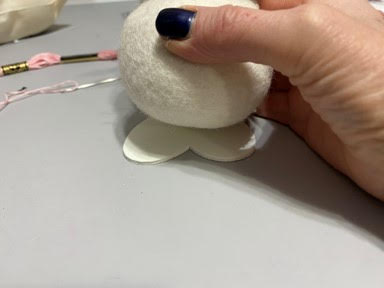
Paint the wooden heart with chalk paint I used the color plaster let dry. Please down the heart with the top of the heart facing you then place your bunny on top to see how you want the feet. Lift the bunny add hot glue to the center of the feet and glue down the bunny.
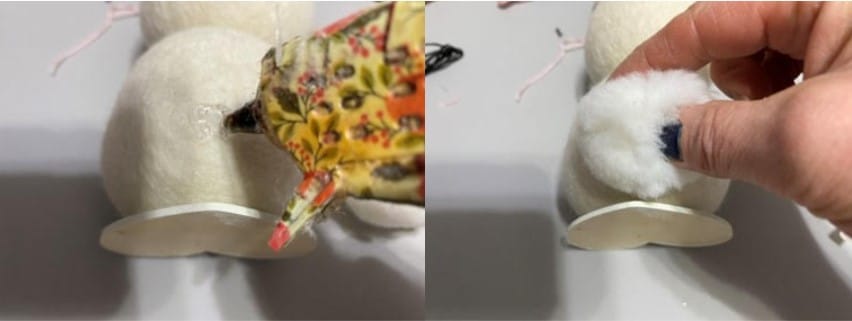
To add the pompom tail add hot glue to the back of the bunny where you want the tail then glue in place.
Now you can add any ribbon or embellishments you would like to your bunny.
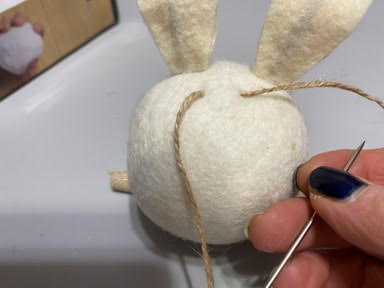
Adding Hanger for Ornament
If you would like to just make the bunny head and use it as an ornament take a piece of twine thread through a needle go through the top of the head pulling the twine through. Tie the ends of the twine into a knot making a hanger. Cut off any excess twine.

I hope you enjoy making the bunnies and making them your own. They would make a great Easter gift for a friend or family member.
Love the bunnies, so cute! Follow you daily I don’t always comment, but really enjoy your Crafting ideas! Found you first, then, Barb and Lisa. Love you all you each have your own unique style. Diana Szakacs ( pronounced say kiss)
I really love these bunnies!! Such a cute craft.
Wonderful…Can’t wait to try this
Love all your crafts u make
Thank you
Wonderful. Can’t wait to do this. Waiting for supplies.
Love seeing all your crafty ideas. Beautiful work Sherry
Love watching you crafting. Love all your craft items
Hi Sherry, I can’t wait to make these adorable bunnies. You are such an inspiration to me. Watching you make these awesome crafts have inspired me to start to craft. I find it very relaxing after coming home from a stressful job. I look forward to your next vlog/blog.
Sherrie I’m making this bunny today I just love them they are adorable I just embroidered her eyes now have to go out shopping for the pink embroidery I’m so excited
How did you make the fuzzy yellow chick?
Sherry, I absolutely love all the crafts you do. I am new and trying different things. I am definitely going to try these bunnies. You are amazing and I also follow your sister’s Barb and Lisa. All three of you ladies do such awesome things. I am retired and trying to fill my day and you always have items I want to try. Take care and blessings to you and John.
Getting ready to make.love all your ideas.
Hi Sherry, I love these bunnies, but I love all of your creations. I am very new to crafting, I lost my husband 4 years ago and just a few months ago I discovered you and your sisters. I am not very good at this new crafting but I find it helps occupy my mind. I don’t comment a lot but I try watching each time you are on.
Please correct the pattern measurements. The pink felt ear should be 3/4″ wide not 1 3/4″ wide. I had a great time working on this bunny. Thank you for ideas. You are the best artist, teacher and video maker.
Where did you get the dryer balls? Want to make these, love them and all that you make.
Love these bunnies but where do you get the dryer balls Sherry? I missed that info.