Home Decor, Valentines Day
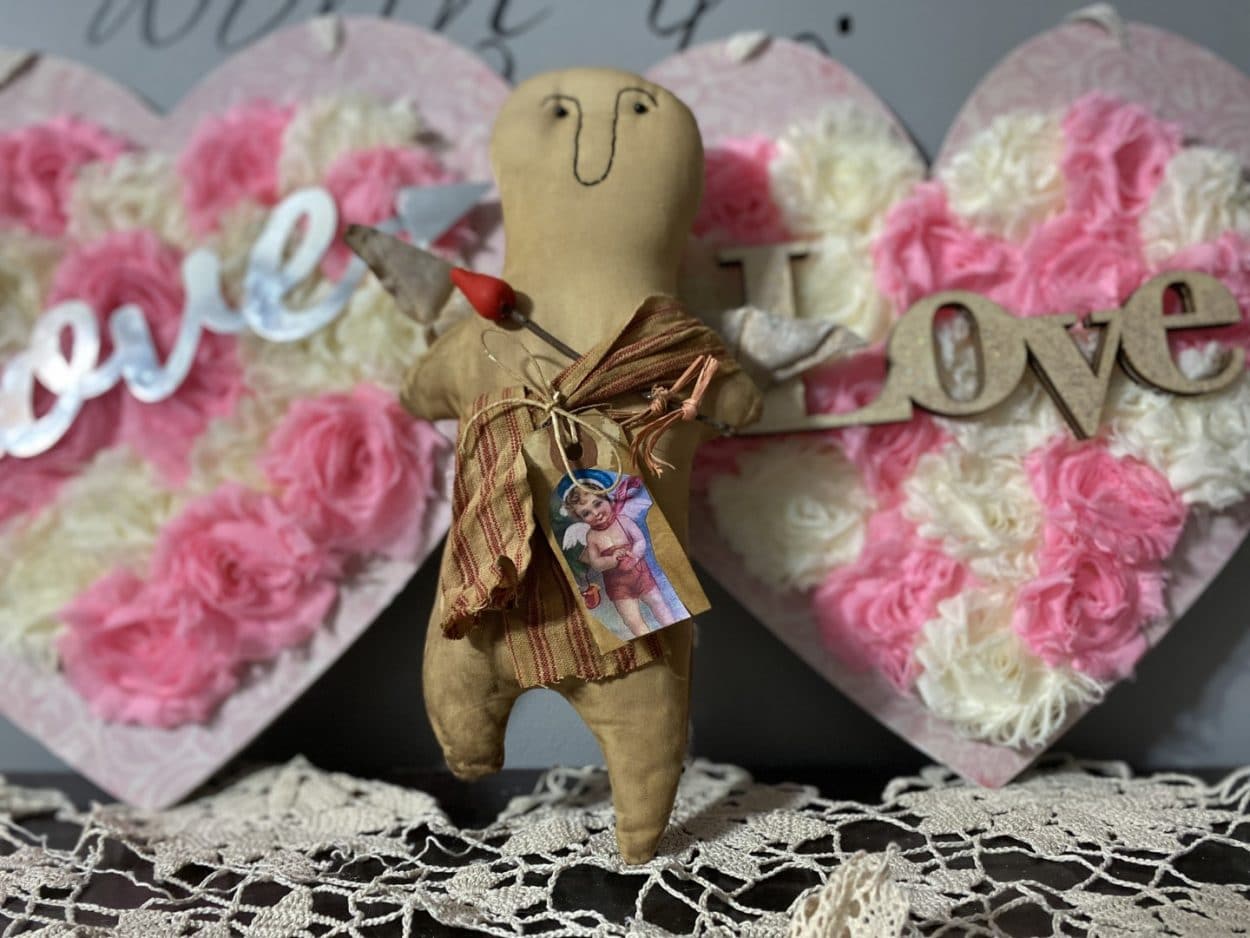
DIY Primitive Cupid
Jan
If you have been following The Crafty Decorator you know some of my crafts are sewing crafts and I know not everyone sews so I always try to come up with a way that you can make the craft by hot gluing it instead of sewing. This primitive cupid was a little challenging I couldn’t get the muslin to stay glued together so I decided to try using a different fabric. You will see below I used warm and natural when making the cupid with hot glue. I think you would also be able to use felt to make this cupid if you do not want to use warm and natural. I think this cupid came out adorable and would look so cute sitting on a shelf, in a Valentine tree and in as a dough filler.
Here is a list of what you will need:
- Cupid Pattern
- Muslin
- Warm and Natural or Felt if you are got gluing
- 16” x 2“ Strip of Fabric of your choice
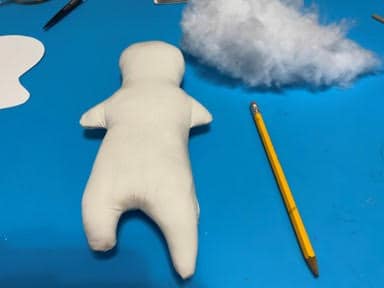
- Polyester Fiberfill
- Sewing Machine and Cream Thread
- Cream DMC Thread
- Black DMC Thread
- Sewing Needle
- Red Sculpey Clay or Red Felt
- 2 Small Black Beads for Eyes
- Small Twig from your yard
- Coffee Stain Mixture
- Paintbrush
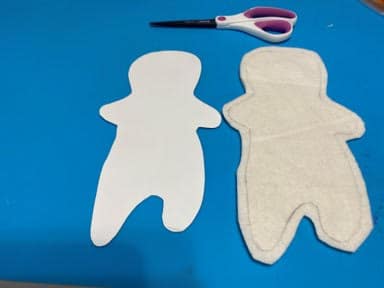
- Scissors
- Pencil
- Hot Glue Gun and Glue Sticks
Making the Cupid Body
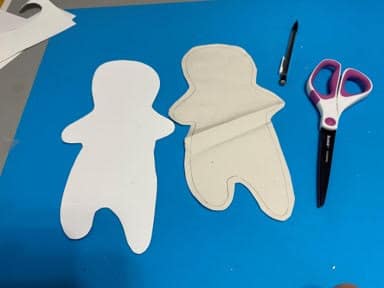
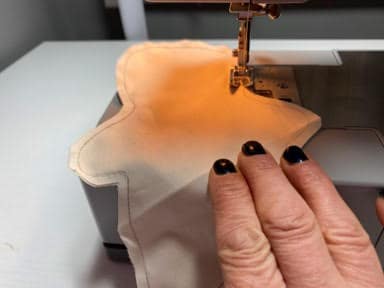
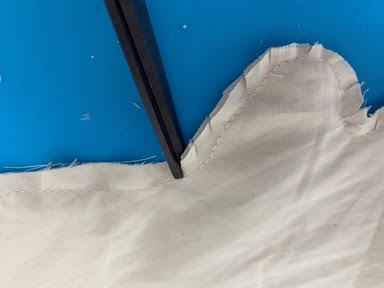
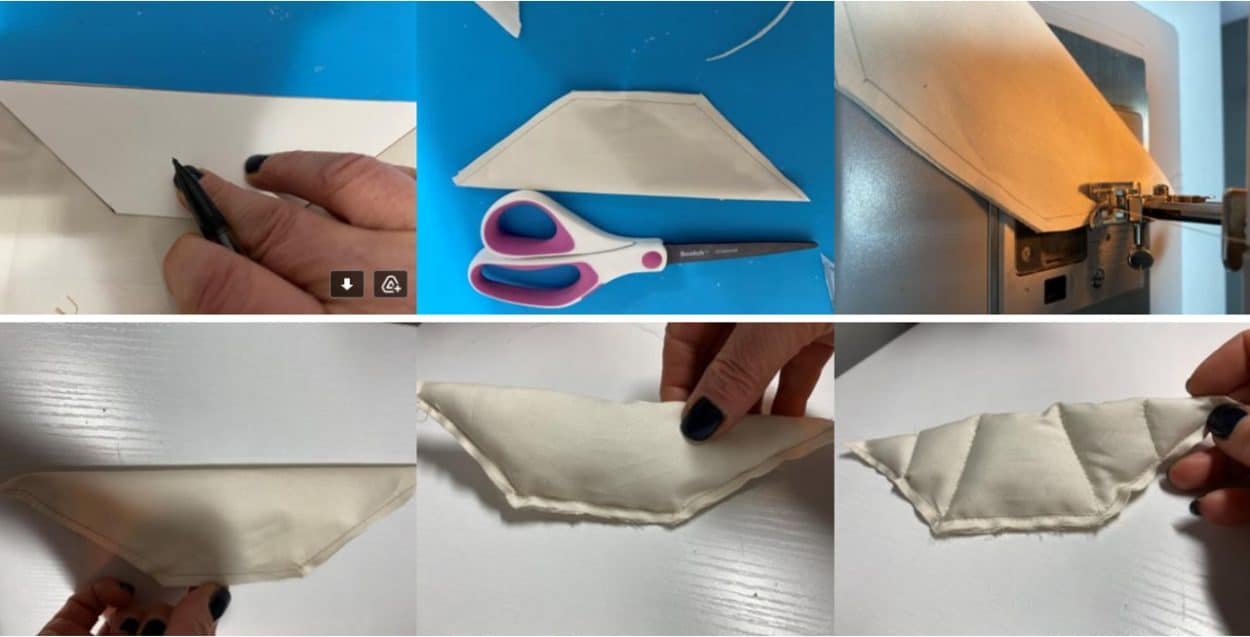
The first thing you will need to do is print and cut out the pattern pieces. Trace the cupid body onto a double layer of muslin. Cut out about ¼” from the trace line. Using a sewing machine sew the cupid body on the trace line leaving a opening where indicated on the pattern. Clip around all curves be careful not to cut your stitches. Turn right side out and stuff firmly with fiberfill. With cream thread and needle sew the opening closed.
Gluing the Cupid Body
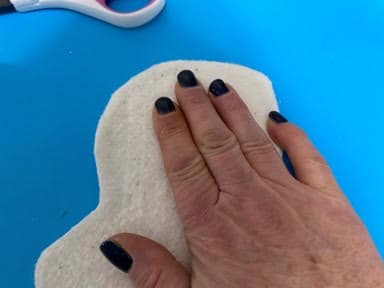
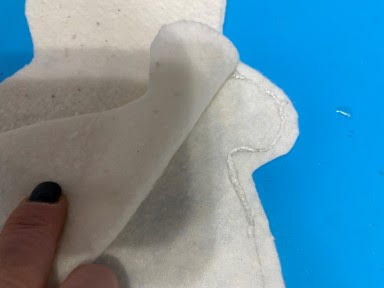
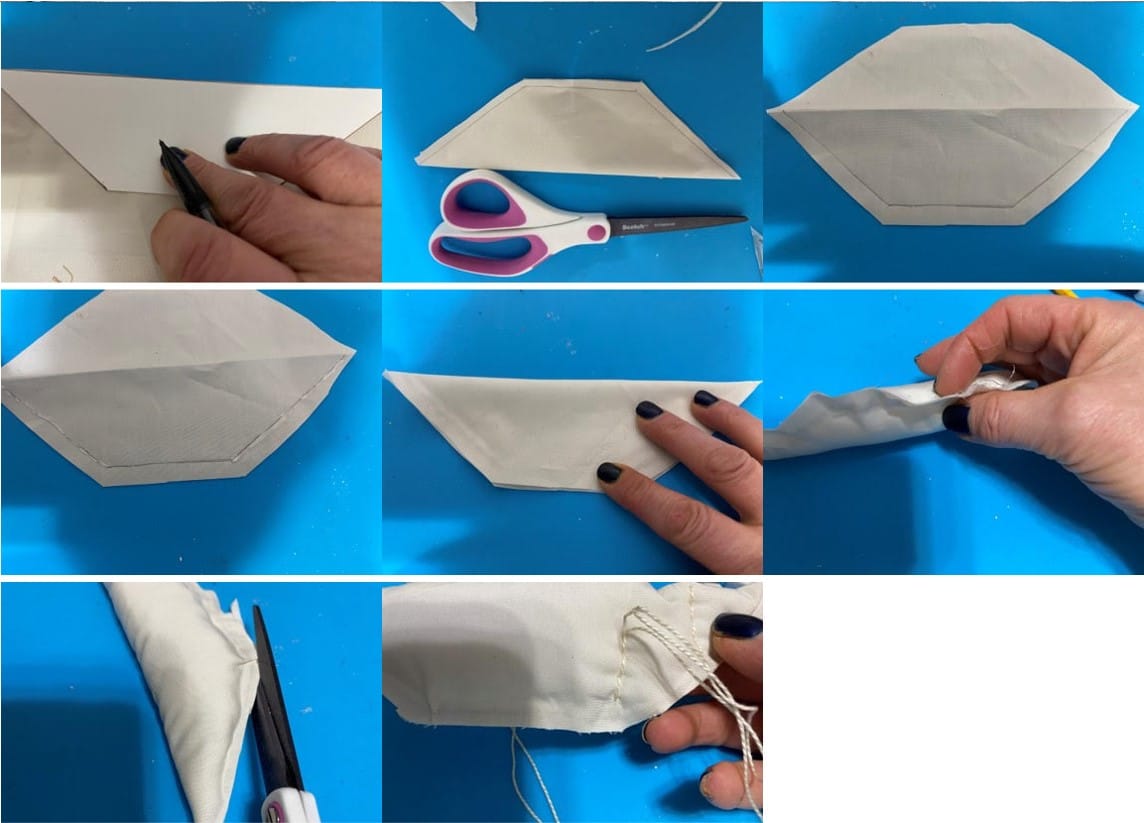
Trace the cupid body on a double layer of Warm and Natural. Cut out about a ¼” from the trace line. Lay the body piece with the trace line down then place the second body piece on top. Fold down the top head piece add a line of hot glue and glue down. Fold back right side and got glue to the trace line making sure you leave a unglued opening where indicated on the pattern. Fold back the left side add hot glue to the trace line and glue down. Clip around all the curves. Turn right side out and stuff firmly with fiberfill. Glue the opening closed.

Making the Wings
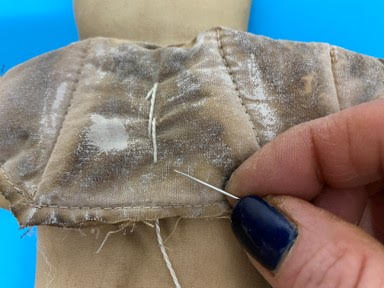
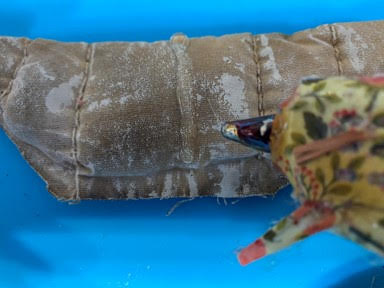
Fold a piece of muslin in half lay the wing pattern down so the long flat part is on the fold. Trace the wing then cut out about ¼” away from the trace line. On the sewing machine sew the two side of the wings leaving the bottom open. Lightly stuff the wings with polyfill then sew the opening closed on the machine. Using your sewing machine sew lines in the wings where indicated on the wing pattern.
To glue the wings fold a piece of muslin in half place the wing pattern so the long flat side is on the fold of muslin. Trace the wing pattern then cut out about a ¼” away from the trace line. Open up the fabric add a line of hot glue to each side of the wings then fold fabric over and glue down. Lightly stuff with fiberfill then glue the opening closed. Trim the fabric around the wings closer to the glue line. Using cream DMC thread sew on lines where indicated on the pattern piece.
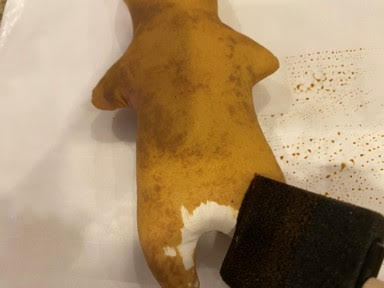
Coffee Staining
If you would like my coffee staining recipe you can find it on my blog on how I coffee stain and color fabric. Brush the cupid body and wings with the coffee stain mixture. Place your fabric strip (16”x2”) into the coffee mixture then ring out. You can let them dry naturally or if you are impatient like me you can dry them in the oven only if you have sewn them. Place them on a foil lined cookie sheet and dry in a 220 degree oven checking them every 5 minutes or so. If you have glued your cupid and wings you will have to let them dry naturally.
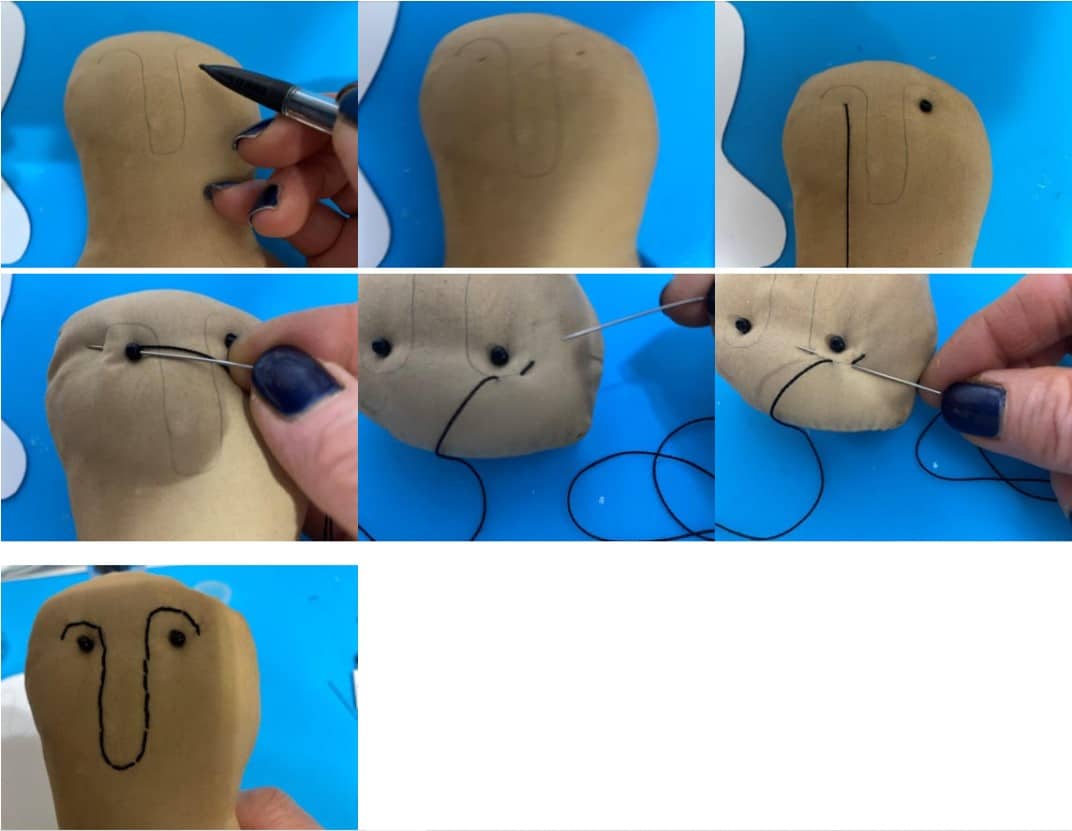
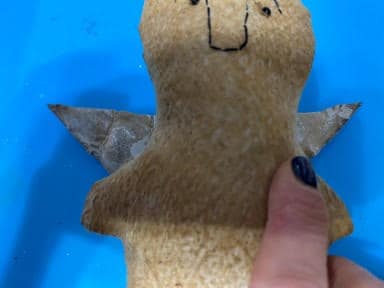
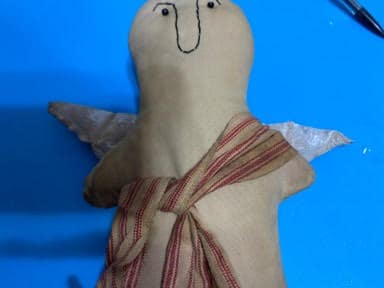
Adding the Face
Using a pencil lightly draw on the face as shown on the pattern. Make two dots where the eyes will go. Using black DMC thread sew on one of the beads for the eye without ending the thread bring the needle under and over to where the second bead is to be sewn on. Next bring the needle and thread over to where you are starting the brows and stitch the brows and nose on when ending bring the needle to the back of the head and tie a knot.
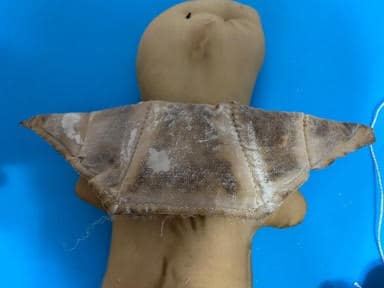
Adding the Wings
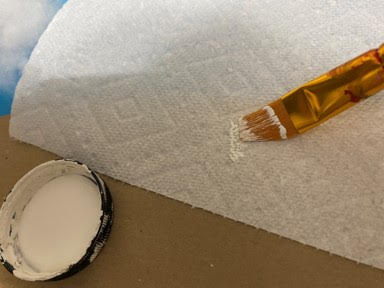
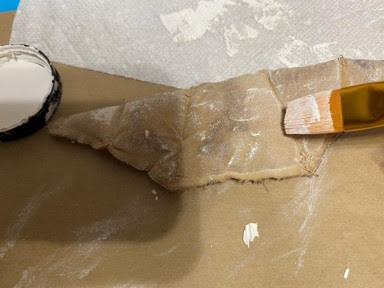
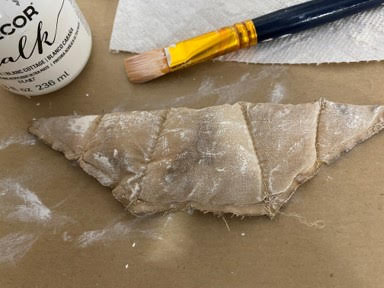
Before adding the wings you will need to dry brush them with white chalk paint. Dip a paintbrush into the paint then blot onto a paper towel until almost dry then brush the wings. Continue this process until you get the look you want. In some area’s I applied a little heavier paint to give an old worn look.
Once the wings have dried place your cupid face down and place the wings, long straight side, at the base of the head. You can pick the cupid up and look to see if they are placed correctly. Next take cream DMC thread and stitch the wings down the middle to the back of the cupid.

If you would like to glue the wings on place the wings, long straight side, at the base of the head check to make sure they look correct. Remove the wings add a line of hot glue down the middle of the wings and glue into place.
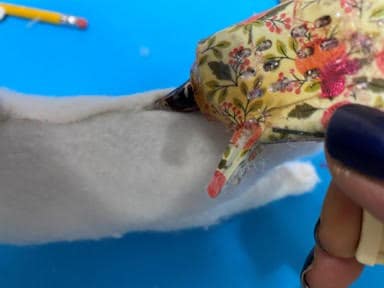
Making the Bow and Arrow
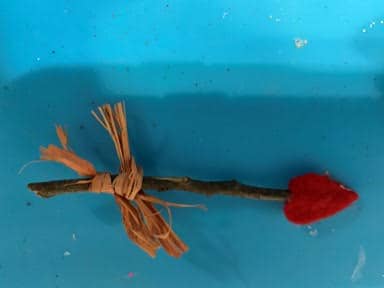
There are two options to make the arrow one is take a piece of sculpey clay and form into a cone like shape mine was about an 1” long. Next take you twig and insert into the bottom to make a hole then bake according to directions. Once baked and cooled add a drop of hot glue into the hole and insert the twig. Add some red or pink raffia towards the end of the twig. I tied two pieces and then added a drop of hot glue to each to hold in place.
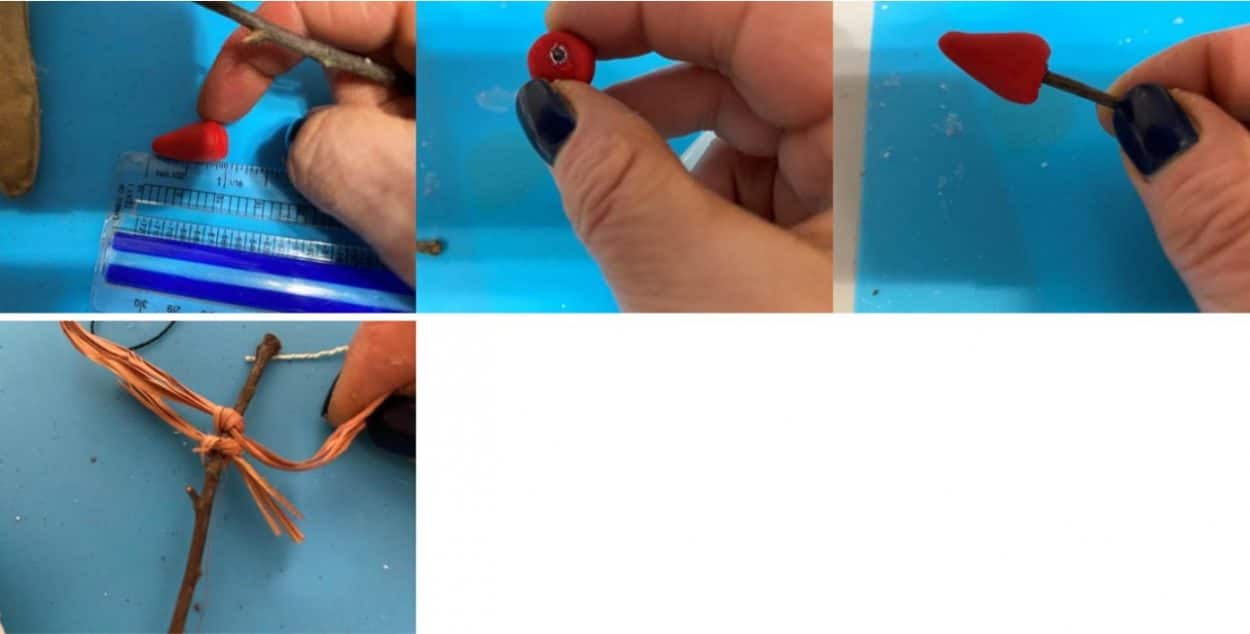
The second option is to trace and cut out two hearts from red felt. The pattern for the heart is included. Place a line of hot glue down the middle of one heart and glue down twig. Add hot glue on top of the heart and twig then glue second heart on top. Add two pieces of raffia towards the end of the twig. I tied two pieces on then added a drop of hot glue to each to hold them in place.
Finishing Touches
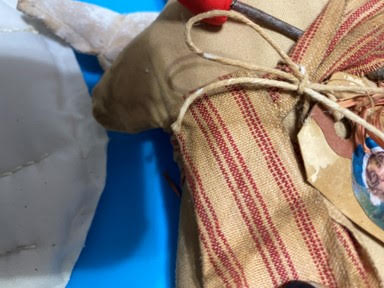
To finish the cupid take your 16”x2” piece of fabric and tie around the cupid. Insert the bow and arrow under your piece of fabric. You can also add a coffee stained hangtag if you like.
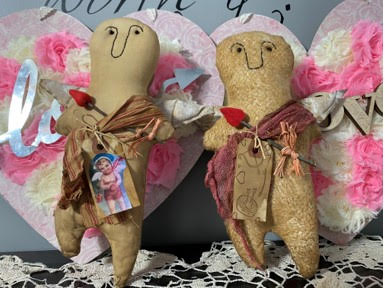
I hope you enjoy making this Primitive cupid. Below you can see how each one came out using the muslin and the warm and natural.
Hello, I don’t have a printer but I would be happy to pay for the pattern. Thank you
I absolutely love all of your crafts I suffer with depression and I have been making your crafts and you just don’t realize how much it helps me I love too sew and am going to try and save up for the little sewing machine you showed thank you very much for the time you take from your life to help people like myself many blessing to you
I adore these. Will you ever sell your items on your web site?
Sherry I don’t know who shared your site with me but I am so glad they did. I enjoy watching you and will be going to Joanns tomorrow. I am immune compromised so limit my outings. This is going to be so wonderful to get back into crafting. I am also one of those who finds things and recreates them.
I love the hearts i watched you make those