Home Decor
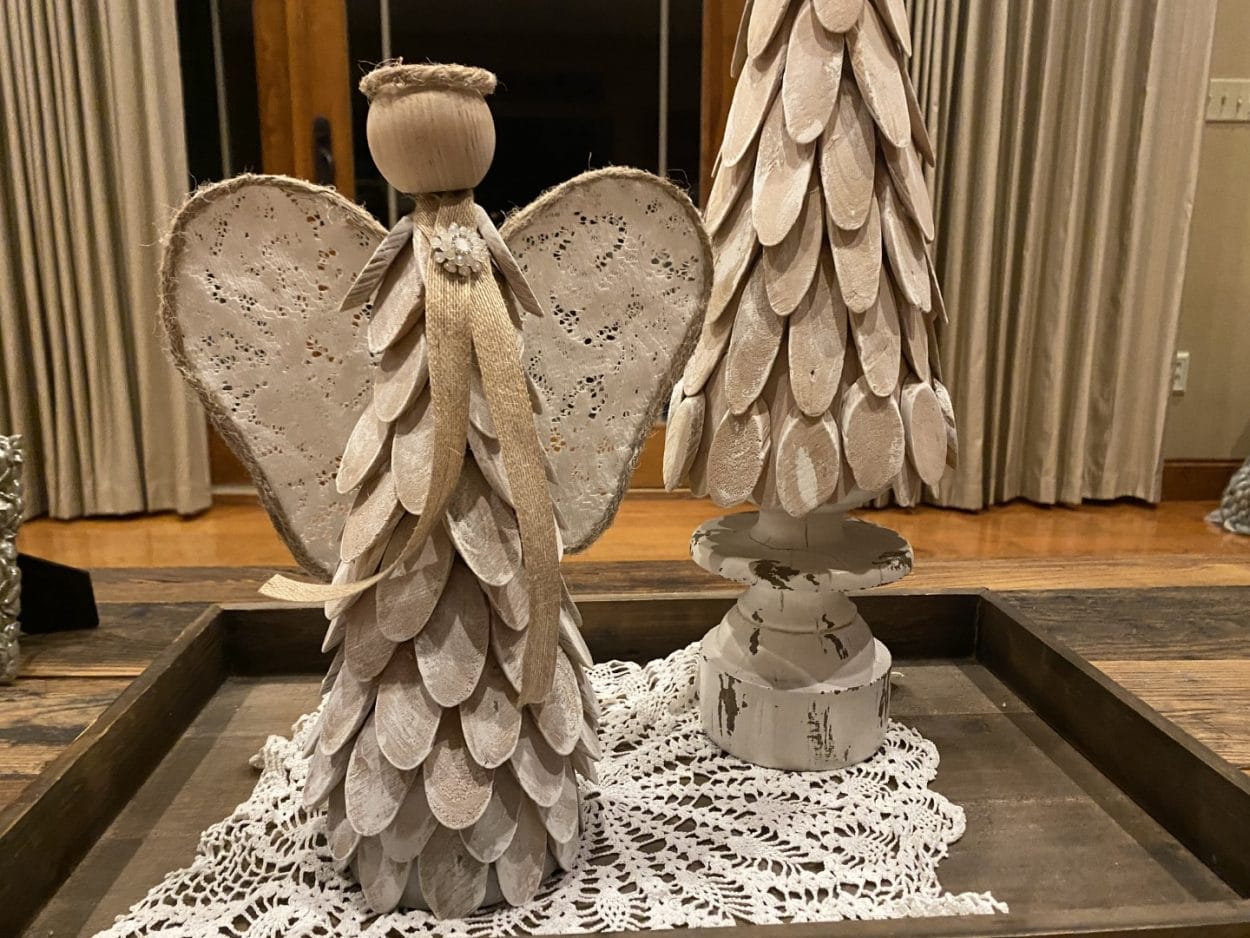
DIY Drift Wood Angel
Jan
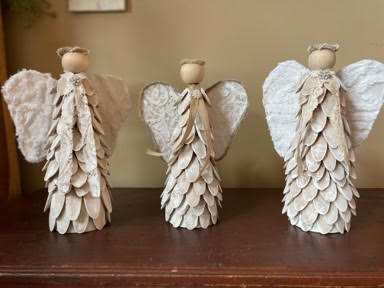
When my husband and I were on vacation I seen this beautiful mirror that was made from driftwood. When I was shopping in Hobby Lobby I came across driftwood chips I bought the three bags they had needless to say I couldn’t get it the way I wanted so I decided to make this angel with the driftwood chips. The bags are a mixture of large and small chips. The angel in the above photo I used all small because one of my bags only had all small chips even though it said it was large and small. Later in the blog you will see I made an angel using the large and small chips and she looks just as beautiful.
Here is a list of what you will need:
- Wing Template
- 3 Bags of Driftwood Chips (Hobby Lobby)
- 2” Wood Ball Knob (Hobby Lobby)
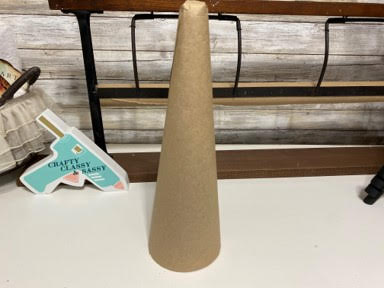
- Either a 12” Paper Mache Cone or a 11.9” Styrofoam Cone
- Brown Craft Paper to Cover the Styrofoam Cone
- 16 Gauge Wire or A Wire Hanger
- A Piece of Thin Floral Wire
- Lace Fabric or Fabric of Choice for Wings
- 1 Meat Skewer
- 6-ply Jute
- Ribbon
- Bling Button
- White Chalk Paint
- Paintbrush
- Hot Glue Gun and Glue Sticks
- Wirecutters
- Scissors
- Drill and Small Drill Bit
- White Duck Tape
- Papertowel

Making the Angel Body
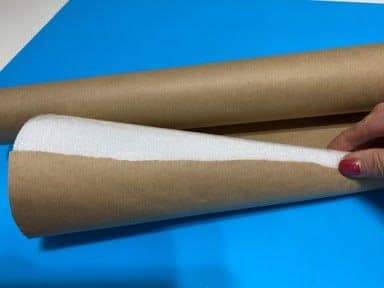
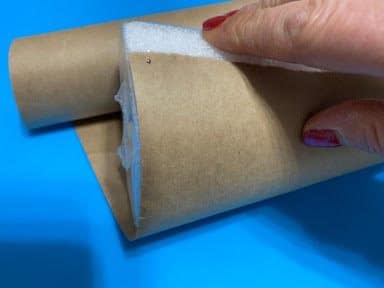
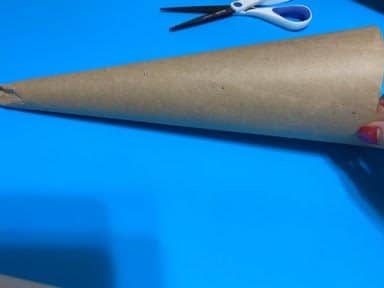
If you are using the Styrofoam cone you are going to cover the cone with brown craft paper. Leave the plastic on the cone. Roll the Styrofoam cone in the paper you can either hot glue in place or pin in place with sewing pins. Cut off the excess paper at the bottom next cut some paper off the top then fold the remaining paper like you were wrapping the side of a present either pin or hot glue down. Remove the plastic from the bottom of the cone. If you are using a Paper Mache cone you can skip this step.
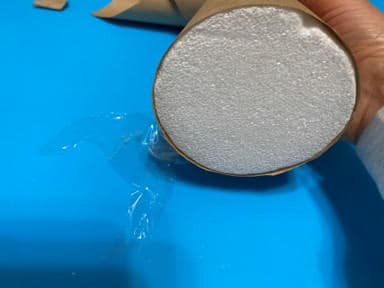
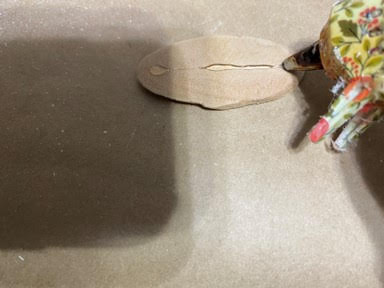
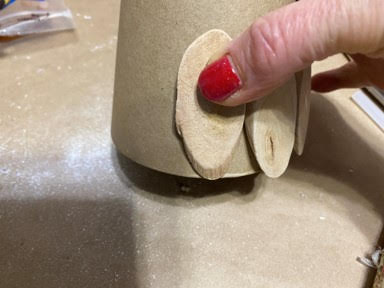
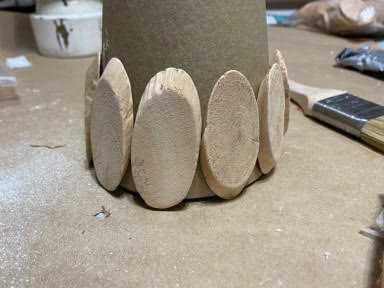
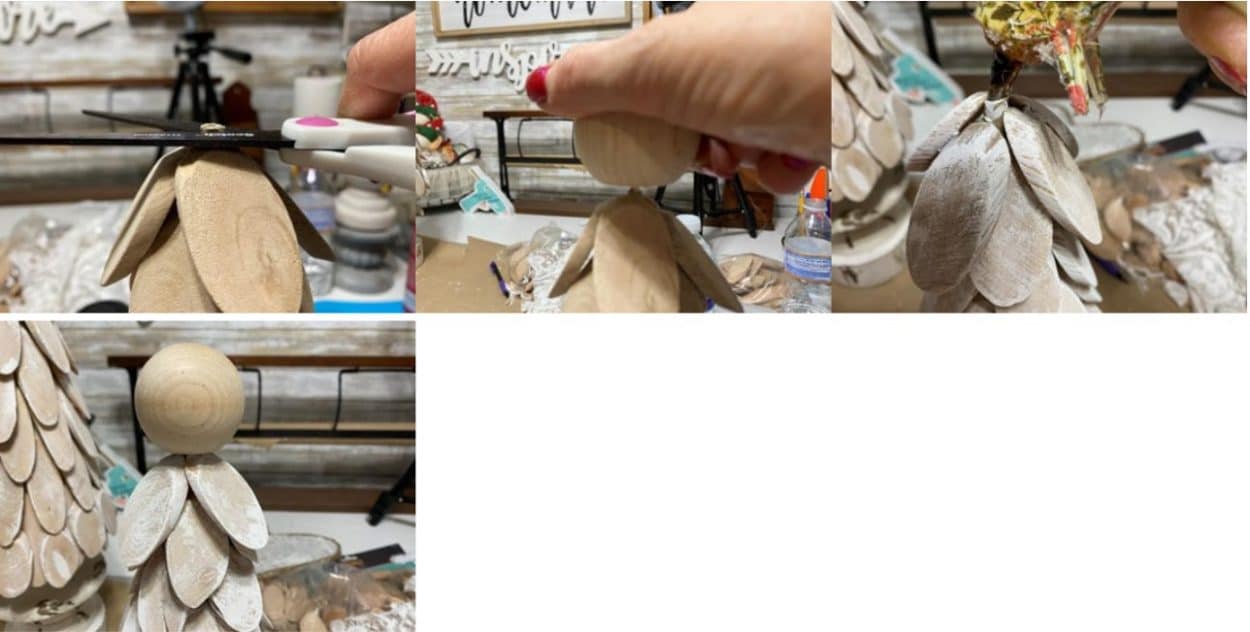
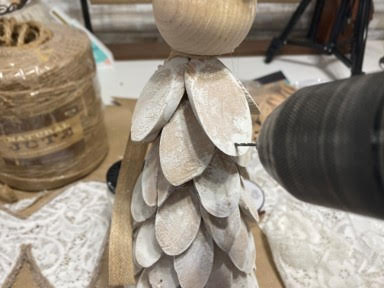
You can use just small chips or a mixture of small and big chips. If you are going to use both sizes you are going to want to start with the large size and do about 3 rows of the large. Start by taking one chip add hot glue to the back of the driftwood chip and glue onto the cone with the uneven edge facing out at the top, see photo below to see which way I mean be care not to glue some the wrong way as I did in the below photo all the rough curved edges should be facing upwards, the chip with my finger on it is the incorrect way. Continue gluing chips around the cone, when you are down to the last three place on the cone without gluing to see how they fit you may need to fit pieces together like a puzzle all the chips in the bag are different widths so you may need to find thinner or wider ones to get them to fit in the remaining space.
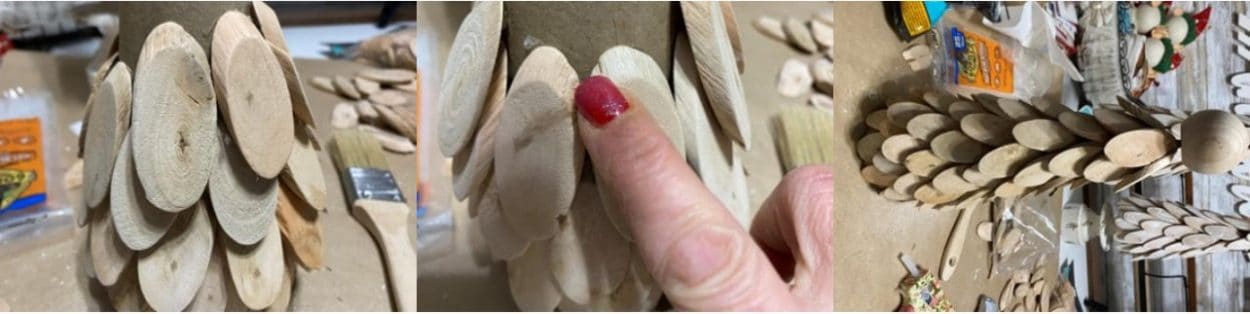
To start the second row place a chip between two chips on the first row overlapping the two chips look to see where the chip is touching the two bottom chips add hot glue to those areas and to the top back of the chip you are adding and glue into place. Continue working your way around the cone don’t forget to check and see if the last two or three chips are going to fit so you can cover the area. Continue this step for all the existing rows until you reach the top of the cone.
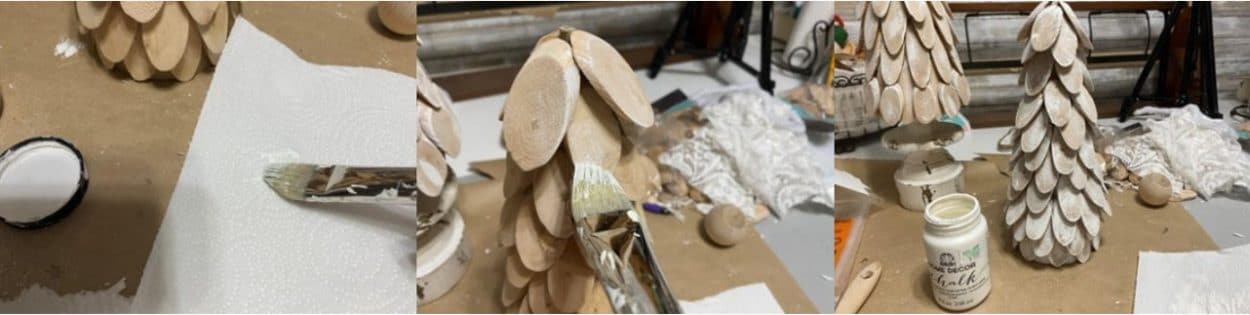
After you have attached all the rows it is time to paint the angel body. You are going to dip the paintbrush into the chalk paint then dab the brush onto a piece of paper towel until almost dry then start brushing the wood chips you can leave more paint on the brush if you would like some spots darker then others this will give it a worn look. Make sure you get in-between the chips. Between the chips on the first row I added more paint to the cone.
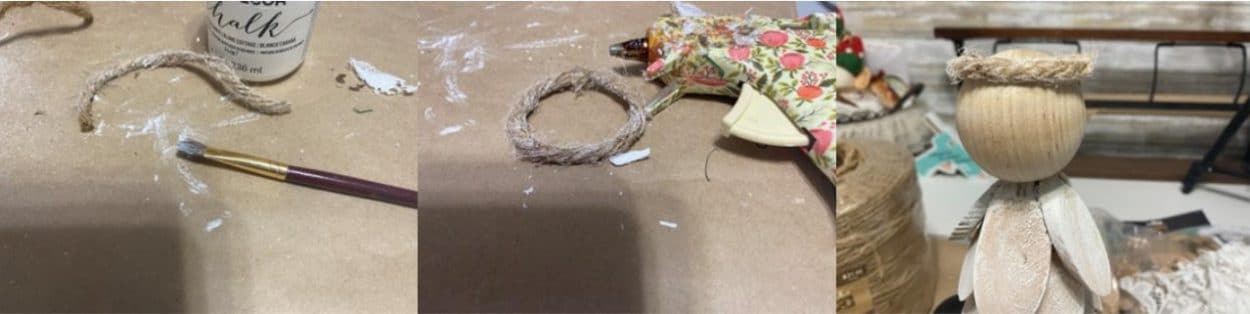
Adding The Head
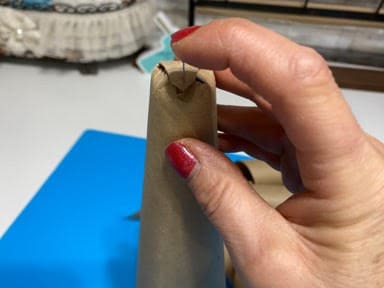
If you are using the Paper Mache cone to make your angel you are going to want to trim off some of the point at the top so it is closer to the top row of driftwood chips. If you are using the Styrofoam cone take the meat skewer and insert into the top of the cone. I found it easier to add the head if made the hole in the Styrofoam first. Next glue the flat end of the meat skewer into the bottom of the head judge how much you think of the meat skewer you will need to cut off and cut off excess. Insert head into the cone if it is good remove add hot glue into the hole at the top of the cone and glue head in place.
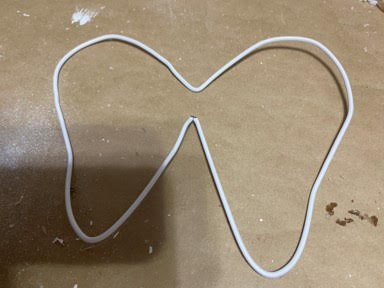
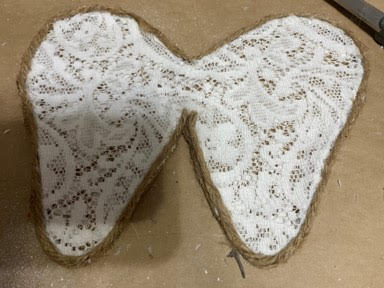
Making the Wings
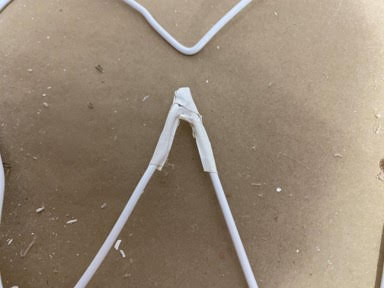
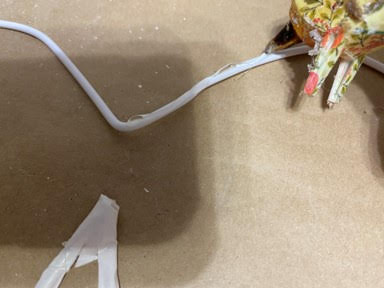
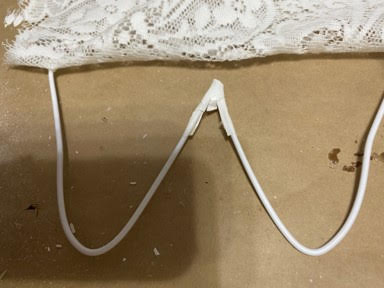
I used a wire coat hanger to make my wings or you can use regular wire. Print out the wing template you can use this as a guide to bend your wire. Once you have the bent the into the wings attach the two ends of the wire using a piece of white duck tape.
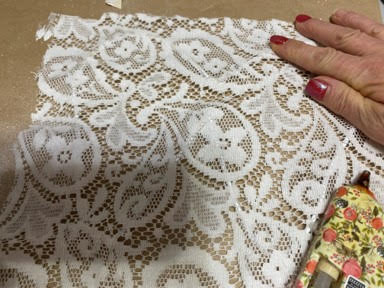
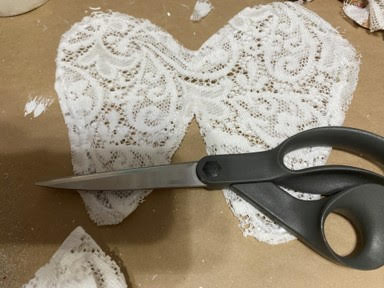
To cover the wings with fabric lay your fabric on top of the wings fold back the top of the fabric add hot glue to the wire and glue down the fabric. Next fold up the fabric add hot glue to the wire and glue down the fabric. Turn the wings over and repeat the above steps. After you have both sides of the wings covered with fabric trim the fabric around the wings glue any openings between the fabric closed.
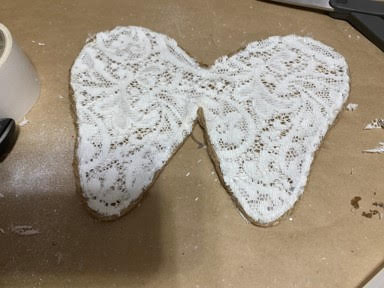
The next step is optional. Because I used lace and you can see the wire hanger I decided to add jute around my wings. If you want to add the jute add hot glue along the rim of the wings and glue jute continue all the way around. Next I added hot glue around the top outer edge of the wings and added jute all the way around and repeated this step to the other side. On another angel I made I used pieces of a chenille bedspread and you didn’t see the wire so I didn’t add jute to this angel I just made sure my edges of fabric were glued closed.


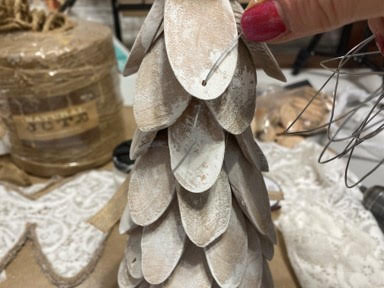
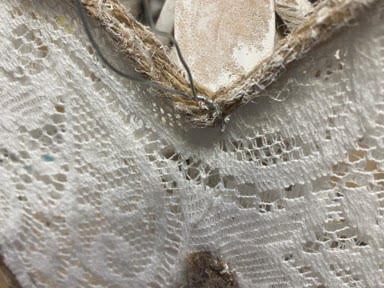
Attaching the Wings
Hold the wings to the back of the angle to see where they should be placed. Drill a small hole close to the end of one of the driftwood chips that would be at the center top of the wings would be. Take a piece of thin floral wire put through the hole then through the wings and twist the wire tight. Cute off excess wire. If the wings seem to move around to much add a little hot glue in one or two spots on the back and glue down wings. If you don’t want to use wire you can just hot glue them in place.
Adding the Finishing Touches
To make the halo take the jute and form a circle around the top of her head. Cut the piece of jute to size. Next dip your paintbrush in the chalk paint dab onto the paper towel until almost dry then paint the piece of jute. Hot glue the two ends of jute together place on her head add a small drop of got glue under the front and back of the halo and glue down.
Finally take a piece of ribbon place around her neck. I pulled the ribbon a little so it would be between her head and body and secure. Cross the two pieces of ribbon in the front and glue together. Next glue a jewel button and you are done.

I hope you enjoy making the angel I just love how she turned out. Below you can see the three angels I have made.
Beautiful, can’t wait to make her!💕💕💕🌻🌻
Sherry, are the driftwood pieces found in woodpile in hobby Looby. I can’t find them not even on line hobby lobby.😪 . I have everything but the driftwood pieces.
Found them on Amazon. https://www.amazon.com/dp/B08L4YK8N1/ref=cm_sw_r_cp_apa_fabc_1F26VMQJX9X5QR5PYV3F?_encoding=UTF8&psc=1
Love the Angel It’s Beautiful!!! I clicked on template it will not open 🙁
Wing template does work
Template for wing doesn’t work
Hi Sherry the wing template will not open. Got the driftwood pieces today and can’t wait to make it.
Got all my wood slices on and paint is drying!! Can’t wait to finish her tomorrow!
Template won’t open but not necessary for me.
Love it♥️
I love the angels!! I’ve watched the videos 3 times and I believe that your amazing!! I love your crafts!
Love the angel. As soon as I am able to shop again I am trying it. Thank you for your ideas.
got my chips and cone going to try these
Love these angels
They are beautiful blessings
Sherry I watch your post each time even if I do not intend to make it. I feel like we are friends. I watched you make these angels. I would love to have made one. I will tell you that your directions are so thorough and easy to follow.!!
Your friend,
I really love your posts. You are friendly and I also like your husband’s recipes.
I love the Angels. Thank you for sharing your talents. I was in the hospital for a week with pneumonia in September. I still have pheumonia in my lungs . The end of January I will have another X Ray. So I am always on the lookout for your crafts. Thank you again.
I love the angel Sherry! You really do a good job on all of the crafts! I love to watch your lives. You have a great speaking voice also! You explain everything so fully. You husband & you make a very special couple. Sprinkling the love from Warrior, Al .
Sherrie I absolutely love this angel I have to make it I love all of your ideas they are amazing I love the country look and especially the soft touch
I finally found the driftwood chips and cone, my husband helped me, we made the angel but I am having problems with the wings, hopefully will get them finished soon.
My 83 year old Dad is very sick, Doctor’s said he may not make it, I want to set the angel up in his hospital room.
All they have to do is pull up the pattern for the wings and hit Control P and it will print the screen just great. No problem getting my pattern. Thank you. Love your ideas…..
Can someone please tell me where they found the driftwood chips?? My hobby lobby only had 2 bags. Can’t find them anywhere, not even Amazon. I keep trying to search with different words. But I can only find plain, unfinished chips.
Hi Sherry.
I love her, she is Gorgeous and so much fun to make. What happened to the trees? I realize it is pretty much the same process but I wanted a picture to look at. Can not find them on your website at all. Thanks for all you do, you are so much fun to watch and learn from
Sherry how many chips does it take for 1 angel I bought mine from Amazon. You said 3 bags from HL how many in a bag. Thank you
I can’t find the driftwood chips. The only ones I can find are the biscuits. Any suggestions? Also, how can I pin 📌 this? I love watching you!!