Christmas, Home Decor, Valentines Day, Winter
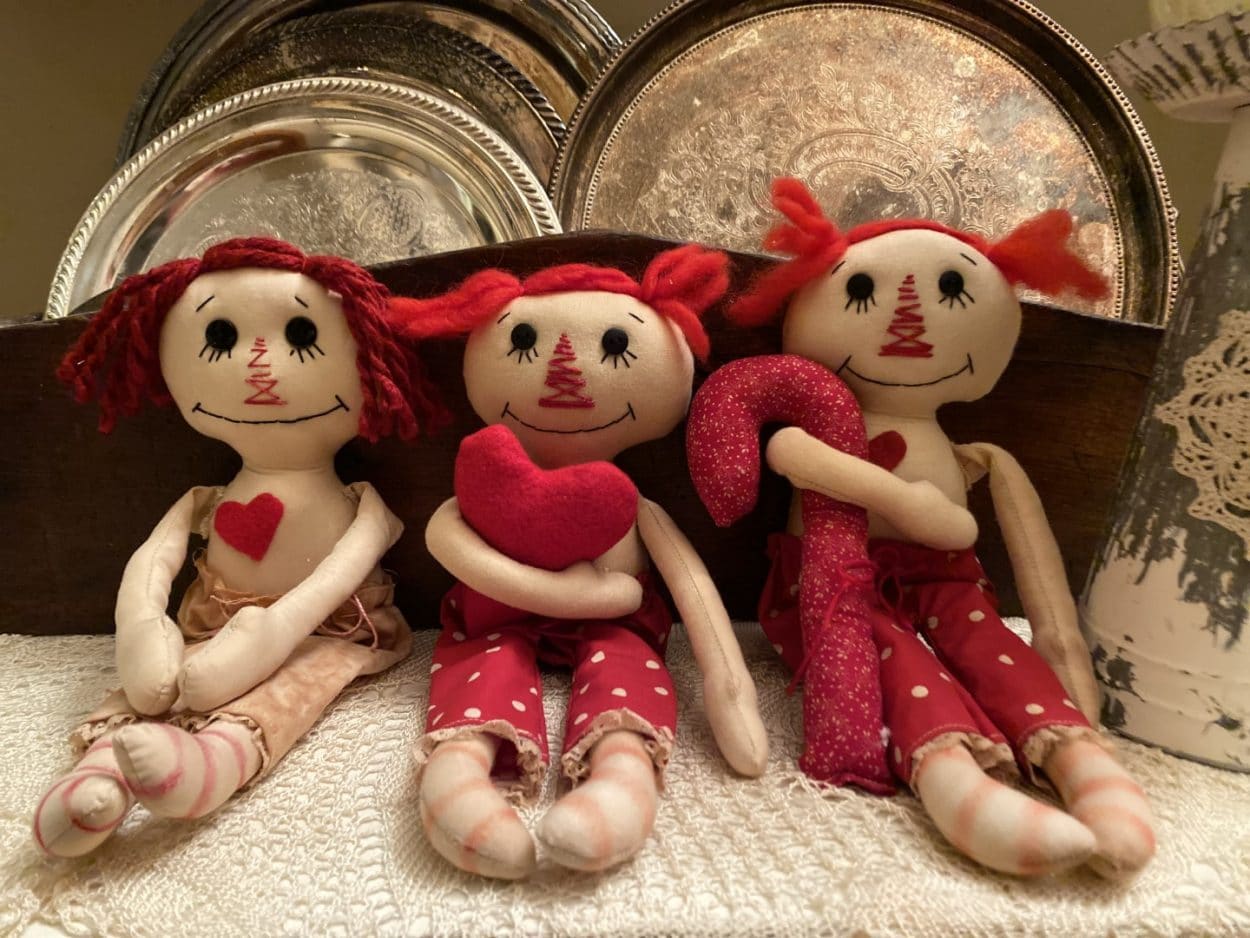
DIY Holiday Raggedy Ann Doll
Jan
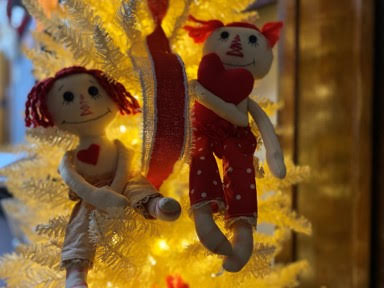
A few years ago I seen a Raggedy Ann Doll at a craft fair and I knew I would be able to use a doll pattern I had from a magazine to recreate her myself.It took a while to figure out how to make her pants but I finally made her.I have seen her with a candy cane but I wanted to be able to use her for Valentine’s Day also so I made hearts to replace the candy cane after Christmas. I gave these adorable little dolls to my family members for Christmas one year.If you think about it you can take a doll pattern and turn it into a lot of different kinds of dolls.Next I am working on a cupid using the doll pattern.I hope you enjoy making this adorable Raggedy Ann doll.
Here is a list of what you will need:
- Raggedy Ann Doll Pattern
- Tea Stain Mixture
- Muslin
- Red Felt
- Fabric of Choice for Pants
- Fabric of Choice for Candy Can if you are making them
- Lace Ribbon Trim
- Sewing Machine
- Ivory Thread
- Red, Black and Cream DMC Thread or Embroidery Thread
- DMC Thread to match pant fabric
- Needle
- 2- 7/16 Black Buttons
- Polyester Fiberfill
- Sewing Pins
- Red Paint
- Stiff Paint Brush
- Foam Brush
- Red Thicker Yarn for the hair
- Pencil
- Scissors
- Hot Glue Gun
- Paper Towel
How To Make Tea Stain Mixture
Bring one cup water to a boil remove from heat. Add 4 tea bags and let sit for about 2 hours.
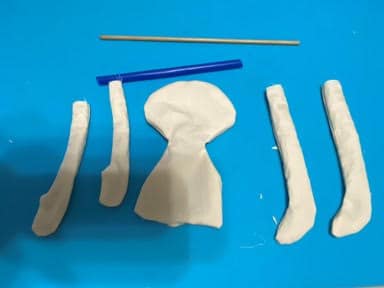
Making the Doll Body
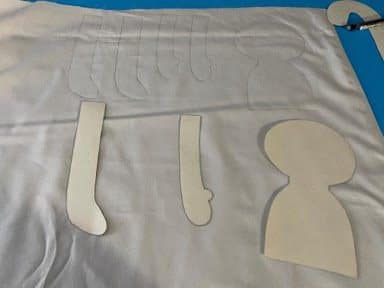
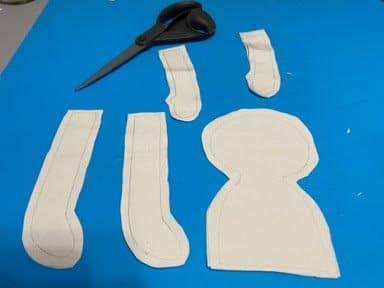
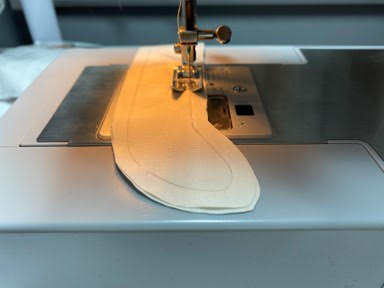
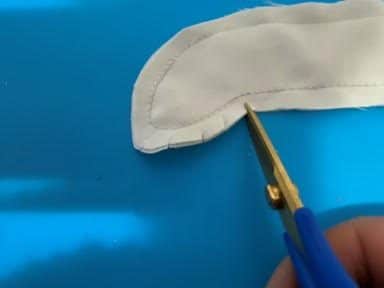
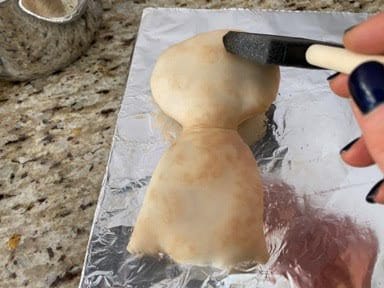
The first thing you are going to need to do is print and cut out your pattern pieces. Make you tea mixture before you start making your doll. On a double layer of muslin trace the doll body, 2 arms and 2 legs. Cut out about a ¼” away from the trace line. On your sewing machine or by hand using cream thread sew your body pieces on the trace line leaving the top of the legs and arms open and the bottom middle of the body open. Using scissors clip around all curves be careful not to cut your stitches. Turn all pieces right side out and stuff with polyester fiberfill leaving about 1 ½” unstuffed at the top of the arms and legs. I use the eraser end of a pencil to push the stuffing into the body parts. Sew the opening closed on the body. Using a foam brush cover all the body parts with the tea stain mixture. You can let them dry naturally or if you are impatient like me you can place them in a old pillow case and dry them in the dryer.


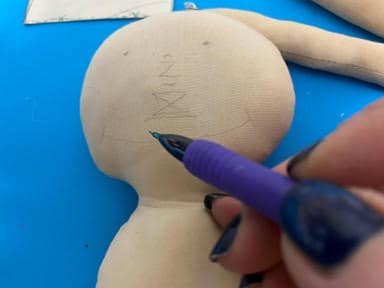
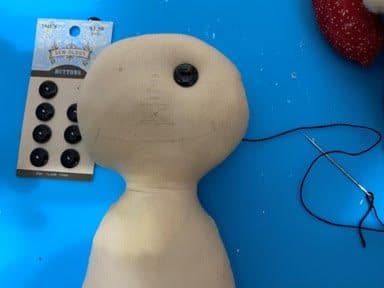
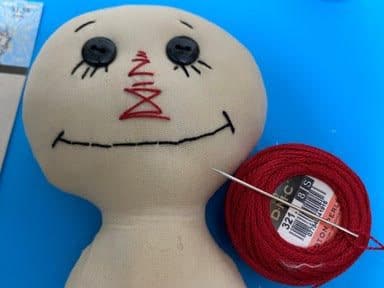
Creating the Face
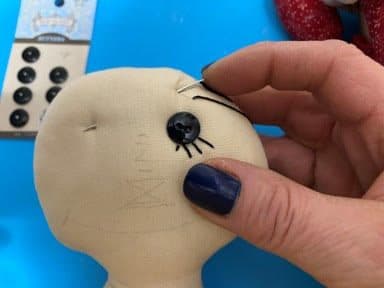
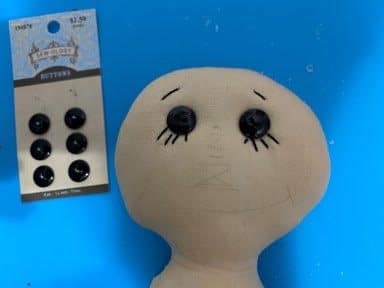
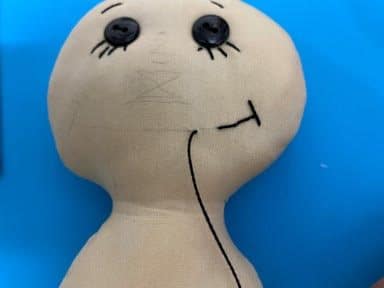
Using a pencil lightly draw the nose and mouth onto your face. You can follow the nose I have on the pattern piece or you can do any nose you would like. Mark where you want the button eyes to go. Using black DMC thread sew on one button eye, do not tie or cut the thread you are going to stitch on the lashes and eyebrow. Using a pencil lightly draw on the lashes and the eyebrow. Using the black thread you have still attached to the button stitch on the lashes then take your needle under the fabric and up to the eyebrow and stitch on. You can bring the thread to the back of the head and knot off or you can just bring your needle and thread over to where you are going to sew the second button on, see photo below. Repeat the steps you did for the first eye to the second eye then bring your needle and thread to the back of the head and knot off. Next using black DMC thread stitch on the mouth. You will be doing a backstitch you can see the photo’s below. Using red DMC thread stitch on the nose bring the needle and thread to the back of the head and knot off.
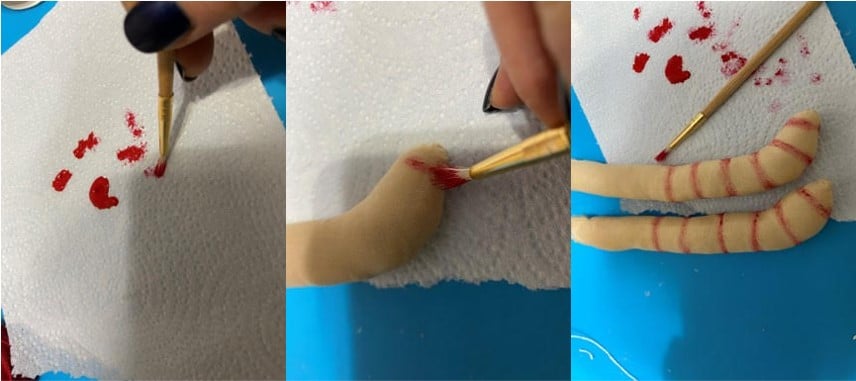
Painting the Legs
Using Red craft paint place a small drop of paint onto a paper towel. Dip the stiff paintbrush into the red paint and dab onto the paper towel until almost dry. Starting at the foot paint a red stripe around the foot. You are going to work your way up the foot and leg painting 6 stripes. See the pattern piece for strip placement. Repeat this step to the other leg.
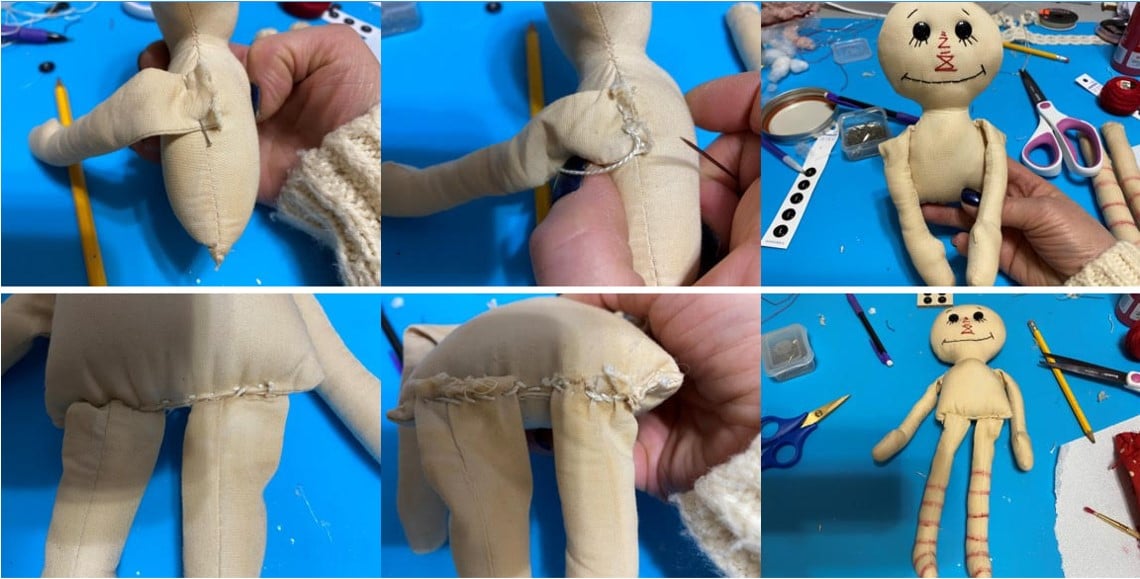
Attaching The Arms and Legs
You are going to attach the arms and legs where the X is indicated on the pattern. Start by pinning one arm into place, make sure the thumb is facing upwards. Using cream DMC thread sew the arm in place. Repeat this step with the other arm. Pin one leg in place, you can either have here foot going straight outwards or slightly turned inwards. Sew in place using cream DMC thread. Repeat with the other leg.
Adding The Heart and Hair
On a single layer of red felt trace and cut out the small heart. Add hot glue to the back of the heart and glue to the chest. See pattern for placement. For the hair I used a thicker yarn by Lion Brand in the color Tampa Spice but you can use any yarn and color you choose. Start by place the end of the yarn at the side of the head then going across and down the other side. You can make her hair as long as you would like. Now make a loop and go back up and over to the other side make a loop and go back to the other side of her head then cut the yarn. Using red DMC thread sew her hair into place by sewing the yarn onto the top of her head on the right and left side. See photo’s below. Once you have the hair attached cut the loops and separate some of the strands of yarn to make the hair fuller. In the above title photo you can see a different doll hair on the other two dolls. I used doll hair that I ordered off Ebay for the dolls I made years ago.

Making the Pants
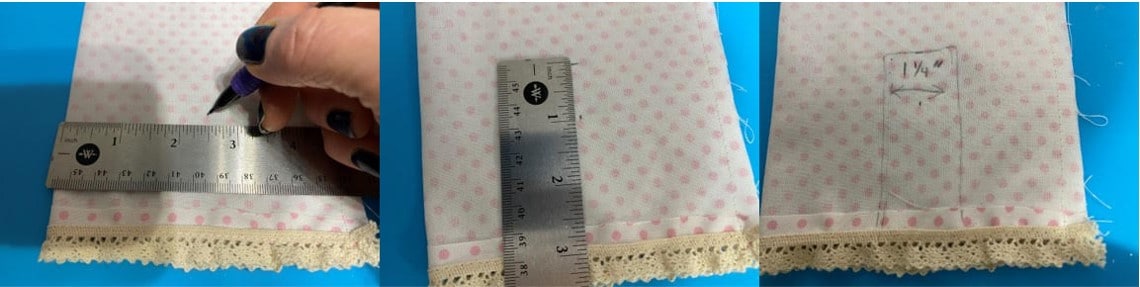
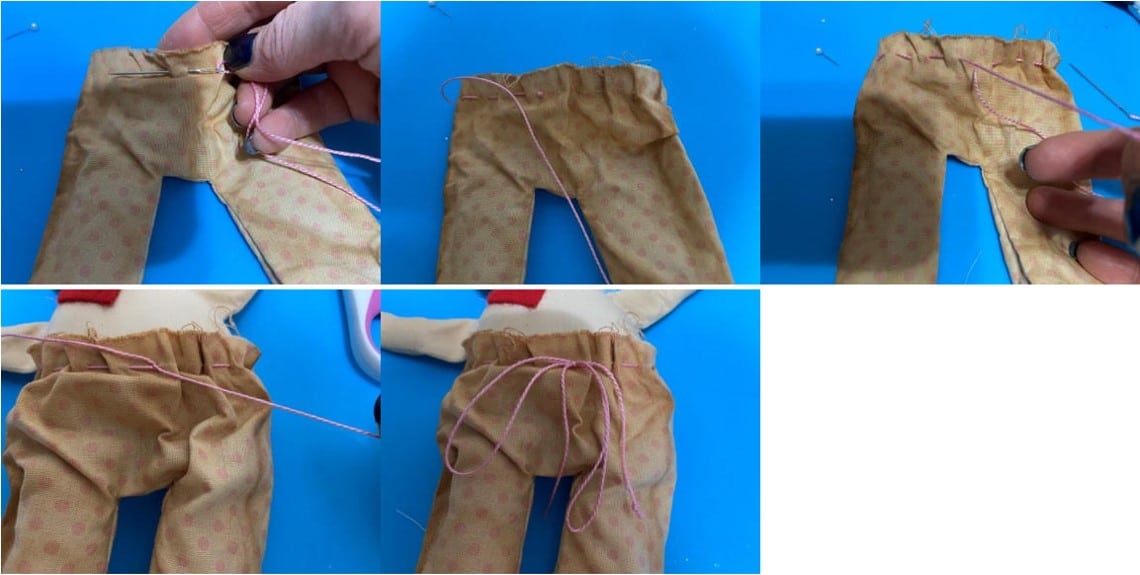
Start by cutting a piece of fabric 10” long and 6”high. Iron about a ¼” hem along the 10” side of the fabric then pin your lace trim ribbon to the hem. Sew into place. With the printed side of the fabric facing upwards fold your fabric in half matching up the two 6” sides then sew them together.
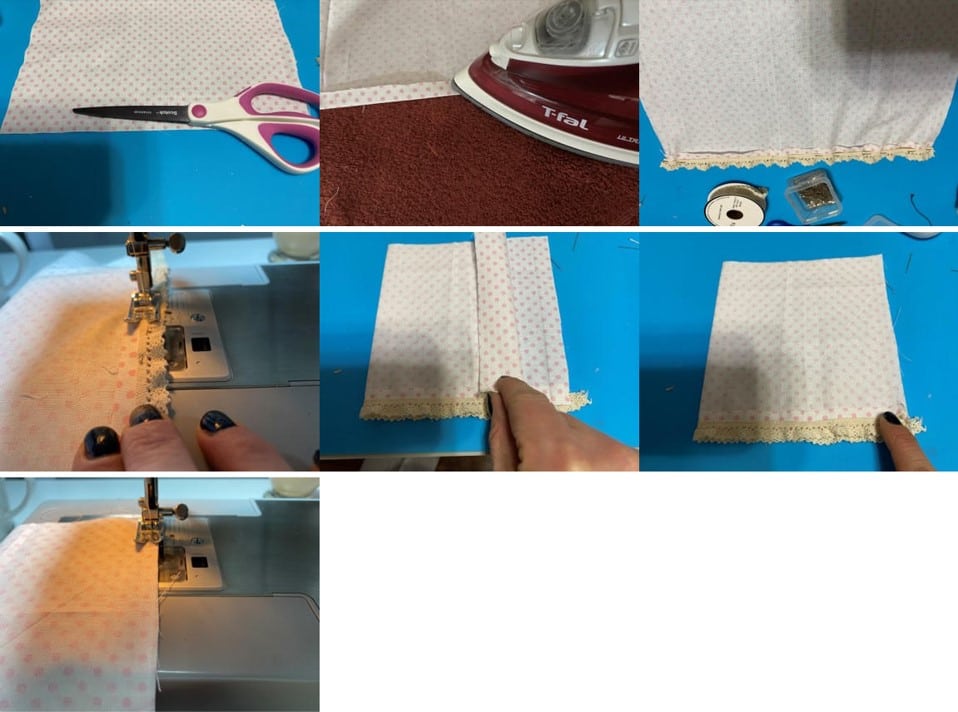
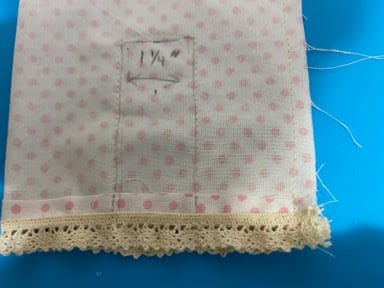
Next using a pencil and ruler mark the center of the fabric going across. Measure 3” up from the bottom and mark in the center of your fabric. Draw a U shape 3” up from bottom about a 1 ¼” wide in the center of the fabric making sure each pant leg will be about the same width. I know this probably sounds confusing if you look at the photo’s below I think you will be able to understand the directions.
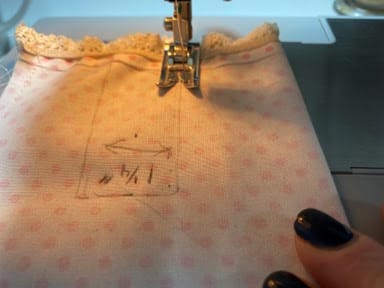
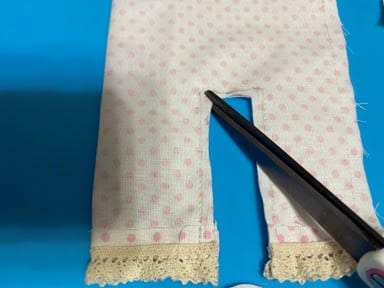
Sew around your U shape. Cut out the U shape then clip the two corners so the fabric will not pucker when you turn them right side out. Turn the pants right side out then tea stain them. I soak the pants in the tea mixture for about 10 or 15 minutes then dry them in a old pillowcase in the dryer.

Using a DMC thread to match the color of your pants start at the front center and begin doing a running stitch about a ¼” down from the top all around the pant ending up at the front center. Place the pants onto the doll then pull the knotted end of your thread until your two end pieces are close to even. Now pulling the threads tight tie a knot I like to do a double knot. This will hold the pants onto the doll now tie a bow and cut off any excess thread.
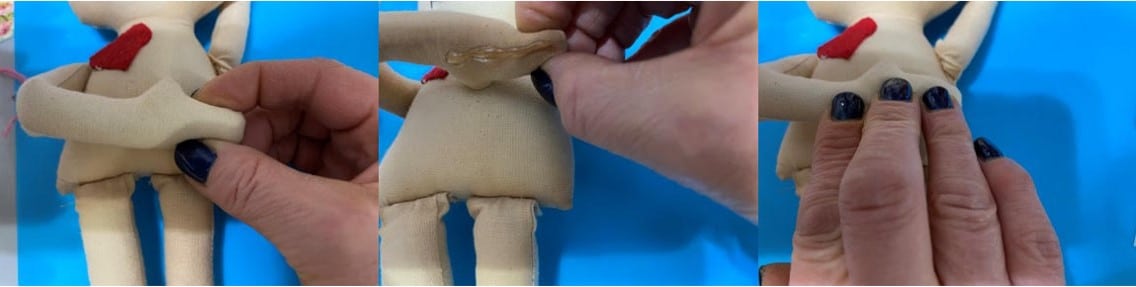
Gluing the Hand
If you would like the Raggedy Doll to hold a candy cane or a heart you will need to glue her hand across the front of her chest. Bend the left arm across the front of her chest placing her hand just above her pants on the right side. Add hot glue to the bottom of her hand and glue into place. She will now be able to hold a candy cane or a heart.
Making The Candy Cane and Heart
To make the candy cane trace the pattern onto a double layer of fabric. Cut out about a ¼” away from the trace line. Sew the candy cane on the trace line leaving the bottom open. Clip around the curves making sure not to cut your sew line. Turn right side out and stuff firmly with fiberfill then sew the bottom closed.
To make the heart trace the pattern onto a double layer of red felt. Cut out about ¼” away from the trace line. Sew the heart on the trace line leaving an opening where indicated on the pattern. Clip around the curves then turn right side out. Stuff the heart with fiberfill and sew closed.
I hope you have enjoyed making this little Holiday Raggedy Ann Doll you can just set her on a shelf or I love adding her into my holiday trees. You can really sew up a few different pairs of pants for all different holidays and add a holiday themed item in her arm.

Thank you so much that is a wonderful pattern and blog. I truly love the way you did the pants.
Absolutely adorable!
Thanks for showing how to make the dolls. Love them x
These dolls are so darn cute!!!! I have never sewn before but I am going too attempt to make this 😳. Hopefully it will look like a doll when done🤪🤣😅🤣
Me too!!! I ❤️ this craft!
I loved this just wish I could print instructions so I could have them as I make this .
So sweet
Love them dollies I would have to hand sew no machine
She is so stinking cute can’t wait till make her. Love this .
Hi Sherry, Love the little raggedy Ann. I had my own folk art/ primitive doll business about 23 years ago and used to supply country shops. Loved making the dolls but when we moved to Florida found that they didn’t want to spend the money for the dolls like in the northeast (NY and PA) so I went and got a job. I retired this past August and have been following you 3 sisters ever since. Thank you for the crafts you teach us. Instead of gluing the arm you could tack her hand or for a primitive look safety pin it so you can slide heart or candy cane in.
Love the idea of the rusty safety pin! Thank you!
They a beautiful, thank you so much for sharing your patterns. You and your sisters a such fantastic people, you all have such generous hearts.
Thank you for putting her on your blog. She is so cute! I love watching you and your sisters
Hi Sherry do you have a printable pattern
Wish that i could have the pattern no way to print and can’t go out
Hi Sherry. I LOVE the Raggedy Ann dolls. The adorable hair in pigtails is what gets me most along with those adorable eyes. You’re truly one of the most gifted ladies ever. Also I read in comments here you and sisters. I know about Barb and I LOVE her also. She’s how I stumbled upon you. Anyway can you give me the other sisters name to find in Facebook because I would love to follow her also. Such amazing women in the world and three sisters at that. What a gift from God when you are blessed with family and friends. Stay safe and keep making our lives brighter. God bless you and your hubby and sisters.
Adorable still need to finish but I got body done need stuff for hair love this lil dolly thank you Sherry such a cutie ❤️❤️❤️❤️❤️❤️❤️❤️❤️❤️❤️❤️❤️❤️❤️❤️❤️❤️❤️❤️