Christmas, Home Decor, Winter
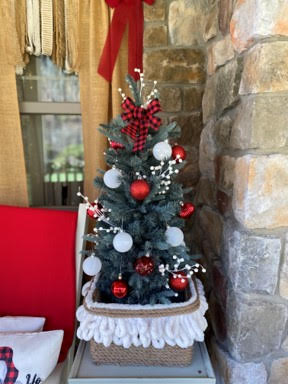
DIY Jute Christmas Tree Box
Jul
Christmas has to be my favorite time of year. I just love decorating for Christmas I do so much decorating that I start right after Halloween and I am totally decorated by Thanksgiving lol. After Thanksgiving I start baking my Christmas cookies and freezing them. Christmas is my favorite because it is one time of year our whole family comes home and we are all together. If you are like me I decorate a bunch of different size tree’s for Christmas that is what makes this DIY Jute Christmas Box so great you can make it any size to fit your tree.
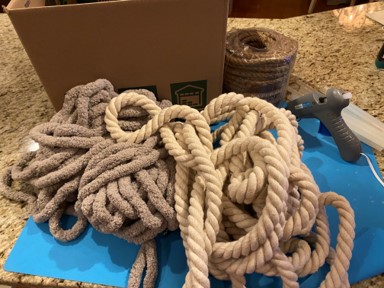
Materials You Will Need
- Cardboard Box Big Enough To Fit Your Tree Stand
- 11mm Jute or Thick Rope (How much you will need depends on the size of the box)
- Fabric to Line The Inside of Box
- 1 or 2 Skeins of Chunky Yarn Depending on How Large The Box
- Box Cutter
- Hot Glue Gun and Glue Sticks
- Packing Tape
- Silicone coated gloves from the Dollar Tree (you can find them in the automotive section, this is going to protect your hands from the hot glue)
Choosing Your Materials
The first thing you are going to do is measure how wide your tree stand or base of your tree is. You are going to want a box slightly wider. If you are making the box for your 7ft. tree or larger you are going to want to put the tree stand with the bottom of your tree in the box to see if you are going to need to trim down the box so the bottom of your tree is not inside the box. If you are making the box for a small tree place the whole tree in the box to see if you need to trim down the box. If you need to cut down your box mark how much you will need to cut down then draw straight lines around the box and use a box cutter to cut the box. I made a few of these boxes for my trees some I used 11mm jute to wrap the box which I got at Hobby Lobby they were the cheapest and one I made using 1” Natural Cotton Rope Trim I found at Hobby Lobby in the home décor fabric section. For the trim around the top of the box you can use anything you would like. You want something that is going to be fuller you don’t want it to lay flat. I found using the Chunky Chenille yarn was the cheapest. After making my first Christmas Tree box I found the silicone covered gloves at the Dollar Tree in the automotive section and believe me they will save your hands from any hot glue burns and they will also save your fingernails.
Preparing And Wrapping The Box
Now that you have figured out what size box you will need and have cut the box down to size if you needed to. To prepare the box start by tapping closed the bottom of the box with packing tape. I taped the sides and the middle of the box to give it a little more strength. If you did not need to cut down your box fold in the flaps on the top of the box. You are now ready to start wrapping your box.
Starting at one of the bottom corners apply a small line of hot glue and glue down the end of your jute continue to add a line of hot glue across the bottom of the box and glue down your jute. When you reach the corner apply hot glue around the corner, wrap your jute around then apply pressure with your hand to make sure the corner is glued down nice and tight. You are going to continue wrapping the other three sides the same way. When you finish all four sides you are going to apply hot glue above the pieces of jute you first started then also add a line of hot glue on top of the existing piece of jute then bring your jute up and start your second row. Continue gluing the second row just like you did the first. When you finish the second row continue onto the third row just like you did to start the second. You are going to continue adding row’s until you reach the top of the box. Once you have covered the whole box cut off any excess jute. To keep the end of the jute from coming undone add a few drops of hot glue in the center and twist holding a few seconds then glue down the end to the box.

Adding The Trim
To get ready to start adding your trim you are going to need to figure out where you are going to start the second row of trim. First decide which side of the box you want to be the back then hold the end of the chunky yarn at one corner of the box on the second row of jute. Next make a loop the size you are going to want. Now you are going to want your second row to start under that loop, I started my second row 3 rows up from the bottom of my loop but that is up to you where you would like your second row to start. Once you know where you want your second row mark that row with a piece of tape.
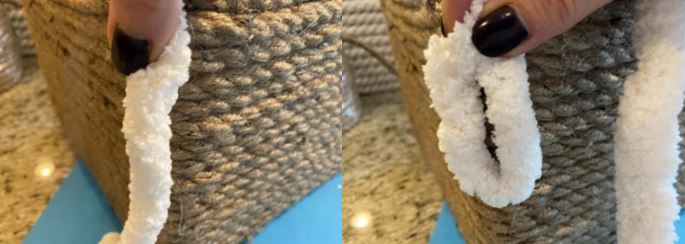
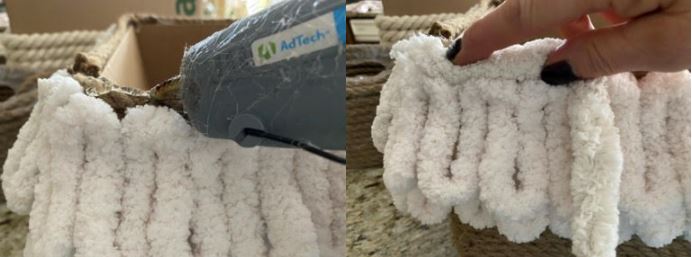
You are going to add your second row of trim before you add the first row. Add a small amount of hot glue at the corner on the line of jute you have marked to start your second row of trim and glue down the end of your chunky yarn. Make a loop and glue down the end of the loop. Continue making loops and gluing down all the way around the box. When you reach the end cut and glue down the end of the yarn.
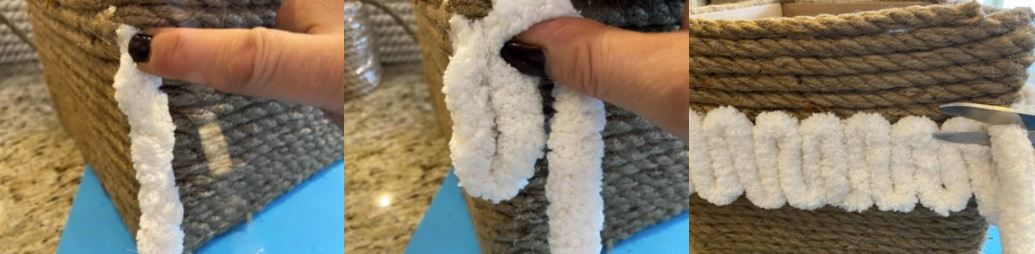
To start the first row of trim you are going to start on the same side you started the second row. Add a small amount of hot glue on the second row of jute from the top at the corner and glue on the end of the chunky yarn. Make a loop and glue down the end of the loop. Continue around the whole box. When you reach the end cut and glue down the end of the yarn.
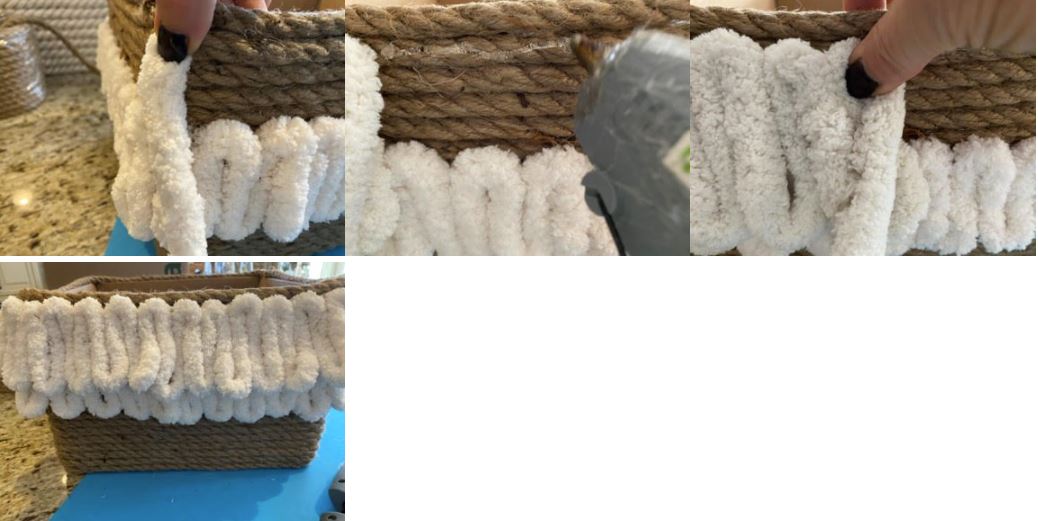
Now you are going to add the trim at the top of the box. Add a small line of hot glue starting on the corner of the top row of jute and glue down the end of the chunky yarn. Continue gluing the yarn on the top row all the way around the box. When you come to the end cut and glue down.
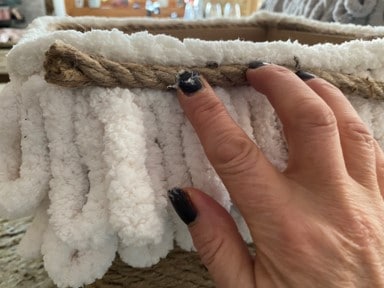
After adding the top row I decided I wanted to add two rows of jute in-between the top piece of chunky yarn and the loops. You don’t have to add this if you don’t want. Add a small line of hot glue on top of the loops and glue on the jute continue adding hot glue and jute all around the box then continue with a second row. When you reach the end of the second row cut and add a few drops of hot glue inside the end of the jute twist and hold for a few seconds now glue down the end.
Adding The Lining
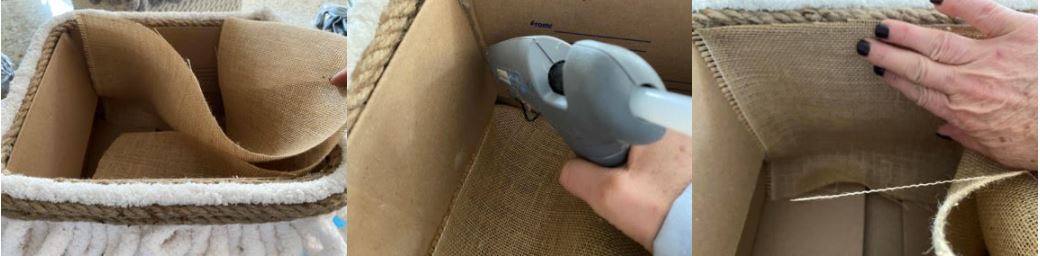
Cut your fabric long enough to go around the inside of the box and wide enough to go down the sides of box. Apply a line of hot glue down one inside corner of the box and glue down one end of your fabric. Add a line of hot glue across the top of the box and glue on your fabric then add a line of glue down the corner and glue down fabric. Continue these steps until you have glued all your fabric to the inside of the box.
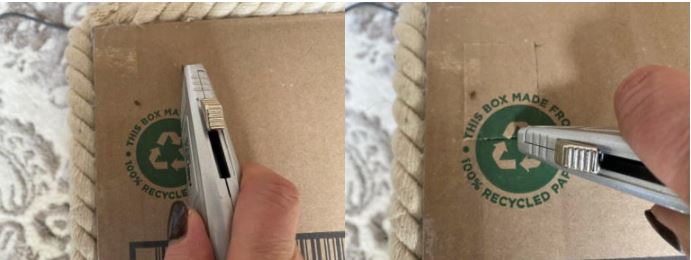
Making The Hole For The Plug
Next you need to make a hole in the bottom of the box for the plug to go through and under the box. You don’t want the plug to hang over the box. Flip your tree box over. On the side that is the back of your box using a utility knife cut out a square big enough for your plug to fit through. I made my hole towards one corner and closer to the end of the box, but you can make the hole where ever would like.
You are now finished with your tree box. I hope you are going to love how your tree looks in it. After making my tree box for my large Christmas I just had to make a few more for my tree’s that I keep up all year long.
So cute
The Christmas tree box is super cute ! I love it !
OMG, I totally adore this box , I did one and need to add the yarn to it for the extra lovely sweet ,fancy, bugie, touch. I love all your crafts so elegant, love the angel balls too will do those as well. Sherie your blog, videos and site are just so much fun and awesome, I am a big fan of The crafty decorator, for sure.