Dollar Tree, Fall, Halloween, Home Decor, Thanksgiving
Dollar Tree Pineapple Turned Pumpkin
Jul
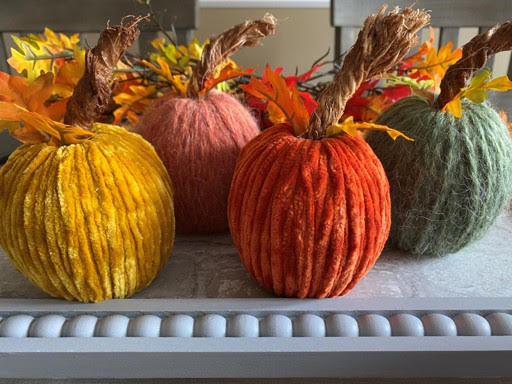
Fall has to be one of my favorite seasons. I just love driving through the mountains and seeing all the beautiful colors on the trees it is breathtaking. Have you seen the 3D tinsel pineapples the Dollar Tree had in the summer? I hope you bought a few so you can transform them into these beautiful pumpkins. I just love the colors and I have to say the velvety yarn ones are my favorite. In the photo I used my homemade pumpkin stems but you can use twigs from the yarn or cinnamon sticks. If you would like to make the homemade stems check out my blog on how to make them.
Materials You Will Need
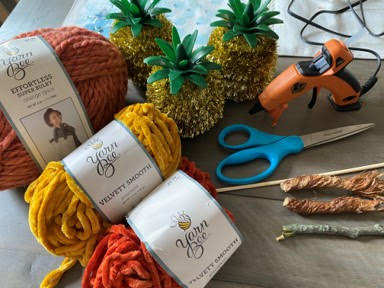
- 3D Tinsel Pineapple (Dollar Tree)
-
Yarn of Your Choice
-
Twigs, cinnamon sticks, or homemade pumpkin stems
-
Artificial Leaves
-
12” Dowel or Skewer
-
]Hot Glue Gun and Glue Sticks
-
Scissors
Preparing and Wrapping The Pineapple
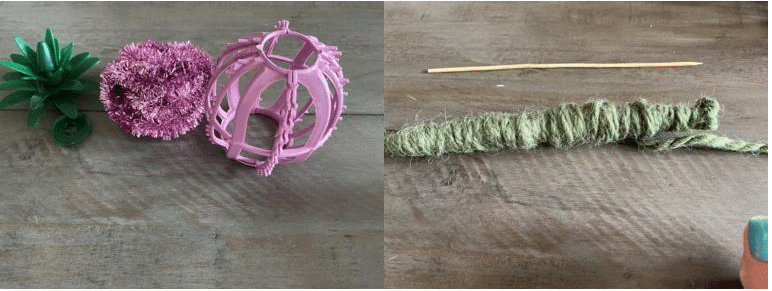
The first thing you will need to do is remove the plastic pineapple top and the tinsel. Next measure out 24 yards of your yarn and wrap it around your dowel, set aside. If you are using a thicker yarn you may want to wrap two dowels with 12 yards on each.
You are going to wrap the pineapple frame horizontal first. Start by applying a small line of hot glue around part the outer rim at the bottom of the frame then attach the end of the yarn from your skein (not the yarn on the dowel) to the frame. Continue to apply hot glue and attaching the yarn until you have covered the bottom outer rim. You can now just wrap the yarn around the pineapple frame. When you get to the middle you may want to add hot glue to horizontal piece going around the middle of the frame. As you are wrapping if you see the yarn does not want to stay in place and sliding up add some hot glue to the part on the frame to hold the yarn in place. You will need to use the hot glue when you get towards the top of the frame to hold the yarn in place. When you have covered the frame cut the yarn leaving about 2” at the end. You are going to tie this to the yarn on your dowel.
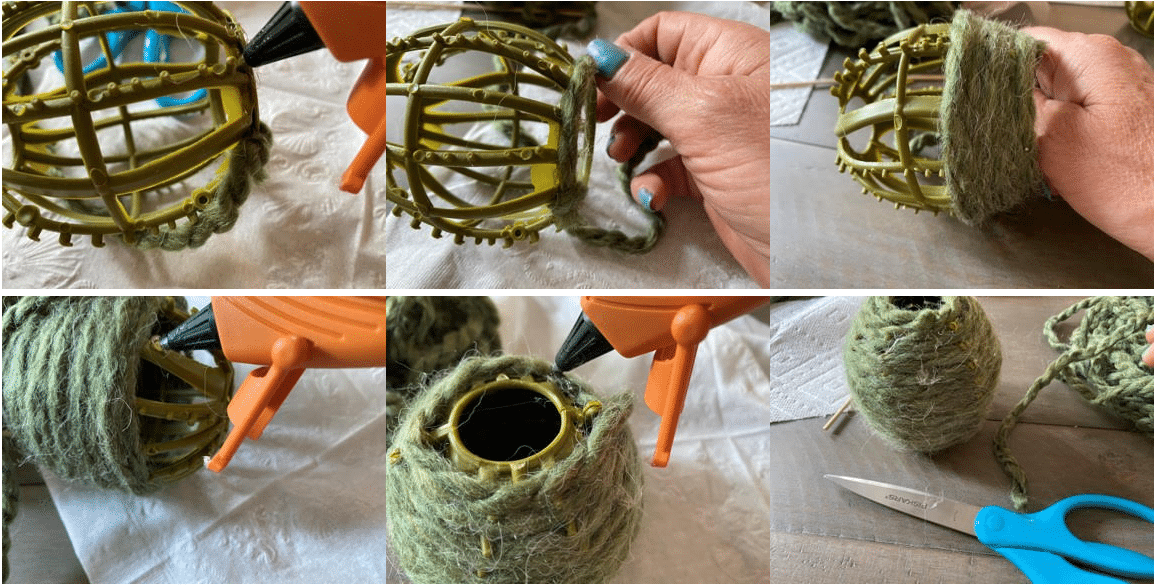
Now that you have your frame covered take the end of the yarn on your frame and the end of the yarn on your dowel and tie a them together, tie a double knot and trim off excess. You are now going to wrap the frame vertically. Insert your dowel with yarn into the top of the frame and bring out through the bottom. Bring the dowel back up and insert through the top and out through the bottom. You are going to keep doing this working your way around the frame. I like to hold the vertical piece of yarn at the top with my finger until I go through the frame again then I hold the next piece in place etc. After you have gone around the pumpkin you should have enough yarn to go around again making sure you have covered any piece of the frame that may still be visible. You may need to a dab of hot glue if the yarn will not stay in place. When you are coming to the end of the yarn you want to make sure you end up at the bottom of the frame. Apply a small line of hot glue to the inside of the frame and glue down the end of your yarn cut off any excess yarn.

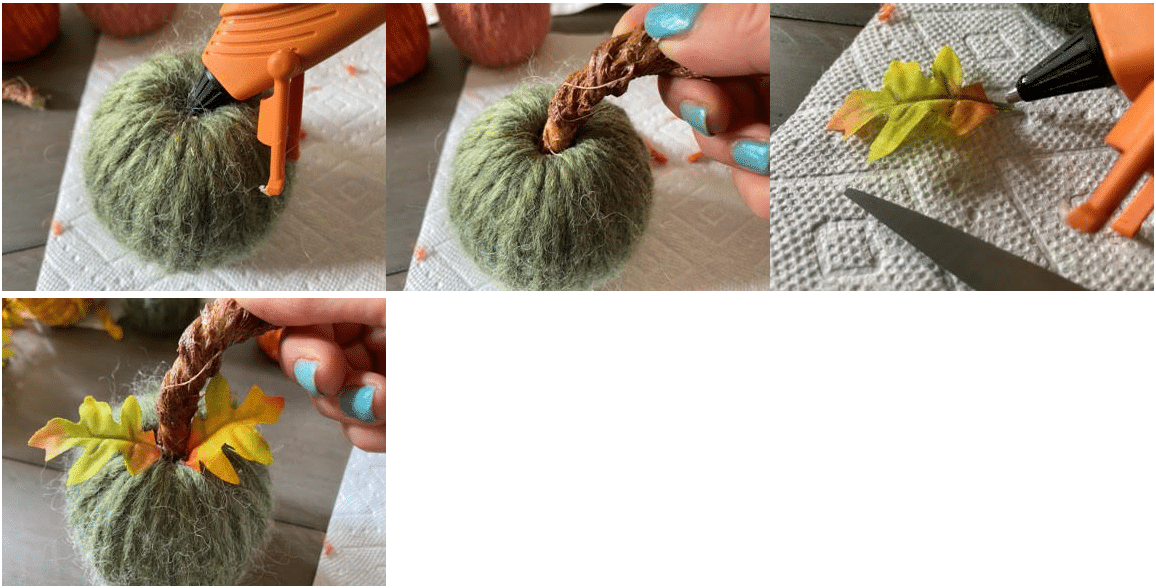
Adding The Stem And Leaves
You can use a twig from the yard, cinnamon stick or if you can make your own pumpkin stem. If you have never made a pumpkin stem before you can check out my DIY pumpkin stem blog. To add the stem add some hot glue around inside of the top hole then stick in your stem. I am visiting my son but if I were home I would have made my own leaves. To add the leaves add a drop of hot glue to the end of the leaf then insert in the hole next to the stem. You may need to push it in with the tip of your scissors
You are now finished with your pumpkin. I hope you are making a few in all the beautiful colors of Fall. If you have a few more pineapples on hand stay tuned I have two more ideas on using them.
Can’t find the pineapple to make them 😢
W(ere can I find directions for stem blog.?
Go to https://www.thecraftydecorator.com you can find the blog for the stem there
Go to https://www.thecraftydecorator.com click on blog
I found the blog finally. But looking at the top page you can not tell that these are the pineapple pumpkins. I have it now and will start making it tomorrow once I decide on what color I want it to be.
I am so glad you will be making them