Home Decor
DIY Spool Side Table

Jul
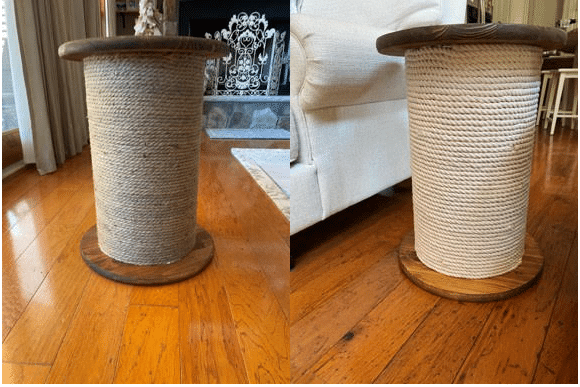
I was searching online at Lowe’s one day for something I needed and I happen to come across a spool side table that I just loved but they wanted $243.00 I knew I could make the table way cheaper. I went on the search for something I could use for the middle and I came across concrete tubes which work just great for the center then I found two 17 ¾” x 1” wood circles at Home Depot all I needed now was the rope and that was just to expensive at Home Depot so on the way home I stopped at Dollar Tree and they had just gotten in the cream nautical rope and the jute rope so I got a bunch of them and home I went to work on my spool tables. This table would also be so cute if you have a nautical theme in your home.
Materials You Will Need
- Two 17 ¾” x 1” Wood Circles (Home Depot or Hobby Lobby)
-
One 12”x22” Concrete Tube
-
22 of the 6.8 Nautical Rope or 25 of the 8 foot Jute rope from The Dollar Tree
- Stain and Sealer of your choice
-
Staining Sponge
-
Rags
-
Spray paint in white if you are doing the nautical rope or spray paint in a brown if you are doing the jute rope
-
Sander and sandpaper
-
Tape Measure
-
Utility Knife
-
Hot Glue Gun and lots of glue sticks
-
Gorilla Heavy Duty Construction Adhesive or liquid nail
-
Piece of white chalk
-
Scissors
-
Pencil
-
Rubber Gloves
Preparing The Concrete Tube
I wanted my spool side table to be 24” high so using a tape measure and pencil my husband went around the whole concrete tube measuring and marking 22” from the bottom on the concrete tube. Next draw a line around the tube at your measurement marks. Here is a little tip if you have a embroidery hoop that will fit around the tube you can line it up at the marks and draw your line around this helps to make sure you are getting a even line. Next using a utility knife you are going to score all around the tube on the line this will help keep your utility knife straight when you are cutting through the tube. Now using your score line as a guide cut your tube to size. I am sorry I could have sworn I took photo’s of my husband doing this for me but I do not have them.
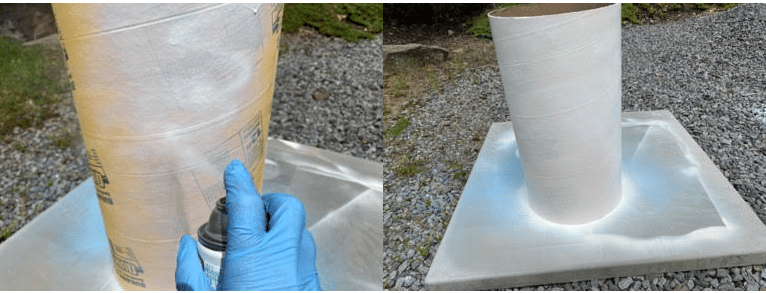
My concrete tube was yellow and I didn’t want to chance the yellow showing through the rope anywhere so I spray painted the one I am using the nautical rope on white and the one I am using the jute rope on I spray painted brown. You do not have to be perfect painting the tube I just painted it enough so you couldn’t really see the yellow. Make sure you spray paint in a well ventilated area. I was lucky it was a beautiful day so I did mine outside and I always wear rubber gloves when I spray paint so I don’t rune my nails lol
Preparing The Wood Circles
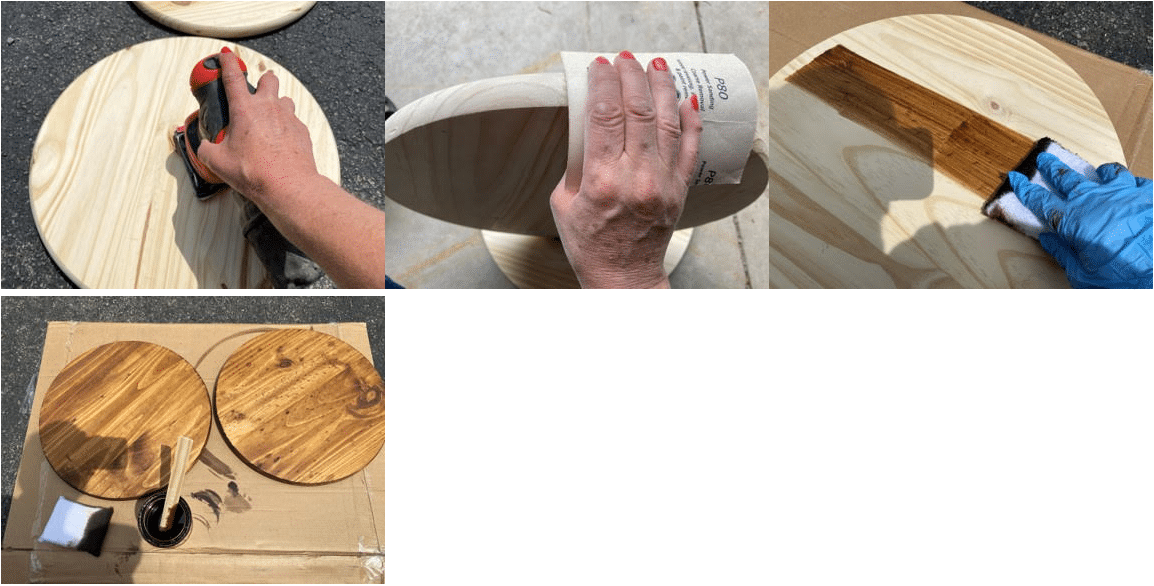
I have to tell you if you don’t want to have to do so much sanding buy your wood circles at Hobby Lobby they are much better wood then Home Depot and do not require as much sanding, they do cost $3 more each when they are on sale then Home Depot but to me it is worth it if I do not have to do so much sanding. Ok the first thing you are going to need to do is give the two wooden circles a good sanding. I used a palm sander for all the heavy sanding then I used a sanding sponge and sandpaper to finish them. Once you are done sanding clean off the sanding dust. Now it is time to stain. I used a stain that also had the sealer mixed in but you can use what you like or what you have lying around the house. Using a staining sponge I applied my stain then wiped off the excess with a rag. I applied two coats to the entire two wood circles letting the stain dry in-between coats.
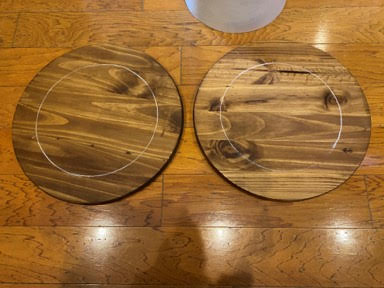
After your stain has dried you will need to mark your circles with white chalk so the concrete tube will be centered. This is the easiest way I found to make sure my tube was centered in the middle of each circle. Decide which circle you would like to be the top of your table now place the side you want to be the top facing down then set your concrete tube in the center of the wooden circle. Using a tape measure work your way around the tube measuring from the tube to the end of the wooden circle adjusting as you go. Next using a piece of white chalk draw a circle around the out side of the tube. This is going to help you place the tube correctly when it comes to attach everything together.
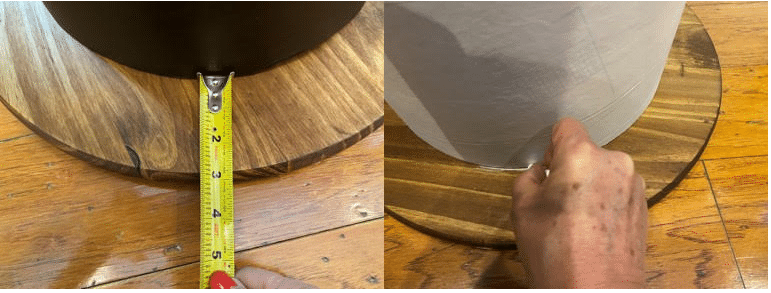
Next lay down your second circle which will be the bottom of your table place the other end of the concrete tube in the center then measure all the way around just like you did for the top of the table. Once you have the tube centered on the wooden circle take your chalk and reach down in the tube and trace your circle on the bottom inside of the tube. This helps me remember which wooden circle I want for the top and which one is the bottom besides helping make sure they are centered.
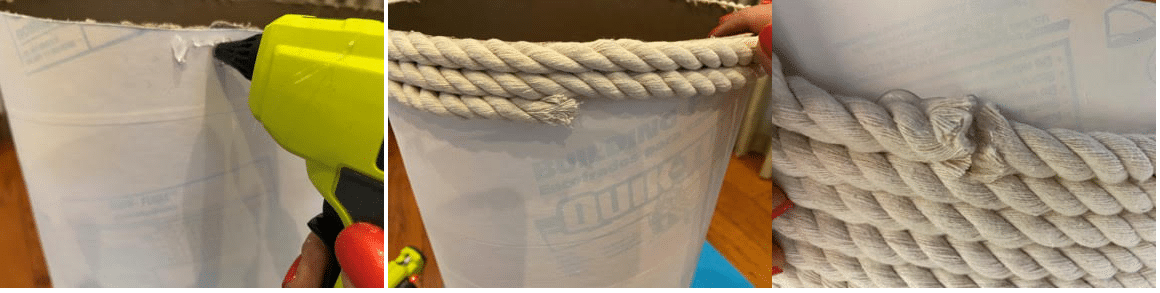
Wrapping The Tube With Rope
I am going to tell you this step is going to take about an hour so grab yourself a cup of coffee sit on the floor and watch some TV as you are wrapping lol. If you are using the 6.8 ft. cream nautical rope you will need 22 strands. If you are using the 8 ft. jute rope you will need 25 strands. I am going to share something I learned along the way, when I took the tape off the ends of my rope they wanted to unwind so I figured out the easiest thing to do is before removing the tape I added a small amount of hot glue in-between the strands then I twisted the end this held the rope together when I removed the tape. I suggest adding the hot glue to all the ends of your rope first then removing the tape from them all before you begin to glue the rope to the tube. Now that you have your rope ready it is time to start attaching the rope to the tube. Add a small line of hot glue to one side of the tube at the edge then attach the end of your rope continue adding a line of hot glue then the rope making sure you are pushing the second row of rope close to the first layer of rope and so on. When you reach the end of the rope glue down. Next add a little hot glue to end of the rope and also a small line of hot glue then bump the end of your new piece of rope to the end of the attached rope and glue down. Continue this process until you have wrapped the whole concrete tube with rope. When you come to the end cut off the excess rope add a small dab of hot glue in-between the rope strands and twist together this will hold your end closed. Now glue down the end of your rope
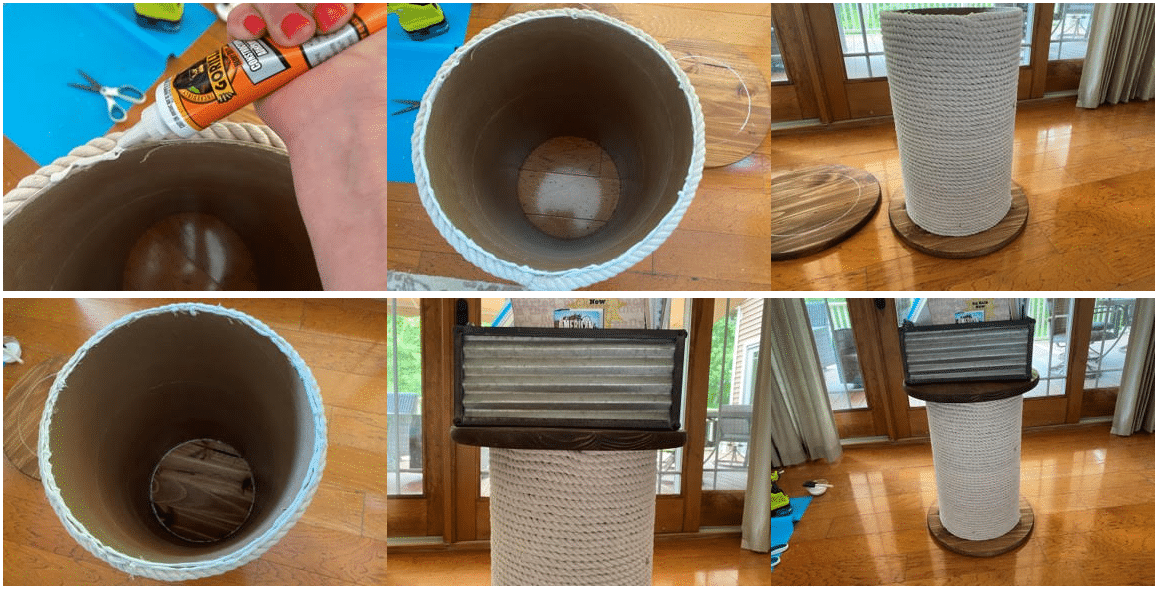
Attaching The Wood Circles To The Tube
The first thing you want to do is place your wood circle that is going to be the bottom on a flat service, this is the wood circle that you drew the chalk circle on the inside of the tube. Next take your tube and place on the chalk circle making sure that the tube lines up with the circle to make sure it is the correct end of the tube. I told you my tube was not perfectly round so my ends were different. Once you have the correct end placed lift your tube and set down with the correct end facing up. Next take your heavy duty gorilla construction adhesive or liquid nail and add a line of adhesive all around the top of your tube then flip the tube over and place on your chalk circle again and glue down. Now add your adhesive to the other end of your tube place your second wood circle on top of the tube making sure you are on your chalk circle. Place something heavy on top of the table to weigh it down and allow the adhesive to dry overnight. You can really remove the weight and move the table after about 30 minutes that is how good the gorilla construction adhesive is.
I hope you enjoy making a spool table. It is really not that hard to make it just takes a long time to attach the rope around the concrete tube. You can also make the tube shorter and make a spool stool. I have sat on my two tables to see if it would be strong enough and the concrete tube hold me lol.
Awesome idea.
Thanks for all your crafty ideas.
Thank you for being here with me.