Christmas, Home Decor, Winter
DIY Pompom Tree
May
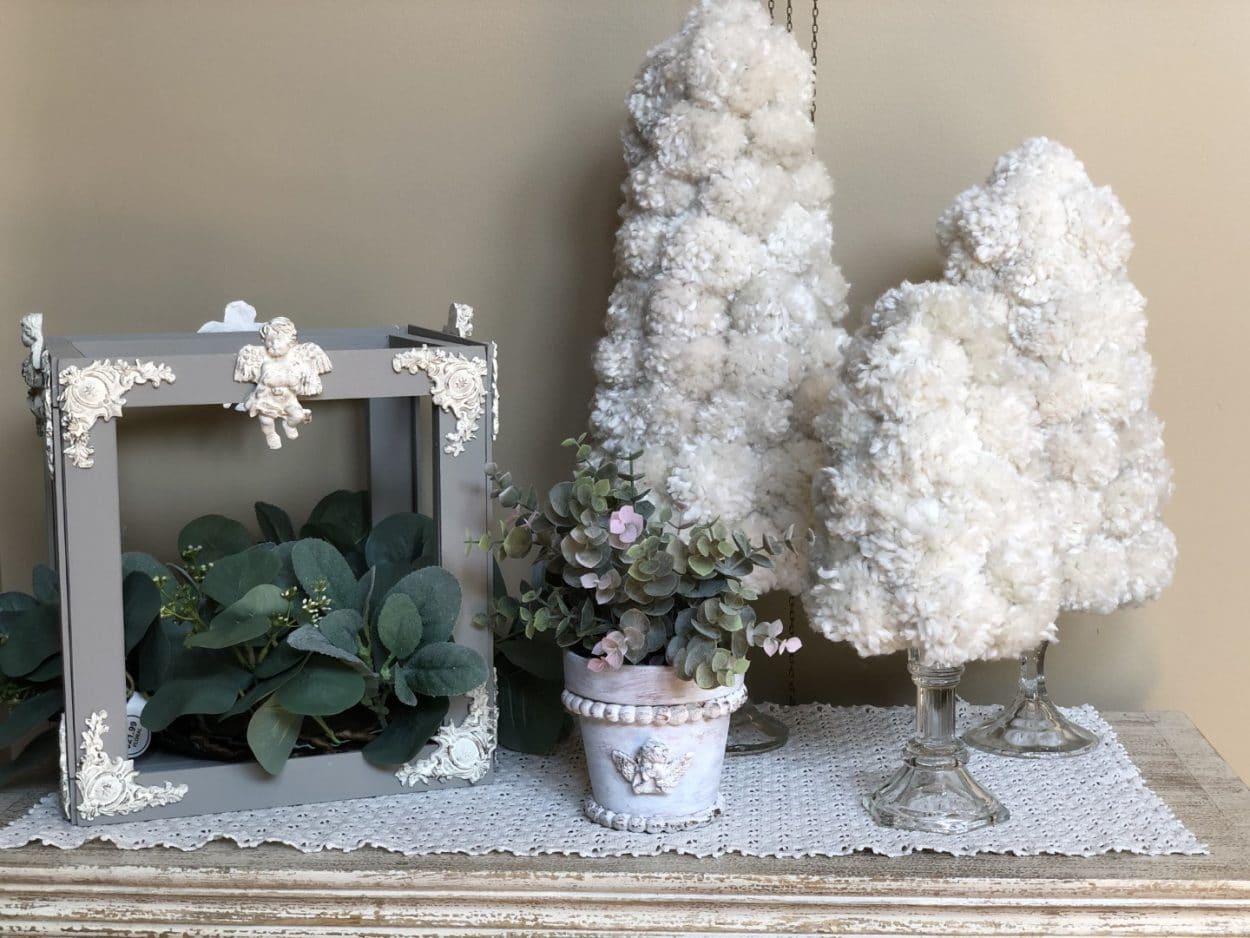
Hello everyone here at The Crafty Decorator I try to inspire you to be creative in decorating your home by making the items to decorate with such as these pompom trees, you can do them in any color to match your décor or make them for the holidays,red would be beautiful for Valentines Day and a green for Christmas the possibilities are endless.If you like the lantern or the flower pot in the photo there is also a blog post for them.
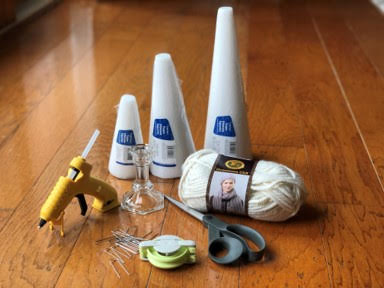
Here is a list of what you will need:
- Lion Brand Super Chunky Yarn in Houston Cream
- Clover 2 ½” Pompom Maker
- U Shaped Floral Pins
- Hot Glue Gun And Glue Sticks
- Candle Stick
- Craft Stick For Mixing
- 2.9” x 5.8” Floral Craft Cone (for the Small tree)
- 3.9” x 8.8” Floral Craft Cone (for the Medium tree)
- 3.9” x 11.8” Floral Craft Cone (for the Large tree)
- Scissors
Making The Pompoms
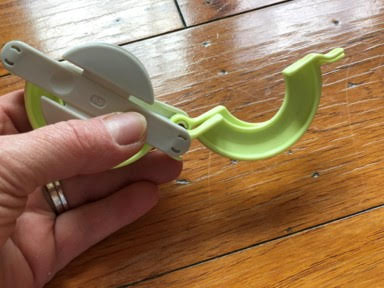
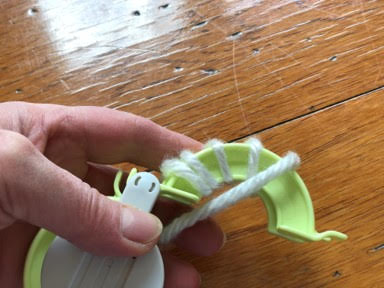
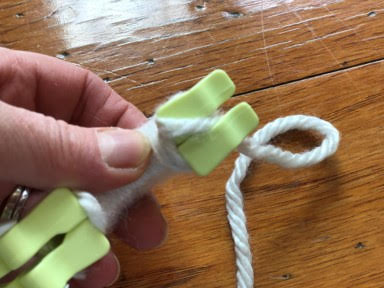
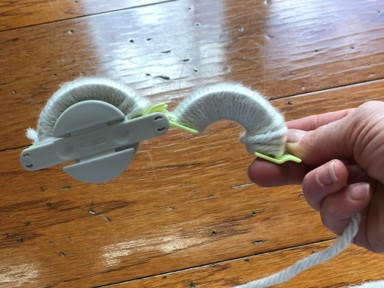
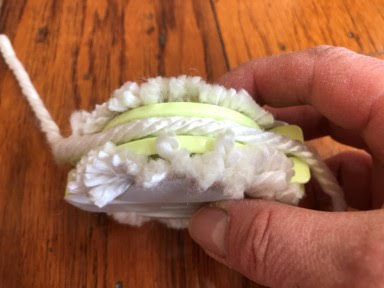
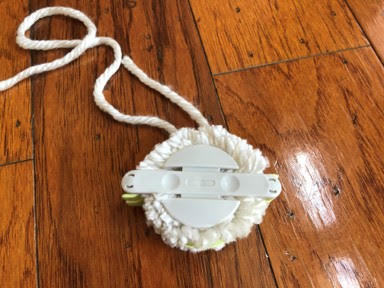
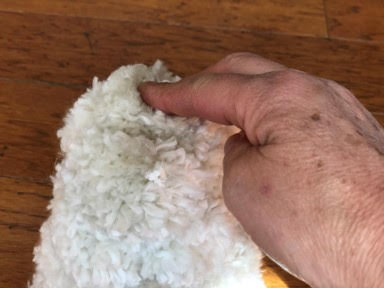
To make the pompom start by lifting the two arms on one side of the pompom maker next take the end of your yarn and place it on one side of the arms closet to the pompom maker, hold the yarn in place and start wrapping the yarn around the arms covering the end you were holding now using your finger push your wraps of yarn down towards the inside end, see the photo’s below.
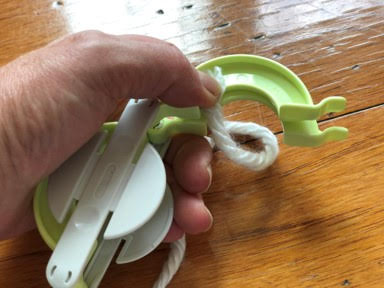
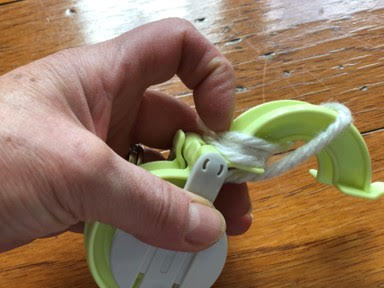
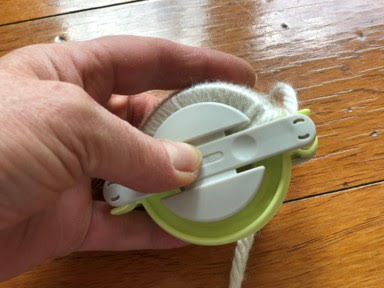
Continue wrapping the yarn and pulling the wraps towards the inner end until the arm is full of yarn, once you reach the end you are going to bring the yarn to the front of the arms where you see the two ends that look like little feet bring the through those feet and close the arms back into the pompom maker, see photo’s below.
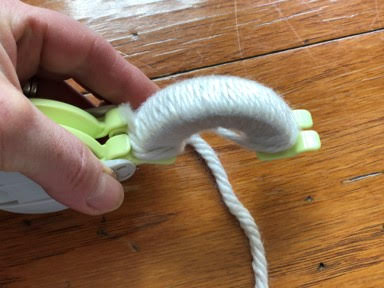
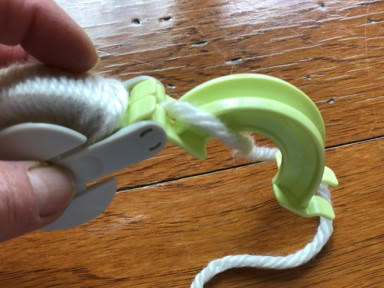
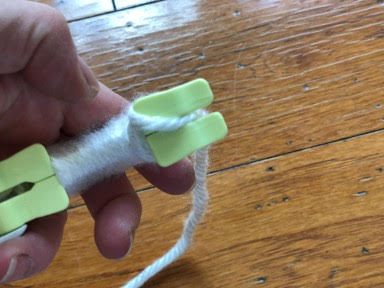
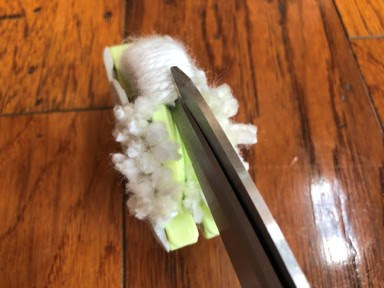
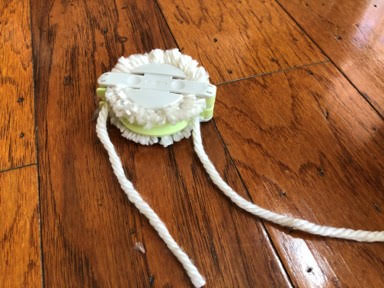
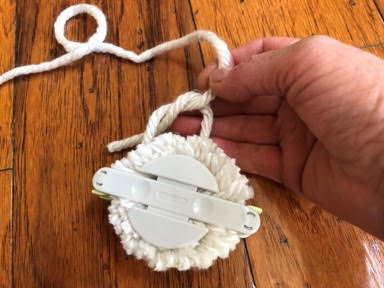
Next open the other two arms and begin wrapping the yarn just as you did on the other side pushing the wraps down as you go once you reach the bottom of the arms bring the yarn around to the front of the arms and bring it up through the feet then close the arms into the pompom maker cut the end of the yarn leaving about a half inch, see photo’s below.
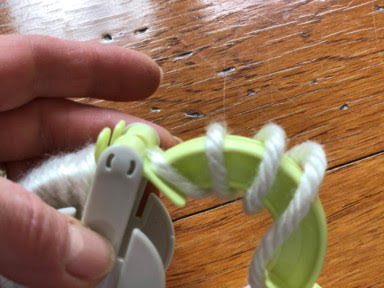

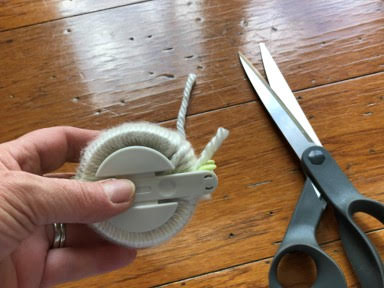
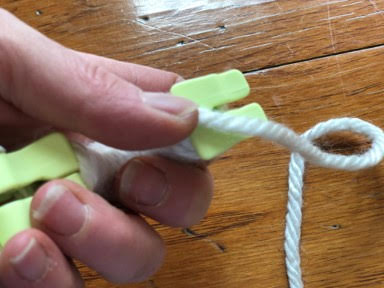
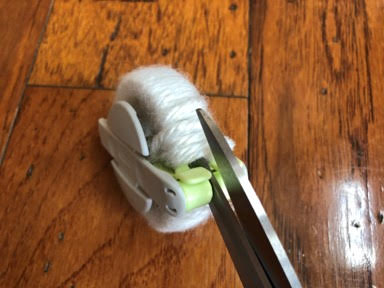
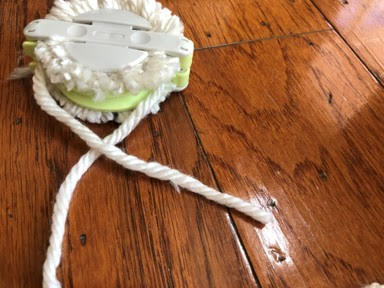
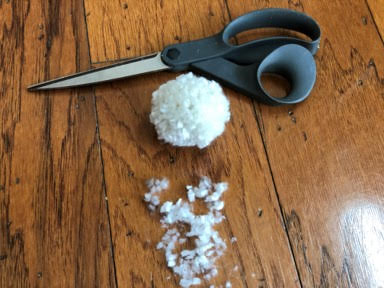
Now take your scissors and insert between the two feet and begin cutting the yarn down the center until you reach the end of the feet then flip the pompom maker over and repeat this step to the yarn on the arms, see photo’s below.
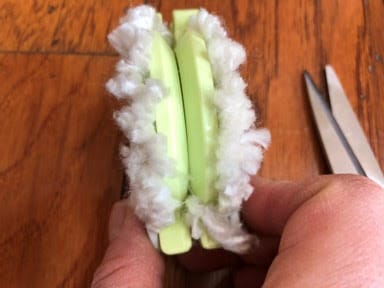
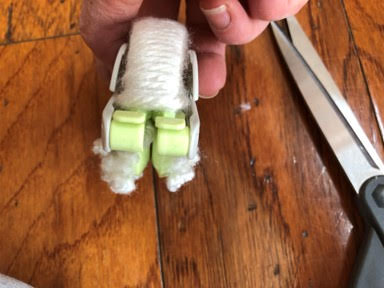
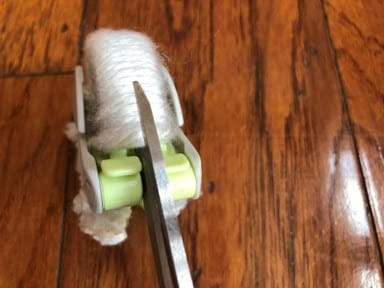
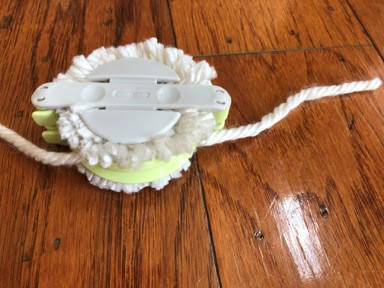
Once you have both sides cut take your yarn again and place in the center of one of the cut sides and bring both ends around to the other side and crisscross the two ends then slightly pull tight then bring the yarn back around to the other side tie a knot and pull tight knot again and pull tight next cut the ends of the yarn, see photo’s below.

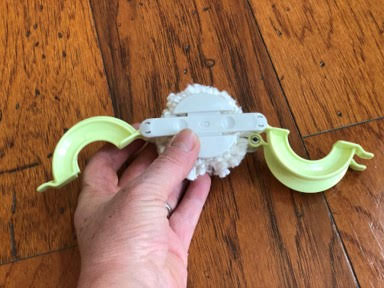
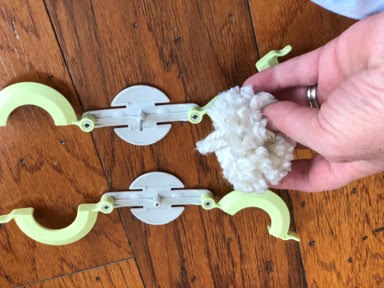
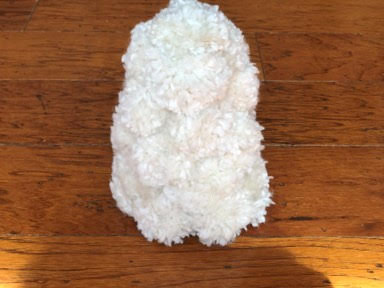
Now that you are all tied off open both sets of arms and separate the pompom maker by pulling on the two center pieces, remove the pompom and fluff and trim around the pompom to make the pieces of yarn look even.
I was able to get 22 pompom’s from one skein of yarn, you will need to make the following according to the size tree you are making.
Small tree – 25 pompom’s
Medium Tree- 45 pompom’s
Large Tree – 64 pompom’s
Attaching The Pompoms
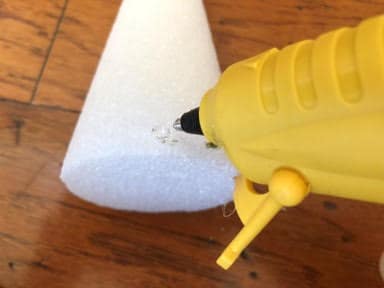
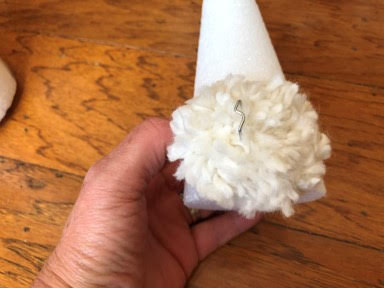
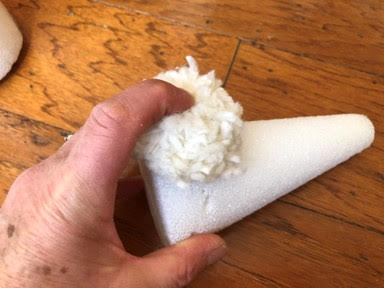
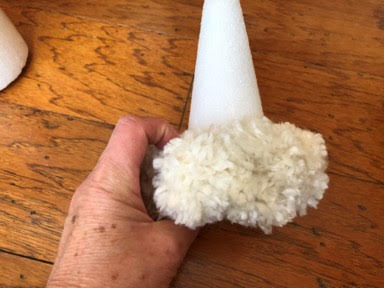
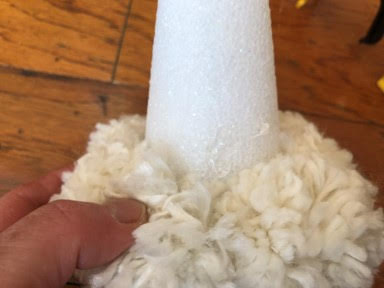
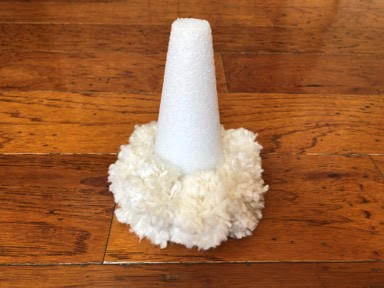
To attach the pompom’s start by adding a small amount of hot glue at the base of the cone and attach a pompom then take one of the u-shaped floral pins and insert into the pompom pushing the pin into the cone, you don’t have to use the floral pins if you rather not I use them because I like the look of the pompom pulled tighter to the cone, continue working your way around the bottom of the cone adding glue, pompom and floral pin I used 7 pompom’s for the first row. To start the second row add glue above the first row between two pompom’s then add the pompom and floral pin continue around the cone using 6 pompom’s. For row 3 you will use 4 pompom’s, row 4 you will use 4, row 5 you will us 3 and you will end with adding glue to the top of the cone then add the pompom and floral pin.
For the Medium Tree the pompom’s used for each row are as follow’s
Row 1 – 9
Row 2 – 9
Row 3 – 7
Row 4 – 6
Row 5 – 5
Row 6 – 4
Row 7 – 4
Top 1
For the Large Tree the pompom’s used for each row are as follow’s
Row 1- 11
Row 2 – 9
Row 3 – 9
Row 4 – 8
Row 5 – 7
Row 6 – 6
Row 7 – 5
Row 8 – 4
Row 9 – 4
Top 1
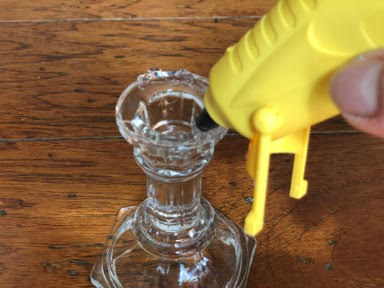
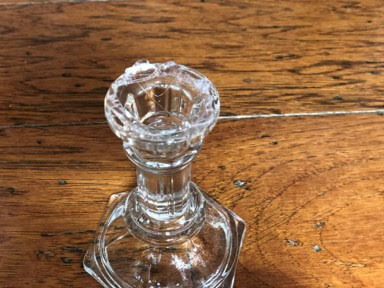
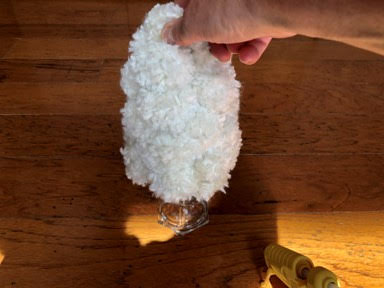
Attaching The Candlestick
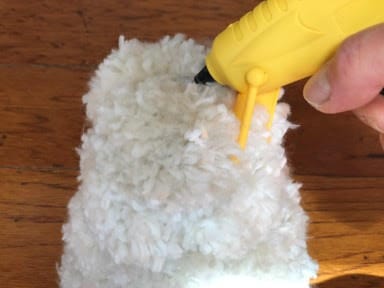
To attach the candlestick add hot glue to the top of the candlestick and attach to the bottom center of the cone.
Love the trees. Looks easy enough and looks classy.
Beautiful, love these. You are so clever. I love that your crafts are more sophisticated primitive if there is such a thing.
Can’t wait to see what you make next.
These pom pom trees are beautiful!!!!
I immediately bought the yarn and pom pom maker. These are super easy and relaxing to make. Love all your projects!
Saw these on barbs video. She said you gave them to her! Made my first one cannot wait to make the second one. Thank you sherru
These are so nice. Thanks for sharing your beautiful work.