Fall, Home Decor, How to Craft Idea's
DIY Pumpkin Stem
Aug
If you love decorating for fall and make your own pumpkins you are going to just love this easy to make pumpkin stem.You can make this pumpkin stem to fit any size pumpkin you are creating and you can attach it to any material, I have used it on metal and glass pumpkins I have made.
Here is a list of what you will need:
- ¼” Sisal Rope
- Mod Podge
- Cinnamon
- Paintbrush
- Hot Glue Gun and Glue Sticks
- Scissors
- Ruler
Deciding On The Size Stem
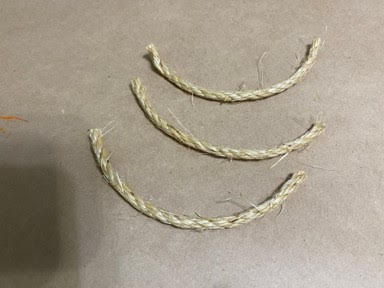
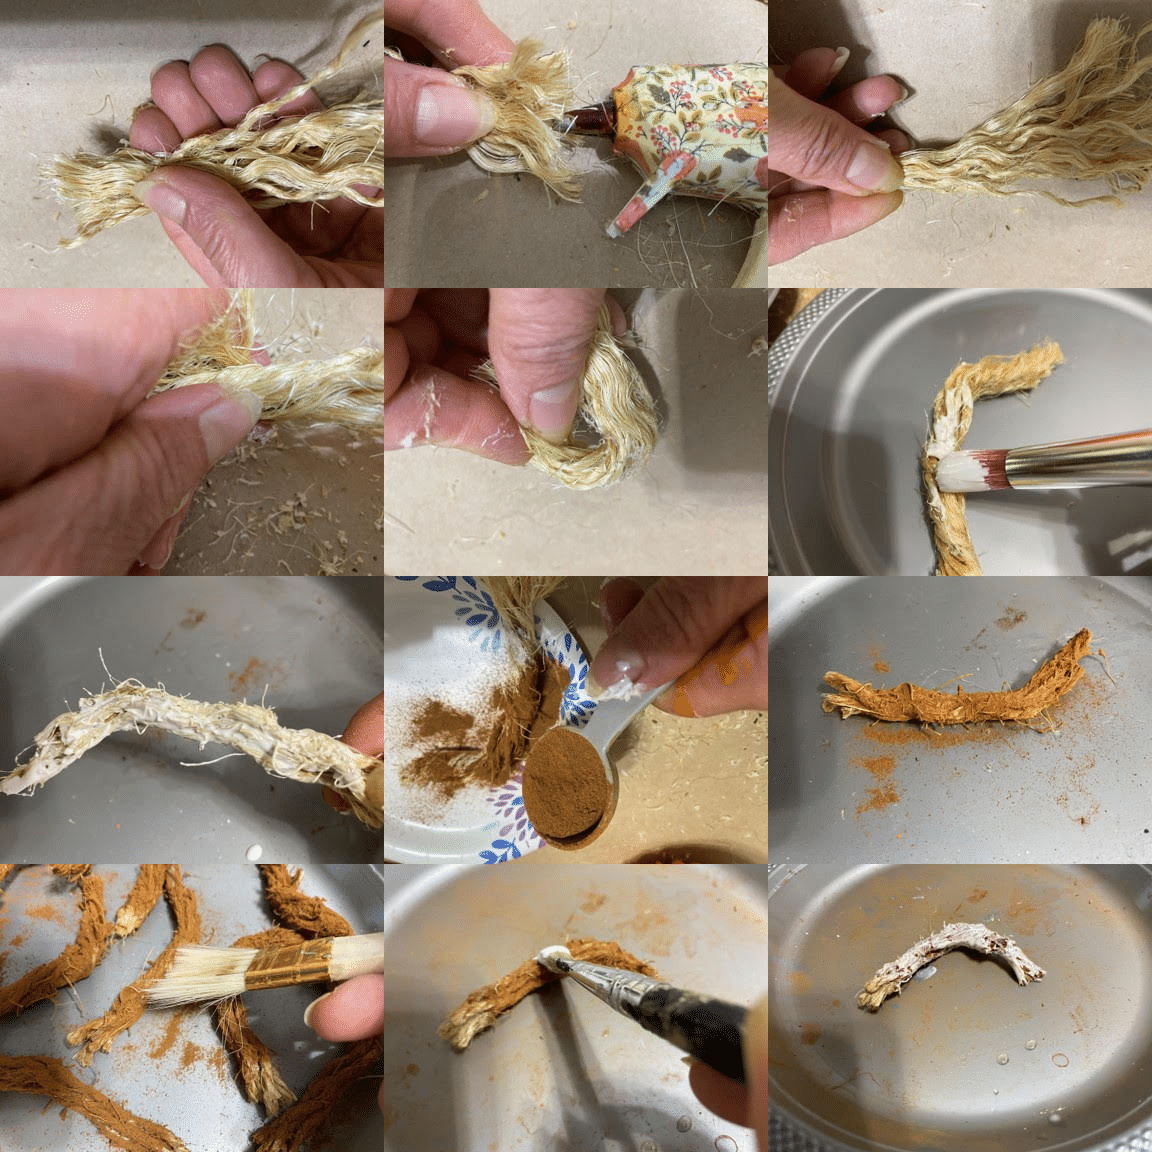
Before you start to cut you pieces of sisal need to decide how long and how wide you will need your stem. Hold the end of the sisal rope to where you will attach the stem them decide how long you want your stem to be and cut your sisal piece, next measure how long your piece is and cut two more pieces if you need a really thick stem you will need to cut more pieces of your sisal. You can decide after you follow the instructions in the next step.
Preparing The Sisal Rope
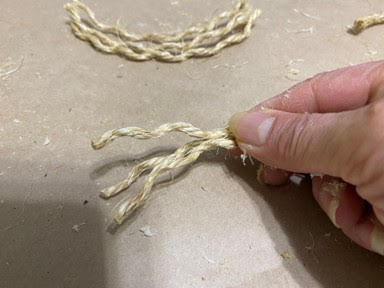
Start by cutting your three pieces of sisal to the length you need next separate each piece of sisal into three pieces so now you should have nine pieces then separate each one of the nine pieces into three more pieces you will end up with eighteen pieces of sisal from the three pieces you started with. Here is where you can decide if you are going to need your stem thicker, twist your eighteen pieces together then hold it onto the pumpkin you are making and see if it is going to be wide enough if not cut another piece of sisal and separate just as you did the others continue this step until you have the thickness you need.

Making The Stem
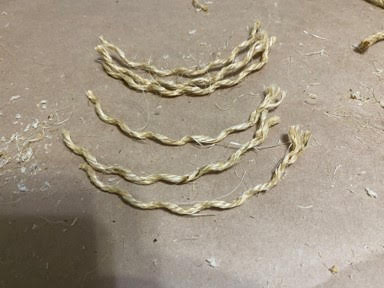
Once you have all you sisal pieces separated hold them all together at the top and using your hot glue gun add a small amount of hot glue in-between the sisal pieces and twist them together tightly and hold for a few seconds, work your way down the stem adding small amounts of glue and twisting, if you would like a bend in your stem this is when you will want to make the bend as you are gluing. If you are attaching your stem to the top of a pumpkin leave about 1” untwisted at the bottom, if you are going to insert the stem into a pumpkin glue and twist the sisal all the way down. If your stem twist are loose anywhere you may need to go back and a little more glue in spots. Now that you have your sisal twisted and glued into place you are going to cover the whole stem with mod podge, next cover your stem with cinnamon, you can bend your stem you again at this point to help it keep its shape, let the stem dry. Once your stem is dry use a clean paintbrush and lightly brush off the excess cinnamon then add another coat of the mod podge onto your stem and let dry.
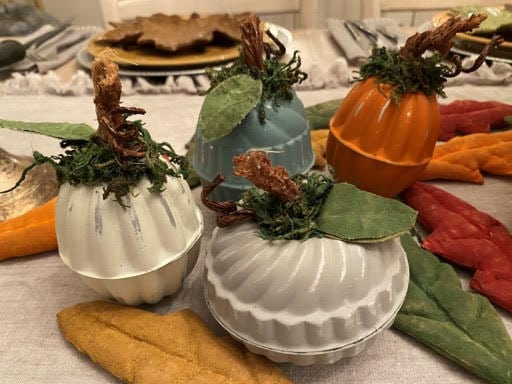
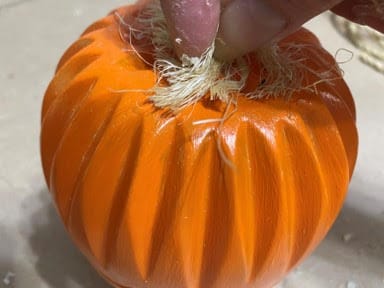
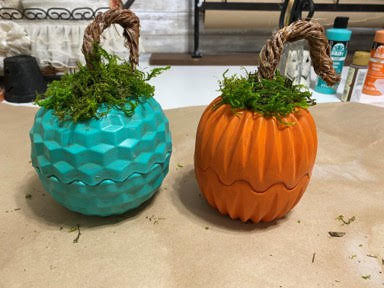
Your stem is now ready for you to attach to your pumpkin. To attach the stem just add some hot glue to the bottom and attach to the top of your pumpkin, if you are inserting the stem add the hot glue around the stem after you have inserted the stem. Here are a few of the pumpkins I have used this stem on.

My favorite stem by far!!! Very natural looking! Need to give v these a try! Thanks for the inspiration
hi Sherry! thank you for sharing this idea! where do you purchase the rope that you use on your stems..is there a certain size for the stems?
I like them alot
Love the stems, you are an amazing teacher, thanks for all your crafts. Love all 3 of you.🇨🇦
Cute things that make me want to craft again~
Thank you for sharing. I am going to try this.
love this and so simple
I love the look of the stems, can’t wait to try it!
Do you glue all the pieces together as you twist?
Hi just watched your video on FB on these stems love them. But, maybe a stupid question but, do you use real cinnamon and if so where do you purchase that big a quantity for a reasonable price?
Hi Deborah,
I do you real cinnamon. I bought those bags of cinnamon years ago off ebay. Look on Ebay or Etcy and see if anyone sells them.
Dollar tree sells cinnamon too.
Yes I have seen that
Yes I have seen it there thank you
Love this idea to make the stem look real!