Fall, Home Decor, Outdoors, Thanksgiving
DIY Scarecrow Ornie/Pick
Aug
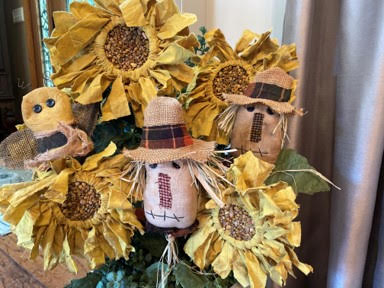
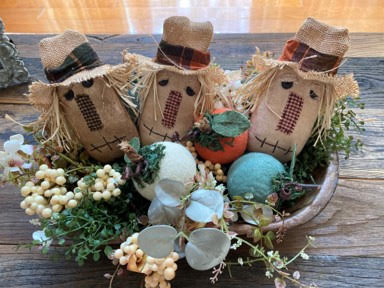
I just love Fall, the cooler weather, all the leaves are changing colors it is just a beautiful time of year, if you have been following The Crafty Decorator you know I try to create items to decorate my home with. I keep tree’s up all year round and change them for the seasons and I wanted some new fall décor so I decided to make some scarecrows to go with the other fall items we have been creating here at The Crafty Decorator and I just love how they came out I think the eyelids just make him, you can use him as an ornie for your dough bowl, add a jute hanger on him and use him as an ornament or by adding a small dowel to the bottom of him you can use him as a fall pick in your floral arrangements
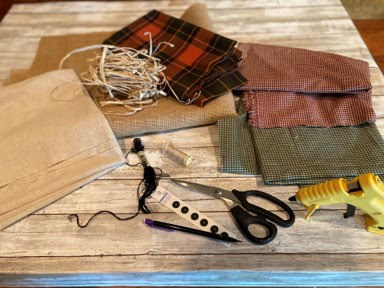
Here is a list of what you will need:
- Scarecrow Pattern
- Osnaburg Fabric
- Homespun Fabric
- Burlap
- ½” Black Buttons
- Raffia
- Polyester Fiberfill
- Black Embroidery Thread and Needle
- Cream thread and Needle
- Coffee Stain Mixture (Optional)
- 12” Dowel for Pick
- Hot Glue Gun and Glue Sticks
- Scissors
- Pencil
- Black Marker
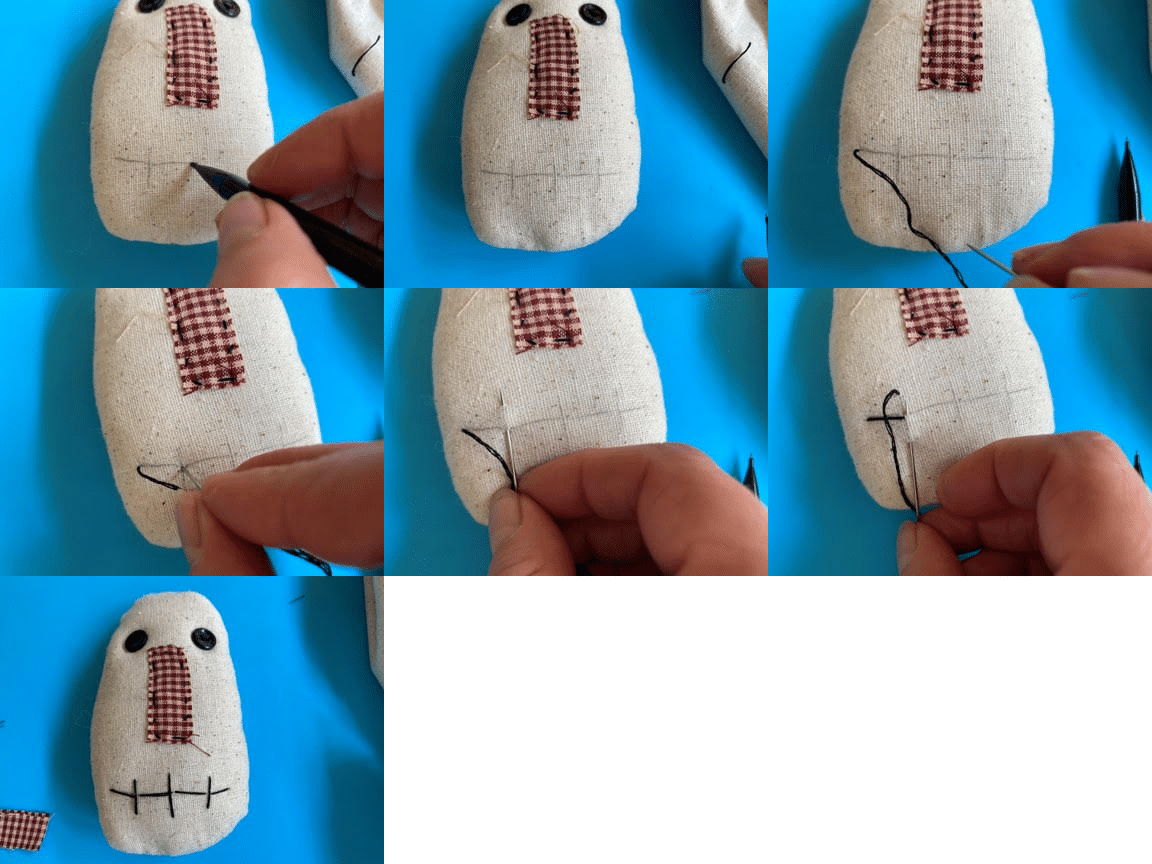
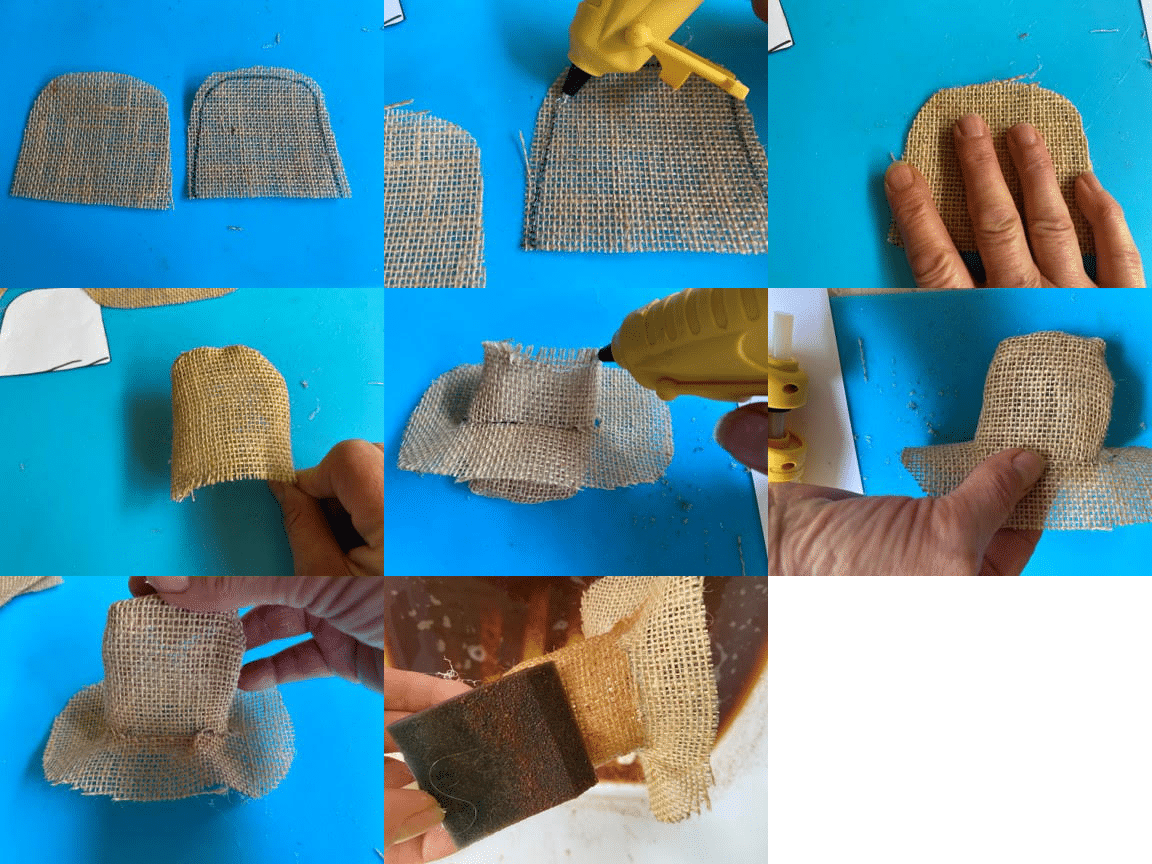
Print Out Scarecrow Pattern
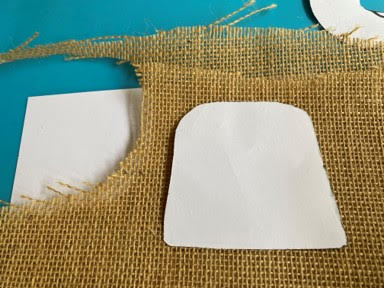
The first thing you will need to do is print and cut out the scarecrow pattern. Once you have your pattern pieces trace the scarecrow head on a double layer of Osnaburg fabric, you can also use muslin if you prefer. If you are machine sewing your scarecrow the trace line is going to be your sew line, start at the top right of the head, (not in the middle you are going to leave this open for turning and stuffing) and sew around the scarecrow head until you reach the top left of the head, stop and leave about 1 ½” opening at the top of the head. If you are making the scarecrow pick you will need to start sewing and leave the opening at the bottom of the head. Next about ¼” away from your sew line trim off excess fabric around the scarecrow head, turn Right Side Out and stuff the head with the polyester fiberfill. If you are making the scarecrow ornie using cream thread and a needle sew the opening closed, if you are making the scarecrow pick do not sew the opening closed we will be doing this later.
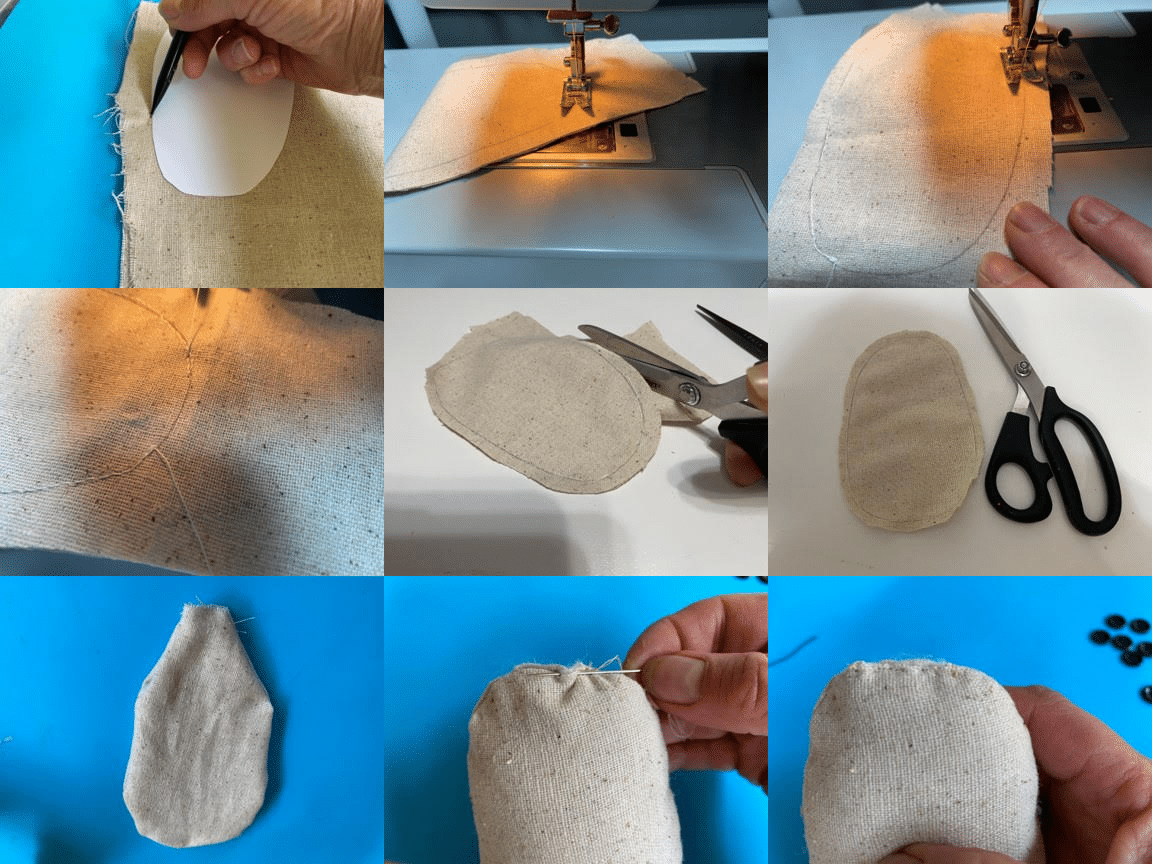
If you are going to glue the scarecrow head start by tracing the scarecrow head on a double layer of Osnaburg Fabric, you can also use muslin if you prefer, next about ¼” from your trace line cut off any excess fabric. Once you have the scarecrow head cut out separate your two pieces of fabric, your trace line is going to be your glue line, then using your hot glue gun start at the top left and right of the head add a small line of hot glue onto each side make sure you leave about 1 ¼” opening at the top of the head for turning and stuffing then place your second head piece of fabric and glue down, continue gluing the two pieces together until the head is all glued except for the opening at the top. Next turn Right Side Out and stuff with the polyester fiberfill. If you would like to make the scarecrow into a pick you will need to leave the opening at the bottom of the head instead of the top. Once you have the head stuffed and you are making the ornie add a small amount of hot glue to the opening and glue closed, if you are making the pick leave open you will glue closed later.

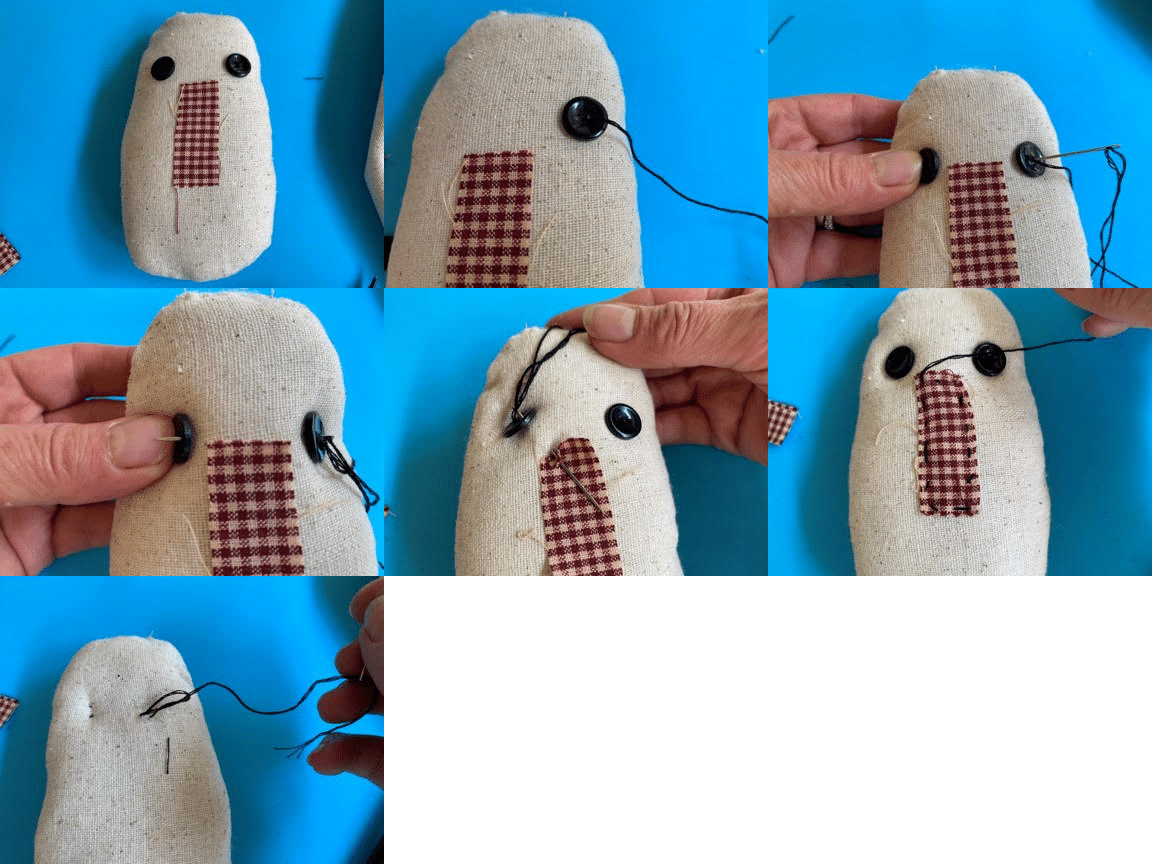
Adding The Face
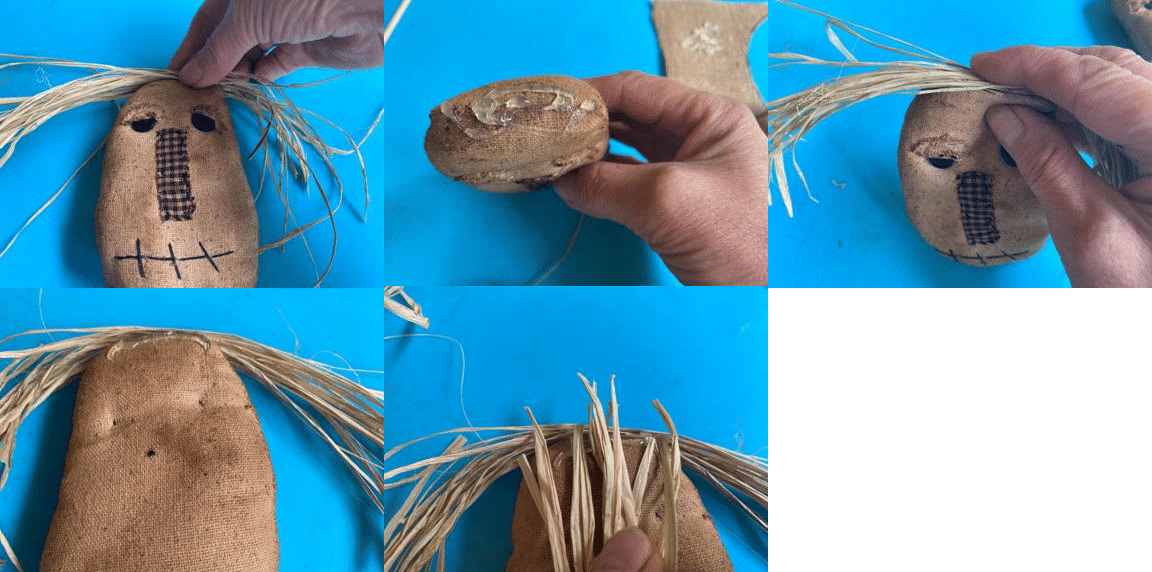
To add the face take two ½” black buttons and place about 4 inches up from the bottom of the head next cut out the nose from the homespun fabric and lay onto the face to make sure your eyes are in the correct spot. Once your eyes and nose are set correctly separate the black embroidery thread into two sets of three strands, then start sewing one of the eyes on, when you are going through the button for the last time feed your needle through the fabric over and through the next button eye, see photo’s, when you are finishing the second eye feed the needle over to the nose, see photo’s, then attach the nose by stitching the homespun all the way around when you are finished bring the need to the back of the head and knot off.
After you have sewn on the eyes and nose using a pencil draw on your mouth, refer to the pattern head, I start by drawing a straight line across then I add vertical lines I like to make some of them at a slant to make his mouth look a little crooked. Once you have your mouth drawn using your black embroidery thread start on the left side bring you needle through the back of the head to the front left horizontal line, start by making your first stitch up to where your first vertical line is, bring your needle under and up to the top of the vertical line then stitch down the vertical line bringing the needle under and up to the horizontal line, see photo’s, continue stitching your mouth this way when you are finished bring your need to the back of the head and knot off.
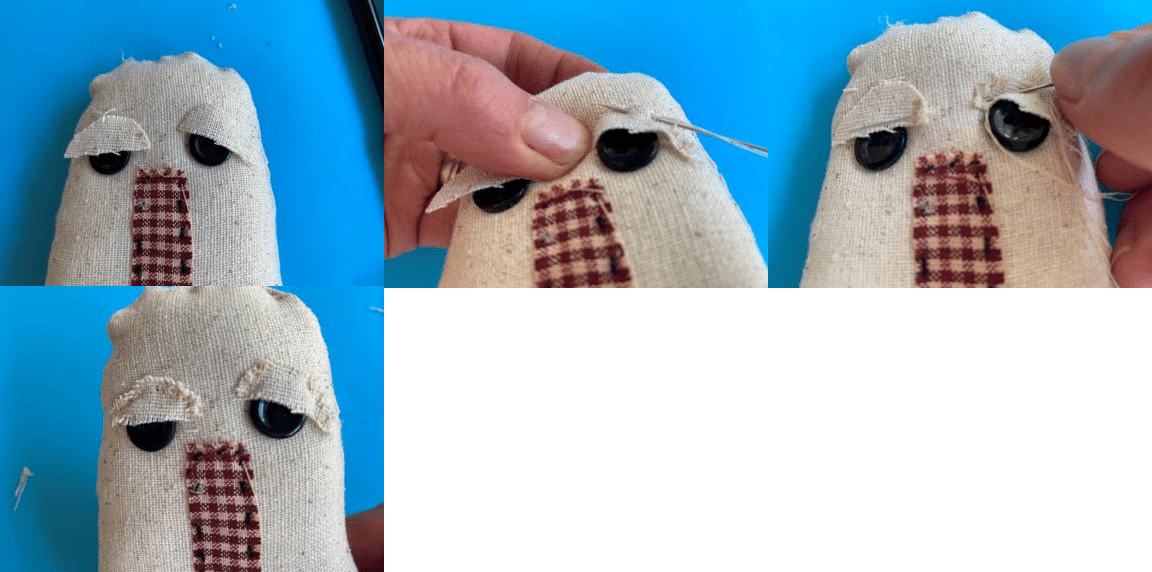
Now that you have the mouth on trace and cut out your eye lid on a double layer of osnaburg fabric, cut your eye lid out on the trace line. Separate the two eyelids you will notice one side goes narrow this is the side that will go towards the outside of the head, place one eyelid at a slant over the eye covering part of the eye, placing it at a slant gives him a droopy eye, see photo’s, using your cream thread sew on the eyelid just in from the end, you are only sewing across the top of the eyelid. Next place the second eyelid over the other eye this time place it straight across covering part of the eye sew on the eye lid.
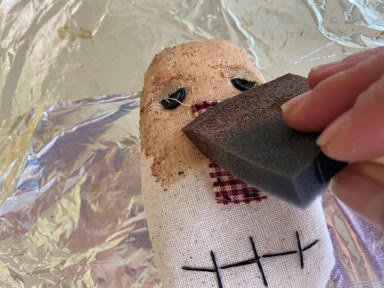
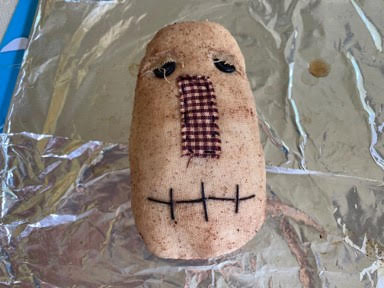
Coffee Stain
You can either leave your scarecrow this color or you can coffee stain him, I prefer coffee staining him but that is up to you. If you would like to coffee stain him and you do not have your own coffee stain mixture you can refer to my blog on how I coffee stain and paint fabric. To coffee stain the scarecrow use a sponge brush dip it into the coffee mixture and apply to the scarecrow continue covering the scarecrow until you have coffee stained all of him. If you have machined sewed your scarecrow head you can either put him out in the sun to dry or you can dry him in a 200 degree oven on a foil lined cookie sheet, make sure your turn him about every 10 minutes until he is dried. If you have glued your scarecrow head you can coffee stain him the same way but you will need to let him dry out in the sun, the glue will melt in the oven.
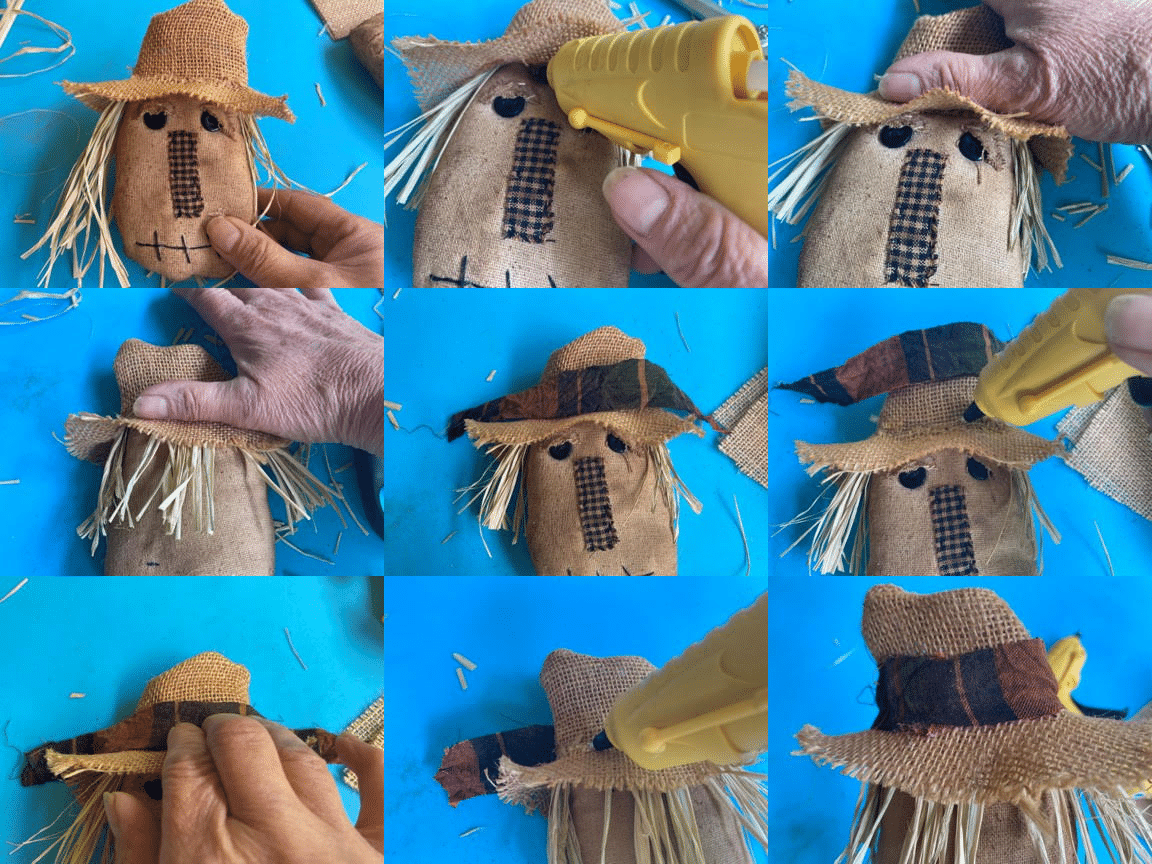
Making the Scarecrow Hat
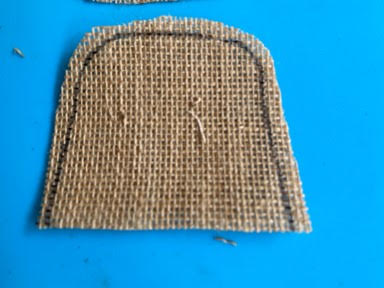
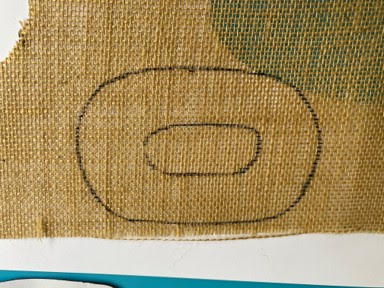
To make the scarecrow hat using a black marker, make sure you put a piece of scrap paper under the burlap so the marker doesn’t get on your surface, trace and cut out the hat on a double layer of burlap, cut the hat out about a ¼” away from the trace line then cut the bottom of the hat on the trace line. Now trace the hat rim on one layer of burlap then cut out on the trace line making sure to cut off all the black trace line, then using your scissors snip the center of the inner circle then cut out the inner circle.
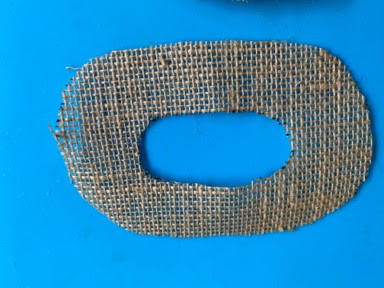
Now you are going to glue the hat together, start by separating the two hat pieces, the trace line is going to be your glue line, next add a line of hot glue on the trace line all around the hat then place your second hat piece on top and glue them together, turn the hat Right Side Out. Slide the rim of the hat over the top hat piece, add a small line of hot glue to the end of the hat piece and glue the inner hat rim piece to the rim of the hat, see photo’s for reference, continue gluing around until the rim is connected to the hat. Next coffee stain and set out in the sun to dry.
Adding The Hair and Hat
To add the raffia for the hair take strands of raffia and hold onto the scarecrow’s head keep adding strands until you feel he has enough, next add hot glue to the top of the head and glue the raffia to the head. I added raffia to the back of his head also if you would like to add to the back just take strands of raffia until you think it is enough add hot glue to the back of his head and glue the raffia to the back of his head. You may want to trim the raffia to the desired length.
Next place the hat onto the scarecrow head, add a line of hot glue under the front of the hat and glue to the head repeat this step to the back of the hat. Next cut a piece of fabric of your choice 7 ½” inches long by 1 ¼” wide, place across the front of the hat so it is centered even, then add a line of hot glue under the fabric and glue to the hat continue gluing both side of the fabric around to the back of the hat. Next add glue and glue the top of the fabric to the hat.
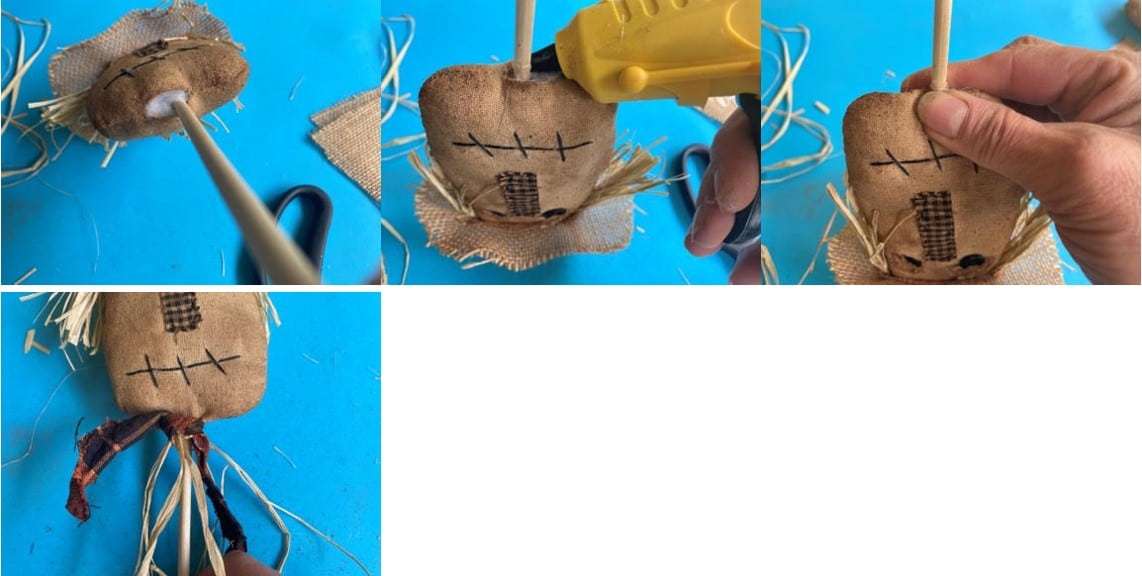
Making The Scarecrow As A Pick
If you are making the scarecrow into a pick you are now going to insert the 12” dowel into the opening at the bottom of the scarecrow head, next add more stuffing around the dowel. You can either sew the opening closed around the dowel or add hot glue and glue the opening closed. Lastly tie some raffia and fabric around the dowel at the base of the head.
I hoped you have enjoyed making these adorable scarecrows, I just love how they turned out. You can use them in a bowl with some fall greenery and pumpkins or use them as a pick in your fall floral arrangement.

Thank you Sherry , For always posting the pattern. I’m a kind of person can’t draw stick people & have to have a pattern.
Can’t find pattern to print
Found it, I’m stupid
Love all your crafts!!
I see the how to do project but no pattern to print
Love all your crafts.
You do a great job with the instructions! Can’t wait to try this cute scarecrow! Thank you.
Adorable
Did you make the sunflowers in one of the pictures posted? If so do you have a pattren fo rthem?
I found them, Here’s the link. https://www.thecraftydecorator.com/diy-sunflower-stem/?fbclid=IwAR2CH4IfgIsOPemFX1wjEld-bIH64YxL3gFAPESWmx3eD7xKvLhgxi3b4N0
Love this but one question how tall is the body
I just completed 16 of these adorable scarecrow faces…..I don’t know why I made so many…hee hee hee….I learned many things making them…..one being I didn’t save time completing the face BEFORE stuffing, because to achieve the depth the face I had to add tacking stitches to the mouth and buttons. I love how cute they are and how adorable they will be on my Fall tree.
I am so glad you made them and believe me you will end up using all of them I wish I had time to make more.
Thank you for the pattern and instructions. I appreciate all you do.
You are so sweet thank you so much. You will love the scarecrow ornies.