Easter, Home Decor, Spring, Thrifty Makeovers
DIY Vintage Bobbin Farmhouse Carrots
Mar
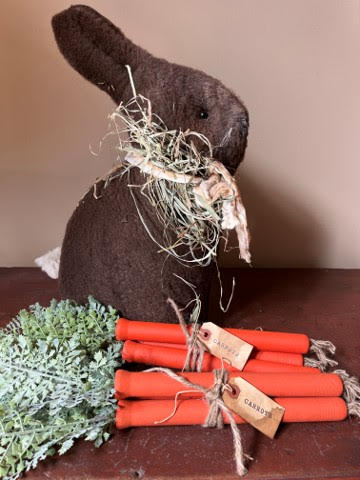
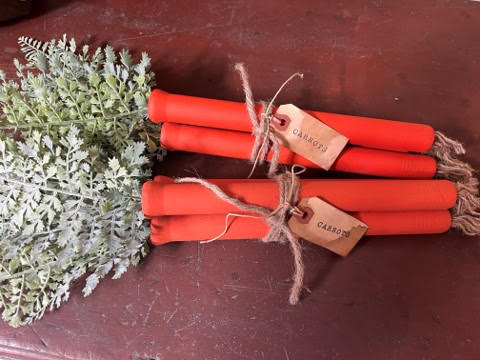
I have been trying to decide what I was going to do with all the vintage bobbin’s I have then one day while I was looking on the internet at vintage bobbin’s I came across these farmhouse carrots someone made using the wooden bobbins so I knew I had to try them. I am just loving how then turned out. These wooden bobbin carrots would be a wonderful addition to your Easter/Summer décor.
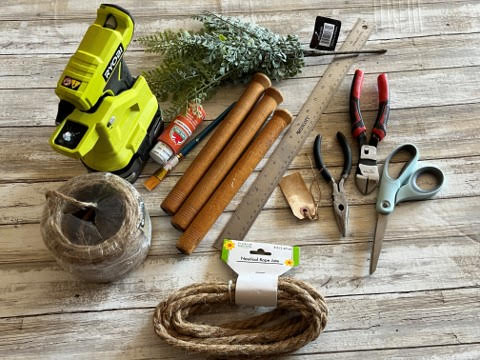
Materials you will need:
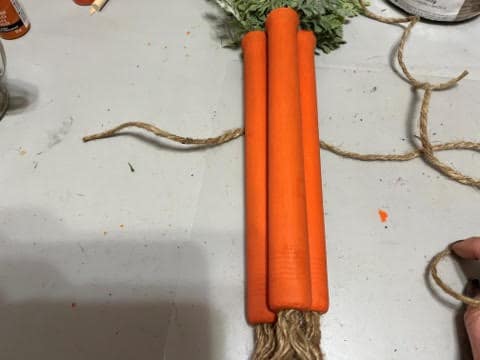
3 Wooden thread bobbin’s (mine are 10” long)
Greens for the tops of your carrots
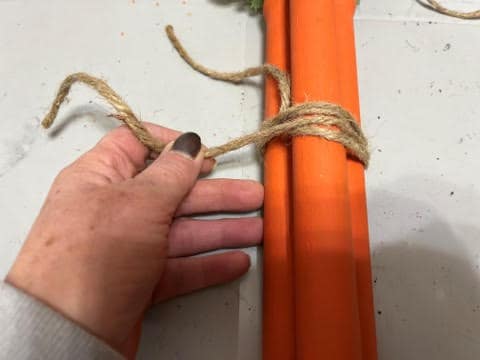
40” piece of 4ply jute twine
Three 6” pieces of 3ply jute rope
Orange paint of your choice
Paintbrush
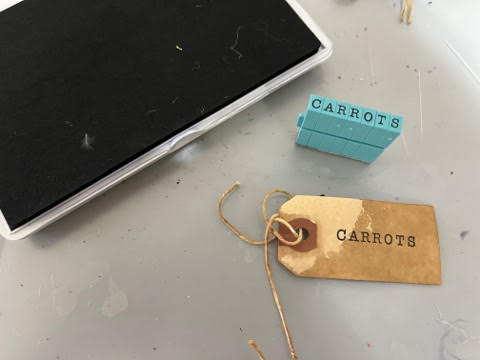
One 2 ¾” x 1 3/8” hangtag (optional)
Wire Cutters
Needle nose pliers
Scissors
Ruler
Hot glue gun and glue sticks
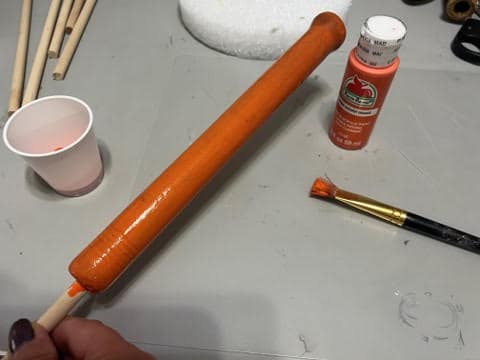
Painting The Wooden Bobbin’s
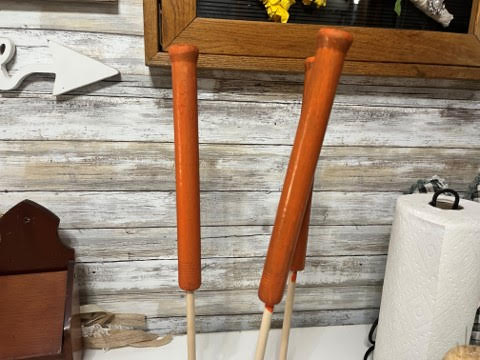
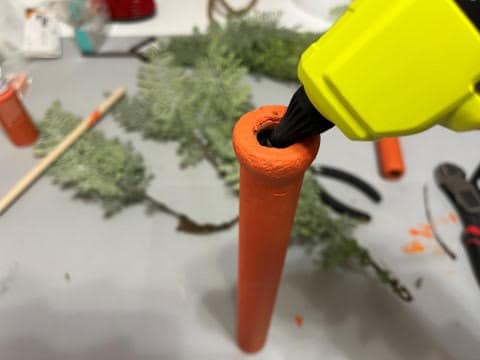
The first thing you are going to do is paint your bobbin’s with your choice of orange paint, you can use a craft paint and paintbrush or you can spray paint them. I used a Harvest orange craft paint because it was freezing here and I can not paint outside. I painted the bobbin’s with 4 coats of harvest orange craft paint but you can decide how many coats you want depending on how you want the color. I found using a 3/8 in diameter piece of dowel inserted into the bottom of the bobbin makes it easy to paint then you can stand them in a container or stick them into a piece of foam.

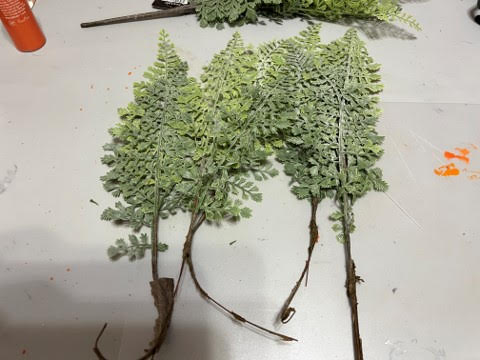
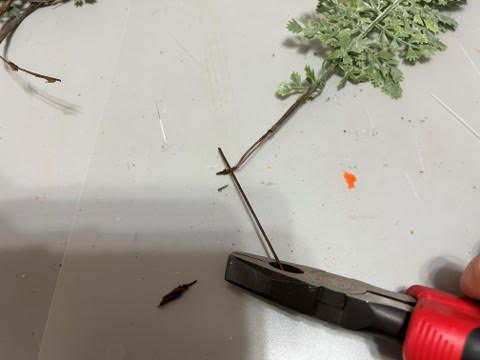
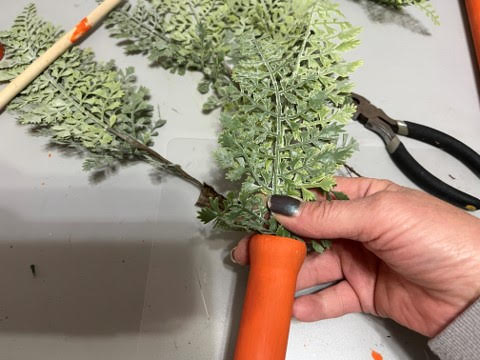
Adding The Greens and Jute Rope Roots
For the greens I used a faux coriander leaf bush which has five stems after I separated it. You can use individual stems or use a bush and separate the stems as I did. If you are using a bush separate your stems first. You will only need about a 1” of wire left at the bottom of the stem so I you need to use a pair of wire cutters and cut off any extra wire. Bend the end of the stem up about ½” and squeeze closed a little with a pair of needle nose pliers.
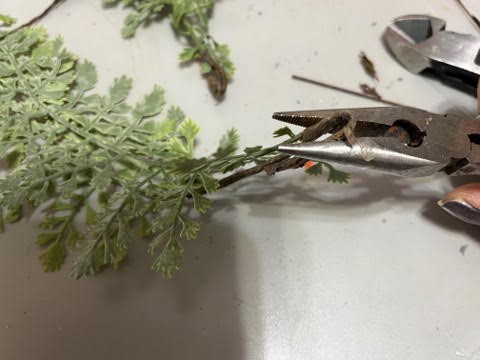
Next add hot glue around the inside of the hole at the top of the bobbin then glue in your greenery stem you can add one or two stems depending how full you want the top of the carrot to be, add some extra hot glue in the top if needed. Repeat this step to the other two bobbin’s and stems.
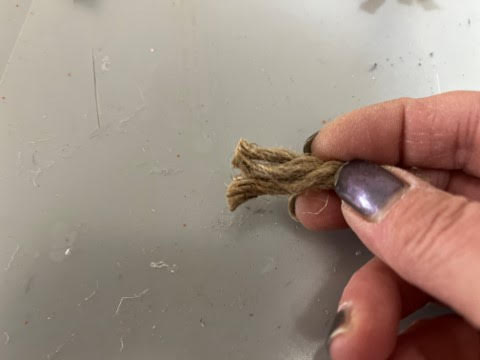
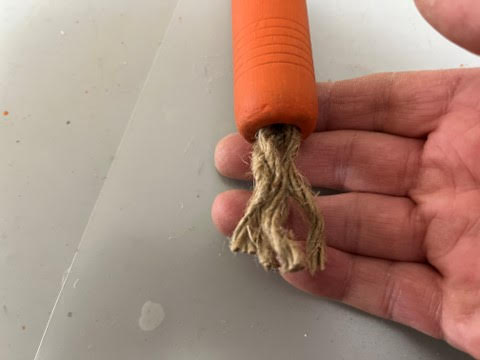
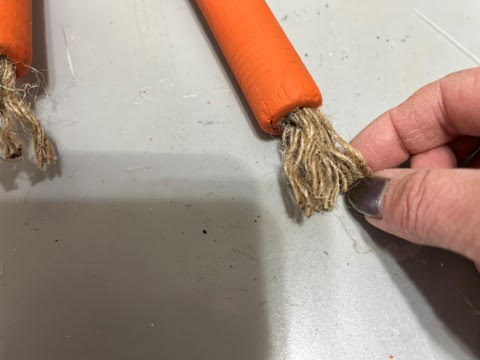
Next take one of the 2” pieces of jute rope and unwind one end just a little. Add hot glue to in the inside of the hole at the bottom of the carrot then insert the side of jute you just loosened add a little more hot glue if needed. Once you have the jute rope glued in unravel the outer pieces of jute so it looks like the roots of the carrots. Repeat these steps to the other two bobbin’s.

Tying The Carrots Together
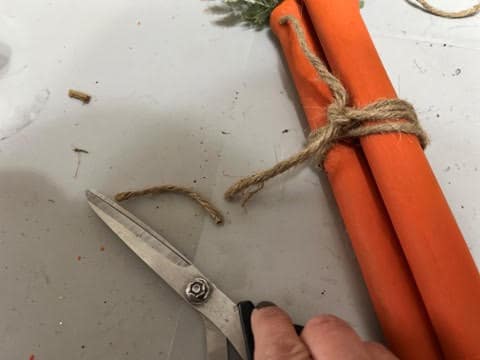
Start by laying down your 40” piece of jute twine then place two carrots on top of the jute leaving about 6 inches on one side of the carrots next place your third carrot on top of the two carrots then take the longer end of the jute and wrap around the carrots 4 times. Tie the ends of jute together make a knot then trim the ends to your desired length.

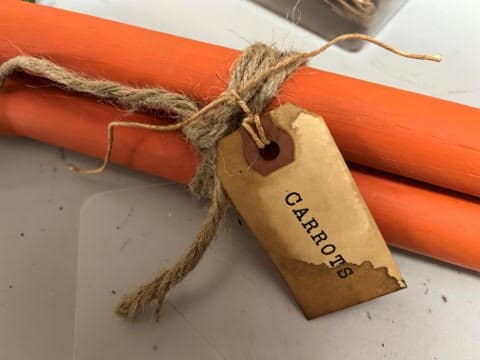
I add a coffee stained hangtag that I stamped with the word carrots I thought it added a cute finishing touch.
You are now finished with your farmhouse carrots I hope you enjoyed making them. These adorable farmhouse carrots would make a beautiful addition to your Easter/Summer décor.
How do I get to your shop where you sell your kits?
Go to https://www.thecraftydecorator.com and click on shop.