Jewelry, Thrifty Makeovers
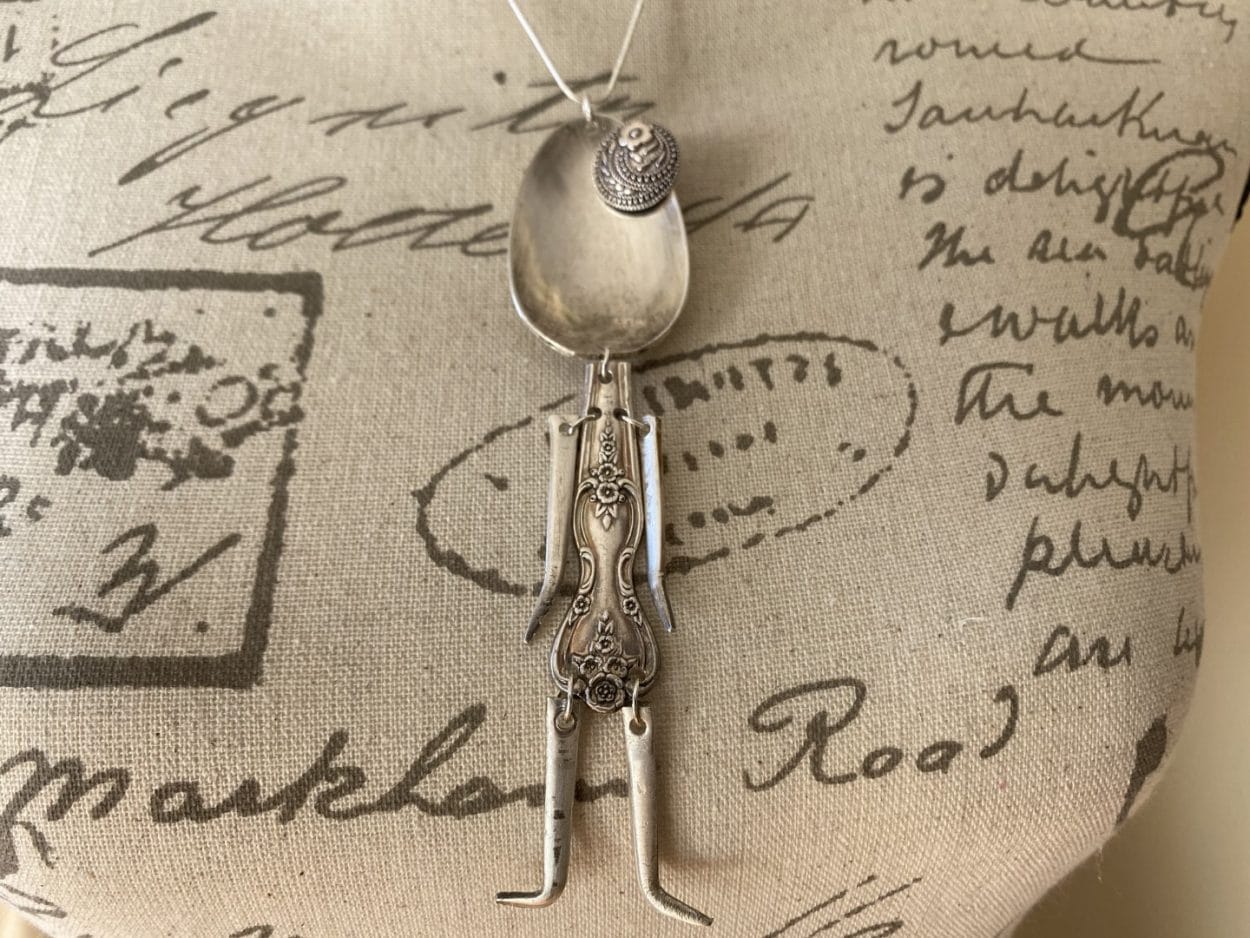
DIY Vintage Silver Girl Necklace
Oct
About a year ago I seen a photo of the most adorable little girl necklace made out of a silver spoon and fork I knew I had to save the photo I just feel in love with it and I wanted to make one.Well a year has passed and I finally came across some vintage silver forks, spoons and butter knifes at the Goodwill for ten cents each as soon as I seen them I knew I was going to make the little girl necklace that I feel in love with a year ago and I have to say it took a little work to find the right tool to make the holes but it was so worth it I just love her, she would make such a beautiful gift for someone.
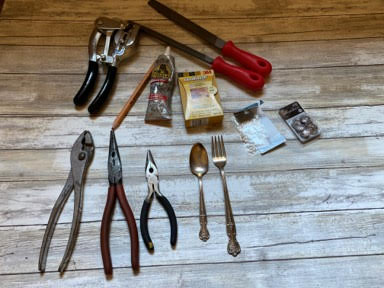
Here is a list of what you will need:
- 1 Vintage Silver Spoon
- 1 Vintage Silver Fork
- Six 9mm Silver Plated Split Rings (Hobby Lobby)
- Decorative Jewelry Piece For Her Head (I used a Piece By Metal Gallery)
- Hacksaw
- Tabletop Vise
- Slip Joint Pliers
- Needle Nose Pliers
- Metal File
- 320 Sanding Sponge
- Power Punch Kit (Michaels)
- Marking Pencil
- Gorilla Clear Grip Adhesive
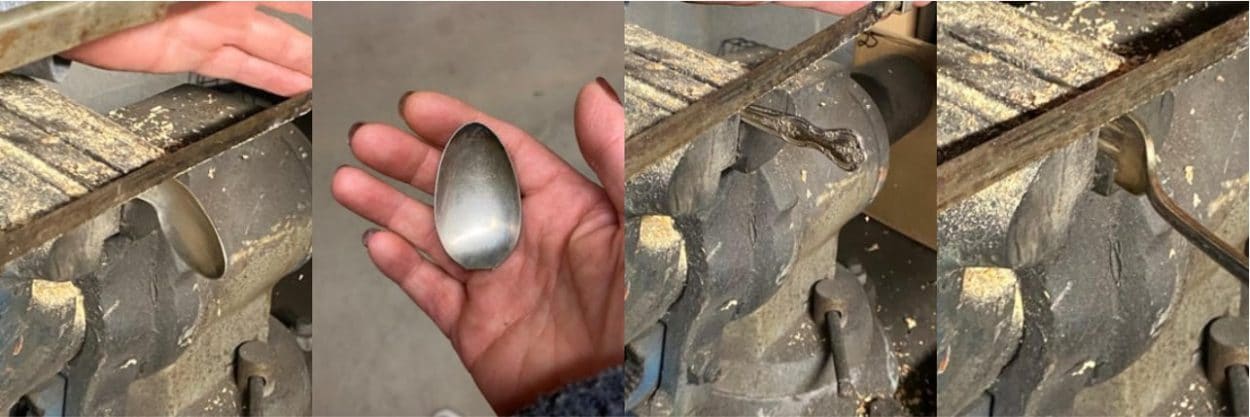
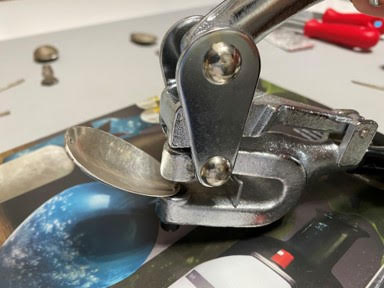
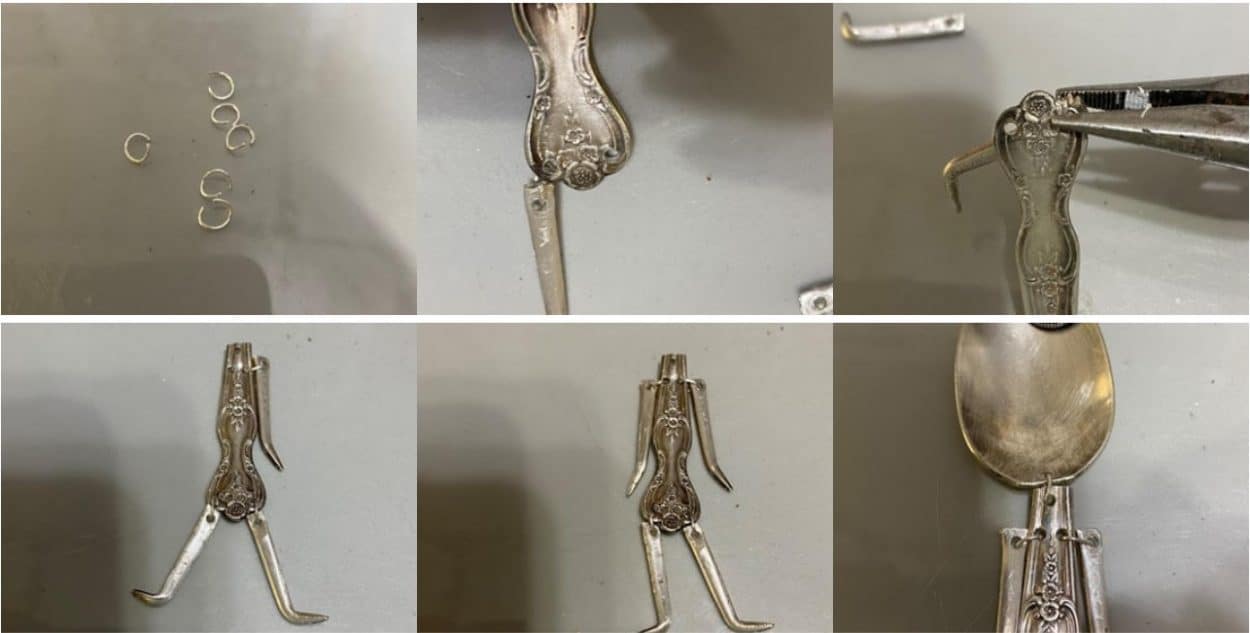
Sawing The Spoon And Fork
The first thing you will need to do is place the handle of your spoon in the vise using the hacksaw cut the spoon at the very base from the handle, next decide how long you would like your girls body to be then place you spoon handle back in the vise with the end of the handle facing out then cut the handle. To cut the prongs from the fork place the prongs into the vise and using the hacksaw the prongs right at the base of the fork these are going to be the arms and legs.
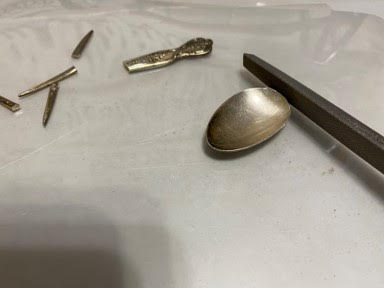
Sanding And Punching The Holes
Once you have all your pieces cut use a metal file to file the cut ends of each piece to make sure you have to sharp edges. Next it is time to punch the holes I broke two different kind of jewelry hole making tools before I finally found a Power Punch Kit at Michaels I almost had given up I was so excited when it actually worked without breaking. Ok the first thing to do is mark the center at the top of your spoon, I used a fabric marking pencil for this, this is where the chain is going to hang from then mark the center at the bottom of the spoon this is where you are going to attach the body. Now take the power puncher and make your two holes.
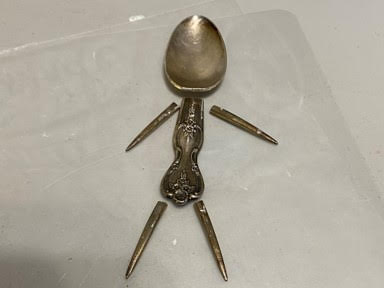
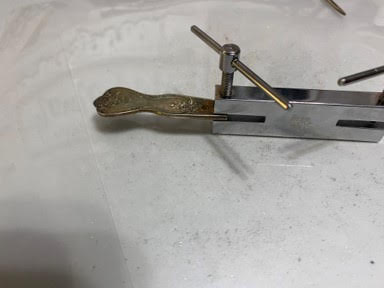
To make the holes in the handle part which will be used for the body lay out all your pieces building your little girl this will help you see where you are going to make the holes for the arms and legs next mark the center of the cut end of the spoon where you are going to connect the head and body then mark on the handle where you are going to the arms and legs you should have five marks total on the handle, punch out your five holes. The picture below is one of the tools I used to make the holes that broke after a few holes and I forgot to retake the photo with the new power puncher.
To make the holes in the fork prongs take two of the prongs lay them next to each other make at the cut end where your holes need to go in the center of each prong then make your holes repeat this step to the other two fork prongs. Sorry I forgot to take photo’s of this part I think I was so worried about the power punch working and not breaking I forgot to take the photo’s.
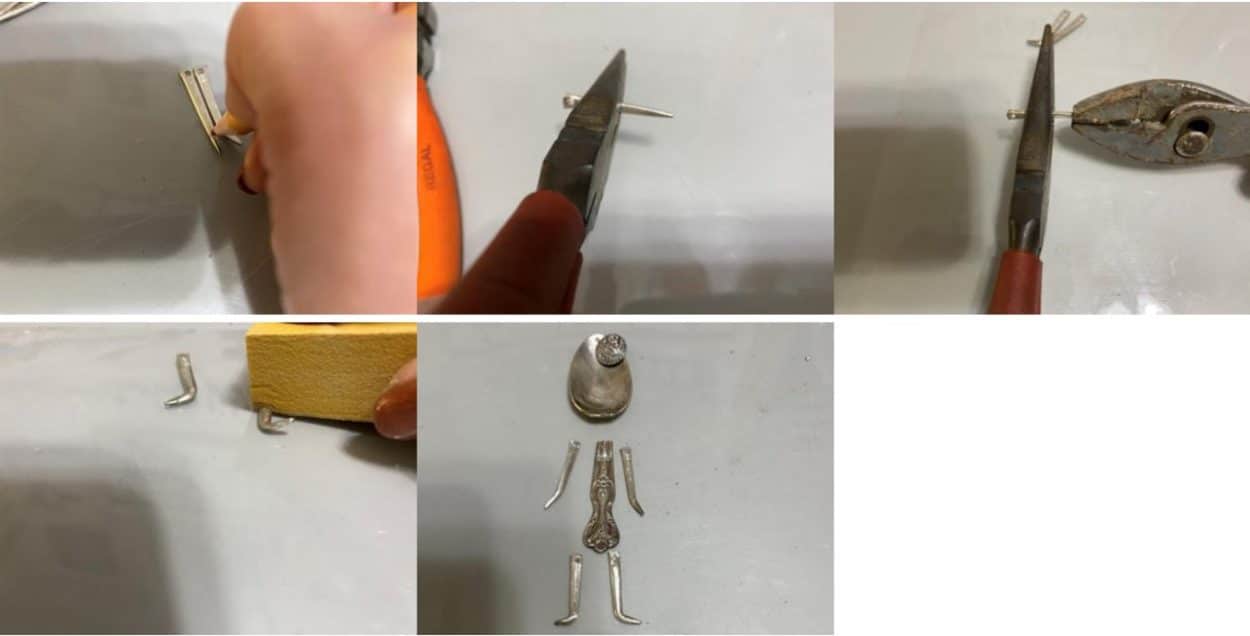
Bending The Arms And Legs
Take two of the fork prongs lay them next to each other and draw a line across the two prongs about a ¼” up from the point of the prong next place the end of the prong with your hole sideways not flat into a pair of needle nose pliers then using your slip joint pliers slightly pend the prong upwards at your drawn line check you bend to see how it will look as the hand, you want it bent just enough to look like it would if you had your hand bent out from your arm. If you think it is not bent enough just bend it a little more until you think it is where you want it. Repeat this step to the other prong try to get the two prongs to match. Next you are going to mark the other two prongs about a ¼” up from the tip of the prongs this time you are going to bend them a little future you want them to look like her foot just bend a little at a time until you think they look like her feet. Lay your little girl all out again to make sure the arms and feet look good. If you end up with scratches from using the tools use your 320 sanding sponge on them.
Assembling The Girl
The first thing you might want to do is glue your decorative jewelry piece to her head using the gorilla clear grip adhesive so it will have a few minutes to tack up or you can wait and glue it on at the end it is up to you. Using your needle nose pliers open your six slip rings then starting with the legs attach each leg with a slip ring and lightly squeeze closed with your needle nose pliers, next attach your arms with two slip rings then attach the body to the head with one slip ring and finally add a slip ring to the top of her head you might want to check to see if your chain will slip through before you squeeze the slip ring closed. The only thing left is to add your chain and enjoy wearing this adorable little vintage silver girl necklace.
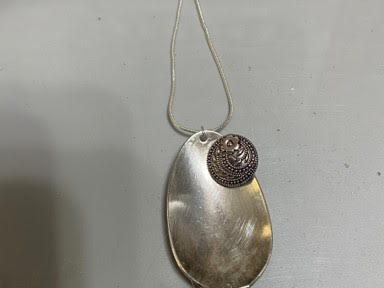
I hope you give making this vintage silver little girl necklace a try she really is adorable and she would make such a wonderful Christmas Gift.
I loved this but my power punch bent and didn’t use silver but made other crafts with silverware
Do you sell these?
Sherry, YOU have just got to make AND sell these !!!!!! Please, they would sell so good. I cannot make them .Please😊