Fall, Home Decor, Outdoors, Spring
DIY Wooden Wheelbarrow
Oct
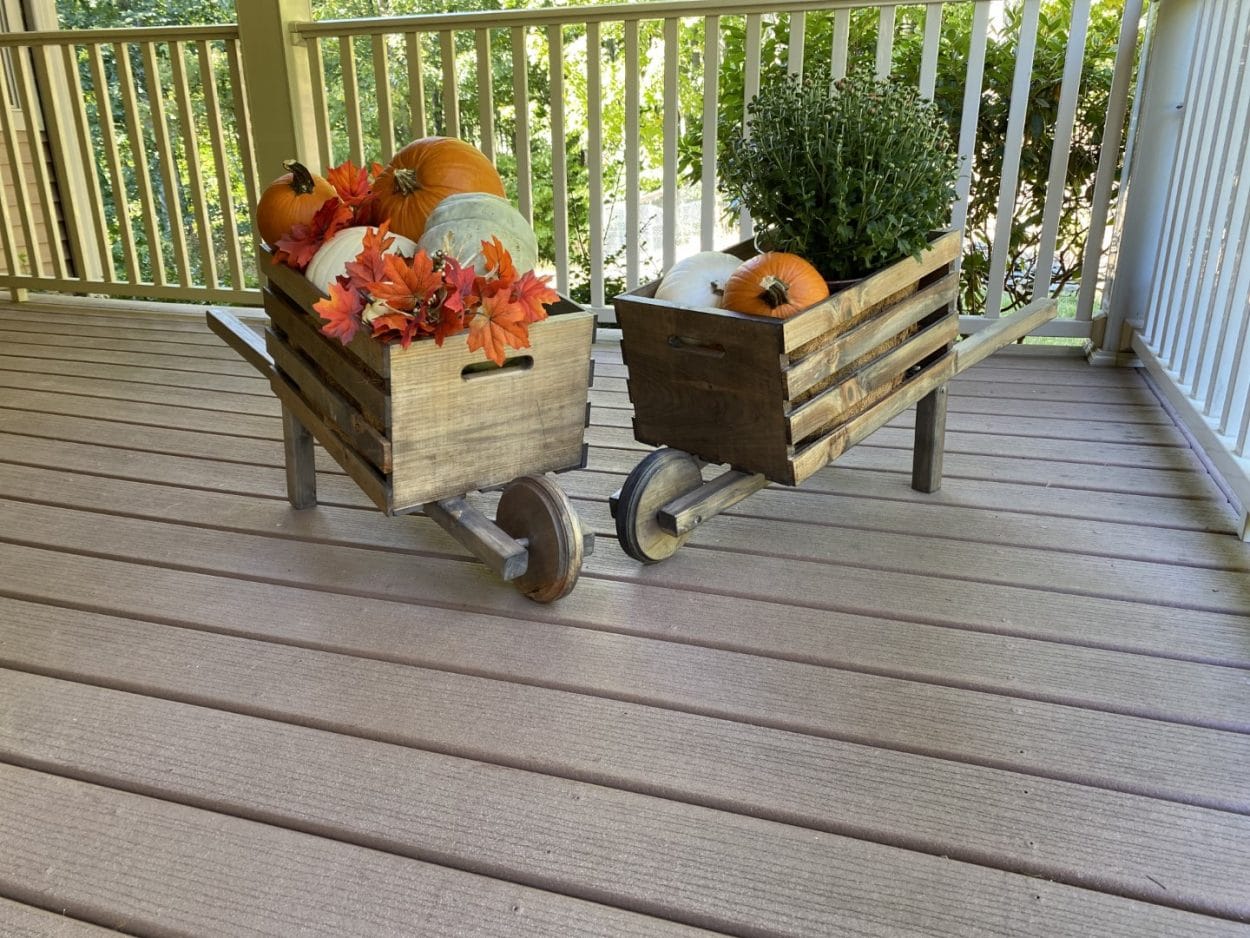
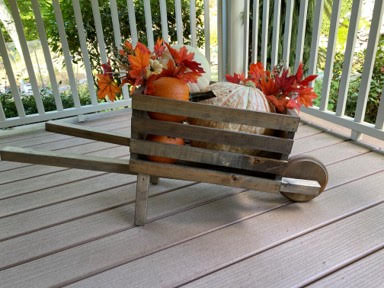
Hello and welcome to The Crafty Decorator if you have been following The Crafty Decorator you know my crafts are something that I would actually use in my own home and this wheelbarrow is definitely one craft I will be using all year round on my porch.I just love this wheelbarrow and it is so simple to make I hope you will give it a try I promise you will not be disappointed in this wheelbarrow.
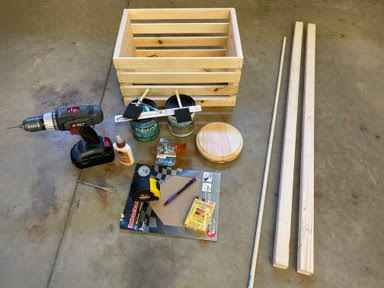
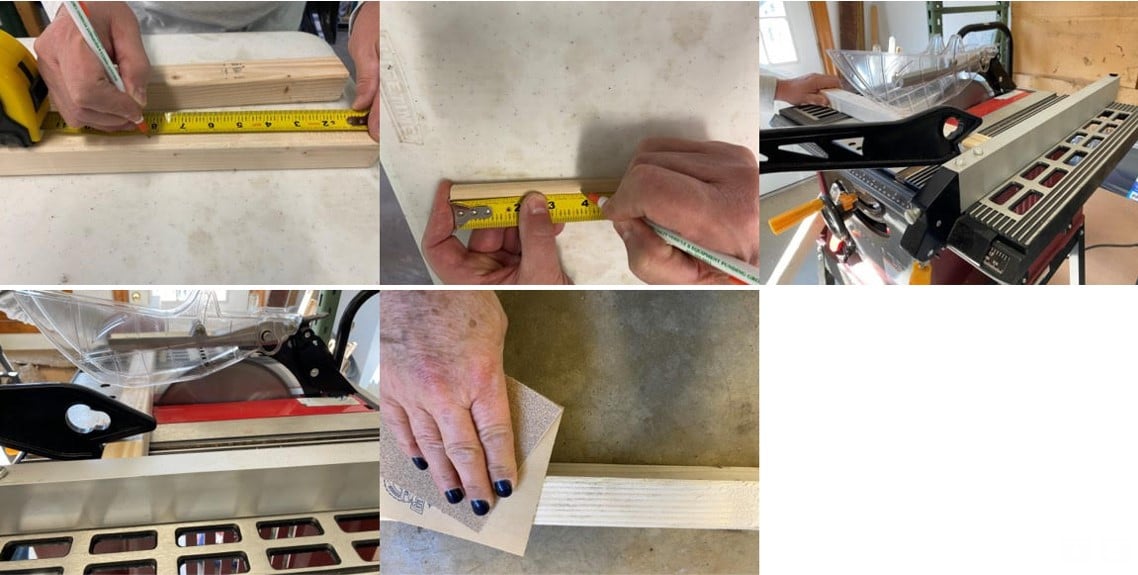
Here is a list of what you will need:
- 18”x12 ½”x9 ½” Wood Crate
- 2 – 6 ¾” Round Wood Plaque (Hobby Lobby)
- 2 – 2”x2”x48” Square Wood Balusters
- 1 – 1/2” X 48” Dowel
- 6 – #8 2 ½” Wood Screws
- 2 – #8 1” Wood Screws
- Gorilla Wood Glue
- 2 Clamps
- Pencil
- Measuring Tape
- ½” Drill Bit
- Safety Goggles
- Saw (Either a Table Saw or Hand Saw)
- Sandpaper
- Rust-Oleum Weathered Wood Accelerator (Optional)
- Polycrylic Protective Finish
- 2 – Sponge Brushes
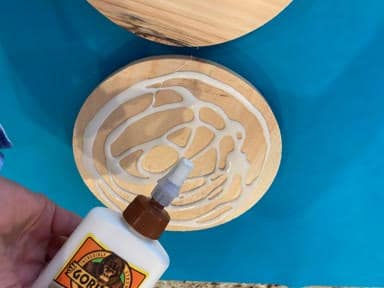
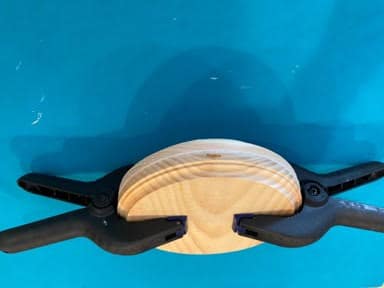
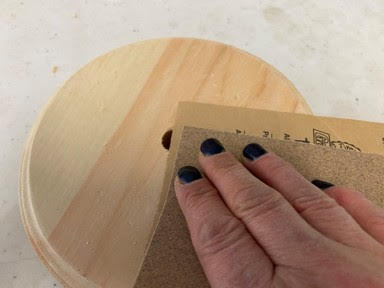
Gluing the Wheel
To make the wheel take one of your 6 3/4” round wood plaques add Gorilla wood glue to the backside of the plaque then place your second plaque on top and clamp them together, the directions for the glue say to leave them clamped for at least 20 minutes, I left them clamped while I prepared the rest of the pieces for the wheelbarrow.
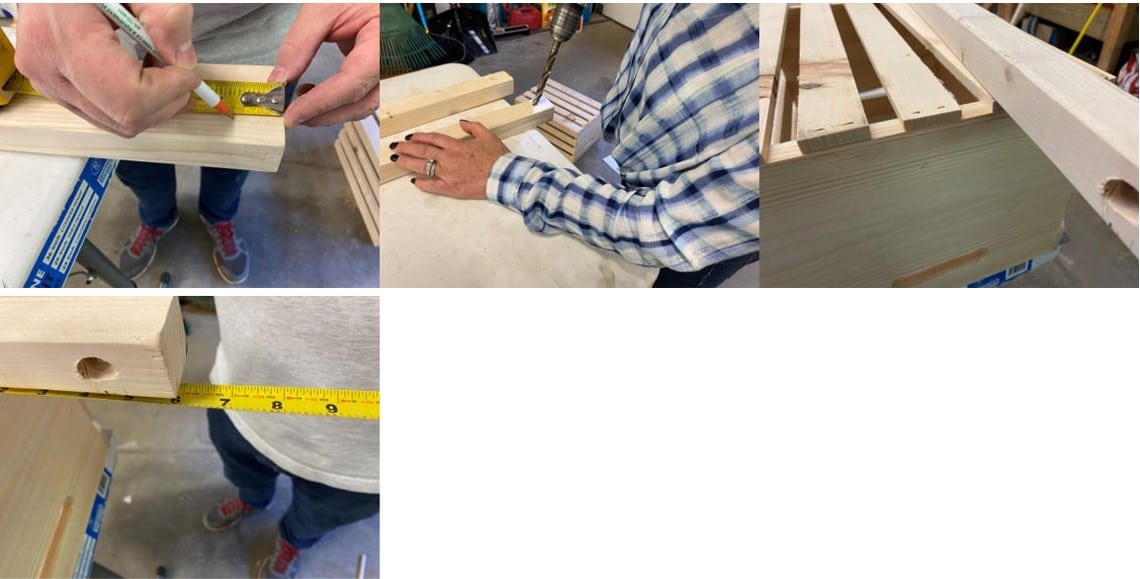
Marking And Cutting The Balusters And Dowel
Using the measuring tape mark each baluster 8 inches from the end then mark the dowel 3 ¾ inches from the end. Once you have your pieces mark you can use a table saw, circular saw, or a hand saw to cut your pieces where you have marked them. Once you have your pieces cut give them a light sanding you might also want to sand the crate at this time. The 8 inch pieces from the balusters are going to be the legs for the wheelbarrow, the two 40” baluster pieces are going to the handles and the 3 ¾ inch piece from the dowel is going to be the axle for the wheel.
Marking And Drilling The Balusters And Wheel
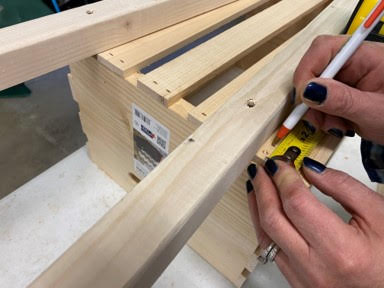
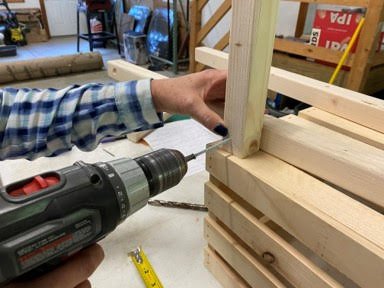
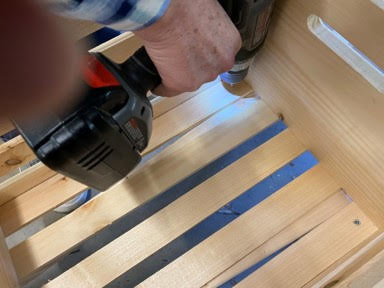
First find the center of the baluster then mark 1 ¼” inch from the end repeat this step to the second baluster. Next take the crate place it upside-down then take one 40” baluster and with your measurement marks facing inward place the baluster in the middle of the second outer slat, measure the front end of the baluster making sure it has a 6” over hang at the front of the crate , align the back end of the baluster between the first two outer slats, I made marks along the baluster with a pencil so after drilling it made it easier to replace them. Repeat this step with the second baluster on the opposite side of the crate. Once you have the balusters set use a ruler to mark a 1 ¼ inches in from the end of each baluster, place your mark on the top of each baluster then draw a straight line across the two balusters connecting your two center marks this line will help you align the drill holes for the axle. Once you have your balusters marked you are going to drill your holes, face the ½” drill bit away from the short end then drill your holes at a 5 degree angle, you are only going to drill half way into the baluster do not drill all the way through the baluster.
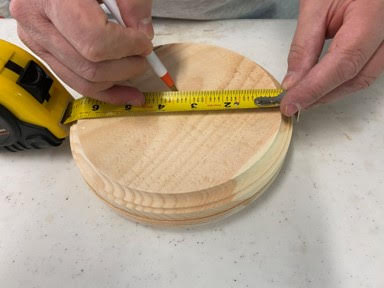
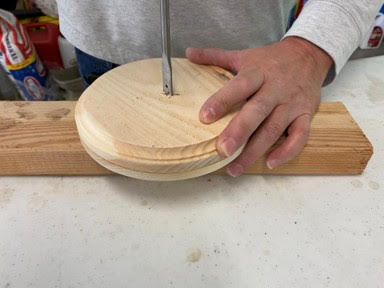
Marking And Drilling The Wheel
Measure and mark the center of the wheel, using the drill and a ½” drill bit drill a hole in the center of the wheel then give the wheel a light sanding.
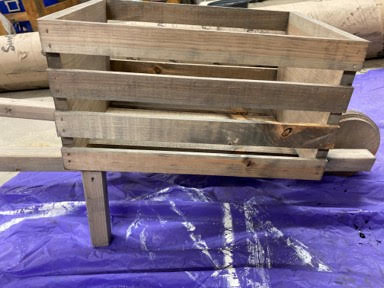
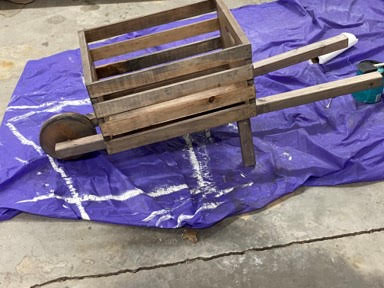
Assembling The Wheelbarrow
To assemble the wheelbarrow flip your crate over then center one of the balusters with the drilled hole at the front in the center the second outer slat of the crate making sure you have a 6” overhang at the front of the crate then center the back end of the baluster at an angle between the two outer slats. Attach the front of the baluster to the crate using a 2 ½” screw then attach the back end of the baluster to the crate using a 2 ½” screw, next insert the axle into the baluster then slid on the wheel. Take you second baluster slide the front end onto the wheel and center in the second outer slat of the crate then center the back end of the baluster at angle between the two outer slats, attach the front and back of the baluster to the crate with two 2 ½” screws.
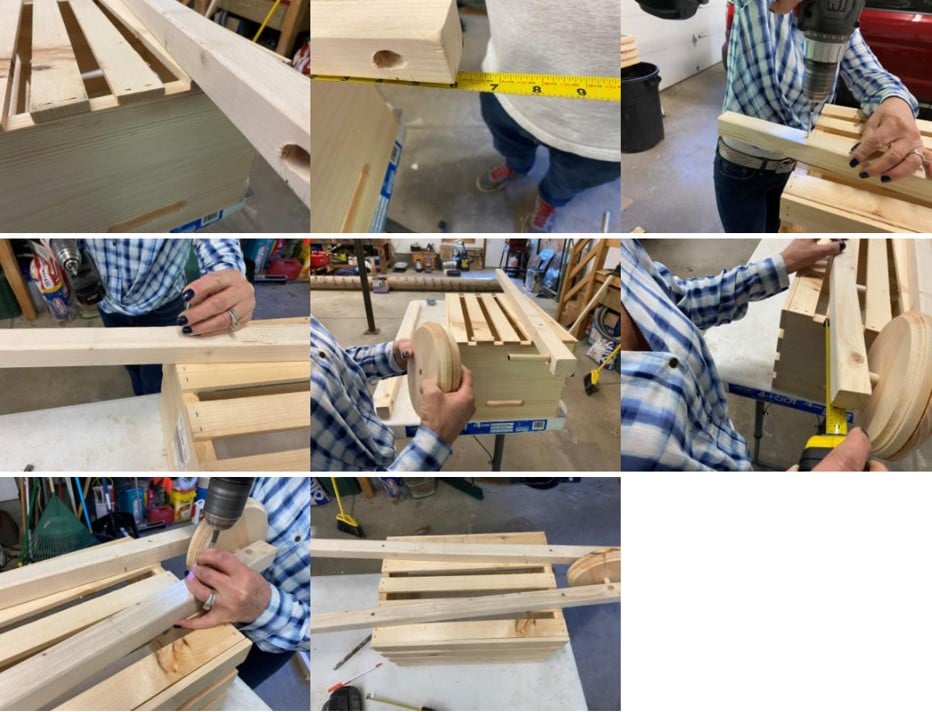
To attach the 8” legs place one leg vertically ¾” from the back end of the crate against the baluster then using a 2 ½” screw attach the leg to the baluster repeat this step to with the second leg on the opposite side. Once you have attached the legs turn your wheelbarrow right side up and secure the legs on the inside of the crate to the baluster using a 1” screw on each leg.
Staining and Sealing
This next step is totally up to you, you can either paint or stain your wheelbarrow I wanted a old weathered look so I used a weathered wood accelerator by Rust-Oleum I gave it three coats to get the look I wanted I then sealed it with a water based polycrylic by Minwax which I gave two coats. Now your wheelbarrow is already for you to fill with whatever you would like.
I am going to try and make these. Love your crafting ideas
Thank you so much and you will love the wheelbarrow