Easter, Home Decor, Spring
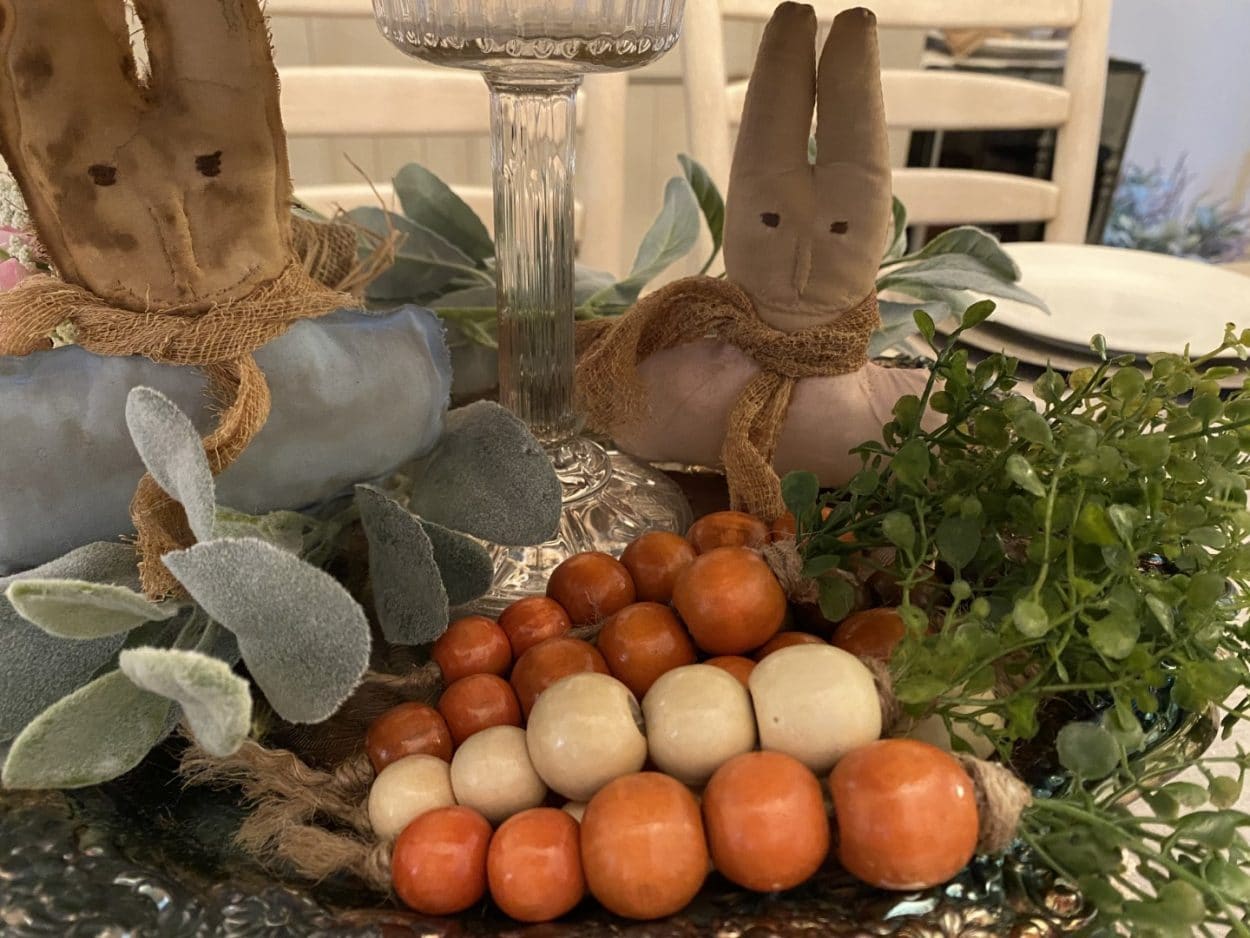
DIY Wood Bead Carrots
Feb
I have been seeing everyone making the wooden bead carrot, I wanted to make them but I just needed to find the time to paint the wooden beads. One day I was shopping in Hobby Lobby and in the jewelry section they sell wooden beads as I was looking I seen a bag of wooden beads that were already colored orange, cream and brown as soon as I seen them I knew I could make the bead carrots. I bought two bags of the wooden beads and some greens then came home and in no time I had my carrots made. It was so simple and no painting lol.
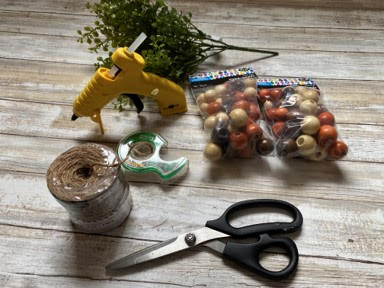
Here is a list of what you will need:
- 2 Packages of Tree House Wood Beads (Earth Multi)
- Greens For The Top Of The Carrot
- 2 Ply Jute Twine
- Hot Glue Gun and Glue Sticks
- Scissors
- Scotch Tape
Making the Carrot
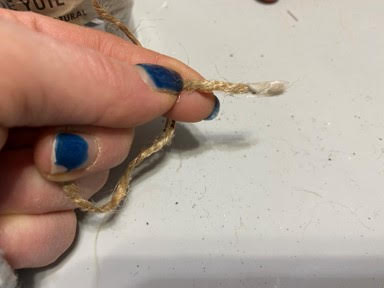
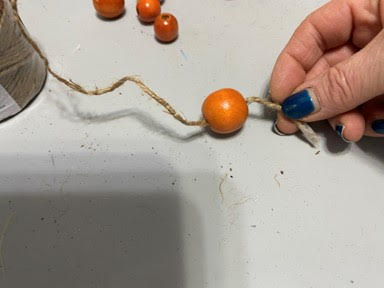
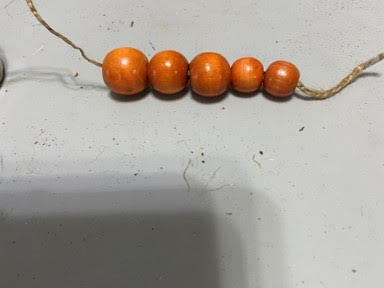
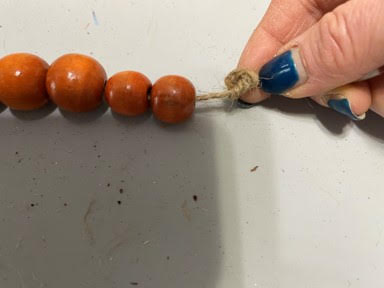
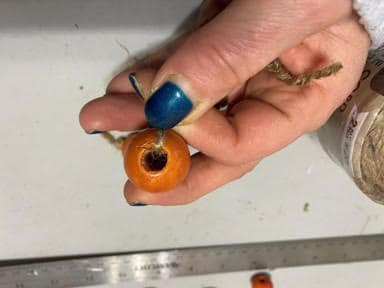
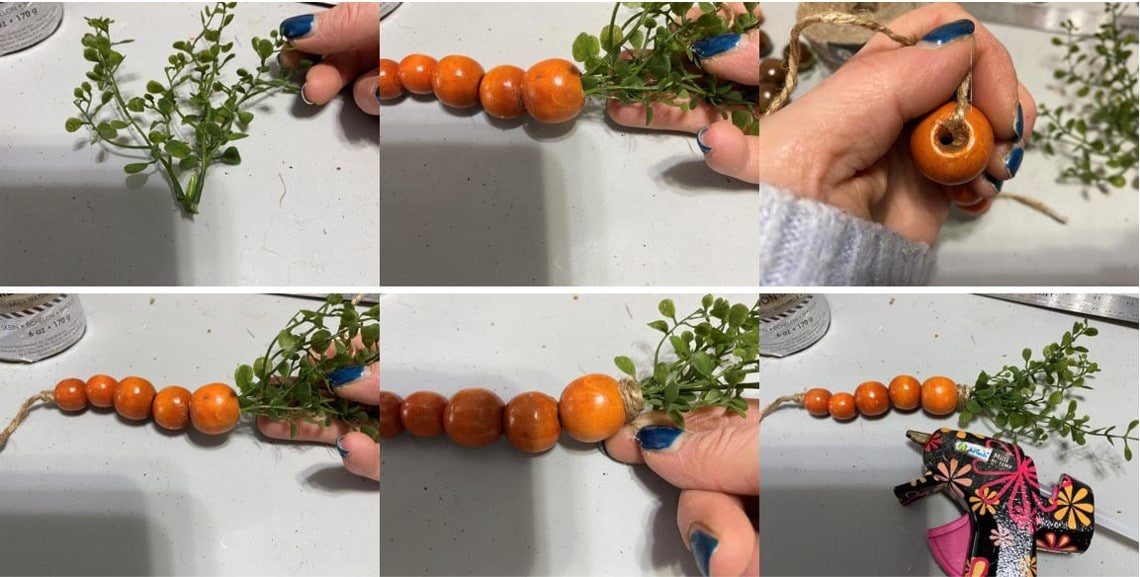
The beads come in three sizes small, medium and large. Start by sliding one large bead onto the twine then two medium ending with two small beads. Tie a knot at the end where the small bead is big enough so the bead will not slide off the twine. I tied a triple knot. Add a small drop of hot glue to the inside of the large bead at one side then pull your twine tight and hold against the hole for a minute to make sure it is glued down.

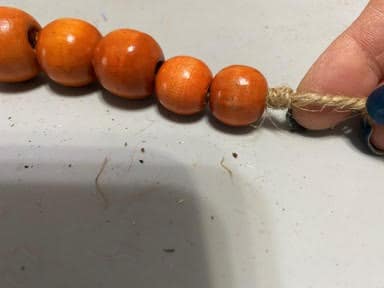
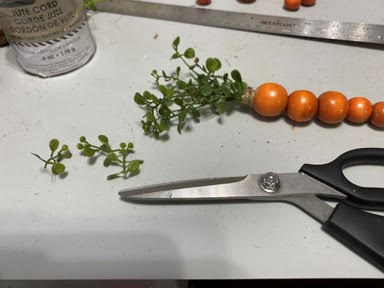
Next cut a few pieces of your greenery. Stick the greenery into the large bead to make sure it is going to look like the top of a carrot. Remove the greenery add hot glue into the top of the large bed then stick your greenery into the opening, hold in place for a minute. Wrap the twine around the bottom of the greenery about 3 or 4 times. Cut and glue down the end.
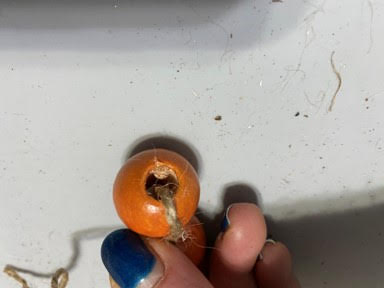
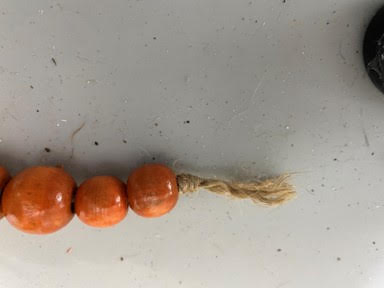
You are now going to unravel the twine at the end of the knot. If you think it is to long trim it some first then unravel the twine. This will make the end look like the root of the carrot. You can also trim the tops of your greens if they are looking to long.

SO GLAD i FOUND THIS i COULDNT REMEMBER HOW TO FINISH THE TOP GREENERY PART i HAVD EVERYTHING ELSE READY,
I can’t wait to make these little carrots . I just got all my materials this weekend so excited.Thank you
I got them made and OMG I LOVE THEM .. Thanks so much
Where did you find the beads, I’ve looked everywhere