Easter, Home Decor, Spring
DIY Primitive Chick Ornie
Feb
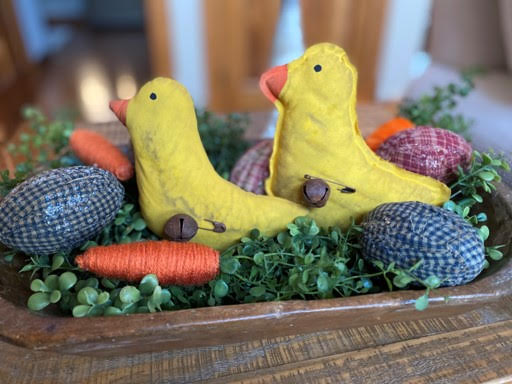
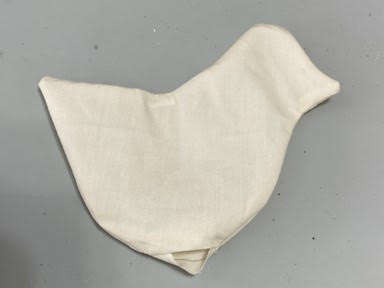
If you love primitives you are going to love this primitive chick ornie. Thank goodness winter is almost over. I just love making my own décor and these little chicks are going to be so fun to decorate for Easter with. They are perfect to use in your wooden dough bowl. If you follow The Crafty Decorator you already know that I am a sewer but I know some of you don’t sew so I always try to also glue my projects so everyone can make them. The chick on the left is sewn and the one on the right is hot glued. I hope you will give them try.
Here is a list of what you will need:
- Chick Ornie Pattern
- Muslin
- Polyester Fiberfill
- Sewing Machine
- Yellow Craft Paint
- Orange Craft Paint
- Black Craft Paint
- Paintbrushes
- Sponge brush
- 2 Rusty Safety Pin
- 2 Rusty 20mm Bell
- Coffee Stain Mixture(You can find my recipe under Sherry’s Shortcuts on my web page)
Making the Chick
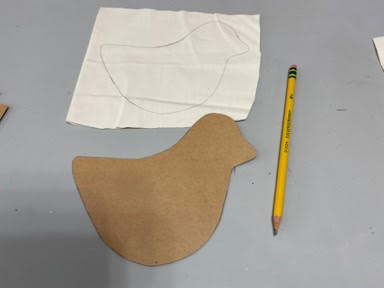
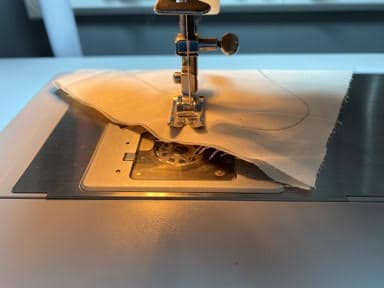
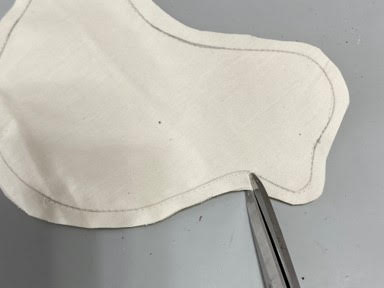
The first thing you will have to do is print and cut out the Primitive Chick Ornie pattern. Trace onto a double layer of muslin. Sew with cream thread on a sewing machine using the trace line as your sew line. Make sure you leave open on the bottom where indicated on the pattern. Cut out about a ¼” away from the sew line.

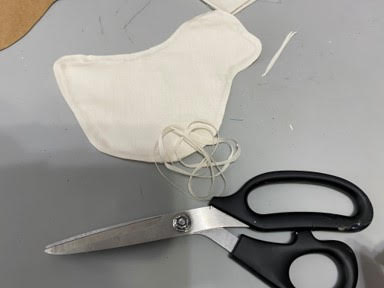
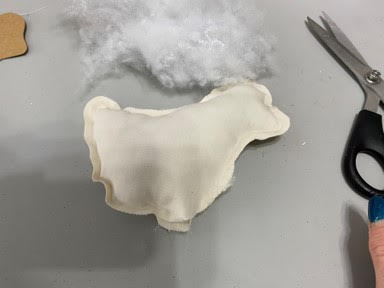
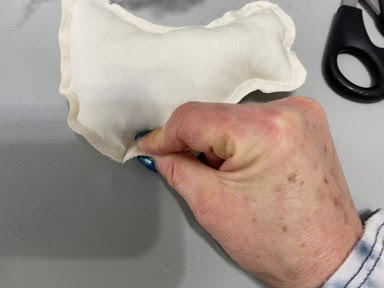
Clip around all corners and turns, this will help stop the fabric from puckering when you turn RSO. Turn the chick right side out. Stuff firmly with polyfill, I like to use the eraser end of a pencil to stuff the chick. Using a needle and cream tread sew the opening closed. I forgot to take a photo of this step.

If you are not a sewer and would like to hot glue your check trace the pattern on a double layer of muslin then cut out about ¼” away from the trace line. Lay your muslin piece with the trace line facing up then lay your second piece on top, making sure it lines up. Fold down the head top layer. Apply a line of hot glue on the trace line around the head and glue down. Work your way around the chick apply a line of hot glue on the trace line and gluing down. Make sure you leave an opening on the bottom where indicated on the pattern.
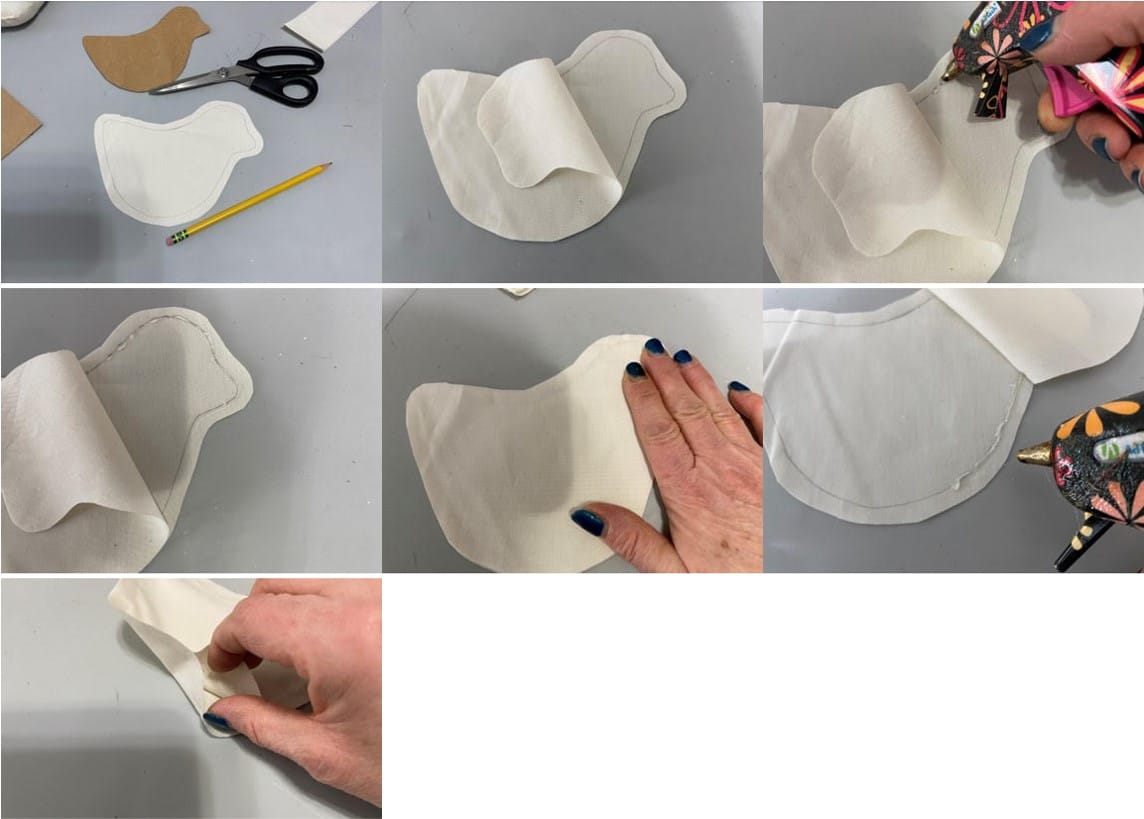
Next trim the muslin around the chick to make sure everything is even around the chick, be careful not to cut your glue line. Stuff with polyfill and glue opening closed. I trimmed around the chick again after stuffing.
Coffee Staining and Painting the Chick
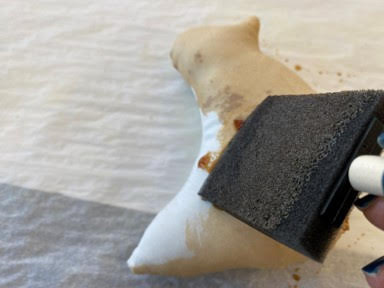
If you don’t have your own coffee stain mixture you can find the one I use on my web page under Sherry’s Shortcuts. Using a sponge brush cover the chick with the coffee stain mixture. If you have hot glued your chick you will need to let him dry naturally. If you have sewn your chick you can either let him dry naturally or you can put him on a foil lined cookie sheet and place in a 200 degree oven to dry. Make sure you check in turn the chick in about 5 minutes. I doesn’t take long to dry him.
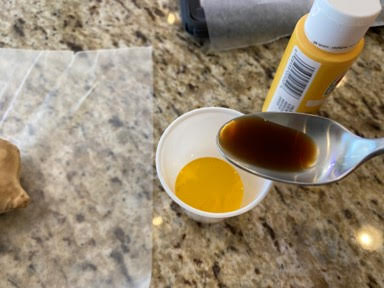
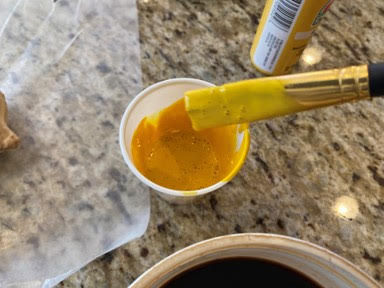
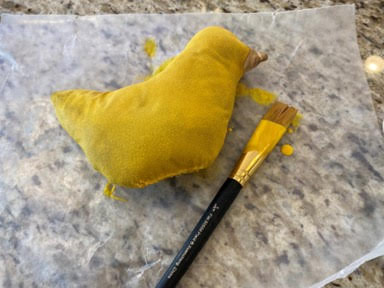
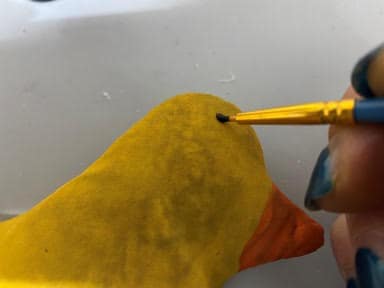
After the chick has dried mix some yellow craft paint with 1 or teaspoons of the coffee mixture and stir. The mixture should drip of your paintbrush. Paint your chick where indicated on the pattern. I dry the chick again before painting the beak orange but that is totally up to you. Mix the orange craft paint the same way you mixed the yellow. Paint the beak and let dry. If sewn you can dry in the oven. Paint a eye on both side of the chick with black craft paint.
Adding the Safety Pin and Bell
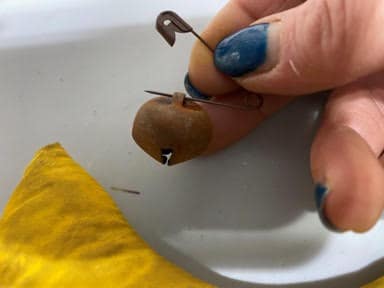
Slid the rusty bell onto the safety pin. Insert the safety pin at an angle on one side of the chick and close the safety pin. The safety pin and bell are his wing so place it where you think the wing should be. Repeat this step to the other side of the chick.
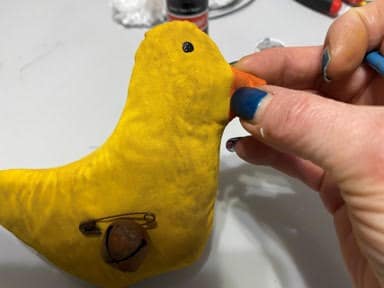
You are now finished with you primitive chick ornie. I hope you have enjoyed making him. You can make him into an ornament by just adding a jute hanger to the top middle of the chick. He would be so cute hanging on your Easter tree. If you make the ornie chick I would love to see how you use him in your home.
I made these and put my twist on them with different materials . my first time to sew also on a machine I bought a new machine about three months ago and been just looking at it and after watching you I went for it yay I did it so fun so much easier leaving the materal in a square instead of cutting it out first what a great TIP.. Thanks