Home Decor
DIY Wooden Centerpiece Box Blog
Oct
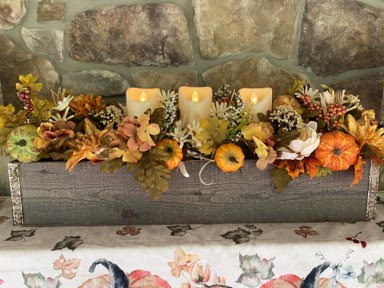
I have a beautiful rusty old metal box filled with flowers and candles as my centerpiece on my dining room table and all the followers always ask if I made it so I decided to make a wooden box to use as a centerpiece. Beautiful old rust tin is hard to find that is why I decided to use wood and I just love how it turned out. After searching Home Deopt and Lowe’s for wood I went to Hobby Lobby and found a 2pc pack of 48” long weathered wood way cheaper. You can really use any wood you have laying around if you would like I didn’t have any scrap wood so I decided to use this wood and it only cost $7.80 on sale and I bought a Woodpile framed pallet wood broad for the base which was 7.20 on sale along with a roll of metal ribbon on sale for $2.50.
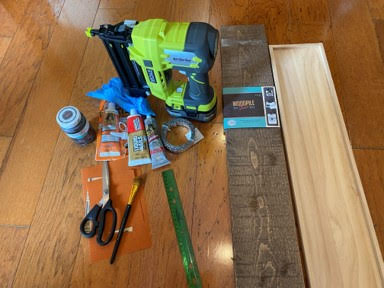
Materials You Will Need:
- 1 Pack of Woodpile Natural Weathered Wood Bundle 48” long – Hobby Lobby the item number is #2050482
- 1 Woodpile Framed Pallet Wood Board (6.22”x.78”x29.8”) – Hobby Lobby the item number is #1433556
- 1 Roll of Metal Ribbon – Hobby Lobby the item number is #331348
- Waverly Antiquing Wax (Walmart)
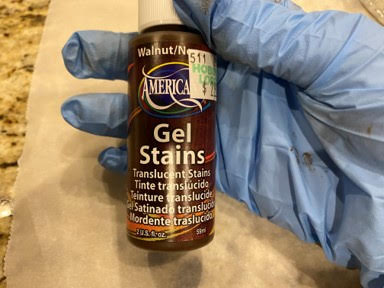
- Americana Walnut Gel Stain (Hobby Lobby)
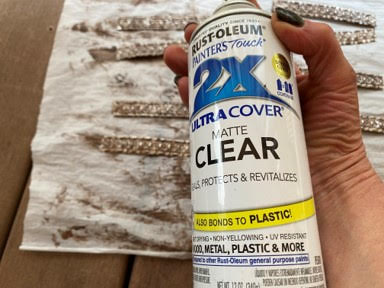
- Rust Oleum Matt Clear Sealer
- Table Saw
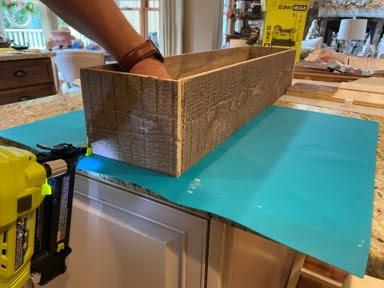
- Brad Nailer and 5/8” Brad Nails
- Gorilla Heavy Duty Construction Adhesive
- Measuring Tape
- Pencil
- Scissors
- 180 Grit Sandpaper
- Rubber Gloves
- Paper Towel
- Baby Wipes (Optional)
- Hot Glue Gun and Glue Sticks
Staining The Framed Pallet Board
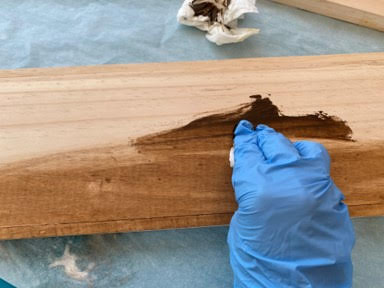
The first step is to stain the pallet wood board. I used Waverly antiquing wax and baby wipes to stain my board but you can certainly use any stain or wax you would like. One of your friends here at The Crafty Decorator told me to use baby wipes to stain my wood and she was so right it seemed to go on much easier , you can also use a rag or paper towels if you would like. Using baby wipes apply a coat of Waverly antiquing wax to your pallet board and let dry. Make sure you were a pair of rubber gloves to save your hands from the stain lol.
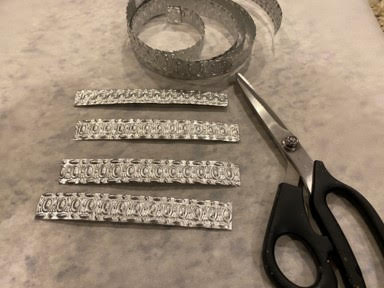
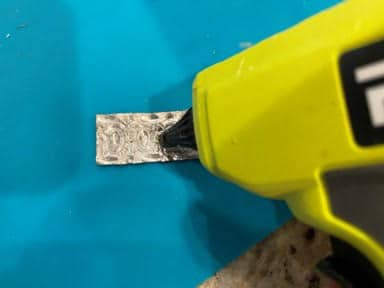
Gel Staining The Metal Ribbon
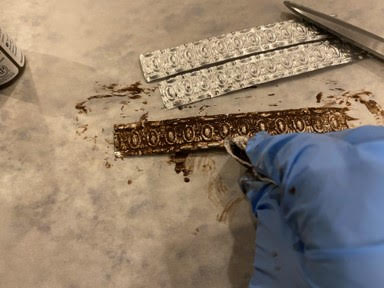
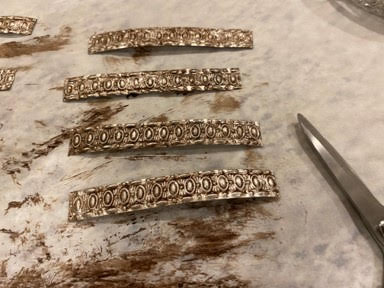
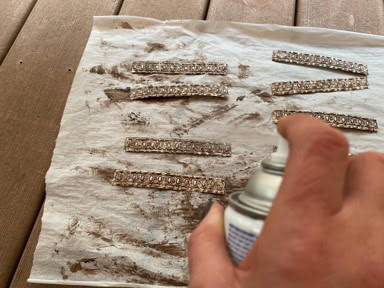
The first thing you will need to do is measure and cut 8 pieces of your metal ribbon 5 3/8” with scissors. You will need to pieces of ribbon for each corner of the box. Wearing your rubber gloves apply the Americana walnut gel stain to the fronts of each piece of ribbon with paper towel and let dry. You can apply a light layer or a heavier layer of get stain depending on dark you want your ribbon. I applied a heavy layer because I wanted mine dark. After your ribbon pieces have dried in a well ventilated area give the ribbon pieces a coat of rust oleum matt sealer and let dry.
Cutting and Attaching The Weathered Wood
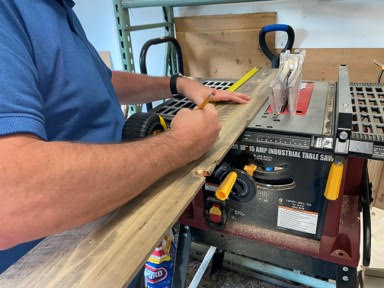
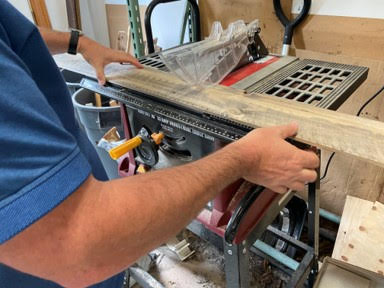
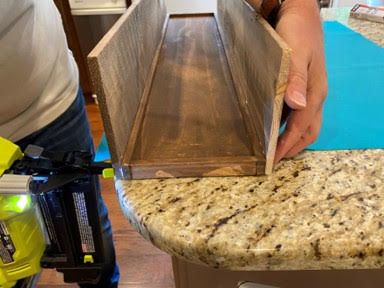
Using a measuring tape and pencil measure and mark two pieces of weathered wood 29 ¾” long and two pieces 6 ¾” long. Using a table saw cut your pieces. Sand the ends of the four pieces with 180 fine grit sandpaper.
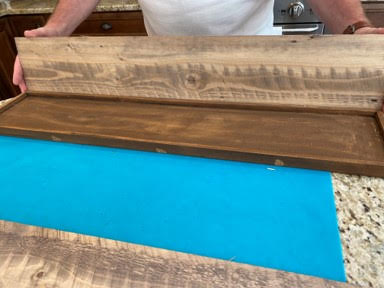
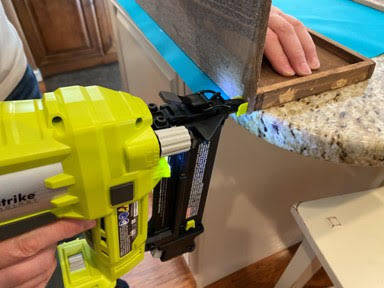
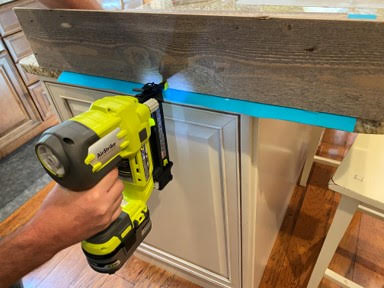
To attach the two 29 ¾” pieces of weathered wood to the framed pallet board you are going to start by adding a bead of gorilla heavy duty construction adhesive at the base of the board then attach to the side of the framed pallet board. Next using your brad nailer and 5/8 brad nails nail the weathered wood piece to the framed pallet board. Repeat these steps to the 29 ¾” piece of weathered wood. After you have the two long pieces attached you are now going attach the two 6 ¾” pieces of weathered wood to the framed pallet board. You are going apply a bead of gorilla heavy duty construction adhesive to the two sides and base of the wood pieces you just attached on one side then attach and nail with your brad nailer. Repeat the steps to the second 6 ¾” pieces of weathered wood.

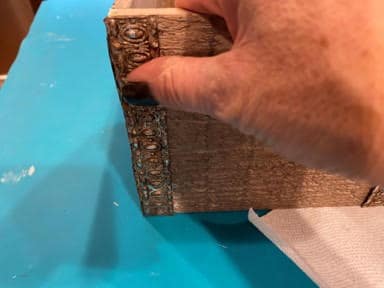
Attaching The Metal Ribbon
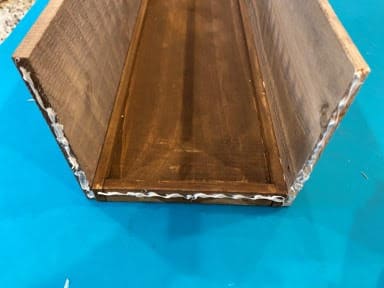
To attach the ribbon add hot glue to the back of one of the pieces of ribbon then attach to one of the corners on the box. Add hot glue to the back of a second piece of ribbon and attach to the other side of the corner. Repeat these steps with the remaining 6 pieces of ribbon to the other 3 corners of the box.
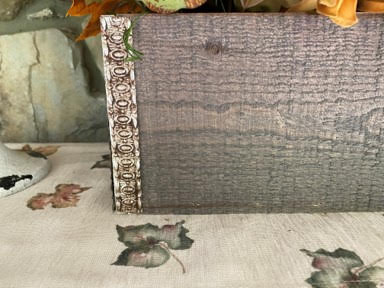
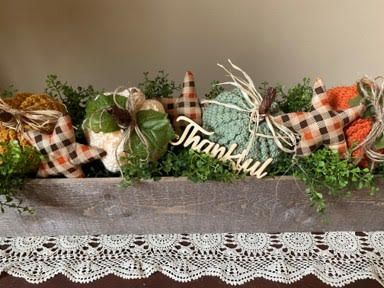
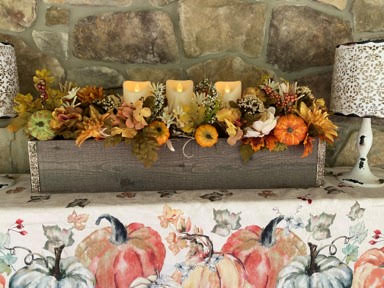
Your box is now finished and ready to fill with greens, florals and candles. You can also use the box as a dough bowl and fill with seasonal items. I filled one of my boxes with greens, stars, and pumpkins for fall and the other box I filled with florals and candles to use on my outdoor fireplace mantel. I hope you find these directions easy to follow and give this box a try you will just love it.
Sherry, this is wonderful!! I can’t wait to try this. Such a great materials list; where to buy; and simple to the point instructions. Wow you’re the greatest!
You are so sweet thank you!