Home Decor
Pipe Cleaner Cherries
14
Apr
Apr
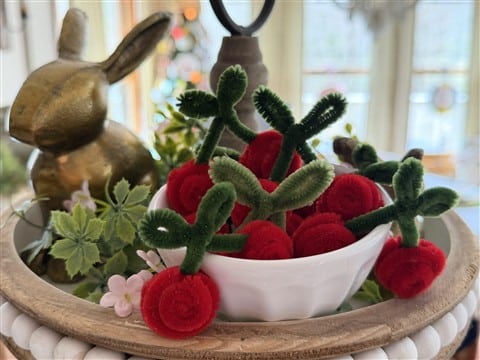
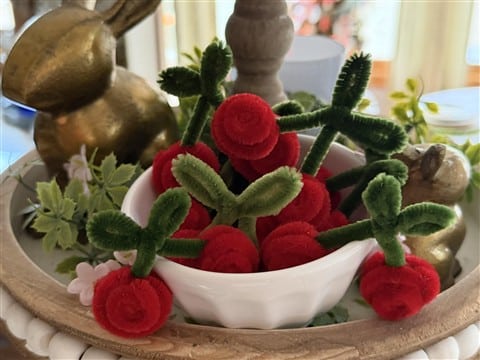
I have been wanting to make some pipe cleaner cherries for my tiered tray. Cherries just scream summer to me. After checking YouTube for instructions, I got started. They were simple to make, but I really didn’t like how flat they looked so I changed them up and made them my own.
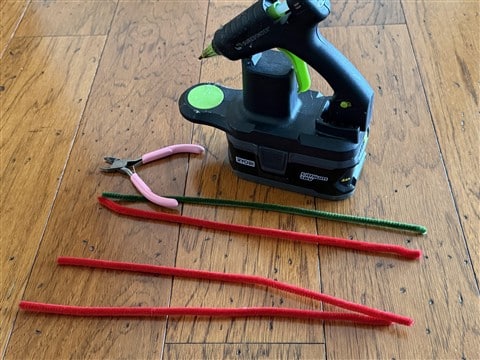
Supplies I Used
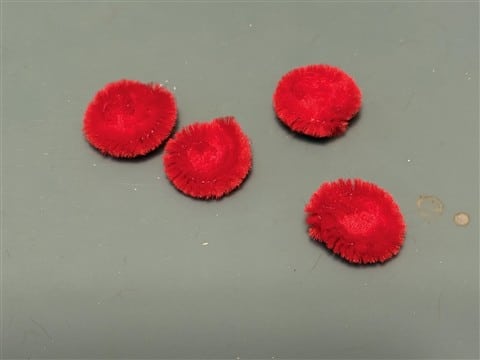
- 3 red pipe cleaners for each cherry
- 1 green pipe cleaner for each cherry
- Wire cutters or scissors
- Hot glue gun and glue sticks
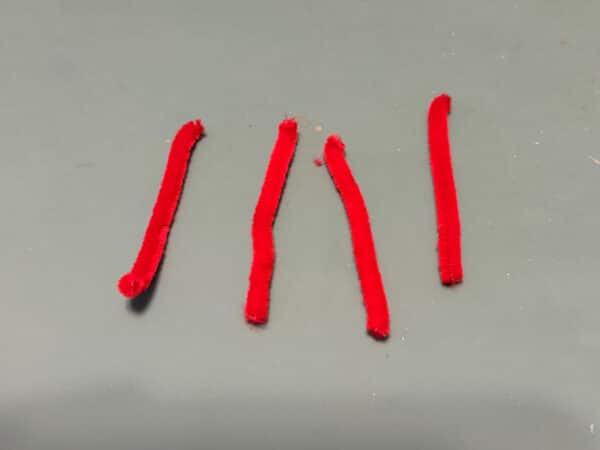
Step 1
The following instructions are for one cherry. Cut 3 red pipe cleaners in half. Then, cut two of those halves in half again. You will have four half pieces and 4 quarter pieces of red pipe cleaners.

Step 2
Take 1 of the half pieces and start rolling it. When you reach the end of the pipe cleaner, fold up the end about a quarter inch add a drop of hot glue fold over onto the roll and glue it down. Repeat these steps to the other three pipe cleaner halves. See photos below.
Roll the 4 quarter pieces the same way but when you reach the end fold up about 1/8″ and glue the end down.

Step 3
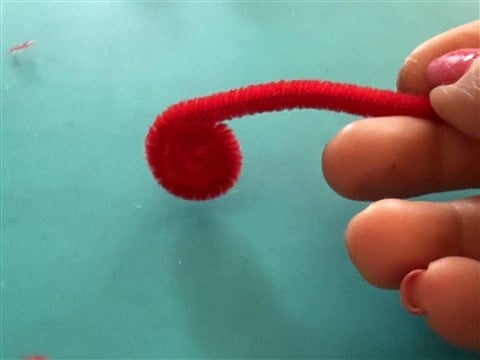
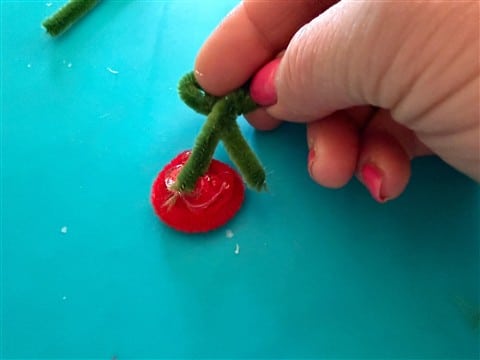
To make the stem take one end and make a loop about 2″ long, leaving enough of a tail to attach one cherry. See the photo below.
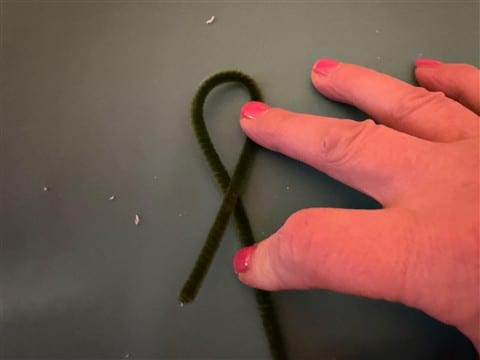
Using a finger push down on the middle of the loop until you reach the center.

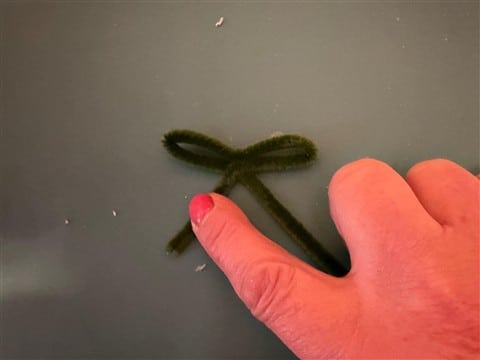
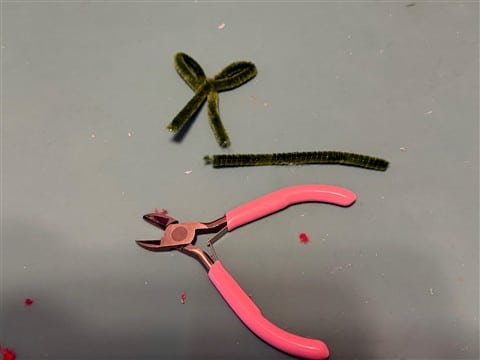
Take the long end of the pipe cleaner wrap up and around the center. Trim the long end to match the length of the short end.


Step 4
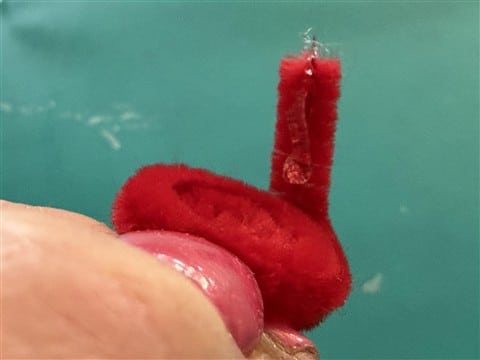
Time to attach and form our cherries. Take one of the larger rolls add hot glue to the center of the side of the round that has the end folded over and glue one end of your stem down. I have the part where I fold over the end of the round at the top of my cherry.

Add hot glue to the second round and glue it on top of the first round. Repeat these steps for the other two rounds attaching them to the other end of your stem.


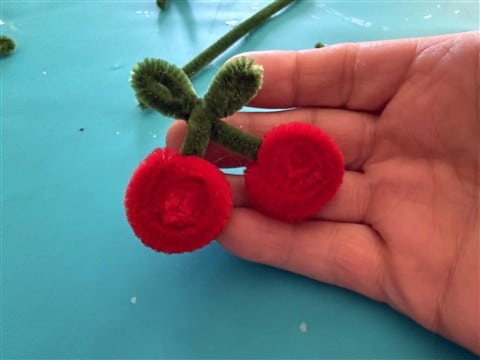
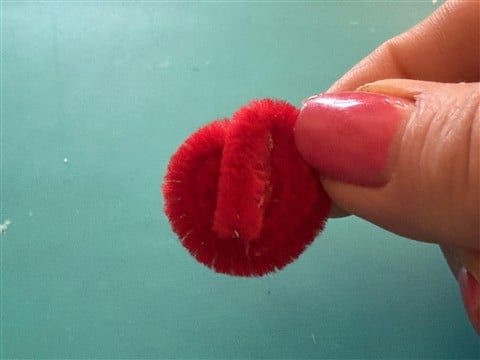
On the videos I watched about making these cherries they appeared finished, but do you see how flat they look? This is where I decided to add another roll to each side. Add a little hot glue to the center of one side of a cherry and glue down one of the small rolls. Apply hot glue to each side of the cherries and attach the small rounds to each side.


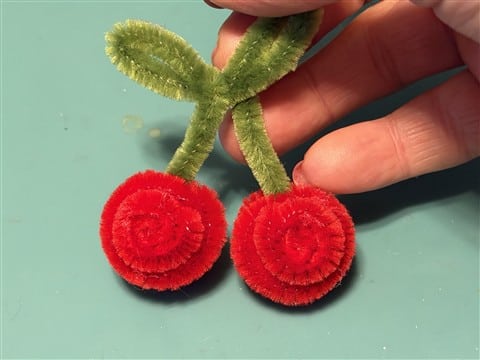
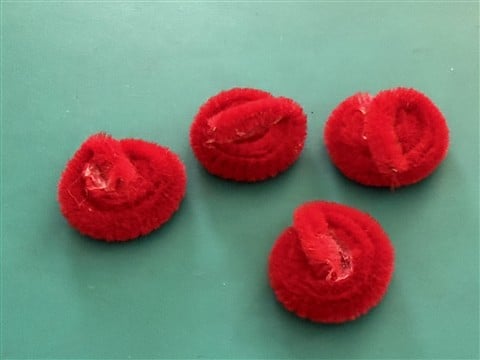
Your cherry is now complete! I hope you try these adorable cherries. They look so cute in a little bowl. You can even mix them with some other fruits or add a piece of fishing line as a hanger and hang them on a little tray in your kitchen!