Do you have some yarn lying around and clover pom pom makers? These pom pom birds turn out so adorable and would make a sweet addition to your summer decor! The best part is you can make them any size and color you want. I have never used cardboard to make my pom poms but some of my followers say they do. If you have used cardboard for pom-poms, I am sure you can also make these birds using it. The size of the bird depends on how much yarn you wrap, the more yarn you wrap the larger the bird you will make.
Yarn in your color choice for the bird’s breast, body, and head.
Felt in a color to match the body and either a light yellow or antique white felt for the beak
Two 6mm black beads for the eyes
Feathers of your choice
A doll needle with an eye large enough to thread the yarn through
Pencil
Sharp scissors
Hot glue gun and glue sticks
Making the body and head
To make the bird’s body, start with the color yarn you have chosen for the breast. If you have never used a pom-pom maker the directions are on the back of the package or you can watch my pom-pom bird video on YouTube. Wrap the yarn up to almost the middle. Remember, the more you yarn you wrap the larger the bird will be but don’t wrap it too thinly, or your bird won’t be nice and fluffy. Once you finish wrapping, cut off the excess yarn making sure to hold down the end of the wrapped yarn against the side of the pom-pom maker. See the photo below.
Next take the end of the yarn you are using for the body and hold it down the side with the end of the breast yarn and start wrapping. Ensure you cover the end pieces when wrapping; this will hold them in place.Wrap and end the yarn then wrap the other side of the pom-pom maker according to the directions. Follow the package directions for cutting and tying off the pom-pom. Fluff and trim your body.
For the head, use only one yarn for wrapping. Wrap and cut the yarn just as you did for the body. This time, when tying the pom-pom, ensure you leave enough yarn on both ends because this is how we will attach the head to the body. Fluff and trim the head making sure you do not cut off the two ends of the yarn.
Attaching the head to the body
To attach the head, thread one piece of yarn from the head through the needle, insert it into the middle of the body under the head, and pull the yarn through to the bottom of the body. Thread the second piece of yarn and insert it into the middle of the body pulling the yarn through to the bottom. Tie a double knot pulling the yarn tight then trim off the excess.
Making and attaching the wings and tail
Print and cut out the pattern pieces. Trace the two tail pieces and two wings onto the felt and cut them out.
Place and hold the wings onto the bird body where you think they look best. While holding the wings in place fold the bottom of one wing back add a little hot glue and secure it in place. Repeat this step for the second wing. Now, fold back each wing add a little more hot glue to each wing and glue it down. Do not glue the entire wing; leave some unglued.
Next add hot glue to the bottom section of the larger tail piece then place the smaller tail piece on top, securing it down. I folded the smaller tail piece back and added more hot glue so the two pieces would hold together better when attaching them to the bird’s bottom. Place the bird on top of the tail to see how far you want the tail to extend out the back. Tip the bird forward add hot glue to the tail and attach the bird to the tail.
You can leave the wings just felt or you can add a feather to each wing as I did. To add the feathers you may need to cut some of the bottom of the feather to fit the wing properly. Once you have sized the feathers, add a small amount of hot glue to the center of each feather, about halfway up, and attach them to the felt wings.
Adding the eyes and beak
Position the two 6mm black beads where you think they should be on the head. Lightly push the beads into the head then remove one bead at a time add a small drop of hot glue to the head, and attach the bead.
The beak size will depend on how large you made your bird. To make the beak, fold one end of your felt up and cut a triangle on the fold. You should end up with a piece that looks like a diamond when opened. Add a small amount of hot glue to the inside of the fold and pinch it closed. I forgot to take photos of this step. Place the beak onto the bird’s face where you think it looks good then work the beak down into the yarn. To push the beak into the yarn, place the needle across the inside of the beak and push the beak into the yarn. Once the beak is in place, remove it and hold the space open with the needle or your fingers. Add hot glue then glue the beak back in place.
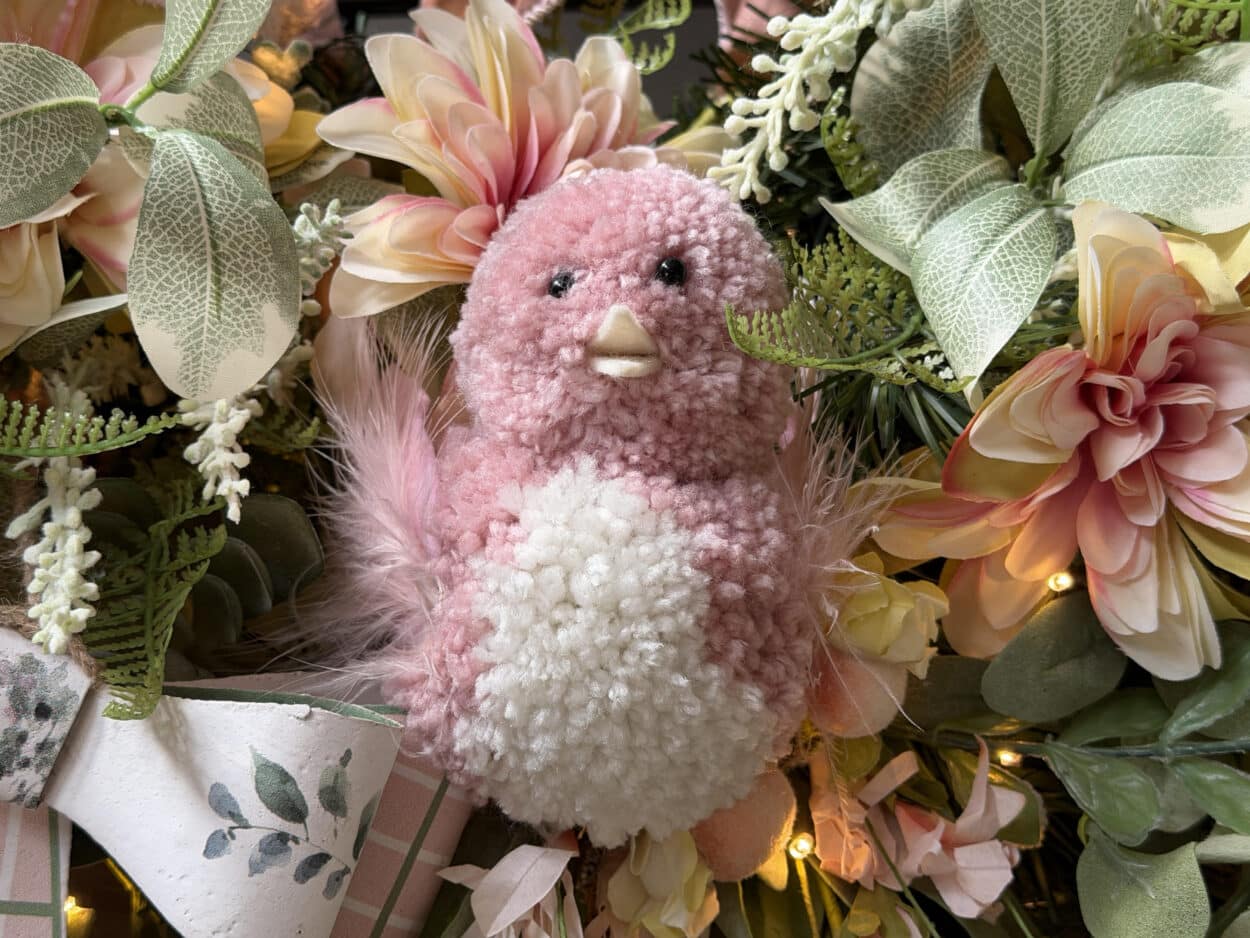
Your sweet bird is now finished. Below you can see my birds, which vary in size and color. I hope you enjoy making these adorable birds. I am going to add some of them to my garland on my mantle, tiered tray, and I also have to send a few to my granddaughter.