Flowers, Home Decor, Outdoors
Solar Garden Flower

12
May
May

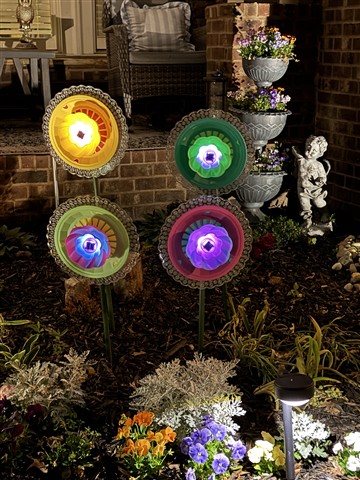
My grandchildren and I made these amazing solar flowers for their mom for Mother’s Day. I have made garden flowers using glass plates and bowls but these are made with plastic plates and bowls. The longest part of making these flowers is painting the dowels for the stems.
Materials I Used:
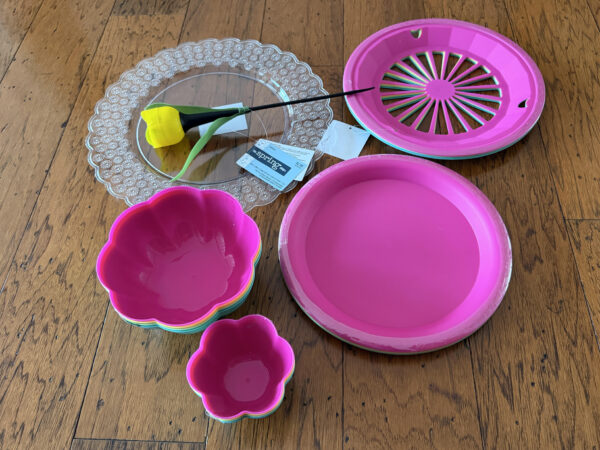
- 13″x13″ Scalloped floral edge charger plate, Hobby Lobby #6387914
- 10.4″x10.4″ Bright plate holders, sold as a set of 4 at Hobby Lobby #6388755
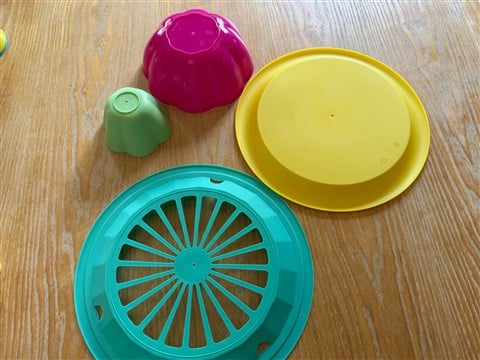
- 9.9″x9.9″ Bright dinner plates, sold as a set of 4 at Hobby Lobby #6388730
- 27oz Bright flower bowls, sold as a set of 4 at Hobby Lobby #6388680
- 2″Hx3.63″Wx3.63″D Bright flower bowls, sold as a set of 4 at Hobby Lobby #6388664
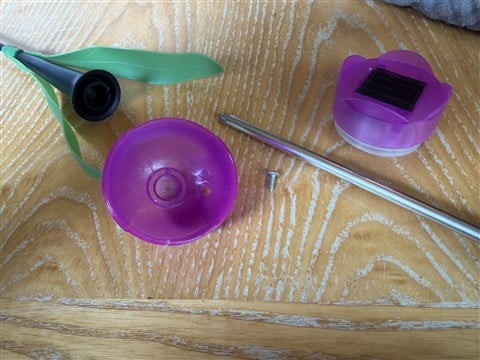
- 12″x1.89″x1.89″ solar flower, Hobby Lobby #6025233
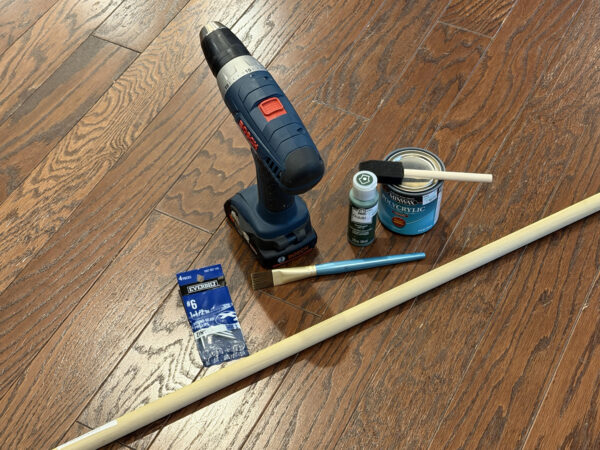
- 1/2″ x 36″ dowel, I purchased mine at Walmart
- Drill and a 3/32 drill bit
- #6 1 1/2″ screw for each flower
- 1/2″ Copper Bell Pipe Hanger, sold in the plumbing dept. at Home Depot #33502
- Folk Art Gloss Outdoor craft paint in the color pine green, Hobby Lobby
- Minwax polycrylic topcoat, Hobby Lobby
- Paint brush
- Foam brush
- Phillips screwdriver
- Saw if you are making more then one flower and would like to cut some of the dowels so the flowers would be at different heights.
Step 1
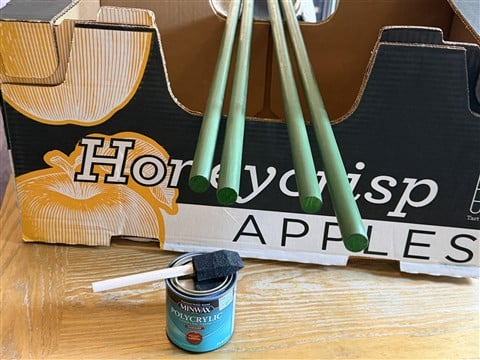
If you are making more than one solar garden flower and would like them to be at different heights in the garden measure and cut your dowels. Paint your dowel with two coats of the outdoor pine green craft paint. After the dowels have dried use a foam brush to coat them with polycrylic.

Step 2
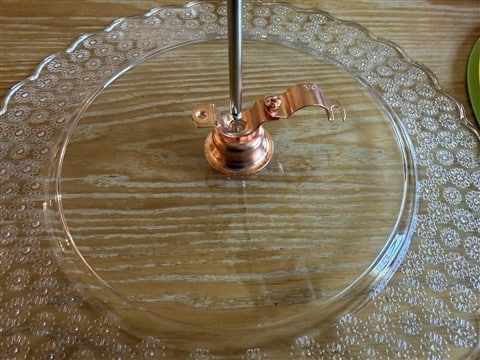
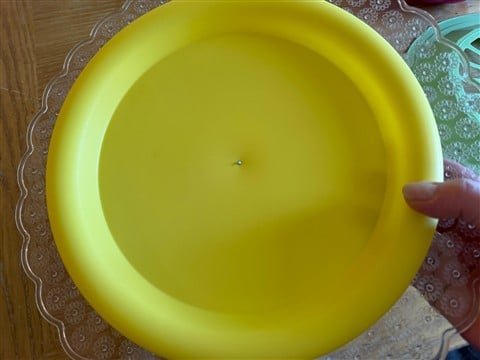
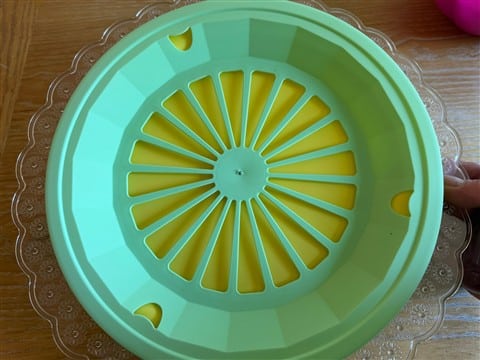
Using a drill and a 3/32 drill bit drill a hole in the center of the charger, plate holder, plate, and the two flower bowls. I forgot to put the charger in the photo below.

Step 3
Remove one of the screws from the copper bell pipe hanger then remove the screw from the center of the hanger. Sorry I forgot to take a photo of this step. Remove the top of the solar flower then use a screwdriver to remove the screw holding the bottom of the flower to the stem.

Step 4
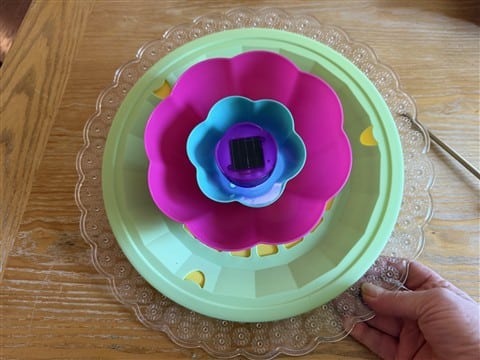
Let’s assemble the flower! Place the bell hanger on the back of the charger plate then insert the #6 1 1/2″ screw through the bell hanger into the predrilled charger. Use the screwdriver to partially screw the part into the charger.
Place the plate onto the screw at the front of the charger then tighten the screw until it is partially through the plate.
Place the plate holder onto the screw then tighten the screw until it is partially through the plate holder.
Place the larger flower bowl onto the screw then tighten the screw all the way. You can use the screwdriver or if you hold the plates and turn the bowl with your hand it will tighten.

Place the smaller flower bowl onto the screw then turn until it is tight. Next turn the solar flower on and put the flower top back on. Place the flower onto the screw and turn it until tight.

Step 5
Time to add the stem! With the back of the flower facing up place the dowel into the bell hanger then screw both bracket screws until they are tight. In the photo you will see that I had to add white duct tape to tighten the bracket around the dowel. This was necessary because I bought a 3/4″ bell hanger and dowel and for some reason the bell hanger was too large for the dowel. I did make flowers with the 1/2″ bell hanger and 1/2″ dowel and it does tighten!


Your flower is now finished and ready for the garden! I hope you enjoy making the solar garden flower. Make a few and arrange them together in your garden to make a beautiful statement!