Home Decor, Ornaments
Beehive Ornaments
14
May
May
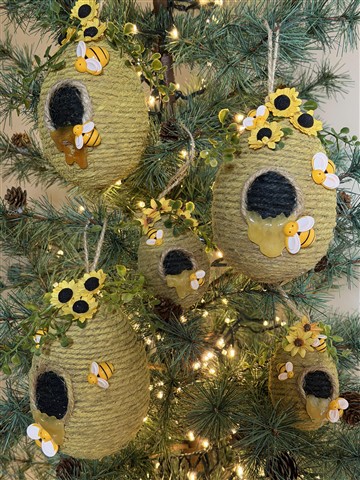
I have so many eggs in my craft stash that I knew I had to use some of them for a craft lol. For this beehive ornament craft you can use any Easter eggs you have. I used paper-mâché, and fillable plastic Easter eggs. These ornaments are great to add to a Spring tree or a garland.
Materials I Used:
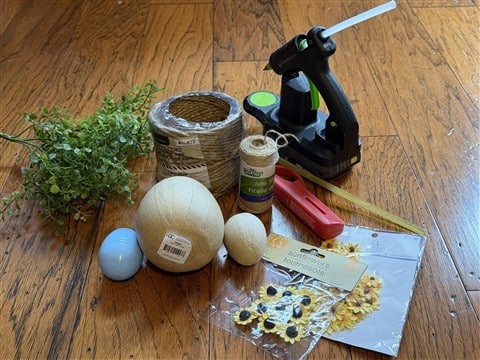
- Eggs of your choice, such as papier-mâché or plastic eggs. I used 2″ and 4″ paper mache, and 2.5″ fillable plastic eggs.
- 4 ply jute cord, Walmart
- Jute twine, Dollar Tree
- Paper sunflowers from Dollar Tree or Hobby Lobby
- Greenery
- Yellow craft paint
- Black craft paint
- A stiff paintbrush, such as a chip brush or a chalk paint brush
- Paper towel
- Crafting bees, I order mine from Amazon
- Auto body hot glue sticks, I order mine from Amazon
- Scissors
- Hot glue gun and glue sticks
- Lighter this is optional
- Tan pipe cleaner, optional
- Black sharpie
Wrapping The Egg
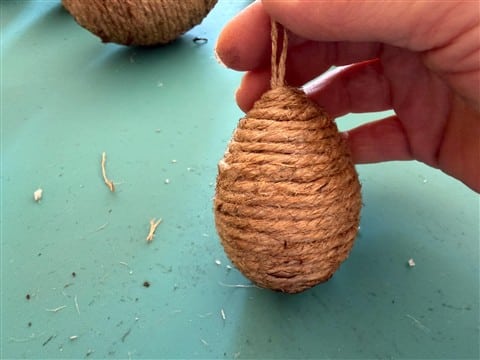
Regardless of which egg you decide to use the following directions are the same. Start by adding a small amount of hot glue to the bottom of the egg then glue down the end of the 4ply jute. Keep adding hot glue and wrap the jute around and around tightly pushing the rows of jute together as you go.


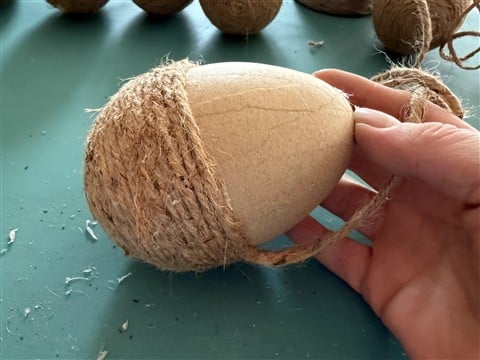
When you get close to the top of the egg, cut a piece of jute twine long enough to make a hanger. Add a small amount of hot glue to the top of the egg and attach the two ends of the twine.

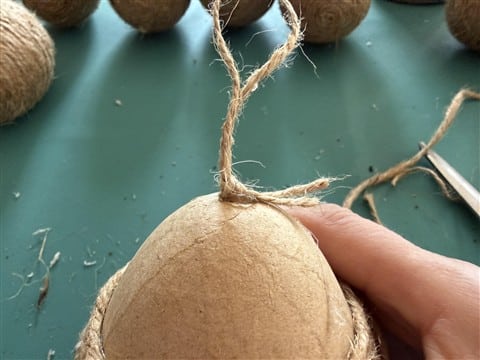
Next keep adding hot glue and wrapping the jute around the egg. Wrap the jute over and around where you added the hanger. Cut the jute and glue down the end.

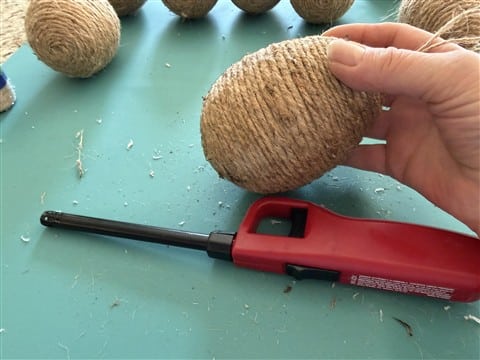
This next step is optional but I like to use a lighter and burn off all the little strings from the jute.
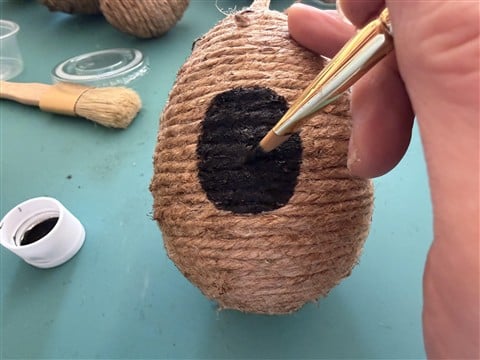
Adding The Opening
Using a black Sharpie, draw an oval where you want the opening. Paint the inside of the opening with black craft paint.

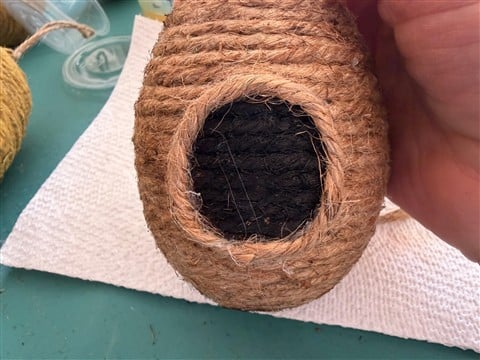
Add a drop of hot glue at the bottom of the painted opening then attach the end of the jute twine.


Keep adding hot glue around the opening and attaching the jute. When you return to the beginning, cut the jute and attach the end.
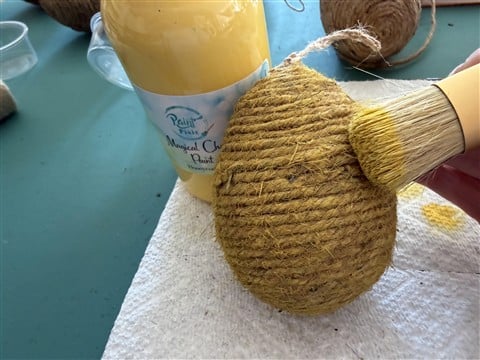
Painting The Beehive
Using yellow craft paint and a stiff paintbrush paint the beehive. I did not cover the beehive completely with yellow paint because I liked seeing some of the jute showing through. Leave the jute around the opening unpainted.
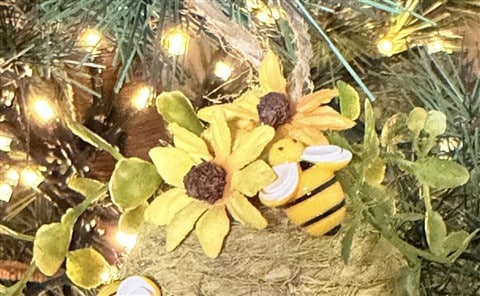
Adding The Greenery and Sunflowers
I really don’t know what I was thinking but I forgot to take any pictures of the added greenery and sunflowers. You can wrap a piece of pipe cleaner around a few small pieces of greenery, then wrap the pipe cleaner ends around the hanger or you can just hot glue the greenery to the top of the beehive. To add the paper sunflowers, apply hot glue to the back and attach them where you want them.

Adding The Honey and Bees
Using the hot glue gun and the auto body hot glue sticks, squeeze the hot glue at the bottom of the opening and let it drip down. You can add as much or as little as you would like. While the glue is still hot add one of the craft bees to the hot glue.


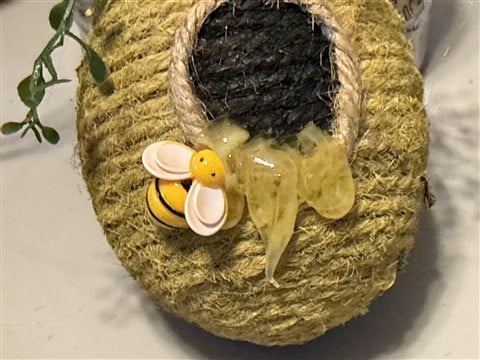
Add more bees by applying hot glue to the back of each bee and attaching it where you would like.

Your beehive ornament is ready to hang on your tree or add to a garland. I hope you enjoy making the beehive ornaments! The small fillable plastic eggs make the cutest beehive ornaments for a small tree!