Halloween, Home Decor
Spooky The Ghost (How To Glue Together)
Jul
I can not believe July is almost over and Fall will be here before we know it! I was shopping in Lancaster and I seen a ghost by a crafter and I just loved him so I thought I would try my hand at making him and I am just loving how he came out. I decided to name him Spooky lol. This blog shows you to make him by using a hot glue gun to glue him together. You can make spooky a boy ghost or a girl ghost! If you are a sewer like me there is another blog on how to sew spooky together.
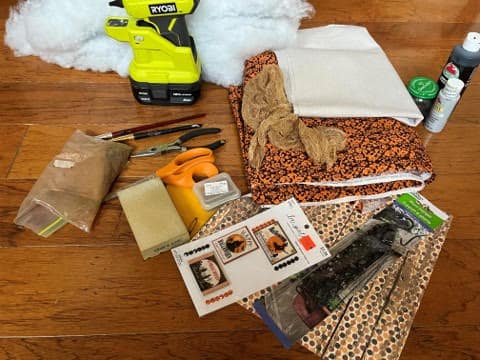
Materials You Will Need
- Spooky the ghost pattern
- A piece of painters drop cloth 35” wide x 30” long. You can also use any fabric you would like.
- A piece of Fall or Halloween printed fabric.
- Polyester Fiberfill
- A piece of coffee stained cheesecloth for around his neck.
- 1 Dollar Tree back plant hanger
- Fourteen 20mm Rusty Jingle Bells
- Light Gray craft paint
- Black craft paint
- Scissors
- Paintbrushes
- Fine grit sandpaper
- Needle nose pliers
- Hot glue gun and glue sticks ( I use gorilla glue sticks)
- Pencil
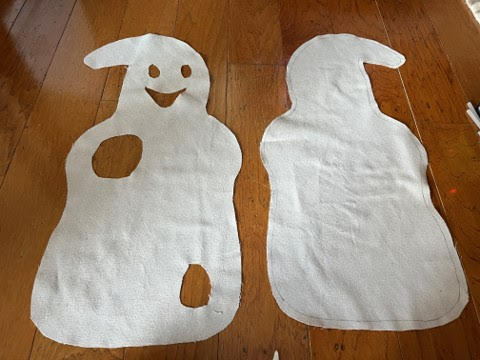
Cutting Out The Ghost
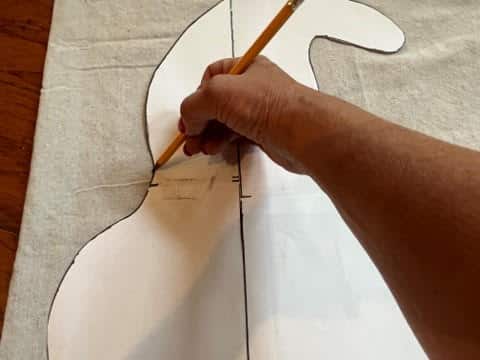
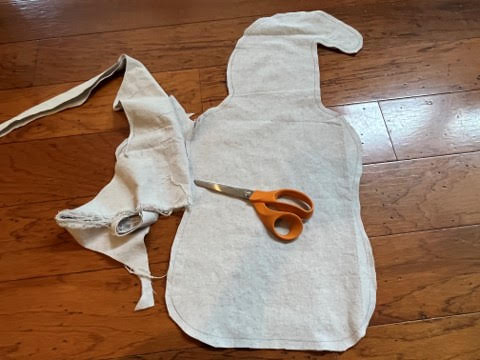
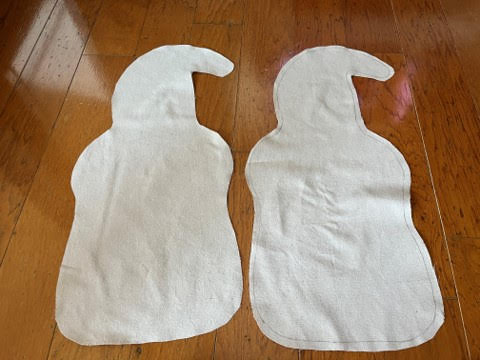
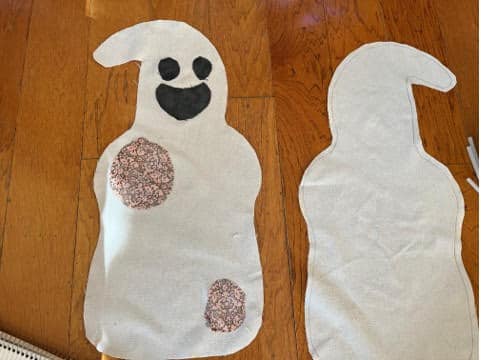
The first thing you will need to do is print and cut out your pattern pieces. Follow the directions on the pattern pieces to assemble the ghost. Fold the painters drop cloth in half then trace the ghost pattern onto the double layer of drop cloth. Cut out the ghost about a ¼” or so away from the trace line. Save the scrap pieces you will be using them for the eyes and mouth.
Cutting Out The Eyes, Mouth, and Holes In The Body
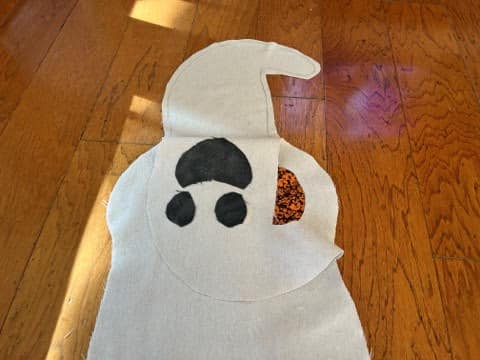
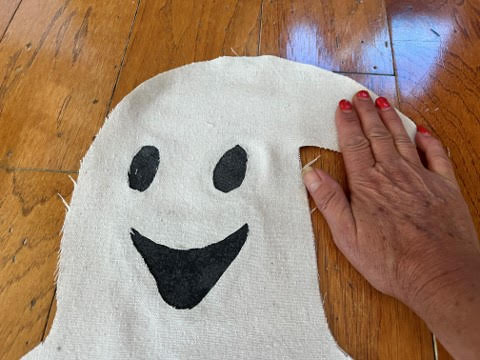
Take the top piece of the ghost with the trace line and set it aside with the trace line facing up. Now with a pencil draw two eyes and trace the mouth where indicated on the pattern onto the bottom layer of the ghost. Next draw two circles or ovals where indicated on the pattern. The circle on the bottom is smaller then the top circle. Using scissors cut out the eyes, mouth, and two circles.
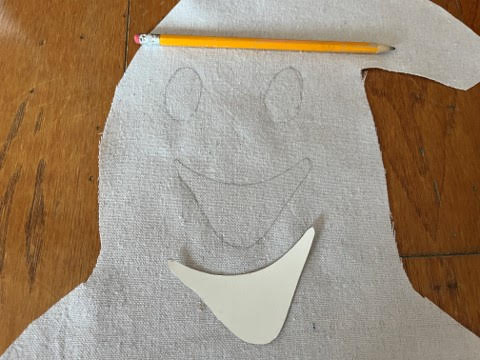
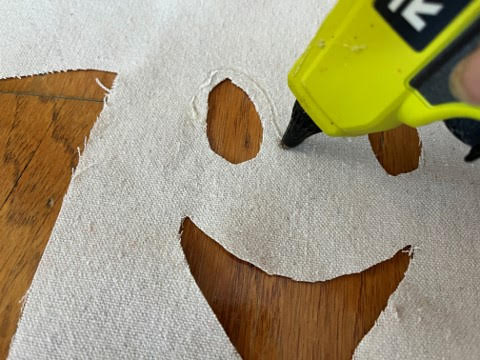
Using the scrap pieces of painters drop cloth cut out two eyes and a mouth larger then the openings you cut out. Cut circles out of your printed Fall or Halloween fabric larger then the circle openings on the ghost. Now mix small parts of your black and light gray craft paint to achieve a color you would like your eyes and mouth to be. Once you achieve the color you would like add a few drops of water to thin out the paint. Paint both sides of the eyes and mouth. Let dry.

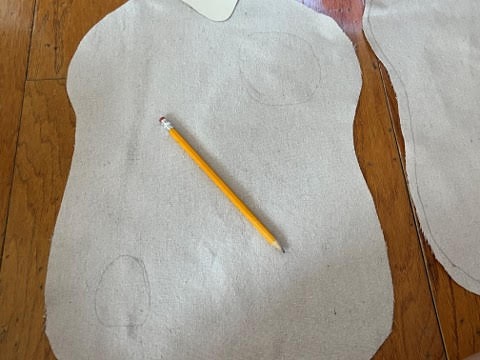
Turn the piece of ghost over that you just cute the eyes out of. Once your painted eyes and mouth have dried give them a light sanding with a fine grit sandpaper. This will give them a worn look.
Adding the Eyes, Mouth, and Printed Fabric
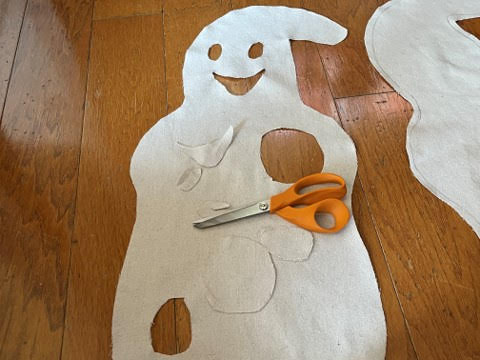
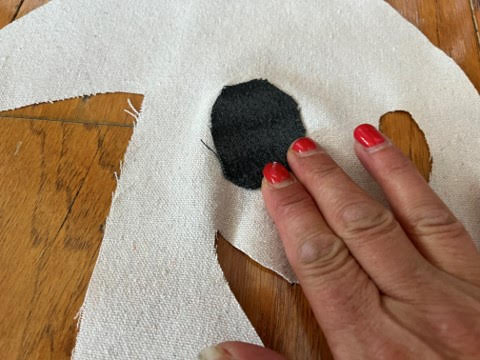
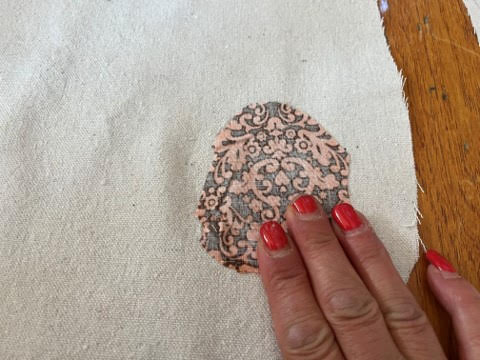
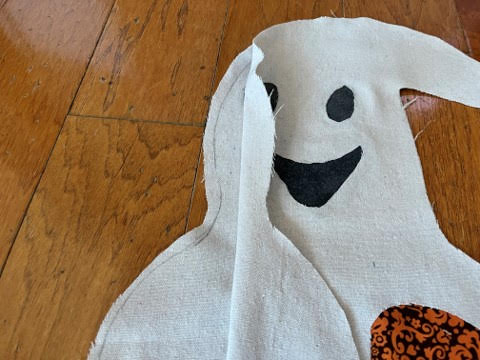
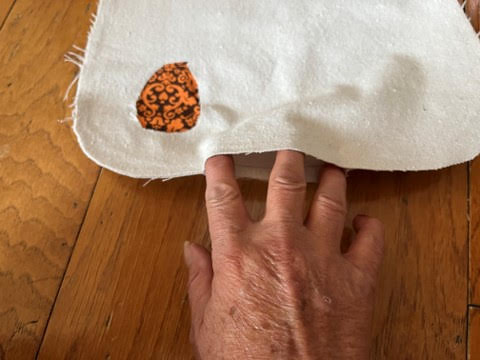
To add the eyes add a small line of hot glue around the eye, do not go to close the inner edge of the eye. Glue down the black eye repeat this step to the other eye. Now add hot glue around the mouth opening, do not go to close to the inner edge of the mouth. Glue down your painted mouth. To add the printed fabric circles add the hot glue around one circle not going to close to the inner edge. Take your printed fabric circle and glue over the opening with the print facing down. Repeat this step to the other circle and printed circle piece.

Gluing and Stuffing
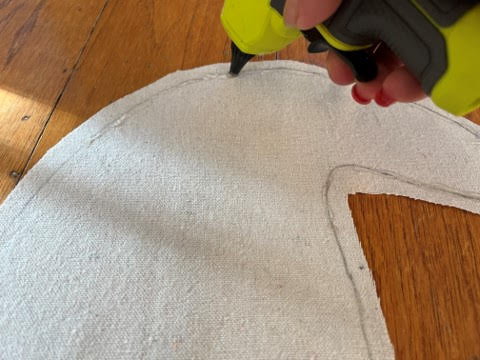
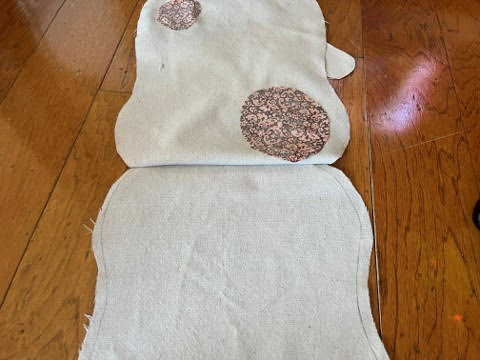
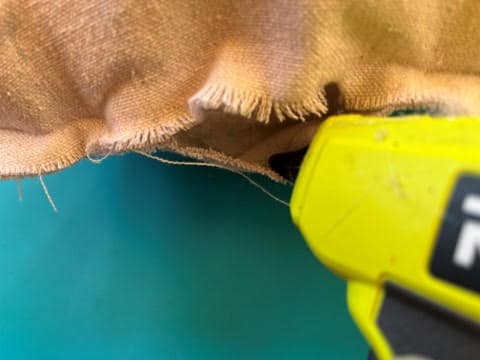
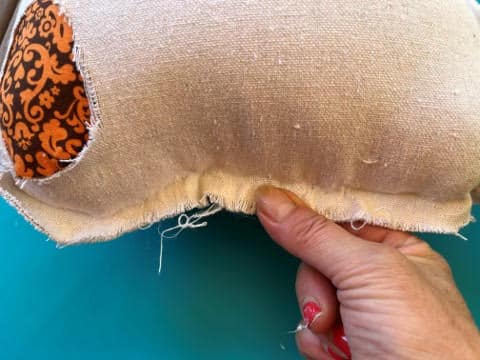
Start by taking the piece of the ghost with the eyes, mouth, and printed fabric circles facing towards you and lay it on top of the second piece, make sure your trace line is facing up, this is going to be your glue line. Now fold back the head of the top layer. Using the trace line as your glue line add a line of hot glue around the piece that comes out from his head. Glue down the top piece of your ghost. You are going to continue folding back the top layer of the ghost adding hot glue on the trace line and gluing down. I found it easier to fold back one side of the head add the glue and glue down then do the other side of the head. Once you have the head glued fold up the body add hot glue to a small section on each side and glue down. Continue working your way down both sides of his body. When you reach the bottom of the ghost you need to leave an opening in the middle for stuffing the ghost.
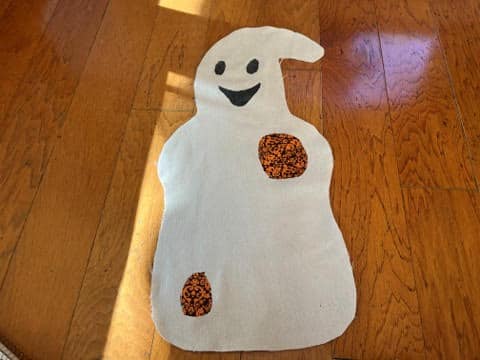

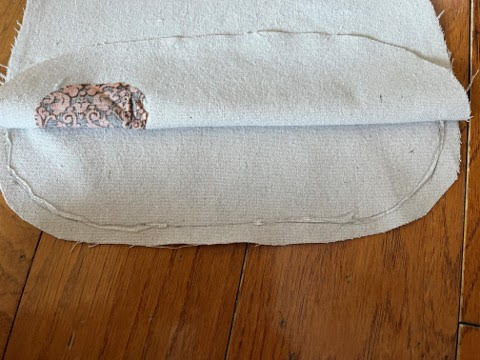
Stuff the ghost firmly with polyester fiberfill. Do not stuff real close to your opening. Once you have your ghost stuffed add a line of hot glue to the opening and close. Next take your pinking shears and trim around the ghost making sure you do not cut to close to where the glue is.


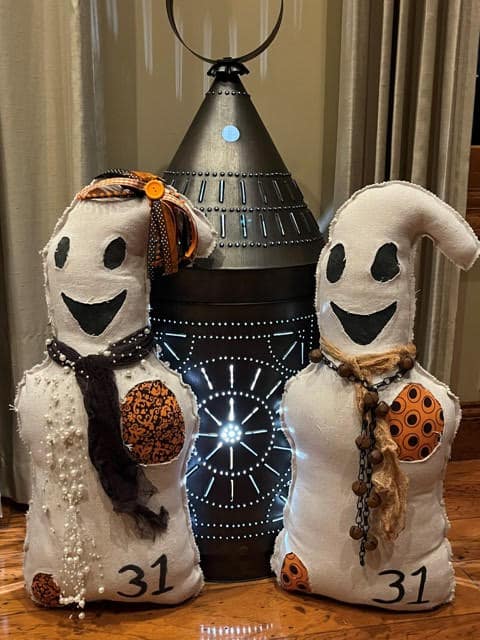
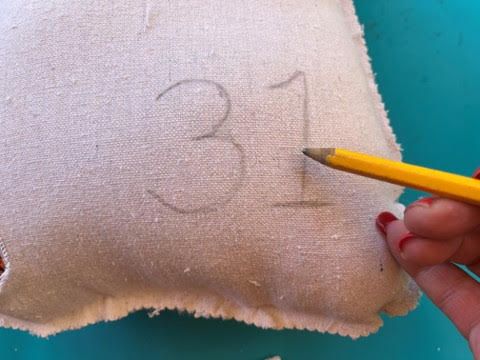
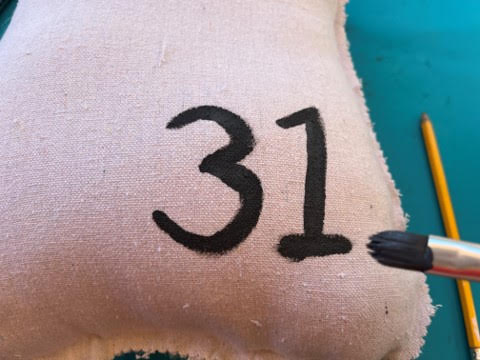
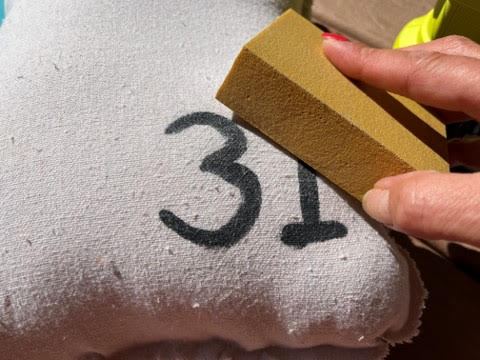
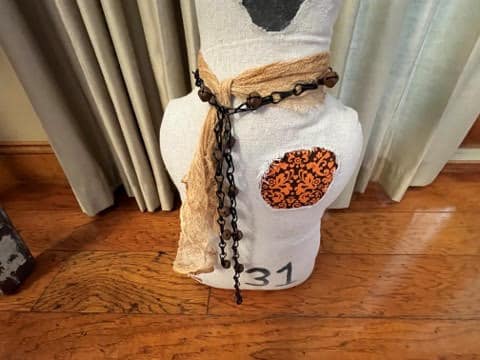
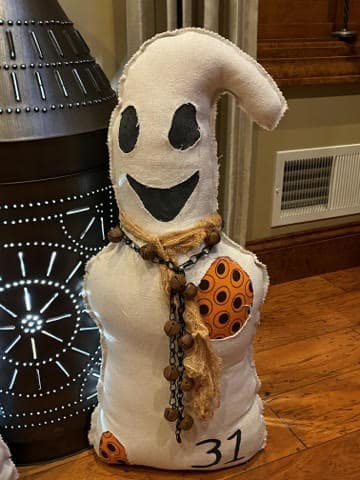
Using a pencil make a number 31 in the opposite corner of your printed circle. Using the paint you mixed paint the number and let dry. Once it is dry give it a light sanding with a piece of fine grit sandpaper.
Adding The Finishing Touches
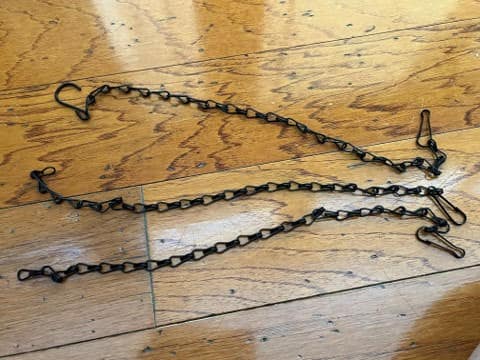
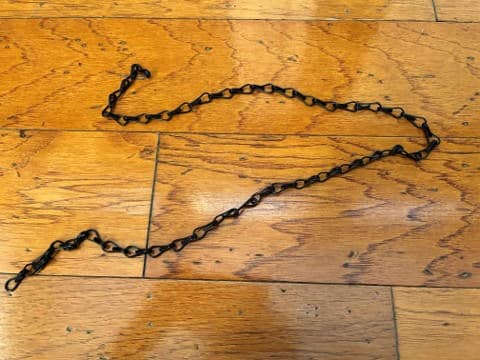
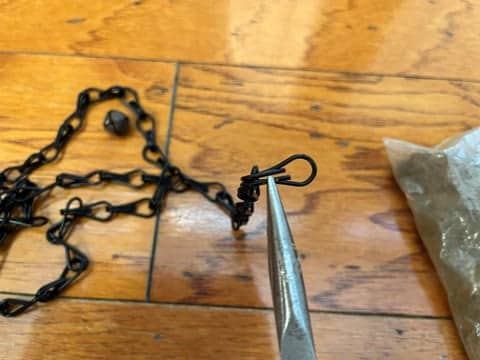
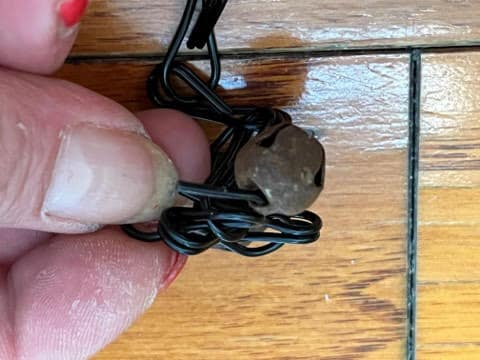
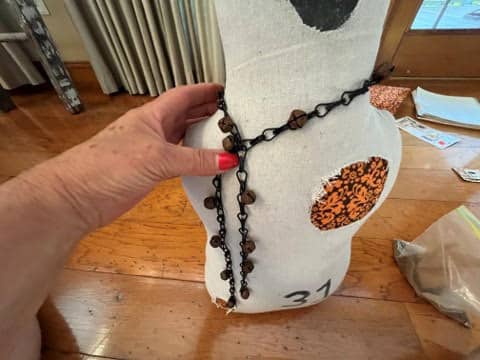
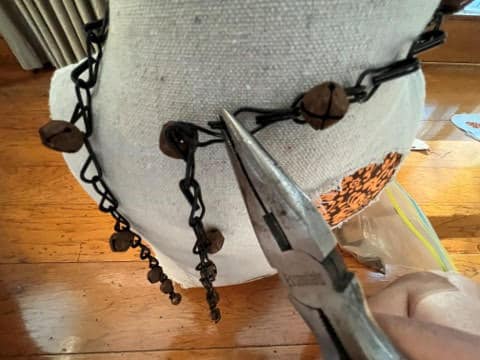
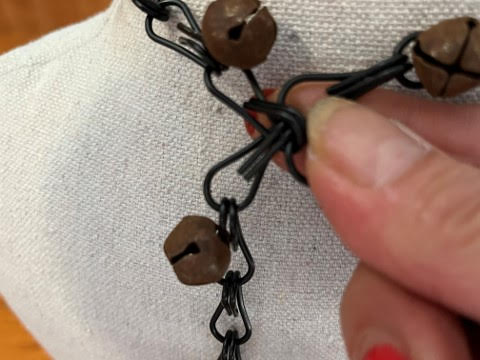
Remove 2 of the chains pieces from the plant hanger then hook them together to make one chain. Starting at one end of the chain using a pair of needle nose pliers lift up one of the folded ends (see photo’s below) slid a rusty jingle bell on then squeeze the end back down. Skip two links then add a rusty jingle bell the same way you added the first one. Repeat these steps working your way to the opposite end.
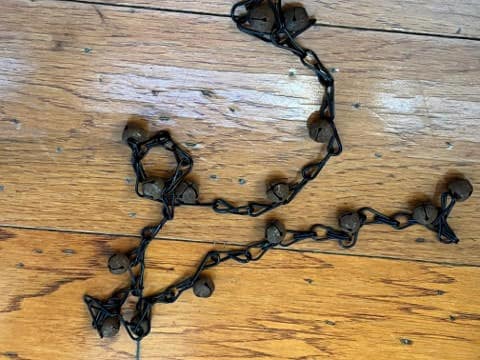
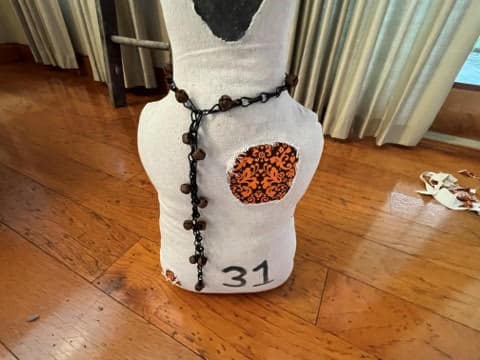
Place the chain around the neck of the ghost. Cross the ends over each other then open a link up and attach a link from the other side of the chain o it is like a neckless with the two ends hanging down the front of the ghost. Tie a piece of coffee stained cheesecloth around the neck.
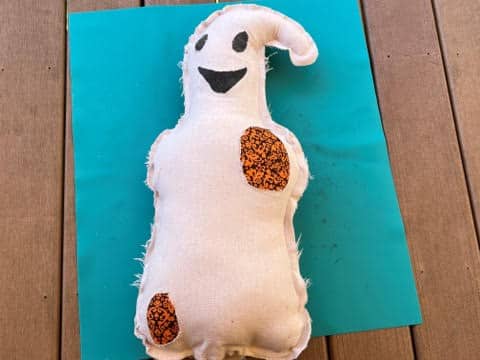
You can make and add a hangtag to Spooky if you would like. Make two Spooky the ghost and make one a girl ghost. I added pearls and a black piece of cheesecloth around her neck then gave her a messy bow on the top of her head. I hope you enjoy making and using Spooky in your Fall and Halloween décor. I just love how they turned out so much I am making 3 boy and 2 girl ghost one for each of my grandchildren!

Thank you. I love it and so simple to make.
I am so glad you like him!
Sherry these are incredible I’m making them as we speak! I just drew my own pattern trying to be really close to yours because I don’t have a printer but I’m loving these so much!!!
This is amazing….gonna give it a try with muslin fabric
I am so glad you like the spooky the ghost.
How much fill is needed to make two ghosts?
Tbird1703@gmail.com
Need to make this, so awesome!! Love your holiday ideas!! Such high quality, your crafts look so professional and store bought!!