Dollar Tree, Easter
Stackable Eggs Turned Chick
Feb
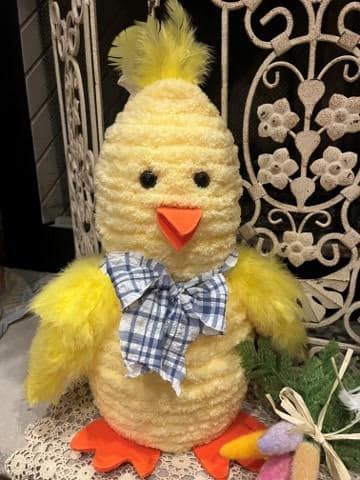
Have you seen the stackable plastic eggs in Dollar Tree Plus? I bought them not sure what I was going to do with them then one of my followers sent me a photo of another crafter who turned it into a rabbit, I was going to do the rabbit and make it my own then I thought about doing a chick and I just love how they turned out! You only use the top two eggs but don’t worry the bottom one won’t go to waste paint the egg and fill it with flowers to use as a centerpiece.
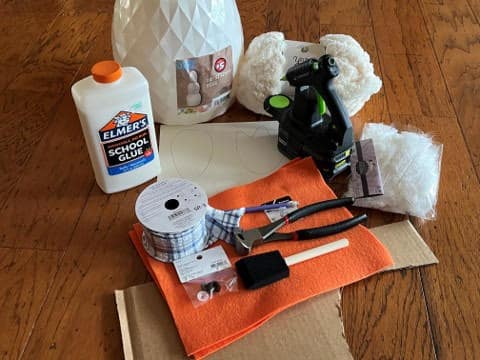
Materials you will need:
- Pattern for the wings, feet and beak
- Stackable plastic eggs from Dollar Tree Plus
- Chunky yarn of your choice. I used Yarn Bee Magnifisoft in the color Ivory (Hobby Lobby) and Loops & Threads Fluffy Chenille in the color Lemon Citron (Michaels).
- 20mm Animal eyes, I used brown that I bought at Joann’s (#0197-9129)
- Orange felt, you want a heavier orange felt I bought two of the single sheets at Hobby Lobby. You need two sheets for each chick
- Fancy feathers in colors to match your yarn. I buy the feathers at Hobby Lobby and Joann’s
- Ribbon of choice
- Piece of cardboard to make the wings
- Hot glue gun and glue sticks
- Elmer’s Glue
- Sponge brush
- Pencil
- Scissors
Wrapping the eggs
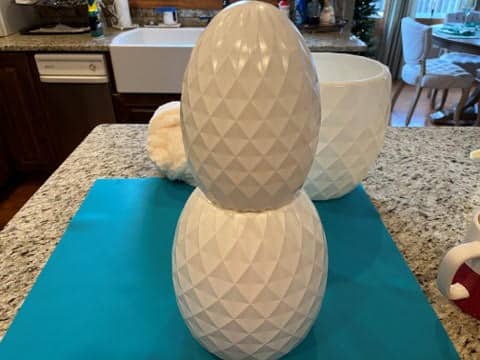
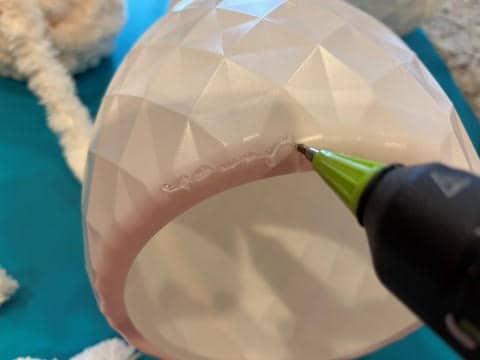
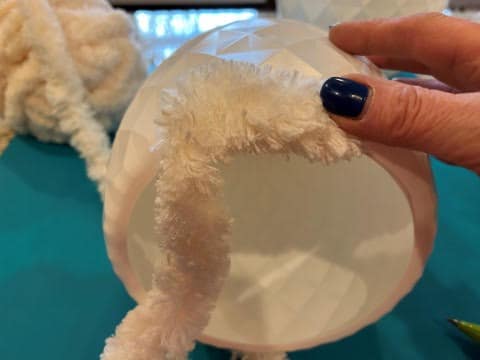
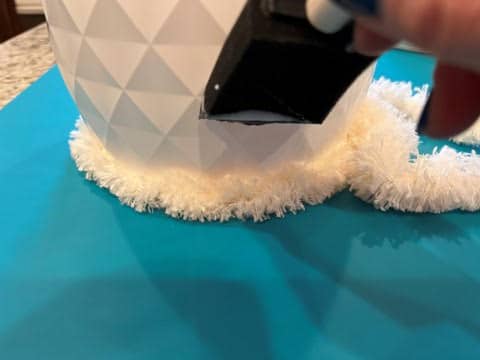
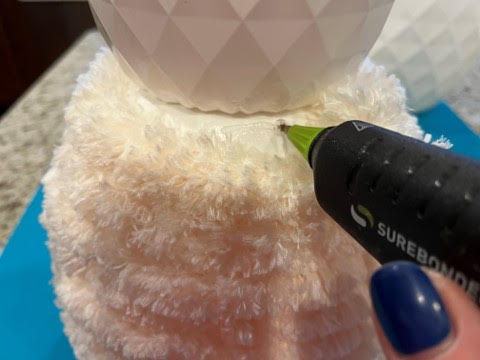
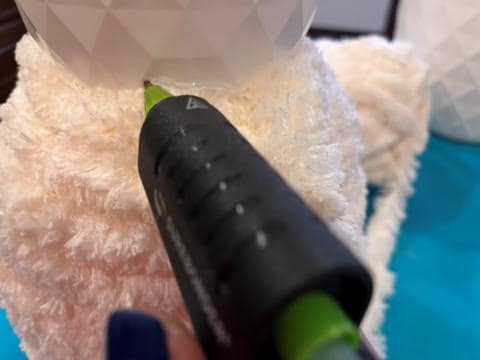
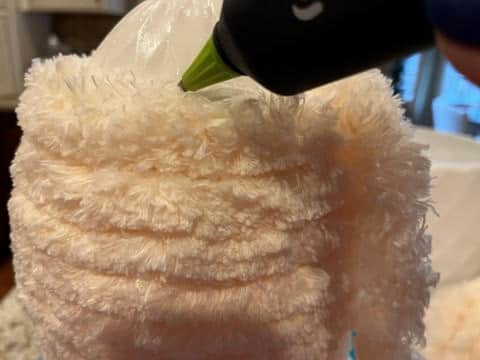
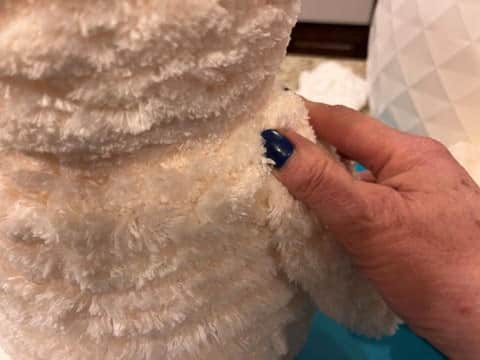
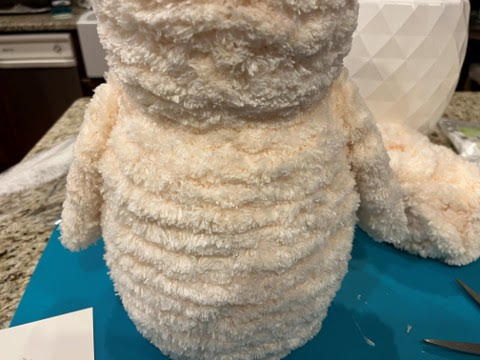
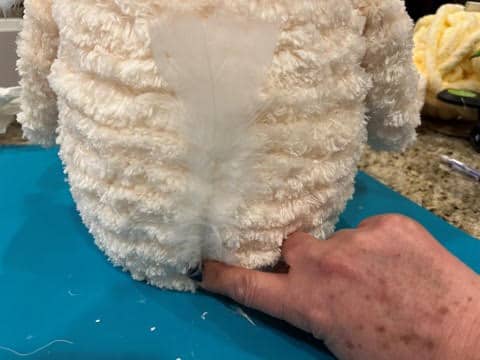
You are only going to use the top two eggs, snap them together. You are going to start by adding a small line of hot glue along the bottom egg at the very bottom then attach the end of your yarn, continue adding hot glue and attaching the yarn until you have done one row around the bottom of the egg. Next using a sponge brush and Elmer’s glue brush the glue around the egg and continue wrapping the yarn around the egg. When you get towards the top of the bottom egg you may need to use hot glue to hold the yarn in place. Once you have the bottom egg wrapped add hot glue to the bottom of the top egg and wrap with yarn. Add hot glue for the first row or two of yarn then you can add the Elmer’s glue to the egg and wrap. You will need to use hot glue again when you get to the top. When you are finished wrapping the top egg cut off excess yarn.

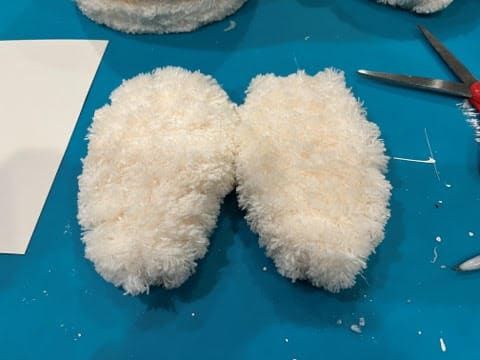
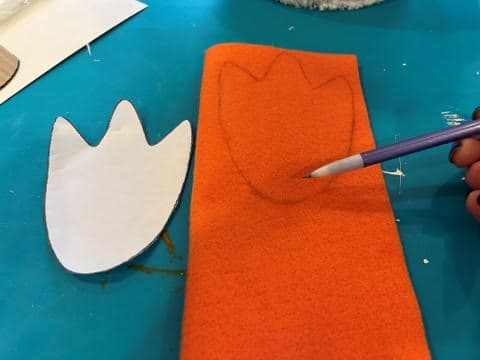
Making the wings
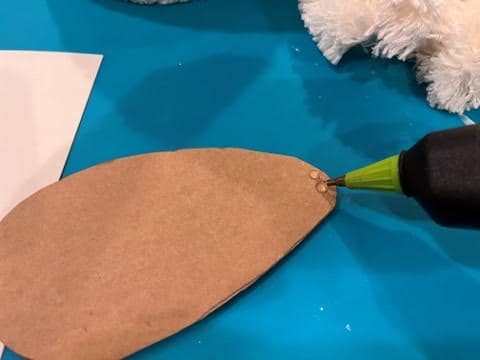
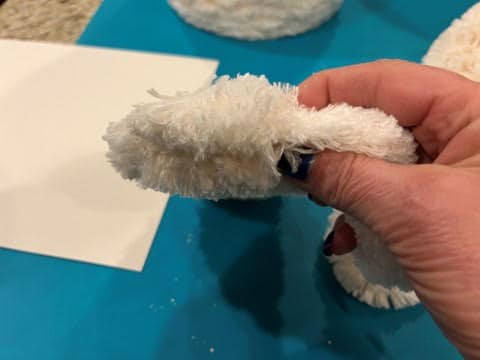
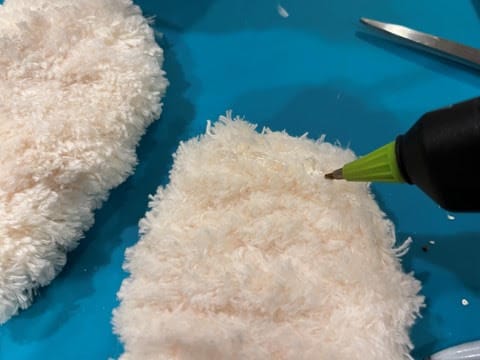
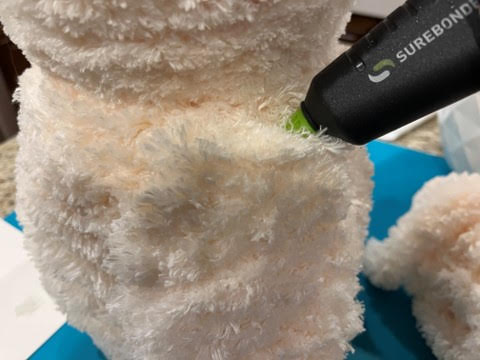
Print out the pattern and cut out the wing, beak, and foot. Trace two wings onto a piece of cardboard and cut out. I just want to say one of my followers suggested using a feather boa to wrap the wings which is a wonderful idea I would have done that if I would of thought of it lol so you can skip the yarn on the wings and wrap with a feather boa if you would like. Add hot glue to the front and back tip of the wing then attach the end of the yarn to the front and back of the tip of the wing. Add hot glue across the front and back of the tip of the wing going right over the yarn you just attached then wrap the yarn around the wing. Continue adding rows of hot glue to the front and back side of the wing and wrap with yarn. When you have wrapped the whole wing cut off excess of yarn and glue down the end. Repeat these steps to the second wing.


Attaching the wings
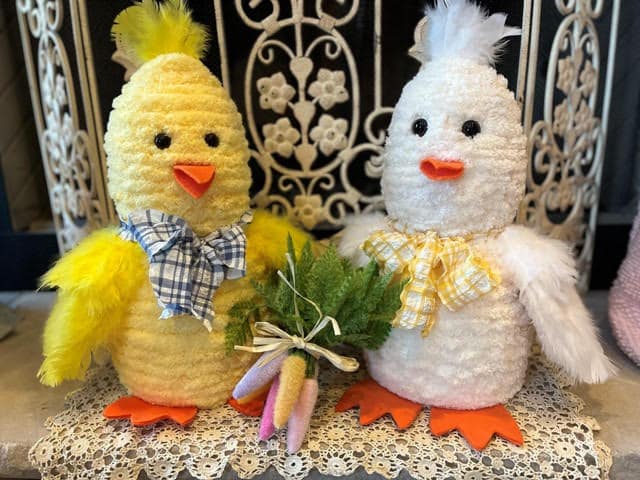
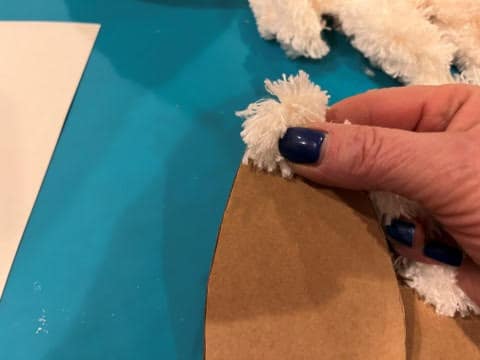
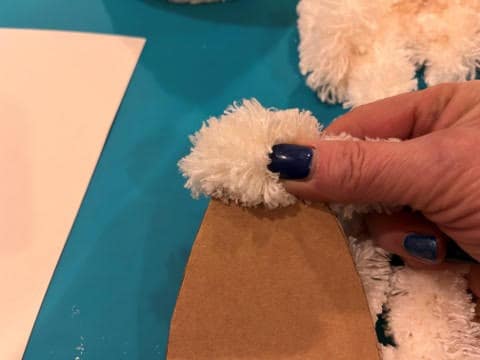
Add hot glue to one side of the top of the wing (the top is the wider part of the wing) then glue in place where you feel the wing should go. After attaching the wing you may want to add more hot glue to secure the win better. Repeat this step to the second wing.
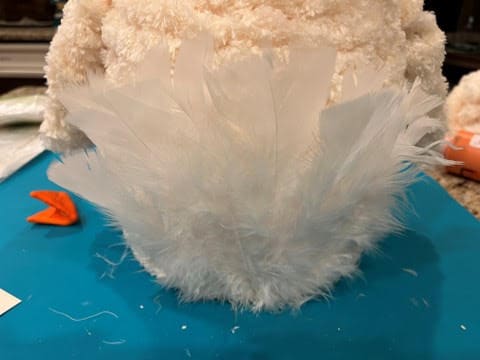
Adding the feathers
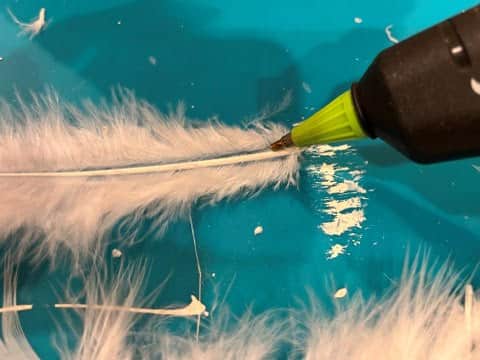
To add feathers to the wing you are going to add hot glue down the back of the feather and glue onto the wing so the bottom of the wing is covered do not worry about covering the top of the wing you are going to add more feathers to the top after you finish the bottom of the wing. Continue add glue to the back sides of feathers and gluing them to the wing until you have the whole bottom of the wing covered. Next take shorter feathers add hot glue only half way down the back of the feather then glue to the top of the wing working your way across the wing. The shorter feather will overlap the bottom feathers some. Sorry I forgot to take photo’s of all the steps! I am sure you can see what I mean by looking at the finished photo. Repeat these steps to the second wing.

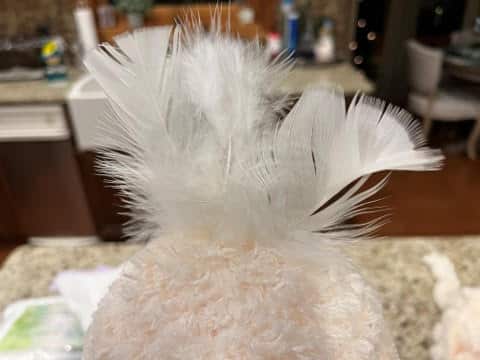
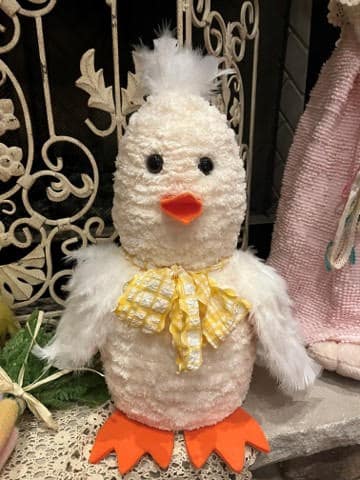
Pick out a few fluffy feathers add hot glue to the bottom of the feathers and glue to the top of the chicks head.
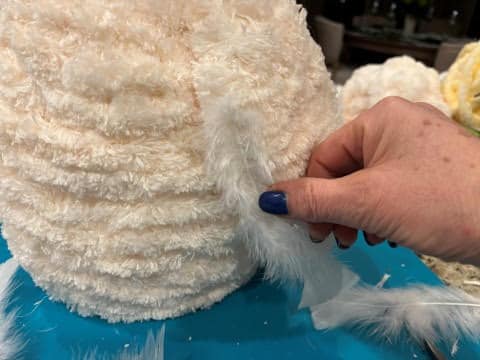
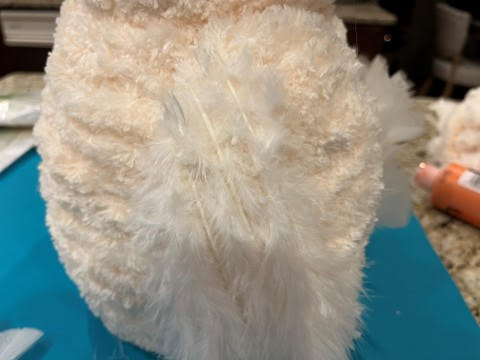
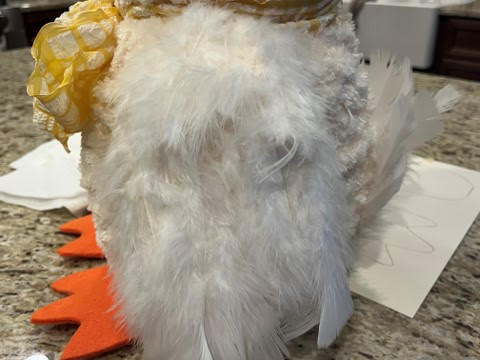
To add feathers of the tail you are going to add hot glue to the bottom back of one feather and glue to the center bottom back of the bottom egg.
Keep adding feathers until you get the look you like. I think I went to wide across the back with feather making it look more like a turkey tail lol. Maybe add feathers just in the middle back and don’t go so wide.

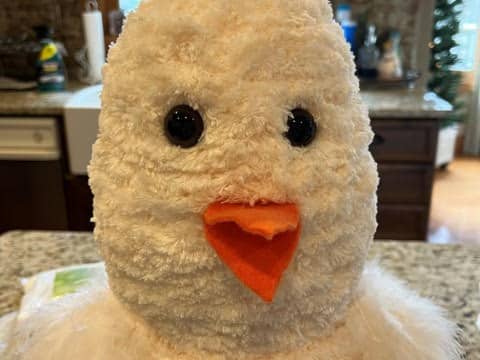
Adding The Face
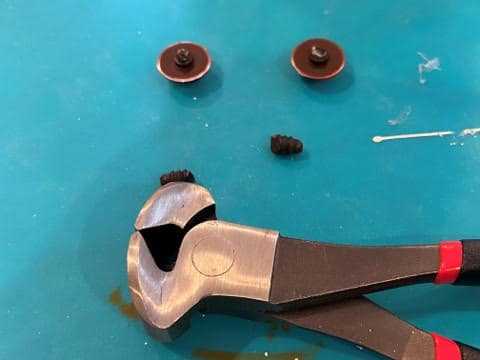
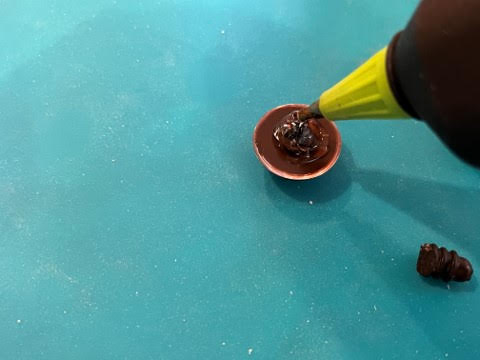
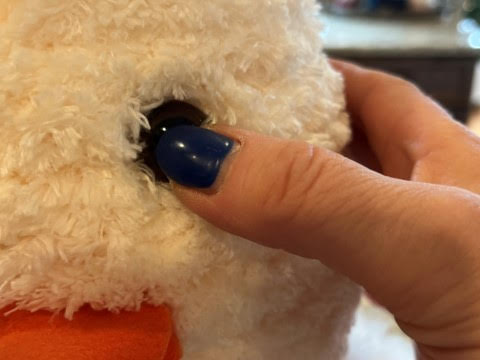
To prepare the eyes you need to cut the screw parts off the back of the eyes, you can use a pair of wire cutters to do this.
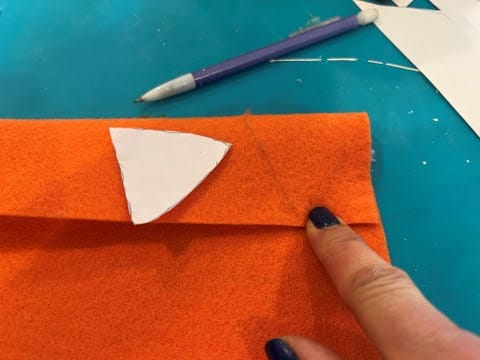
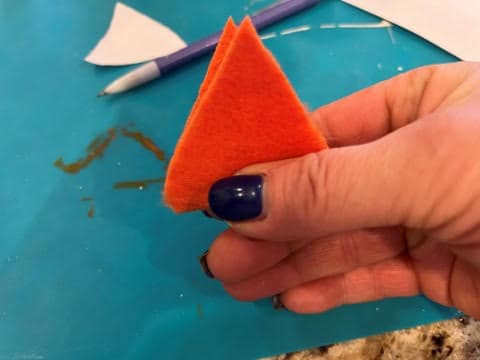
Next fold a piece of the orange felt then take the beak pattern and place the bottom of the triangle on the fold of the felt trace onto the felt then cut out the beak making sure you do not cut the fold part.
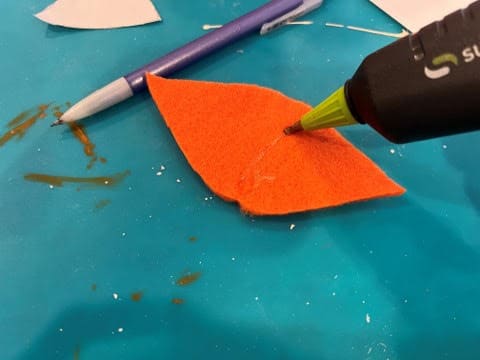
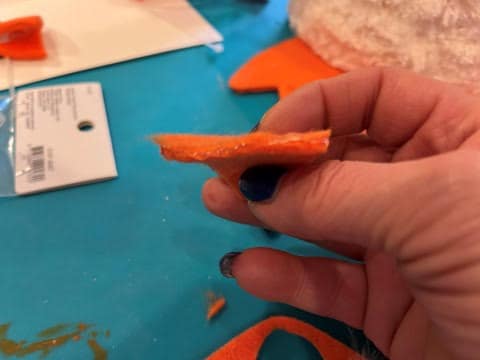
After cutting out the beak open it up and it will look like a diamond. Add a small line of hot glue to the fold then fold closed and piece the glued area.
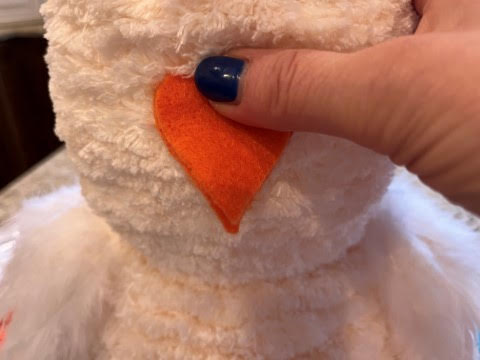
Please the eyes and beak onto the chick head to see where you think they will look correct. Add hot glue to the fold of the beak and glue in place. Then add hot glue to the back of each eye and glue into place.
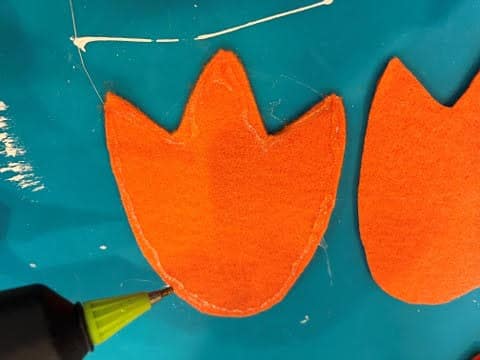
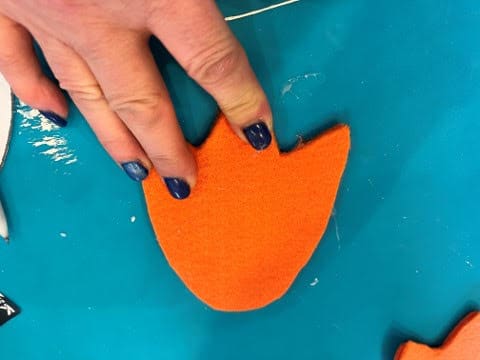
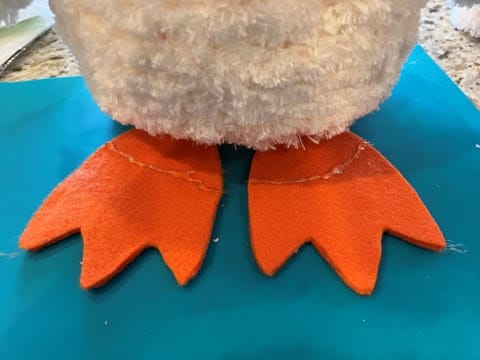
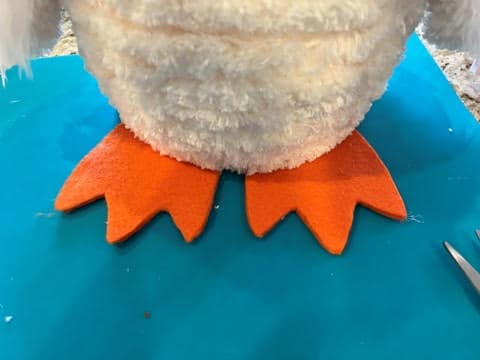
Making and Adding The Feet
On a double layer of orange felt trace and cut out two feet. You should have 4 feet. Add hot glue around one foot and glue a second foot on top. Repeat this step to the other two feet pieces.
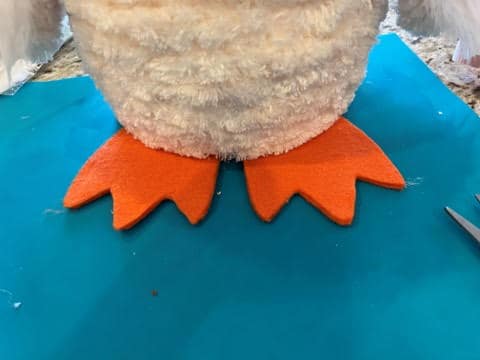
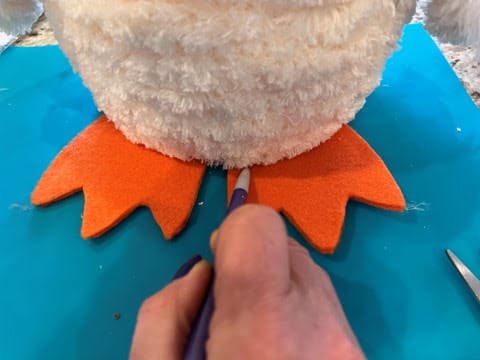
Place the feet under the chick where you would like them then take a pencil and make a line under the egg where the feet are then tilt the chick back add hot glue to your pencil lines then set the chick back down gluing on the feet. Pick up the chick and see if you need to add more hot glue to make sure the feet are secure.
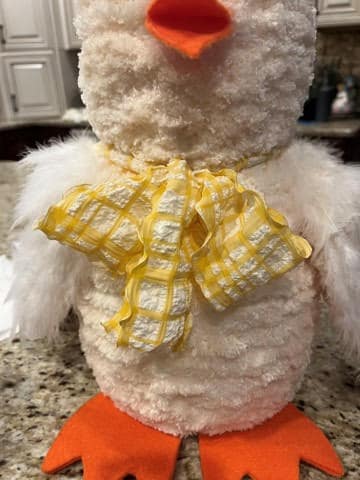
Tie some ribbon around the neck and make a bow!
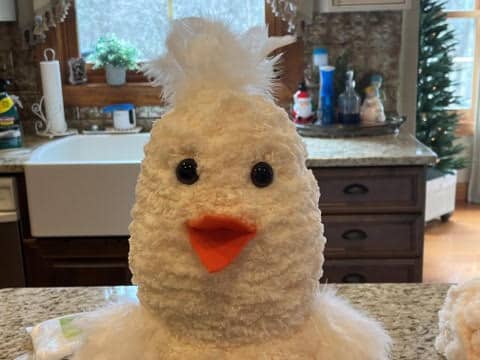
You are done making your adorable chick! I hope you enjoyed making him and adding him to your Spring/Easter décor!
I love the chicks. So proud you have a blog page. I enjoy all your crafts.
This is great. I am going to try and make a yellow chick for my granddaughters. I will need to find a dollar tree plus. There are none around my home. Does another store have the plastic eggs?
Also do you put the body and head together before or after you glue the yarn?
You do great work and I love watching you. Enjoy your vacation alone with your husband.