Home Decor, Patriotic
DIY Primitive Uncle Sam & Lady Liberty (Sewn)
May
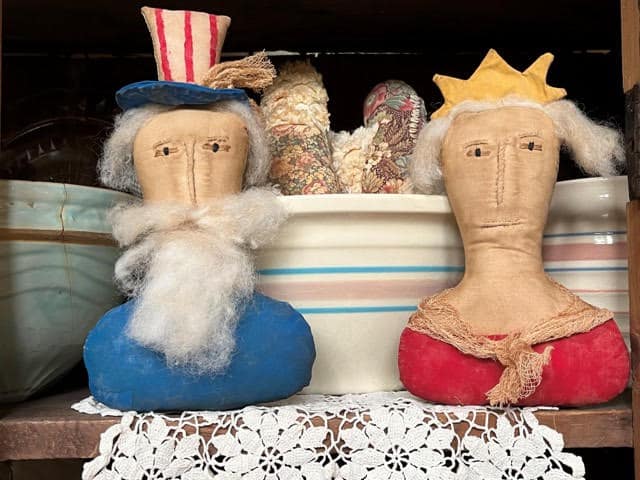
I was looking online to find a primitive Americana project and I came across a Uncle Sam and Lady Liberty for sale on Ebay. I just loved them so I thought I would try and make a pattern and give them a try. I love how they came out! You can use them as a shelf sitters or dough bowl fillers.
Materials I Used
- Uncle Sam & Lady Liberty Pattern
- Muslin Fabric
- Polyester Fiberfill
- Craft paints in the colors true red, primary blue, and antique gold
- DMC cotton thread in colors black and ecru
- Cream thread and sewing needles
- Sewing pins
- Artiste 100% Wool Roving in white (Hobby Lobby #309955)
- Coffee stained cheesecloth
- Paintbrushes
- Sponge brush
- Pencil
- Scissors
- A piece of fine grit sandpaper
- Sewing machine
- Hot glue gun and glue sticks
- Paper towels
- Coffee stain mixture

Sewing and Stuffing Uncle Sam & Lady Liberty Body
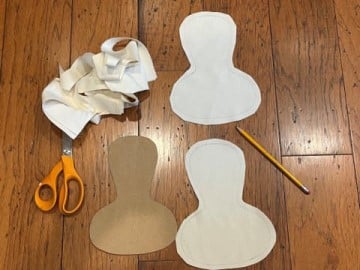
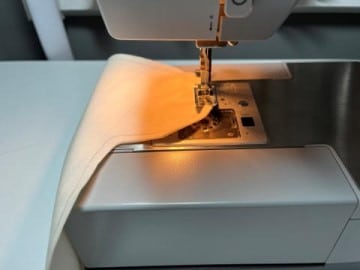
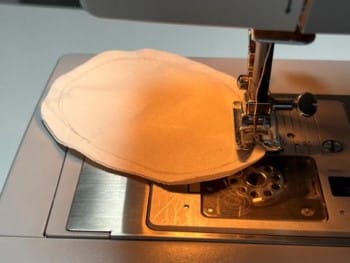
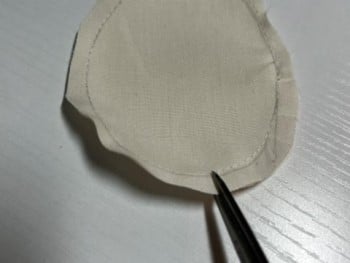
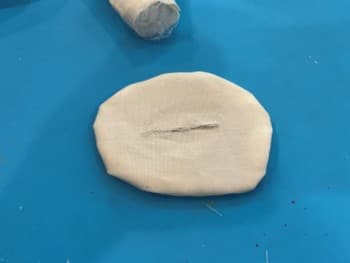
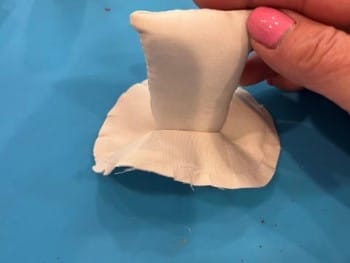
The first thing you will need to do is print and cut out the Uncle Sam and Lady Liberty pattern pieces. Using a pencil trace the body on a double layer of muslin. Cut out the body about a ¼” from the trace line. Trace and cut out a second body. Using a sewing machine and cream colored thread sew up the body using the trace line as the sew line. Leave the bottom open where indicated on the pattern.
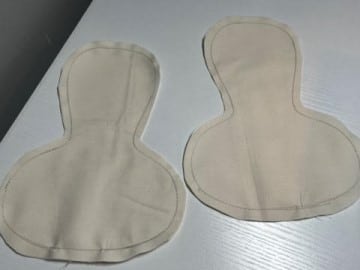
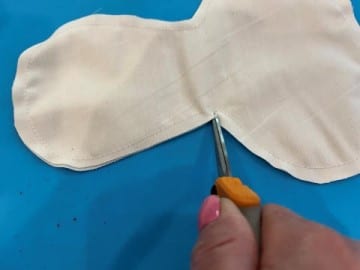
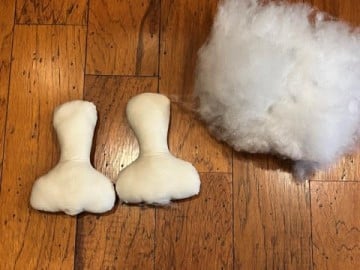
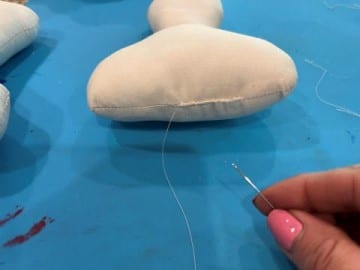
Using a small pair of scissors make small cuts around all curves of the body. This will help to stop puckering of the fabric when you turn it right side out. Be careful not to cut your stitches. Turn the bodies right side out. Stuff firmly with polyester fiberfill. Sew openings closed with cream thread and needle.

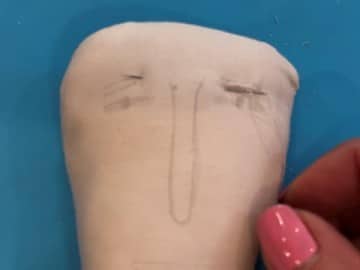
Stitching The Face
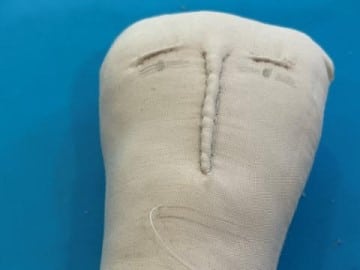
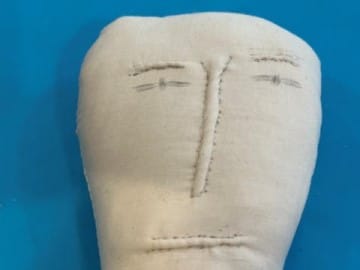
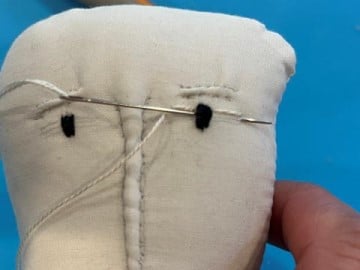
Using a pencil lightly draw on the face to the Uncle Sam and Lady Liberty. To sculpt the face using a cream thread and needle insert the needle in the back of the head coming out at the eyebrow. Make a small stitch across the top eyebrow then come out at the beginning of the lower eyebrow line. Make a small stitch on the lower eyebrow line then come out at the top eyebrow line where you ended the first stitch. Go back and forth in the same manner pulling the thread a little tight as you go. When you get to the end of the first eyebrow bring the needle over to the top line of the second eyebrow and continue stitching as you did the first eyebrow. When you are finished with the second eyebrow bring the needle over to the top of the nose.
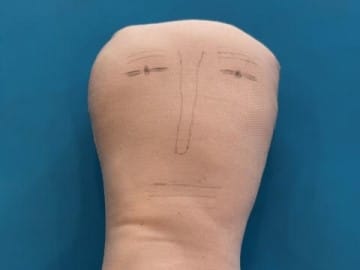
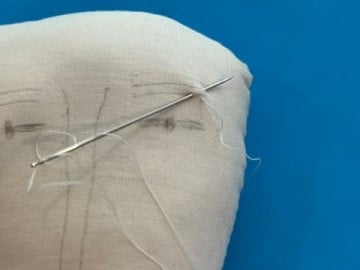
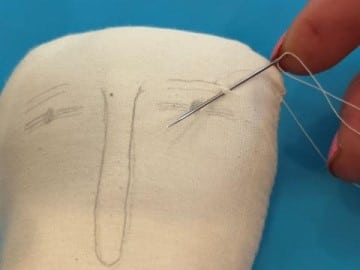
You are going to stitch the nose in the same manner going from one side of the nose to the other all the way down. When you finish stitching the nose bring the needle to the top line of the mouth. Stitch the mouth just like you stitched the eyebrows. When you are done sculpting the mouth bring the needle to the back of the head make a knot and trim off thread.
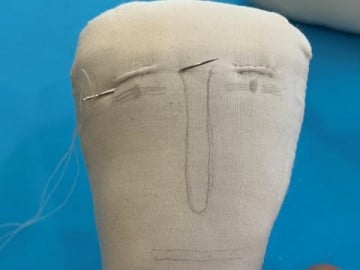
Stitching the Eyes
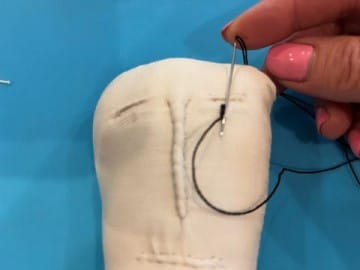
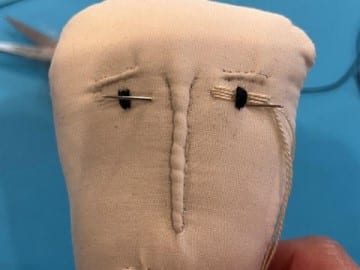
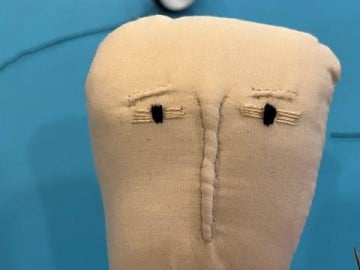
Using black DMC cotton thread and a needle go in from the top of the head and come out at the circle of the eye. Stitch up and down to form the center of the eye. When you have finished stitching the first center bring the needle over to the other eye and stitch the center of the eye the same way. When finished with the second eye bring the needle to the top of the head make a knot and trim off excess thread.

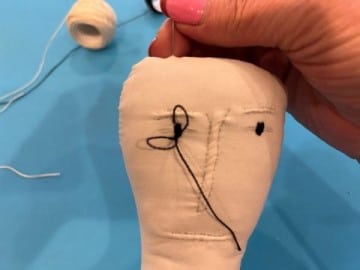
Next using ecru DMC cotton thread and a needle go in from the top of the head to the top line at the side of the center of the eye. Stitch the line bringing the needle over the first line on the other side. Make a stitch then bring the needle down to the next line make a stitch then bring the needle over to the second line on the other side. Keep stitching the same way until you stitch the fourth line then bring the needle over to the other side of the eye and stitch the same way stitching all eight lines. On the fourth stitch bring the needle over to the other eye and stitch the same way you did the first eye. On the fourth stitch bring the needle to the top of the head make a knot and trim of excess thread.

Painting & Coffee Staining The Body
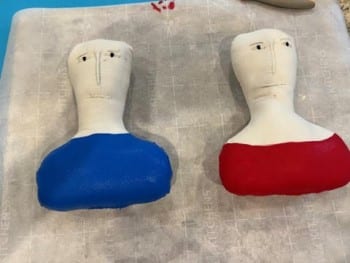
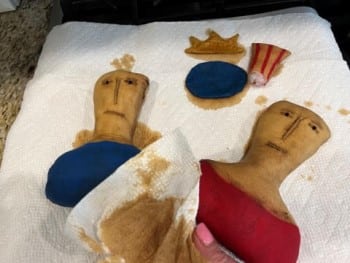
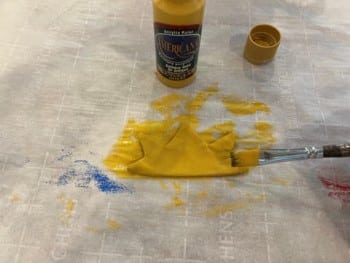
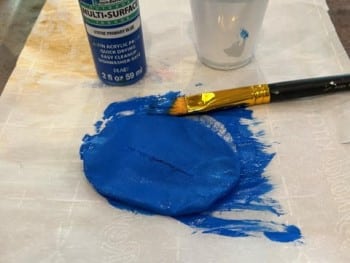
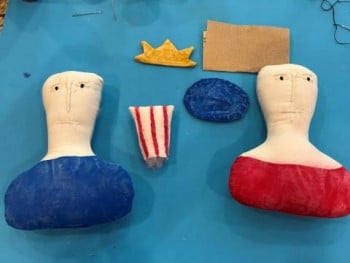
Using primary blue craft paint you are going to paint a shirt on Uncle Sam. You can refer to the photo below to see how I did mine. For Lady Liberty you are going to paint a off the shoulder top on her using true red craft paint (refer to the below photo). Let dry.
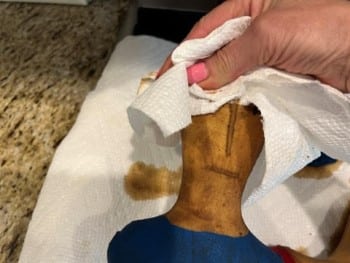
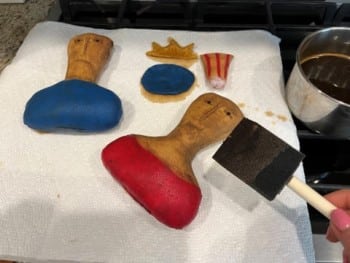
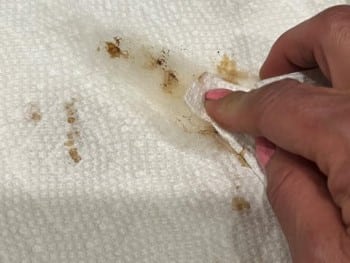
Once the paint has dried give the painted tops a light sanding with a fine grit sand paper. Next you are going to coffee stain them. If you need a coffee stain mixture you can go to my blog on how I coffee stain and color fabric I have a recipe there. Coffee stain uncle Sam and lady Liberty by using a sponge brush and brushing them with the coffee mixture covering them completely. I do not like the faces to be to dark so I use paper towels to remove some of the coffee stain mixture from their faces. Wrap the head with paper towels then squeeze to remove some of the coffee. If you would like them very primitive you can skip this step. Let dry.


Making The Hat & Crown
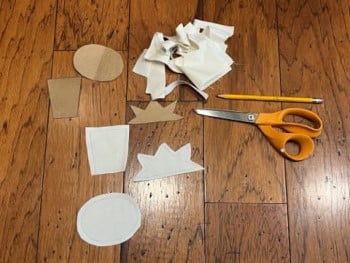
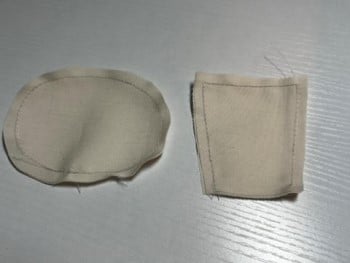
Trace the crown, hat, & hat brim onto a double layer of muslin then cut them out about a ¼” away from the trace line. The bottom of the top hat piece you can cut on the trace line but make sure you cut all the other 3 sides about a ¼” away from the trace line.
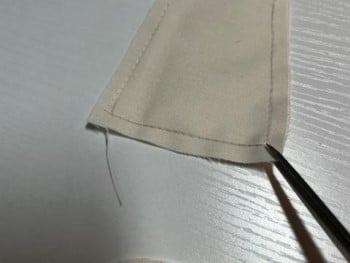
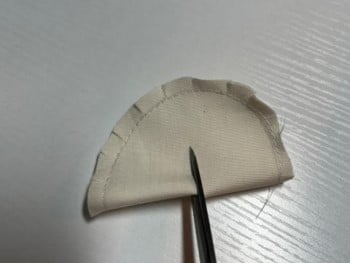
Sew the three sides of the top of the hat using the trace line as the sew line and leaving the bottom of the hat open. Make to slits in the corners of the hat making sure not to cut the stitches. Turn right side out and stuff with polyester fiberfill. Sew all the way around the hat brim using the trace line as the sew line. Make small cuts all around the hat brim, this will help with puckering of the fabric. Fold the brim piece in half then using scissors cut about a 1” slit in the center of the brim. Turn right side out. Side the top hat piece into the cut in the brim. You want the brim to fit snug around the bottom of the hat. Make the slit a little bigger if you can not get the hat into the brim. Remove the hat from the brim. Sew the crown leaving open where indicated on the pattern. Make small cuts in-between the points of the crowns this will help with the puckering of the fabric. Turn right side out.
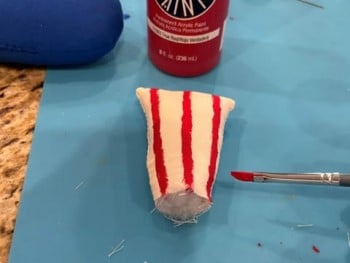
You are now going to paint the crown with a antique cold craft paint and let dry. Paint the hat brim with primary blue craft paint and let dry. Using true red craft paint and a small paintbrush paint red strips on the hat and let dry. Once the paint has dried on your pieces give them a light sanding with a fine grit sand paper. Coffee stain all three pieces by brushing them with the coffee stain mixture. Let dry. You can also stain some cheesecloth at this time for wrapping around the hat and around lady Liberty’s shoulders.
Adding The Hair
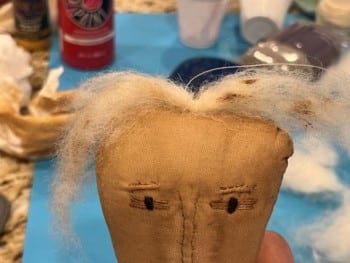
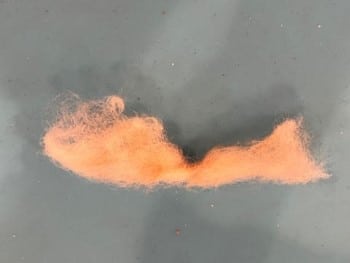
The first thing you will need to do is to decide how long you will want the hair for your lady Liberty and uncle Sam. You are only go across and down the sides of the head with the hair. I did not cover the back of the head with hair. Using the white wool roving cut the hair for uncle Sam and lady Liberty. Next cut a piece of wool roving for uncle Sam’s beard and mustache. Once you have your pieces cut brush them with the coffee stain mixture then blot them with paper towel. You just want them to not be so white looking.

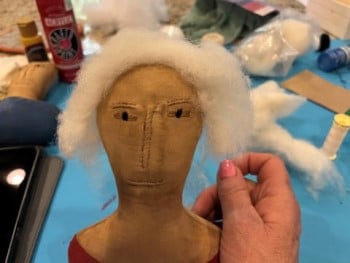
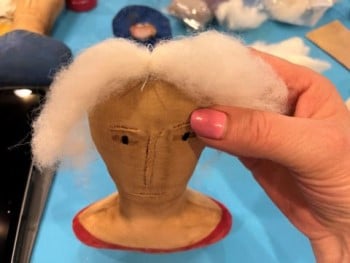
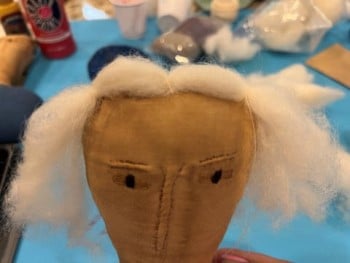
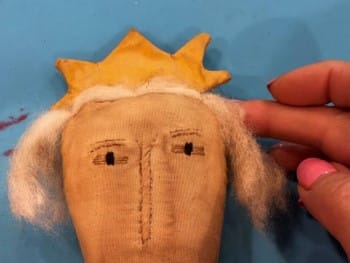
For the lady Liberty center the hair on top of her head. Using a needle and cream thread attach the hair to the center top of her head by sewing a few stitches around the hair attaching it to the head then attach the hair the same way to the right and left side of her head (see photo’s below). I decided to add a drop of hot glue to each side of her head to hold the hair down more on the sides.
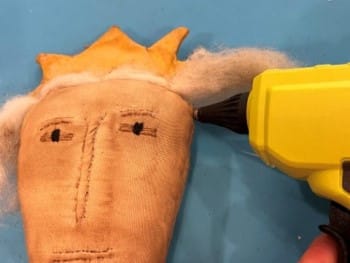
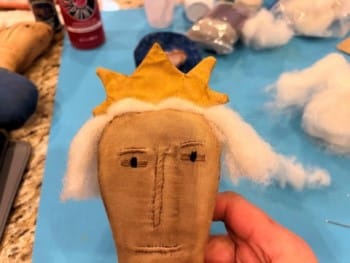
Center the crown on top of her head then using cream thread and a needle sew the crown to the top of her head. You are going sew the crown to the hair and head.
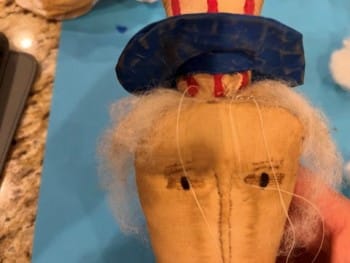
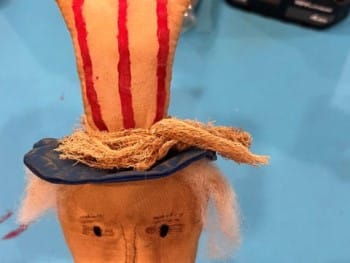
Center the hair on top of uncle Sam’s head then using a needle and cream thread attach the hair at the center of the head (do not tie off the thread). Next place bottom of the top part of the hat into the brim. Pull the brim upwards. Place the hat in the center of the head. It will be easier to hold in place if you place a sewing pin in the front and back of the hat. Using the needle and thread sew the hat to uncle Sam’s head all the way around then pull down the brim and sew the brim all the way around to the hat. Knot and trim off extra thread. Sorry I forgot to take a photo of sewing the brim to the hat.
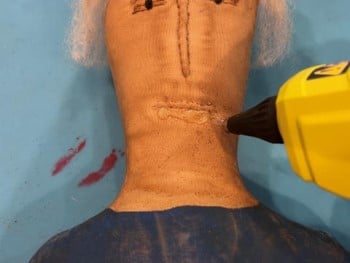
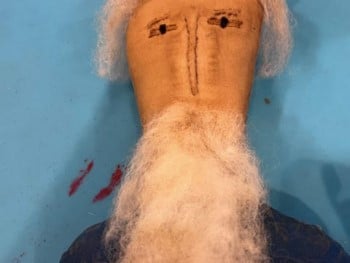
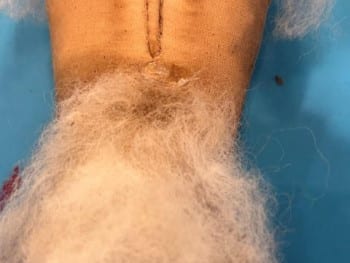
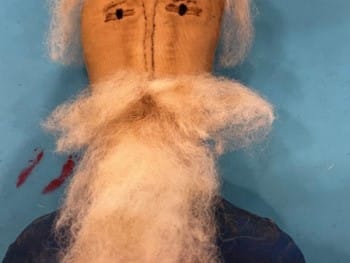
To add the beard add a small line of hot glue under the mouth then glue on the beard. To add the mustache twist the mustache in the center add a drop of hot glue under the nose and glue down the mustache.
Adding The Cheesecloth
Cut a piece of coffee stained cheesecloth big enough to tie around uncle Sam’s hat. Wrap the cheesecloth around the hat and make a knot.
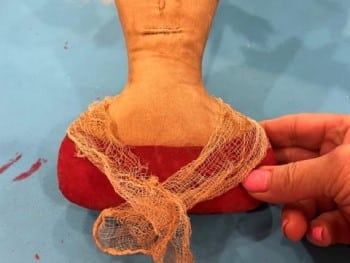
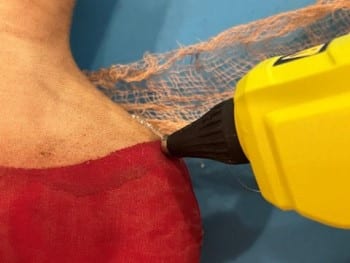
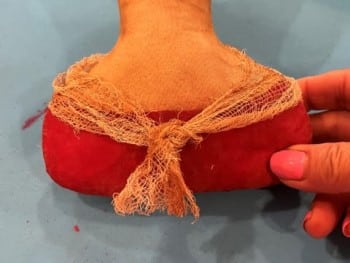
Cut a piece of coffee stained cheesecloth large enough to place around lady Liberty’s shoulders coming around to the front and making a knot. Open up the piece of cheesecloth place over her shoulders and bring the end to the front center. Once you have the cheesecloth in place lift one side of the cheesecloth up add a drop of hot glue to her should and glue down the cheesecloth. Repeat this step to the other shoulder. Tie the two ends together in the front (see photo’s below).
I love your clear instructions and pictures.
The eyebrows were clever and added age and distinction.
Im excited to make Uncle Sam and Lady liberty.
Thank you for teaching.