Easter, Home Decor, Spring
Wood Rings & Macramé Bunny
Mar
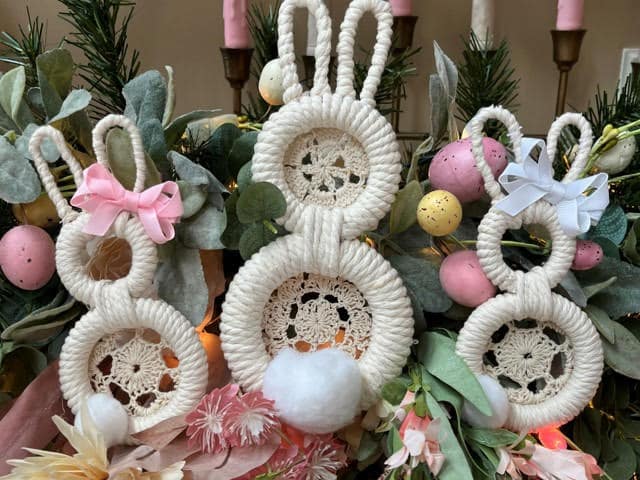
I am so excited spring is finally here! I just love the all the beautiful colors of spring. I was shopping in Home Goods one day and I seen a garland made of macramé’ bunnies and I knew I could make the bunnies. I went to Hobby Lobby on a search of what I could use for the bunny bodies and yes I found wooden rings in three different sizes. The macramé cord I got in the yarn section of Hobby Lobby. In the materials list below I give you the item numbers for the items I used from Hobby Lobby. These adorable macramé bunnies are so simple to make and there are so many ways you can use them!
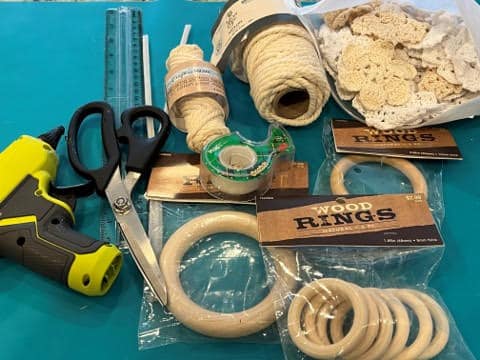
Materials I Used:
- 1.89 “ Wood Rings (Hobby Lobby #1522820) This size is used for small bunny head
- 2.95 “ Wood Rings (Hobby Lobby #1522853) This size is used for small bunny body and large bunny head)
- 3.81 “ Wood Rings (Hobby Lobby #1886092) This size is used for large bunny body
- 5mm Yarn Bee Macramé Rope in Natural (Hobby Lobby #2170553) I used this macramé for the large bunny
- 4mm Crafters Square Macramé Cotton Twine (Dollar Tree) I used this macramé for the small bunny
- White Chenille Pipe Cleaners
- 1” Pom Pom for small bunny
- 2” Pom Pom for large bunny
- Small Doilies or Lace (optional)
- Scissors
- Tape
- Pencil
- Ruler or Measuring Tape
- Glue Gun and Glue Sticks
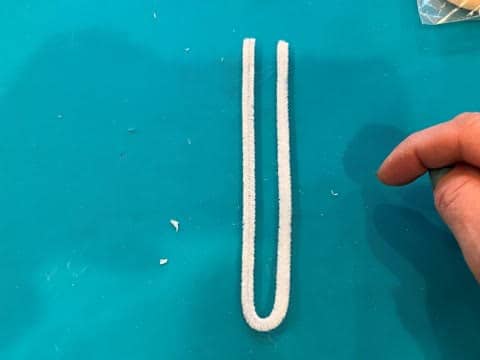
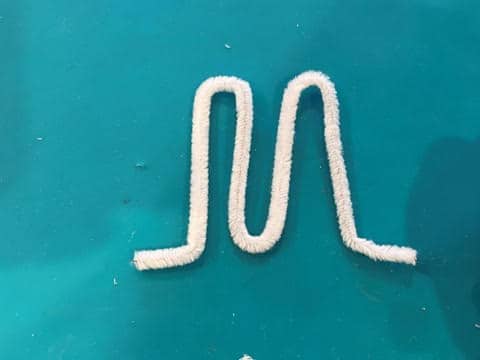
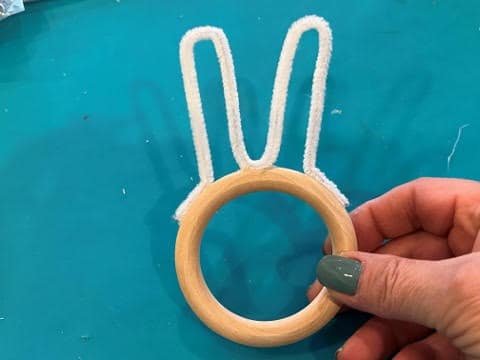
Making The Ears
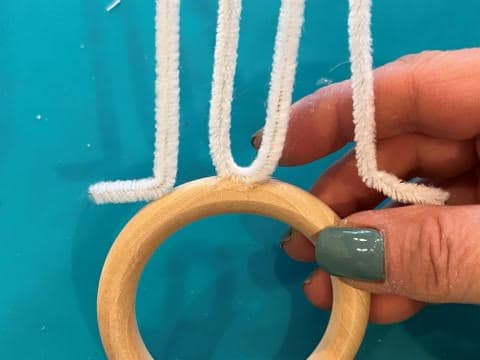
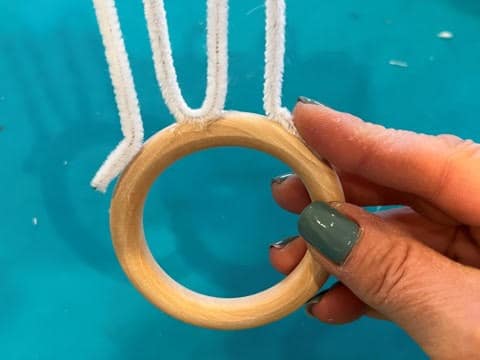
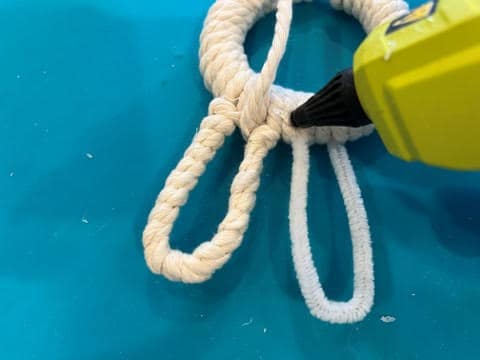
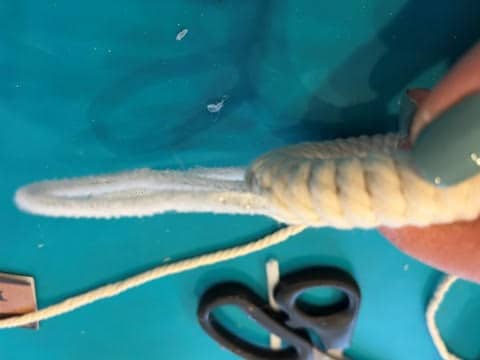
For making the ears you are going to use one pipe cleaner per bunny. For the small bunny you are going to measure and cut your pipe cleaner to 10” long. For the large bunny you are going to use the 12” pipe cleaner. To form the bunny ears fold the pipe cleaner in half forming a U. Next fold down the two sides forming a M and leaving about a ½” inch or so extra on either side, see photo’s below. The directions for the bunny ears are the same for the small and large bunny the only difference is the length of the pipe cleaner.
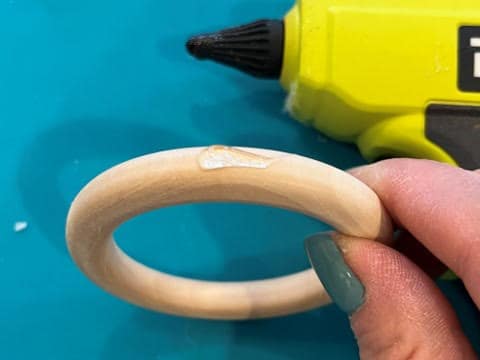
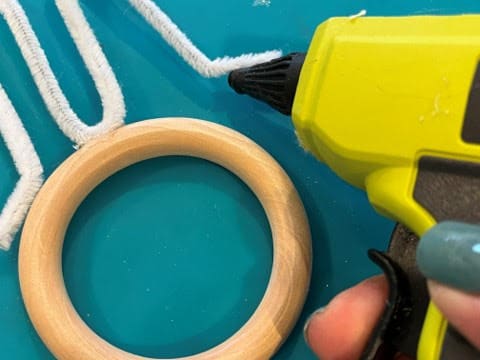
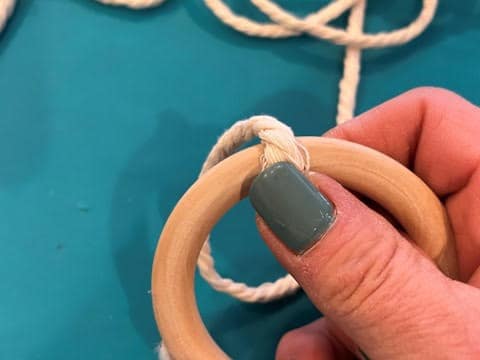
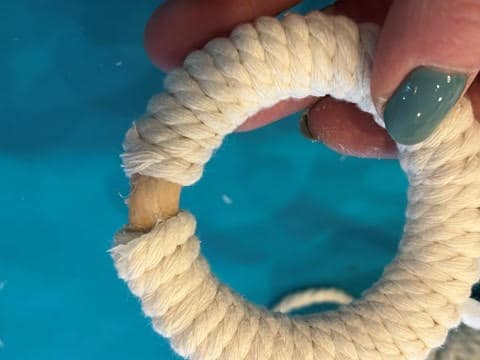
Next add a small drop of hot glue to the top of a 1.89” wooden ring for the small bunny or a 2.95” wooden ring for the large bunny then glue the middle of your bunny ears on (see photo below). Add a hot glue to the small extra piece at the bottom of one ear and glue down on the wooden ring. Repeat this step to the other side of the ears. Please see photo’s below!
Wrapping The Head & Ears
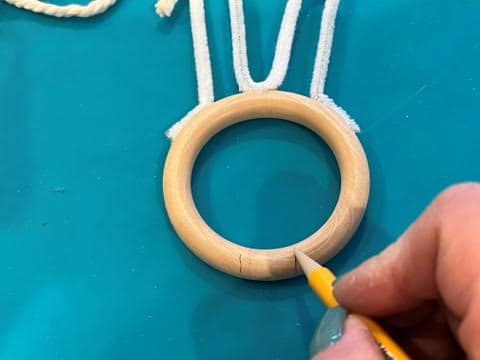
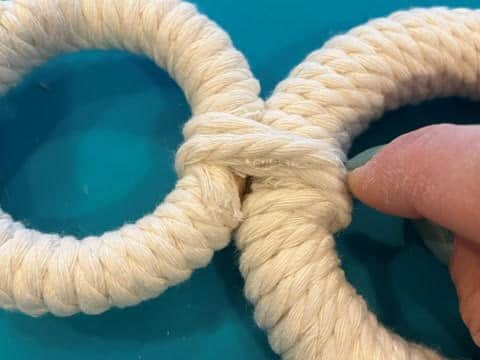
Looking a the bunny head make two lines at the bottom of the head down from where the middle of the bunny ears is. I hope this makes sense. This space you are not going to wrap so you can connect the head and body together a little later (see photo below).
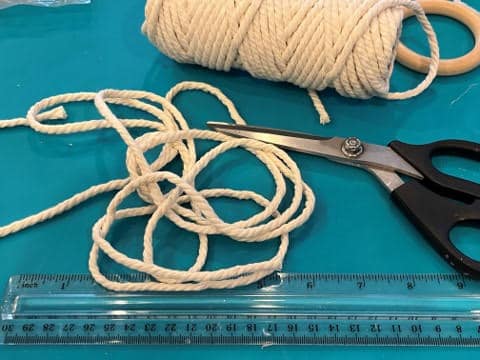
For the small bunny you are going cute a 30” piece of the 4mm macramé cotton twine for wrapping the ears and a 45” piece of 4mm macramé cotton twine for wrapping the head. The for large bunny cut a 32” piece of 5mm macramé rope for wrapping the ears and a 70” piece for wrapping the head.
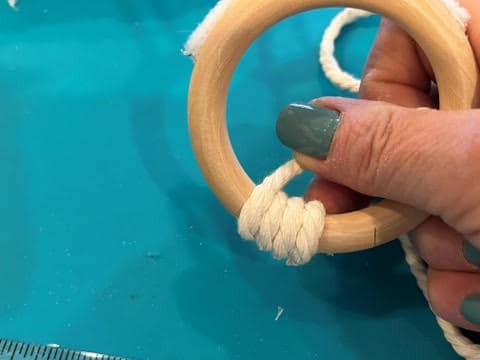
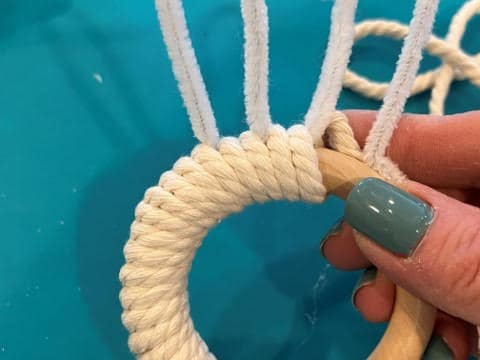
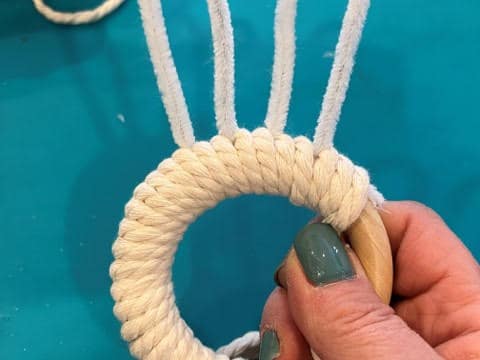
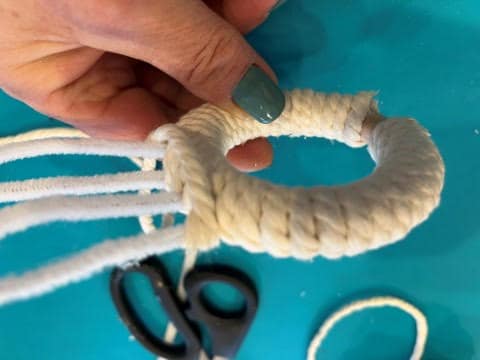
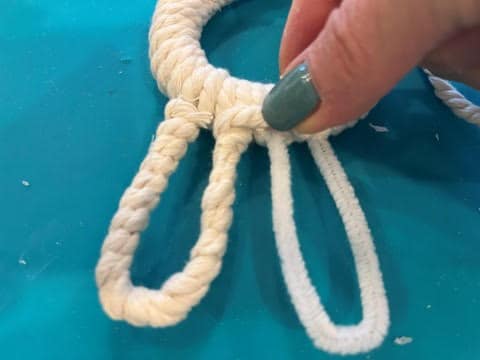
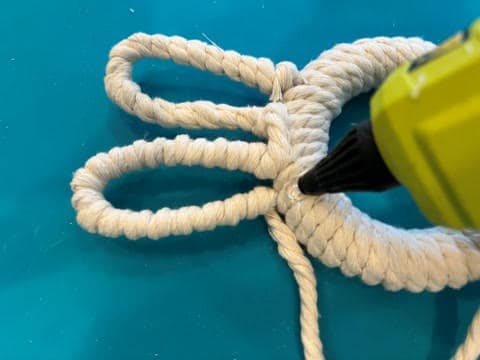
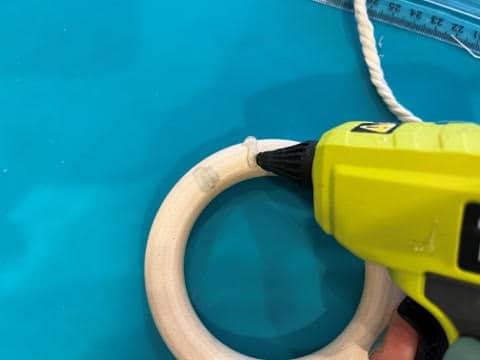
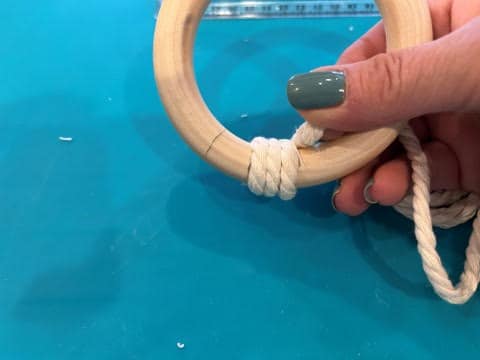
You are going to wrap the head first. Start by adding a drop of hot glue on the left pencil line at the bottom of the ring then attach one end of the macramé you cut for wrapping the head. Wrap a small piece of tape around the other end of the macramé this will stop it from unraveling. Start wrapping the macramé piece around the wood circle working your way up to the ears. When you reach the ears you are going to wrap through the ear twice then wrap between the ears two or three times. Next you are going to bring the macramé through the second ear and wrap twice. Work you way wrapping down the wooden ring until you get to the pencil line add a drop of hot glue and glue down the macramé cut off any excess.
Wrapping The Bunny Ears
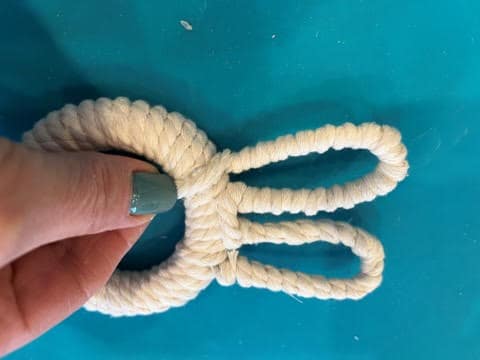
The following directions for wrapping the bunny ears are the same for the small and large bunny. Add a drop of hot glue to the outside of the left ear and glue down one end of the macramé then wrap a small piece of tape around the other end this will stop the macramé from unraveling. Start wrapping the bunny ear up and around until the entire ear is wrapped. Next add a small drop of hot glue to the head and glue down the macramé, (see photo’s below) this side will now be the back side of the bunny head. Next wrap the second bunny ear.
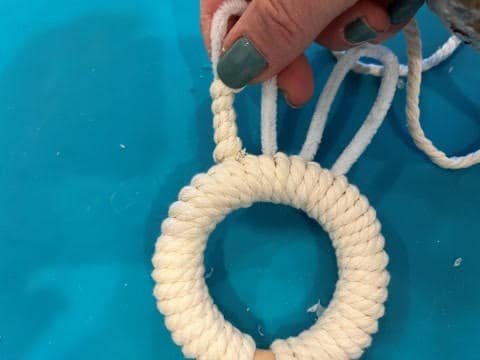
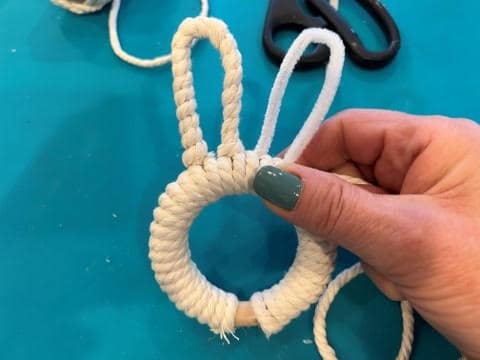
Once you have the second ear wrapped add a drop of hot glue to the backside and glue down the macramé cord then trim off excess.
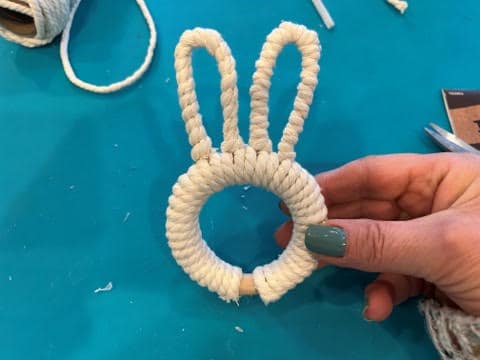
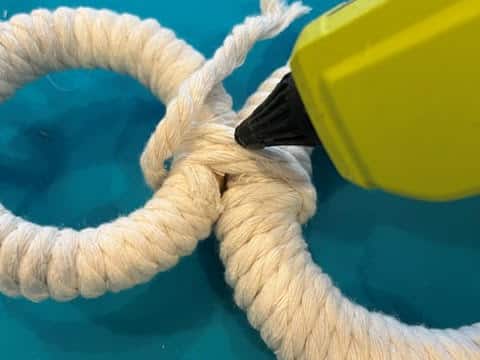
Wrapping The Body
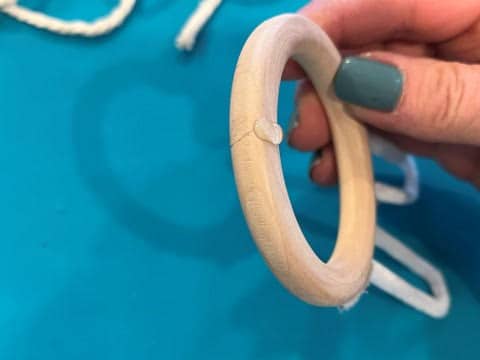
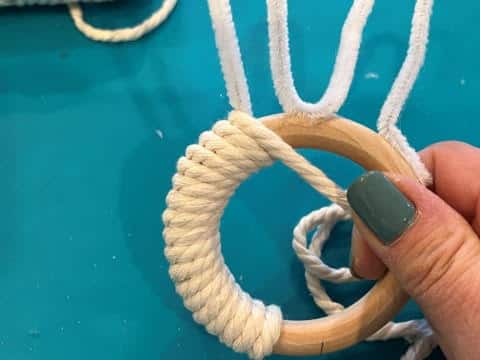
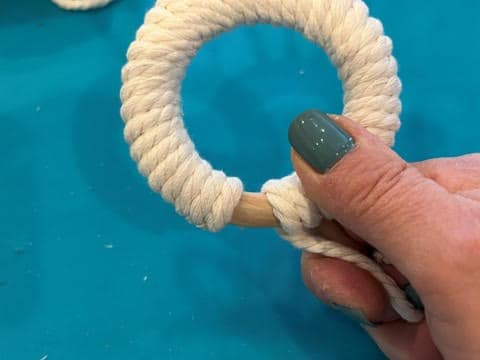
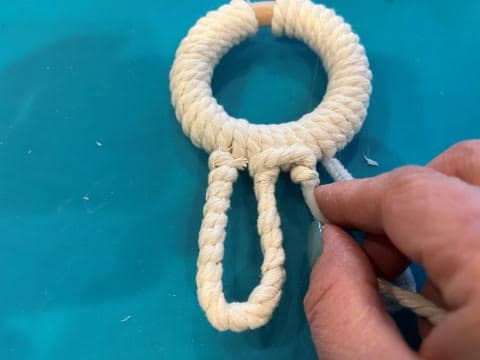
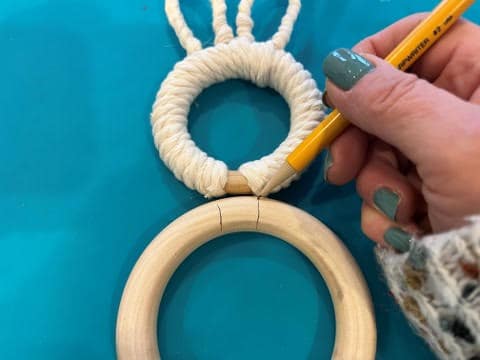
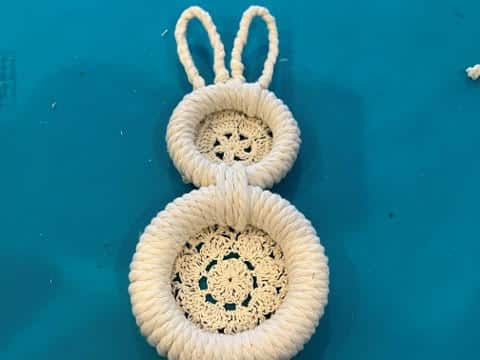
The first thing you will need to do is lay down your finished bunny head then lay down your unfinished body ring right under the bunny head. Using a pencil make two lines on the bunny body that line up with the sides of the unwrapped part of the bottom of the bunny head, (see photo below).
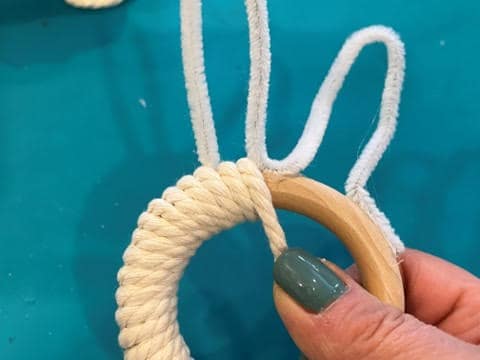
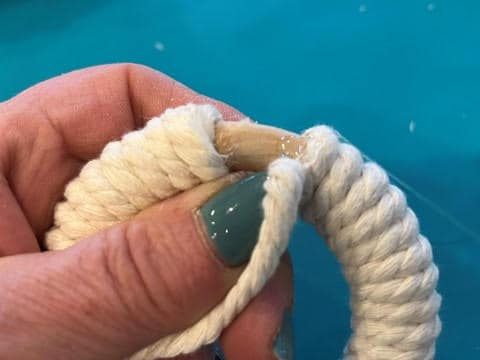
Add a drop of hot glue on the left pencil line and glue down one end of your macramé then wrap a small piece of tape around the other end of the macramé this will stop the macramé from unraveling while you are wrapping. If you are wrapping a small bunny body you will be using your 100” piece of macramé, if you are wrapping the large bunny body you will be using the 140” piece of macramé. Wrap around your bunny body until you reach the second pencil mark. Once you reach the second pencil mark lay down your bunny head and body connecting the two unwrapped area’s then tightly wrap your macramé cord around the head and body covering the unwrapped areas. I wrapped around 4 times.
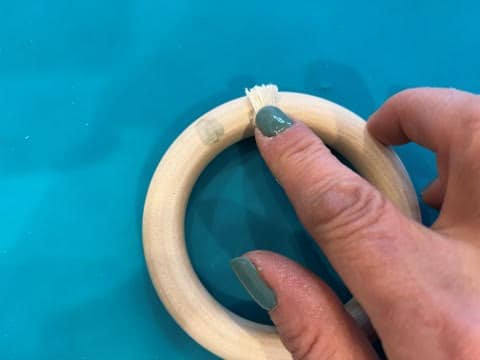
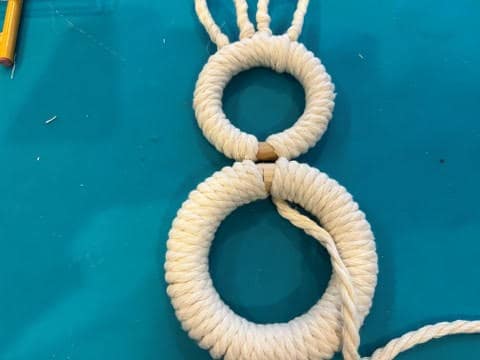
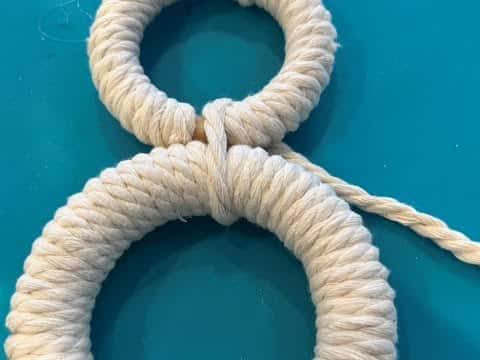
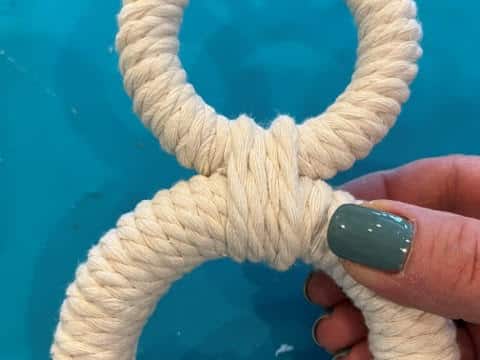
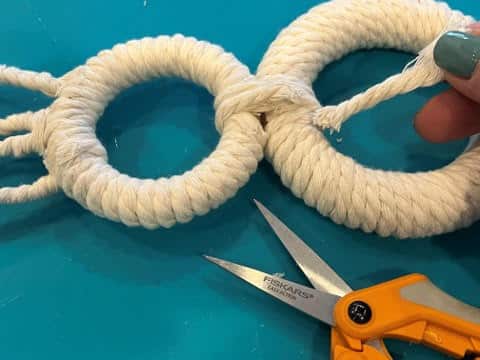
Once you have your bunny head and body tightly wrapped together end your wrapping on the backside then add some hot glue and glue done the macramé cord and cut off any excess.
Adding The Finishing Touches
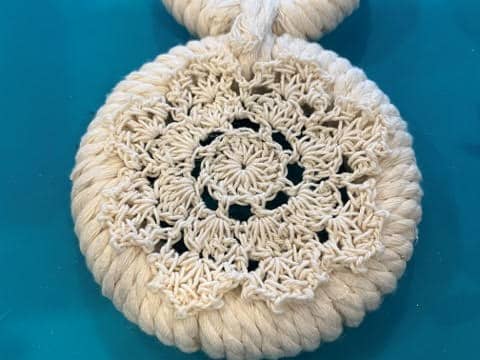
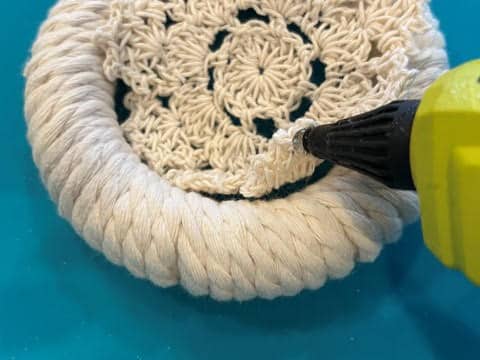
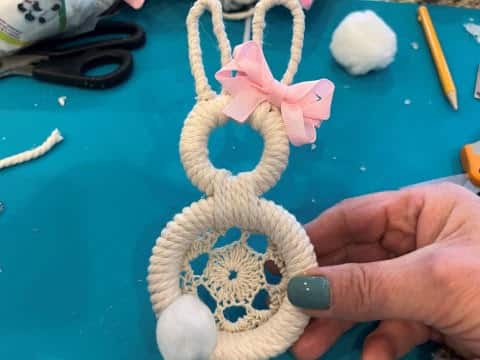
Now that you have your bunny all wrapped and put together it is time to add the finishing touches. You can add small doilies to the bottom or bottom and head this is up to you. If you do not have any small doilies you can also cut circles out of a piece of lace. To attach the doilies or lace place the doily or lace on the backside of the bunny then lift one side at a time and hot glue down. On my large bunny I added a doily to both the head and body but on my small bunny I only added a doily to the body.
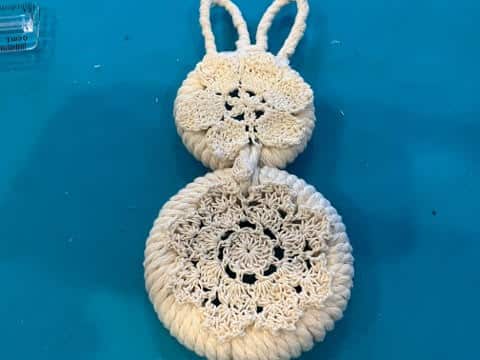
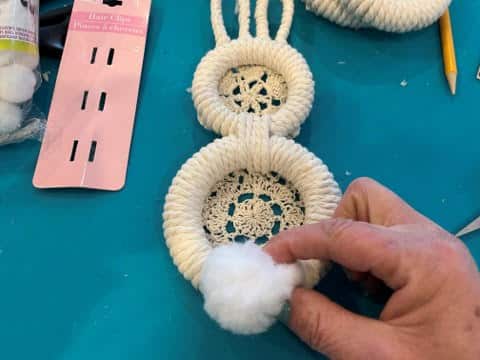
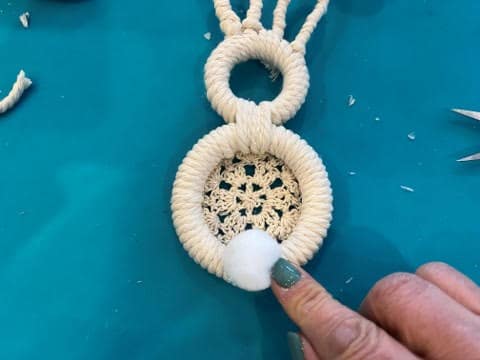
Next for the small bunny you can either add a tail on the front side or in the bottom middle of the bunny. For the small bunny use a 1” pom pom for the large bunny use a 2” pom pom. Add hot glue to one side of the pom pom then glue in place. You can also add a pretty bow at the ears!
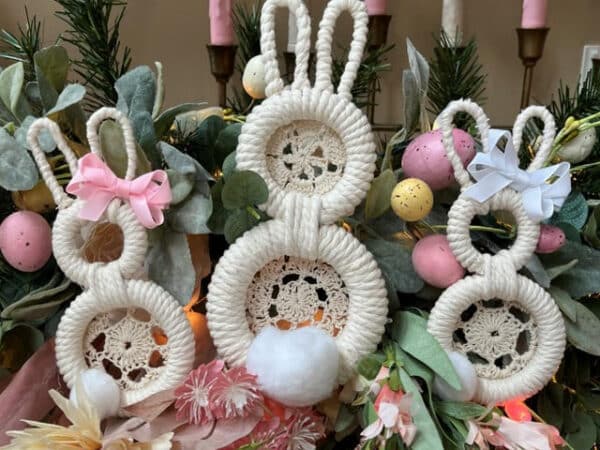
You are now done with the bunny! You can use these beautiful bunnies as bowl fillers, tie them to a garland, or add a fishing line hanger to hang on a tree. I hope you enjoy making these beautiful bunnies!
this is so cute. Thanks for sharing.