Home Decor, Thrifty Makeovers
A Simple Way to Update A Coffee Station
Jun
If you have a space to create a coffee station I highly recommend creating one, it keeps the clutter off your counter and everything you need is in one spot.I created our coffee station about 8 years ago and if you are like me you get tired of looking at the same thing after so long so I wanted to give it a update and I have used peel and stick wallpaper in my craft room so I thought I would look online for a peel and stick wallpaper I thought would look good on our coffee station wall and I found this brick wallpaper on Amazon and I love how it came out.Below I will explain how I put up the peel and stick wall paper and about the décor I used.
Here is a list of what you will need:
- Grey & White Brick Peel and Stick NUWALLPAPER (you can find it under my Recommended Products)
- Smoother
- Utility Knife
- Spackle (if you need to fill in any holes)
- Putty Knife
- Sandpaper
- Scissors
- Measuring Tape
- Pen
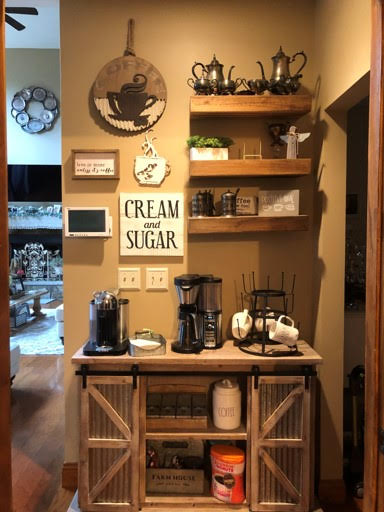
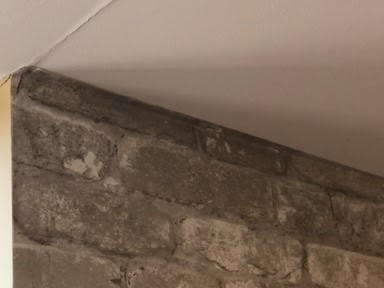
This is the before photo
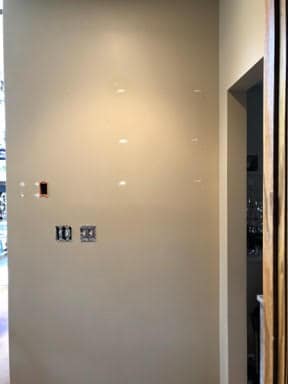
Preparing the Wall
The first step is to clear the area, remove the coffee station and everything from the wall including any switch plates you may have. After removing everything I washed down the walls then I decided to spackle and sand the nail holes from the items I had hanging on the wall to make sure the wall was all smooth before I began to hang the wallpaper.
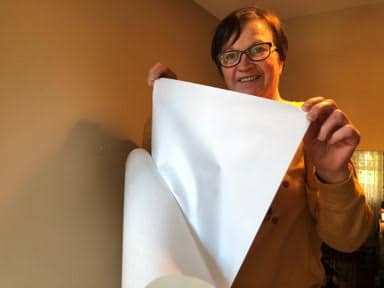
Hanging the Peel and Stick Wallpaper
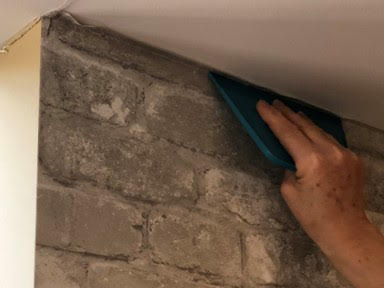
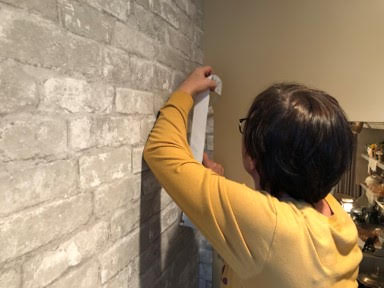
I started by peeling back about 12 inches of the paper on the back of the wallpaper then starting at the end of the wall I lined up the wallpaper with the end and top of the wall, I had to pull it back off and adjust the wallpaper because the ceiling and wall were not straight so I ended up with a piece of the wallpaper on the ceiling so I can make the wallpaper straight, once you have the wallpaper set correctly at the top and side of the wall use the smoother tool to smooth the wallpaper and get out any bubbles there may be, see photo’s below, don’t mind the crack in the ceiling that is on the list of things to fix.
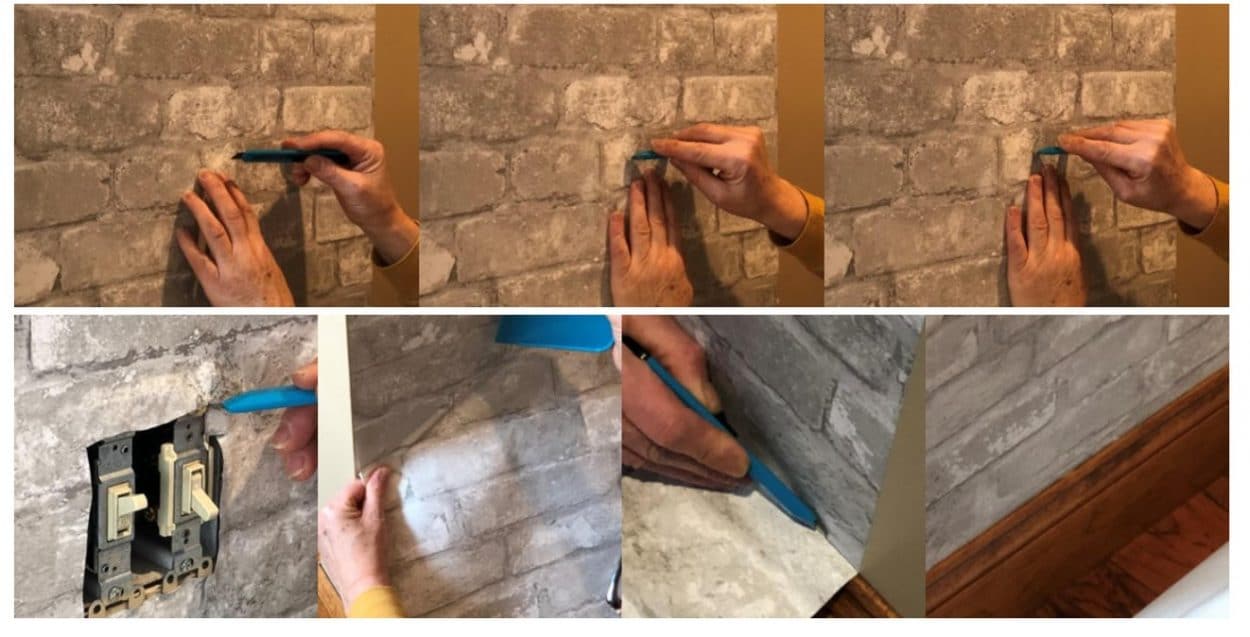
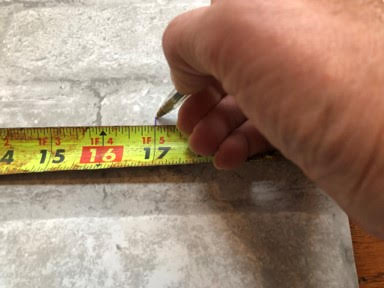
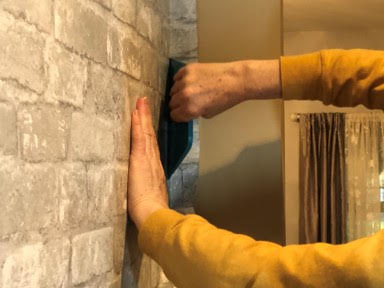
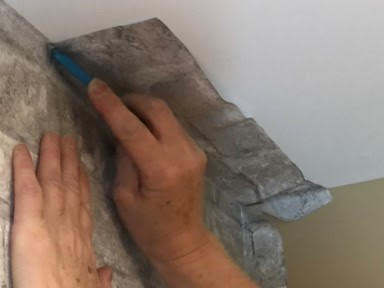
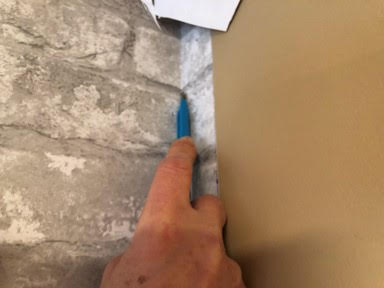
Continue working down the wall peeling the backing down, sticking the wallpaper to the wall and smoothing with the smoothing tool, if you have any switches apply the wallpaper over them then using the utility knife start by cutting a small square in the center around the switch and remove keep trimming around the switch until you get near the outside of the plate then smooth the wallpaper and continue down the wall. When you reach the bottom of the wall use the smoothing tool to make sure the wallpaper is nice and tight to the baseboard then using the utility knife cut the wallpaper as close as you can to the baseboard next using the utility knife trim off the excess wallpaper at the top of the wall as close to the ceiling as you can get.
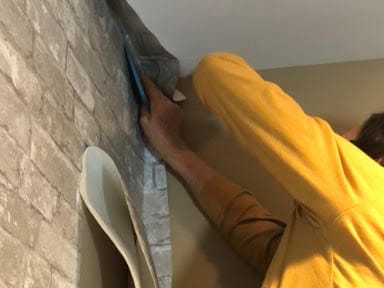
To start the second piece you need to match the bricks at the top of the wall with the paper you just applied I found the bricks that matched before I peeled the backing of the wallpaper so I would have an idea where I needed to start with the new piece, this is the only problem I had with the this wallpaper I matched the top few bricks then the next two or three were slightly different but it really isn’t noticeable unless you are really look close and were looking for the difference. Once you know which brick you need to start at peel back the backing and applying the wallpaper to the matching bricks, you are going to overlap the wallpaper about a ¼ inch or so, work the wallpaper towards the ceiling with the smoothing tool making sure your wallpaper is even. Next keep peeling about 12 inches of backing at a time and continue working your way down the wall using the smoothing tool as you go until you reach the bottom then cut the wallpaper the same way you cut the first piece.

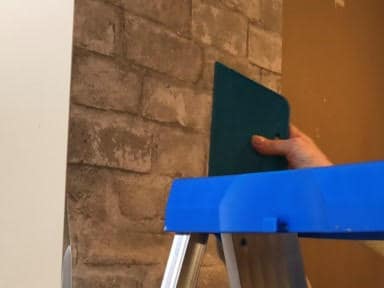
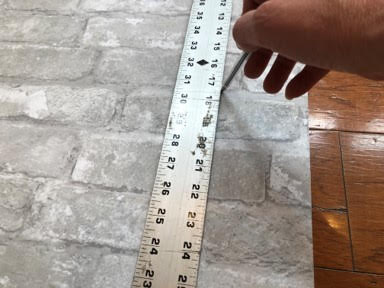
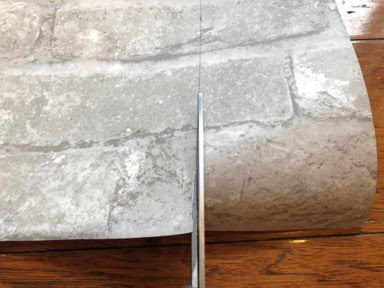
My third piece was going into the corner of the wall and the piece was to wide to be able to place the wallpaper so it would lay flat and straight into the corner so I matched the bricks on third piece to the bricks on the second piece to see where I needed to start my third piece of wallpaper I then measured how wide and how long I would need the piece then I added a few extra inches to the width and length ,to cover any mistakes I may have made in the measurements, it is better to extra then not enough, I marked the measurements onto the wallpaper and drew lines to make sure I cute the wallpaper straight. After I had the wallpaper cut I started buy peeling back some of the paper from the back of the wallpaper and lined up my bricks and attached the wallpaper as I did before this time I just had to make sure I used the smoother good into the corner of the wall so it would have a crease when it came time to cut into the corner, keep applying the wallpaper until you reach the baseboard as you did with the other pieces. After you have the wallpaper attached you are going to start by trimming off the excess that is on the ceiling then trim down the corner and across the baseboard, I only needed to use three pieces of the wallpaper to cover my wall you may need more.

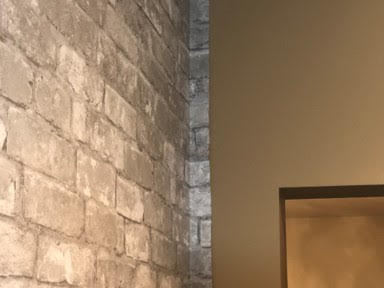
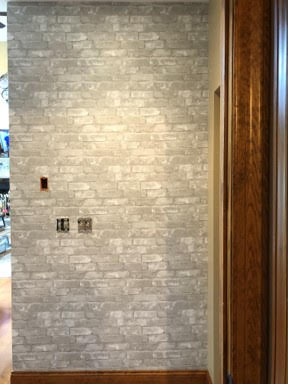
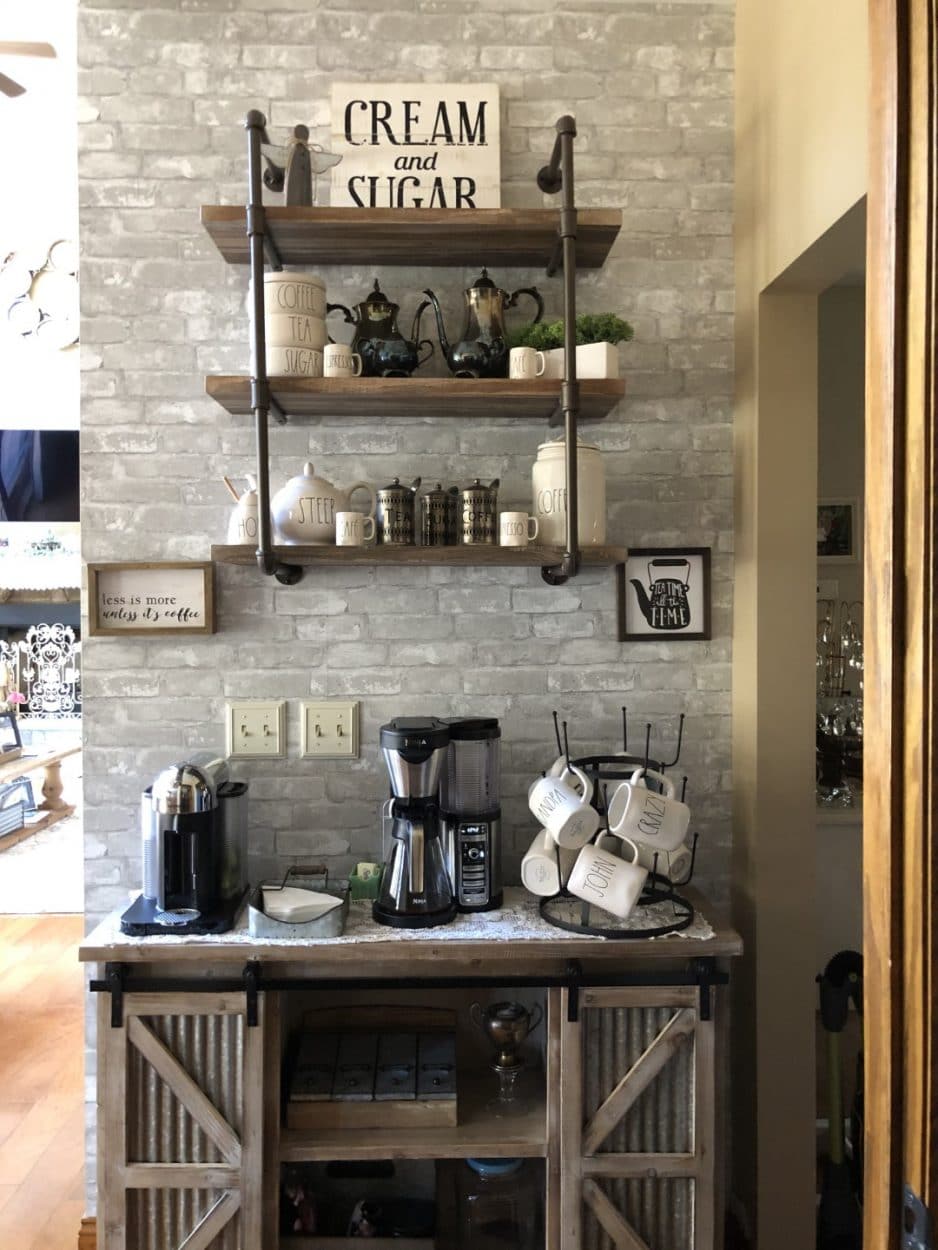
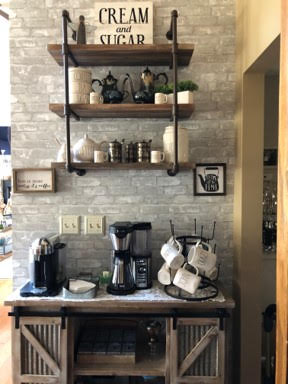
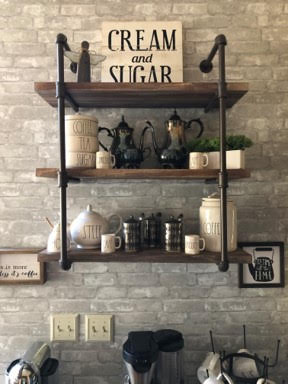
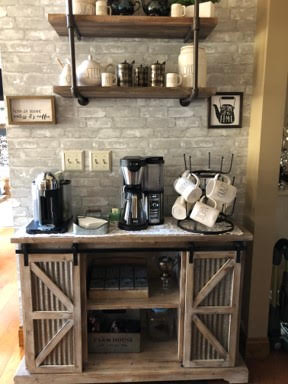
I just love how the brick wall looks you really can’t tell where the brick is off a little. The fun part was putting it all back together, I put the switch plates back on and then moved the coffee bar back into place so I would be able to center the new wall shelf I ordered from Wayfair. If you know you want to redo a space in your home don’t be in a hurry keep an eye out when your shopping for deals on items you would like to use in the space that is what I did here I new I wanted to change the floating shelves so I searched for something I wanted to replace them and I came across this 3 shelf unit on Wayfair I waited until they emailed me that it was on sale and for the accessories I love Rae Dun so every time I was shopping in TJMaxx, Marshalll’s or Home Goods I would keep an eye out for pieces I would like for the coffee bar I bought a piece at a time this way you are not spending a lot of money at once, last was the wallpaper this was something I splurged a little on because I just loved it and if I get tired of it I can just peel it right off without ruining the wall.
Don’t hate me but I like the first one the best.
Sherry, this is the best I have ever seen and I am gonna try and figure a way to do this in my kitchen. I love what you did and you are The Best Crafty Decorator ever. Thanks for sharing.
I love the shelf and found it on wayfair, but was it easy to put on the wall? I’m worried about it holding the weight of the items. Is it placed in the studs of the wall? or did you use anchors.
Thanks for your help!
I have one as well. You definitely should use anchors but use the studs on the wall too. It will really make it sturdier and safer. It should never fall off the wall or be too heavy with the anchors and the studs. Hope this helps.
I have one as well. You definitely should use anchors but use the studs on the wall too. It will really make it sturdier and safer. It should never fall off the wall or be too heavy with the anchors and the studs.
Love it the new coffee bar