Christmas, Home Decor, Thrifty Makeovers, Winter
DIY Snowmen Heads
Jul
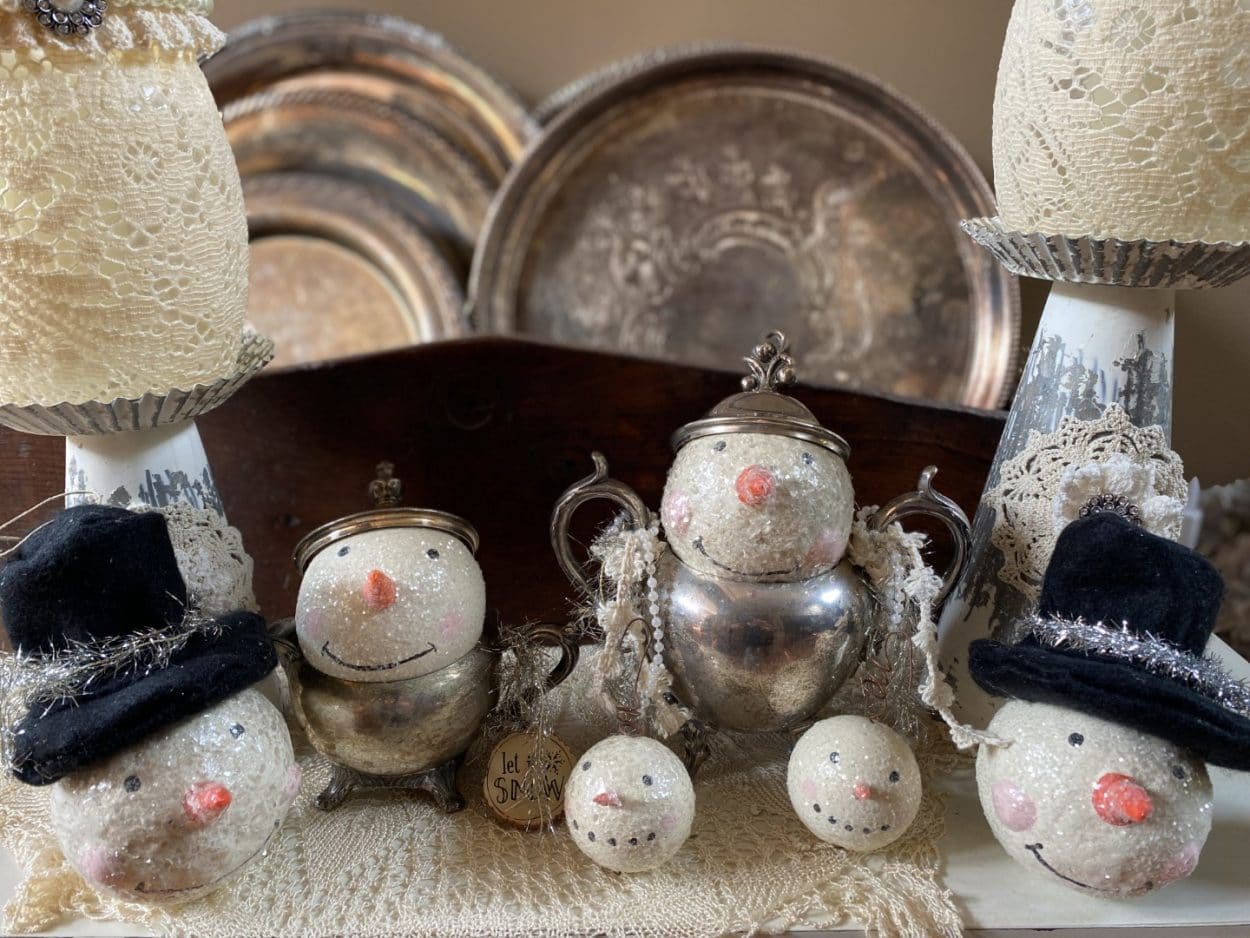
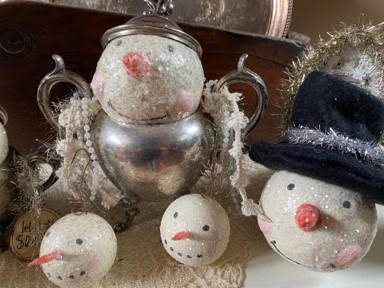
Hello everyone welcome to Christmas in July, if you love snowmen you are going to love making these snowman heads, you can use them as ornaments to hang on your tree or add them to vintage silver pieces as I did let you imagination run wild on how to display them.I made these adorable snowmen in two different sizes and two different ways which I will explain below in the directions.
Here is a list of what you will need:
- Snowman Hat Pattern
- 2 inch smooth Styrofoam balls
- 3 inch Styrofoam Balls (Smooth if you are painting Regular if you are using molding clay)
- Air Dry Molding Clay
- Skewers
- Craft Paints in the Colors Black, Carrot Orange, Touch of Pink, and Light Ivory
- Paintbrushes
- Glitter or Mica Flakes
- Small Bowl of Water
- Hot Glue Gun and Glue Sticks
- Black Felt
- Number 2 Pencil
- Scissors
- A Piece of White Chalk
- Thin Wire
- Thin Wire
- Needle Nose Pliers
- Wire Cutters
- Ruler
- Tinsel

Making The Small Snowmen Head
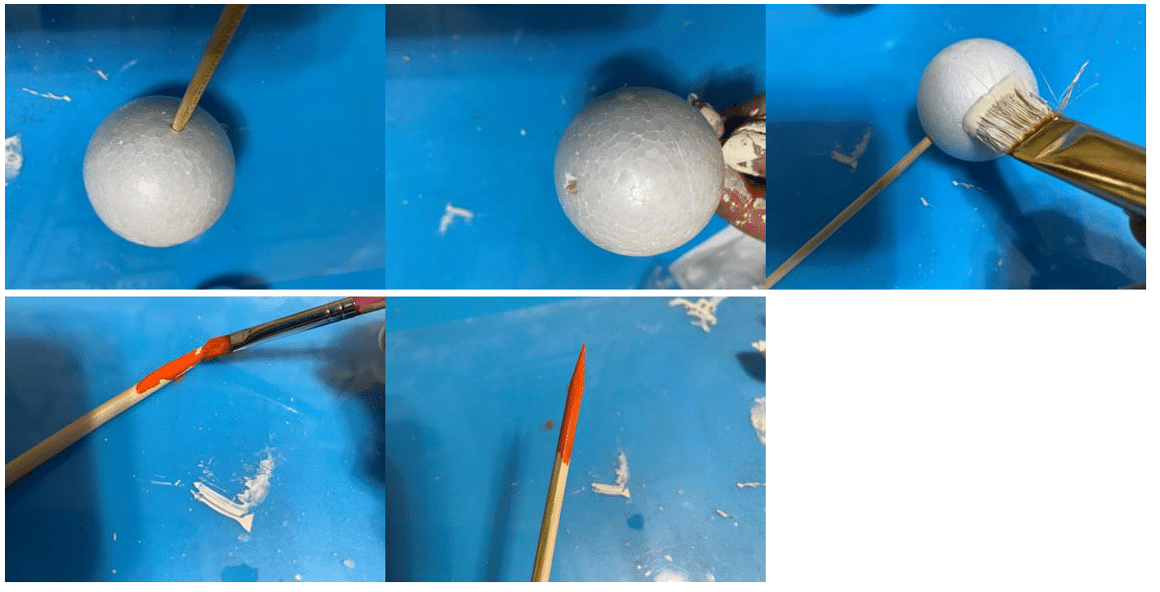
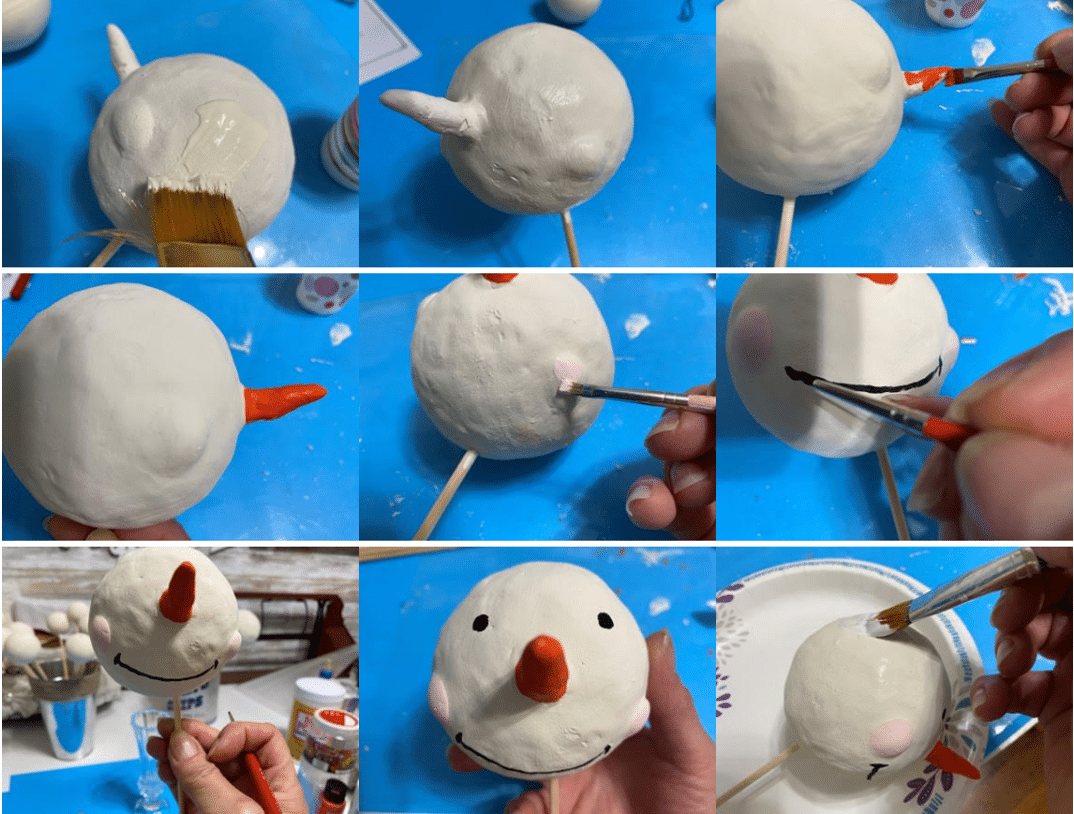
To make the small snowmen head you will need to use the 2” smooth Styrofoam ball, if you would like the larger painted snowman head you will be using the 3” smooth Styrofoam ball, begin by inserting one of the skewers into the bottom middle of the Styrofoam ball, pushing and twisting the skewer until the point of the skewer just pokes through the top of the ball, if you don’t want to make it an ornament then do not push the skewer up through the top. If the Styrofoam ball has a noticeable ring around the center you can either take a small piece of Styrofoam and rub on top of the ring to remove or lightly scrap it off with a razor blade. Paint the Styrofoam ball, I used a light ivory craft paint but you can use any color you like, once your ball is painted place in a container like a vase to dry. While you Styrofoam ball is drying take another skewer and paint the pointy part carrot orange about 1 ½ inches or so down from the point, let dry this is going to be the nose.
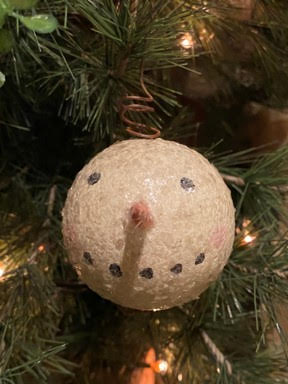
Painting The Face And The Nose
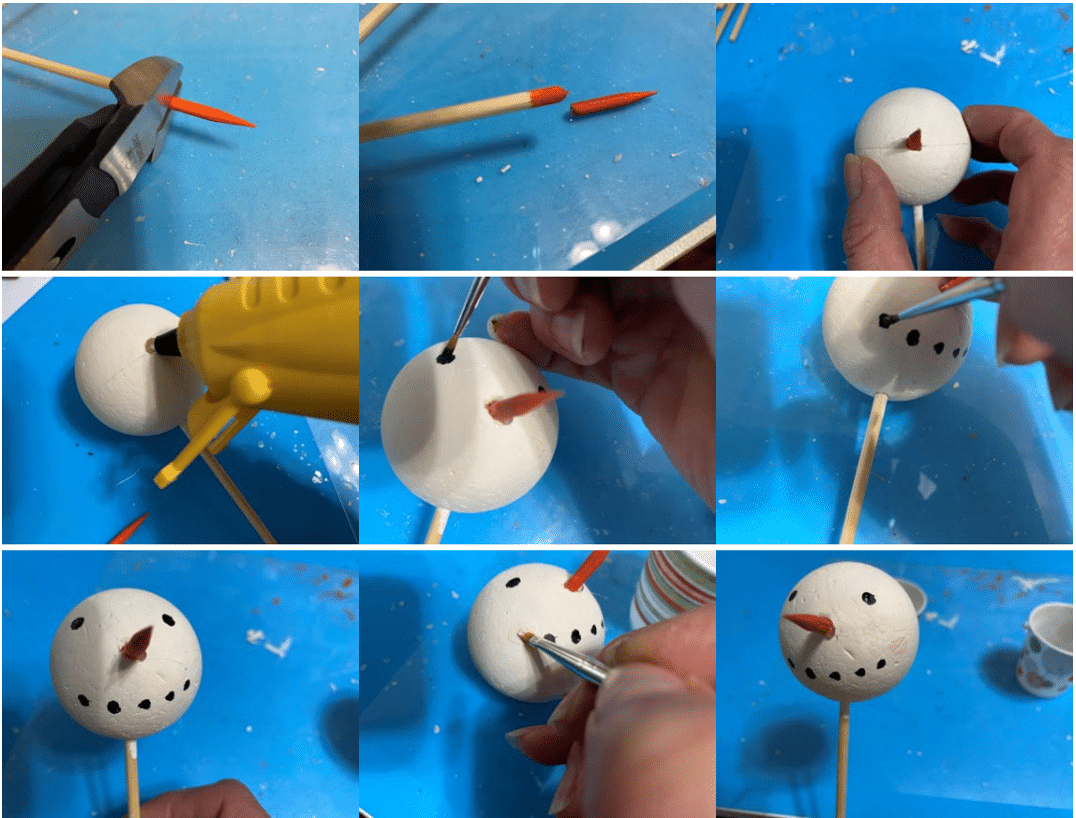
Now that your Styrofoam ball is dry it is time to add the nose, using the wire cutters cut the orange part of the skewer off then decide where on the face you want to place the nose once you have decided insert the nose, cut end into the Styrofoam, if it seems a little loose take the nose back out and add a drop of hot glue and reinsert, for the larger snowman I used small foam carrots I purchased from Factory Direct you can also use the skewer for the nose. The next step is to paint the eyes, I use a very small paintbrush for the eyes and mouth, using your black paint place two small dots where you want the eyes to go ( I do this in case I decide they need to be placed somewhere else it is easy to paint over the small dots with the ivory paint) if they are correct paint small circles for the eyes. Next decide where the pink cheeks should be placed then paint a pink circle for each cheek then using the black paint add small circles from cheek to cheek for the mouth, let dry, you will notice in the photos I painted the mouth first but I found it easier to paint the mouth if I painted the cheeks first.
Adding The Glitter And Hanger
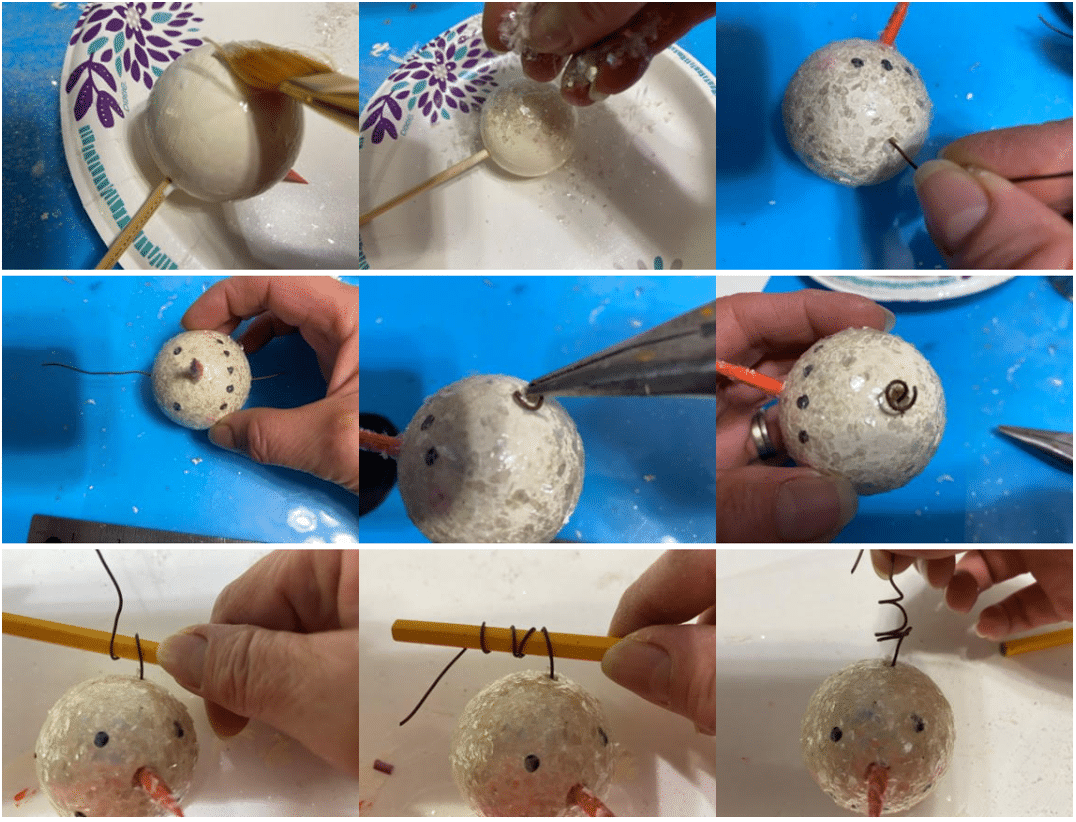
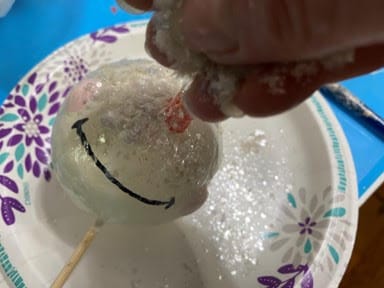
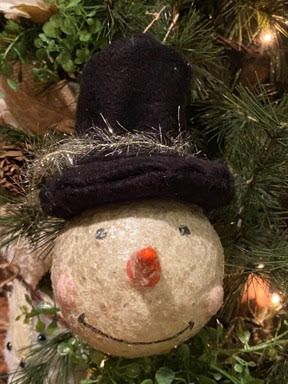
After the face has dried it is time to add the glitter or mica flakes which ever one you choose to use. Start by using a paintbrush to cover the whole Styrofoam head including the nose with Elmer’s glue next sprinkle the glitter or mica flakes covering the whole head and nose, let dry. After your snowman is dry remove the skewer, if you are making the snowman into an ornament you will then need to cut a 10 inch piece of thin wire for the small snowman and a 24” piece for the large snowman or you can make the snowman hat, insert the wire into the snowman head where the skewer was leaving just about an inch at the bottom of the head now using the needle nose pliers bend the wire into a small circle or u shape this will stop the wire from sliding up through the head. Next using a number 2 pencil start at the head wrap the wire around the pencil leaving enough wire at the end to make a hook , about an inch, remove the pencil and bend the wire so it is upward on the head. Your snowman head is ready for your tree or they make a great Christmas gift I gave these to my sisters for Christmas one year.

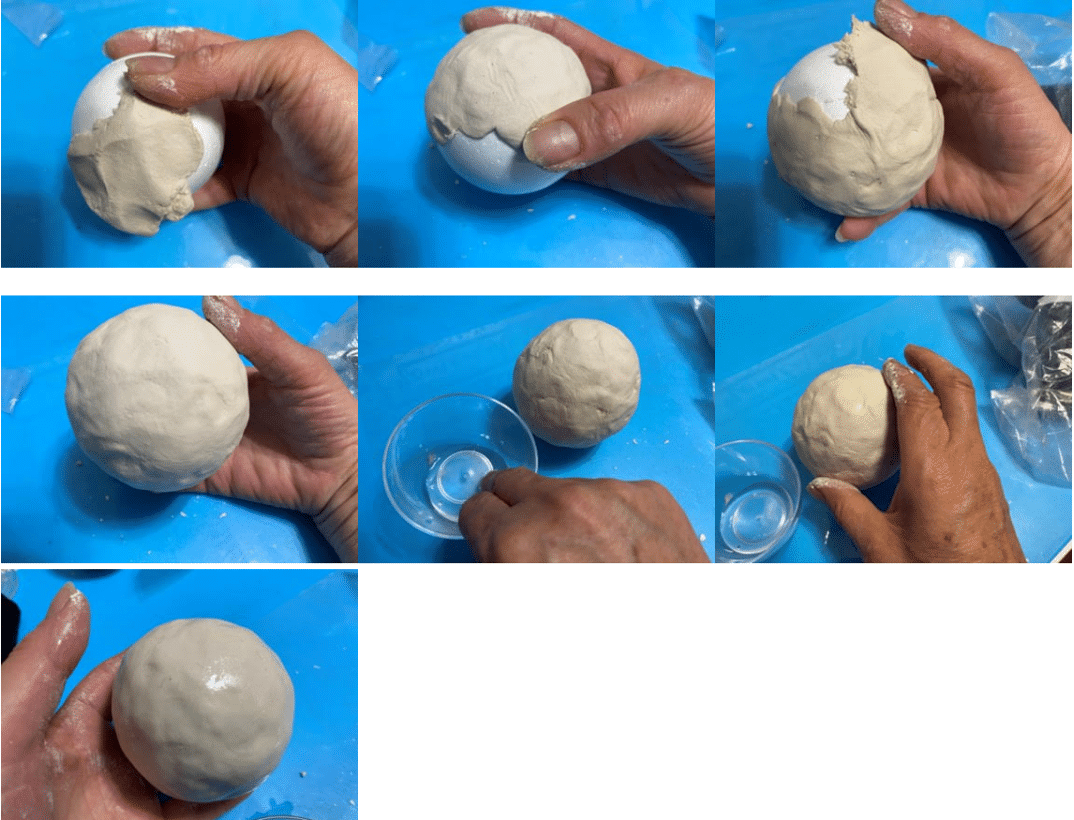
Using The Molding Clay For The Snowman Head
To make the snowman head using the molding clay you can use any 2” or 3” Styrofoam ball it doesn’t have to be smooth in fact I would prefer the rougher Styrofoam but I used the smooth because it is what I had on hand, you can use any air dry molding clay I used the Creative Paperclay. Start by taking a medium piece of the molding clay and work it a little in your hands to get it nice and soft next apply to the Styrofoam ball by pressing down on the clay then working it outwards with your fingers you only want a thin layer keep adding pieces of molding clay the same way until you have the whole head covered with the clay next dip your fingers in the bowl of water and smooth out the clay it doesn’t have to be perfect just so you don’t see where you joined the pieces together.
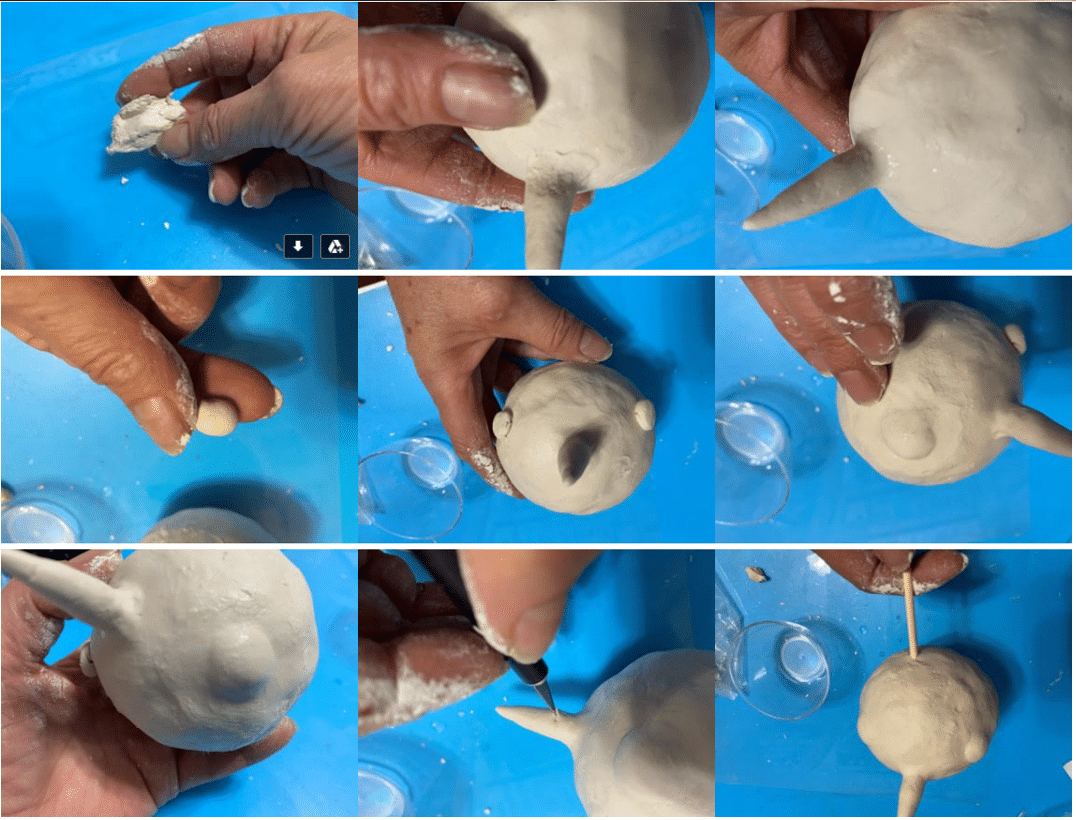
Forming And Adding The Nose And Cheeks
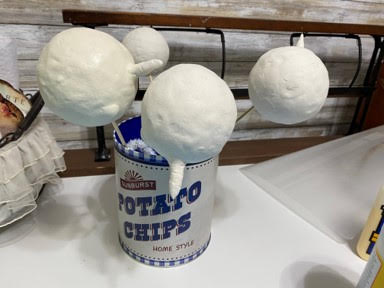
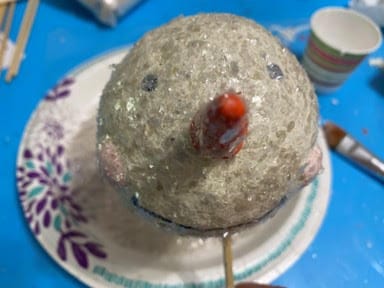
To form the nose take a small piece of molding clay place it in the palms of your hands and rub them together this should form a cone shape you will need to finish forming with your fingers to make the carrot shape make sure the bottom of the carrot is flat, next place the carrot on the ball where you think it should go I placed it in the middle on one side where I decided to do the face once you have the carrot placed you are going to attach the nose by using a finger to pull some of the clay from around the bottom of the carrot working into the clay on the head you will want to dip your fingers in the water to help blend the clay together if you would like you can an small lines on the nose like a carrot has either with your fingernail or a small craft knife. To make the cheeks you will need to make two small clay balls the size of a pea take one of the clay balls and place where you think the cheek should go press down on the clay they wet your fingers and rub the clay around the cheek to attach working it into the clay on the head you may want to press down on the cheek again if it looks to high repeat this step to the other side to form the other cheek. Once you have the nose and cheeks attached take one of the skewers and insert to the bottom middle of the head then place in a container such as a vase to dry overnight.
Painting The Head And Face
Now that your snowman head has dried overnight it is time to paint. Start by painting the whole head except the nose with the light ivory cream craft paint, let dry. Next paint the nose orange then paint the cheeks pink. I painted a smile line for the mouth with black paint you can also do small circles to look like a coal mouth, next decide where you would like the eyes to be then paint to small black circles for the eyes, let dry. The next step is to cover the whole snowman head with Elmer’s glue including the nose then sprinkle with either mica flakes or glitter and let dry. Once the snowman has dried you can remove the skewer or leave it in and paint it and use the snowman as a pick.
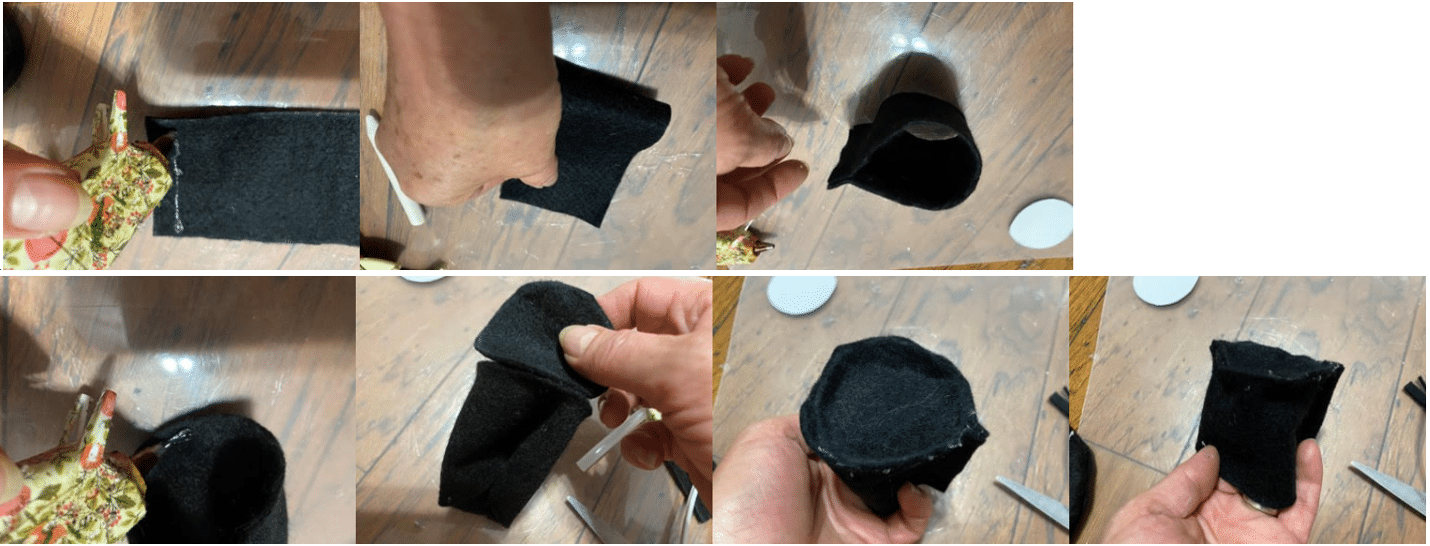
Making the Snowman Hat
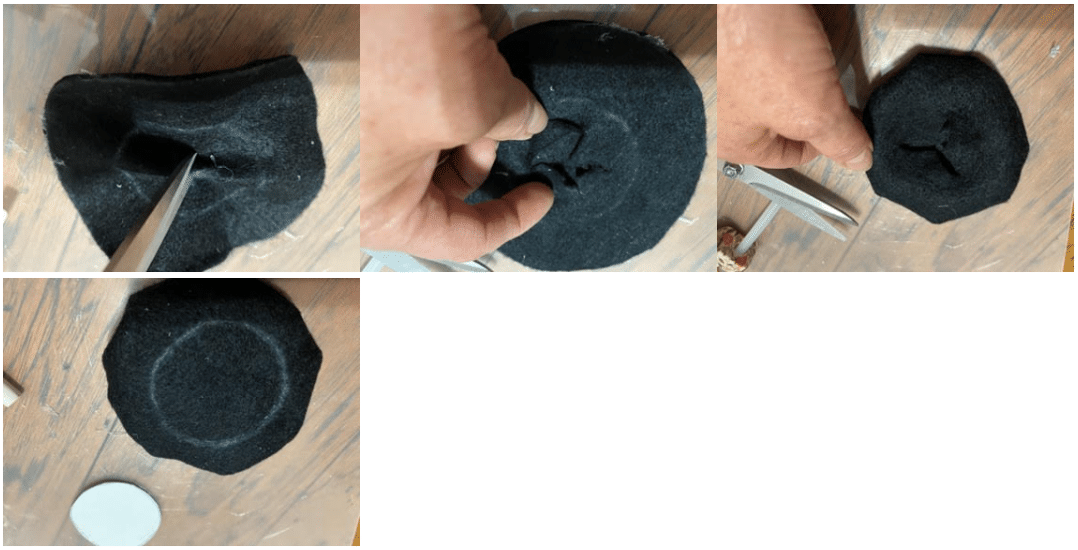
The first thing you will need to do is print and cut out the snowman hat pattern, once you have your pieces cut out lay the hat brim pattern piece on a double layer of black felt and using a piece of white chalk trace and cut out your pattern piece. Next lay your hat crown and hat top pattern piece on top of a single layer of black felt trace and cut them out. Using a hot glue gun glue your two hat brim pieces together by applying a small line of hot glue just below the other edge and gluing the two pieces together, continue adding a small line of hot glue and gluing around the brim until the two pieces are glued together once you have the brim glued take your top hat pattern piece and lay it in the center of the brim and trace then using your fingers separate the two brim pieces and using your scissors make a small cut then insert your scissors into the cut and cut an X in the center of the circle, turn right side out, next take your hat top pattern piece and trace in the middle of the uncut side of the brim.

Next take the hat crown piece and add a line of hot glue about a 1/4ince from the end of one of the short sides then glue the two short sides together, to glue the top of the hat to the crown piece at one end of the crown piece you are going to add a small line of hot glue just under the edge then attach the edge of the top hat piece work your way around the crown piece until the top hat piece is fully attached, turn right side out.
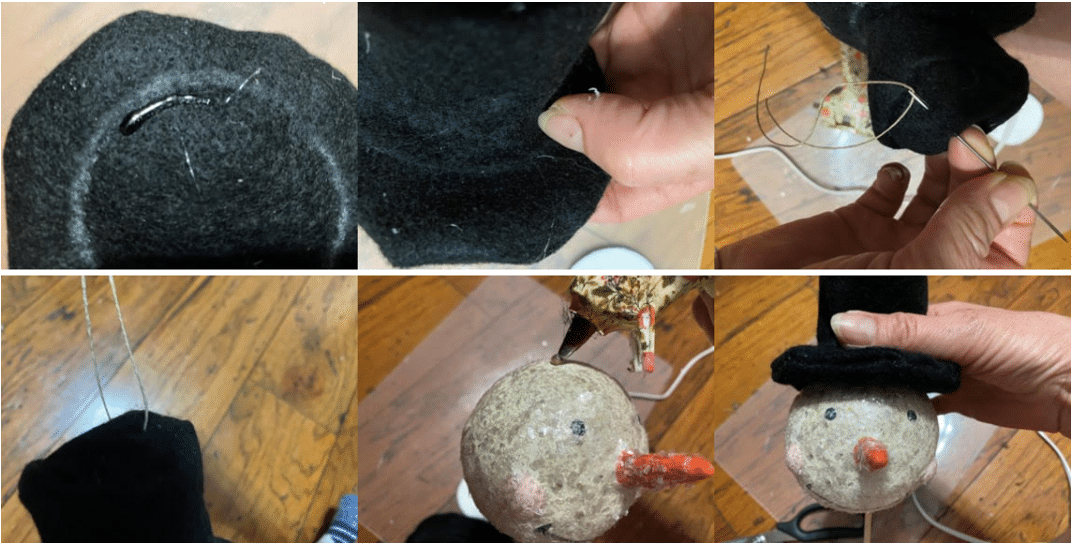
To add the top of the hat to the brim you are going to apply a small line of hot glue just inside your chalk circle then place the edge of your hat piece on the chalk line and glue down work your way around the brim until your hat piece is glued to the hat brim. To attach the hat to your snowman head add hot glue to the top of your snowman head and glue the hat on. If you would like to make it an ornament just take a needle and a thin piece of twin insert the needle in the top of the hat and pull one end of the twin through take off the needle and tie the twin in a knot add a piece of tinsel around the base of the hat and you are ready to decorate.
I’m going to try this dryer ball Snowman. You are pleasant to watch. Thanks for sharing
The Mika flakes I ordered are so big. I thought it’d be like glitter.