Home Decor, Thrifty Makeovers
DIY Jewelry Holder/Thread Holder
Jun
Hello everyone and welcome to my Thrifty Thursday, if you are new at The Crafty Decorator every Thursday I try to show you how I take an item I purchase from a thrift store, rummage sale, or yard sale and create it into something different, give it a transformation while still keeping it for it’s intended use or keeping the item original and just showing you how you can incorporate it into your home.A few years ago I had made a thread holder for a Christmas gift using a picture frame, peg board, fabric and dowels which gave me the idea of making a jewelry holder, two things you should never pass up when you are out looking for vintage treasures are vintage picture frames and linens there are so many things you can create with them.Below I will explain how I made the Jewelry holder and explain how you can turn it into a thread holder.
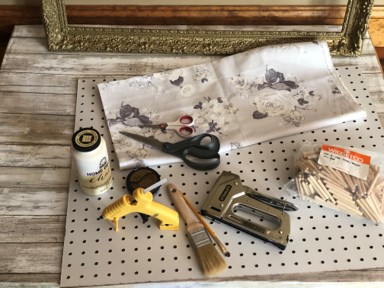
Here is a list of what you will need:
- Vintage Picture Frame
- Pegboard
- Lace or Fabric
- ¼” x 2 ¼” Dowels
- ¼” x 2 ¼” Dowels
- DecoArt Metallic Luster in Iced Espresso
- Spray Sealer
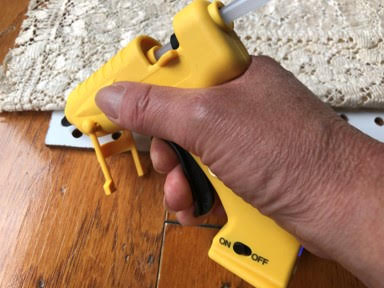
- Hot Glue Gun and Glue Sticks
- Gorilla Clear Grip Glue
- 2 Self-Leveling Picture Hangers
- Paintbrushes
- Hammer
- Staple Gun
- Saw
- Piece of Scrap Wood
Painting The Frame
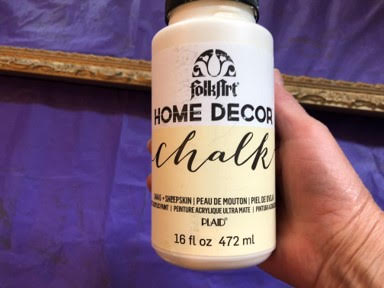
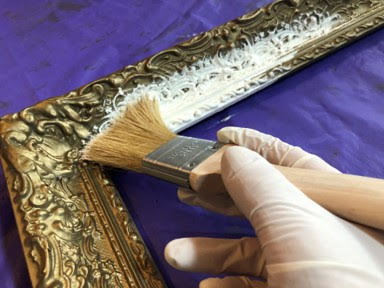
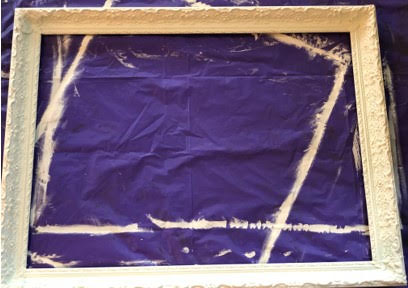
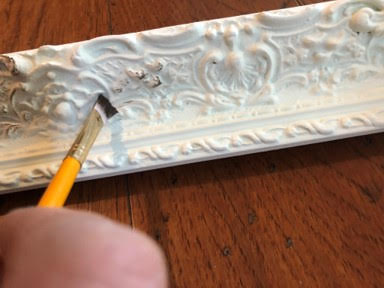
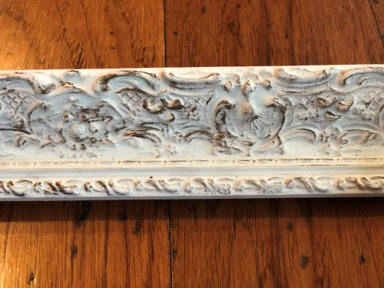
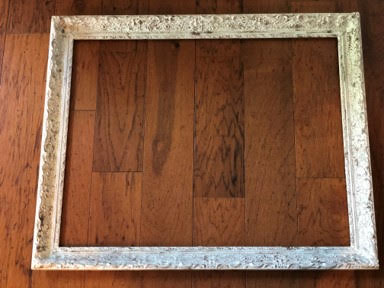
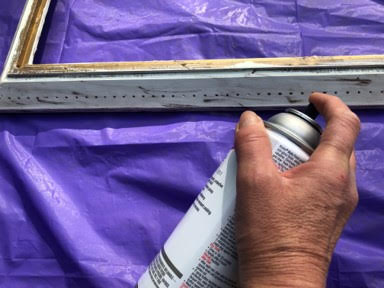
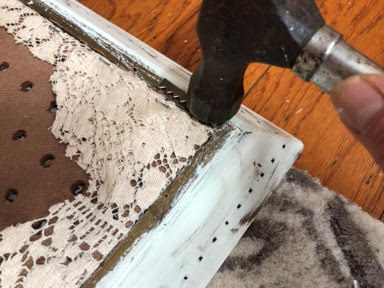
The first thing you will need to do is wash down the frame to make sure it is nice and clean before painting. After you have washed your frame you are ready to paint I used Folk Art Chalk Paint in the color Sheepskin you can use any paint or color you would like, start by giving the frame one coat of paint then let dry, once the paint has dried apply a second coat and let dry. Now that your paint has dried it is time to highlight the details on the frame I used Deco Art Metallic Luster in the color Iced Espresso, using a paintbrush lightly brush the metallic onto the details of the frame, I started applying the Metallic lightly to control how much I wanted to add, after highlighting all the details I went back and made area’s darker to give it a more vintage look then I added metallic to the sides of the frame. After adding the metallic I took the frame outside then I used Krylon matte finish spray sealer on the frame.

Painting The Dowels
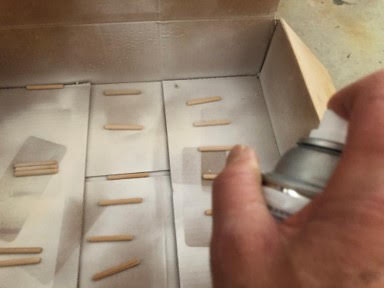
Start by placing the dowels in a cardboard box if you have one, this helps stop them from rolling all over when spray painting them, spray paint the dowels and let dry then roll them over and paint continue rolling and painting the dowels until they are completely painted, I started with 12 dowels which worked out great for me, if you are making the thread holder you will need a lot more, you can place spools of thread on the pegboard to get a rough idea how many you will need.
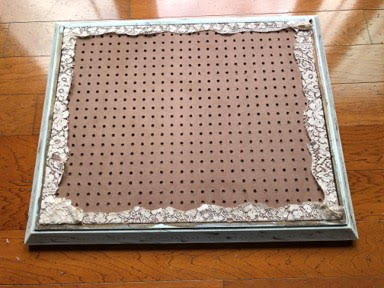
Cutting And Covering The Pegboard
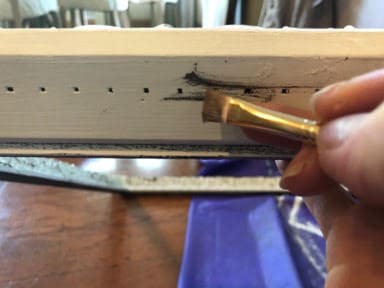
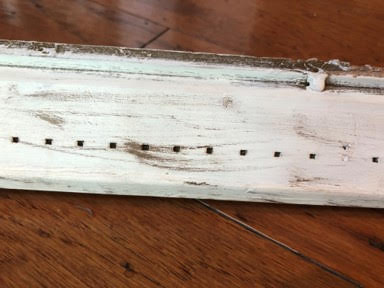
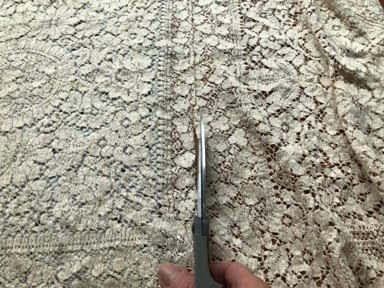
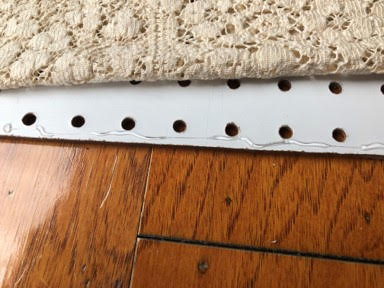
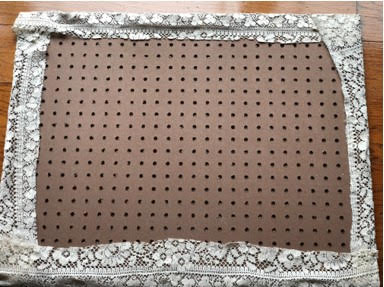
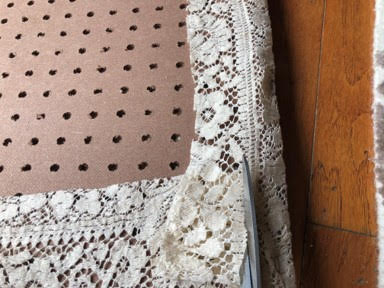
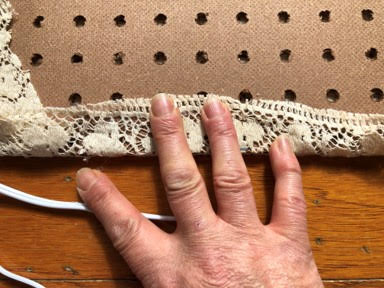
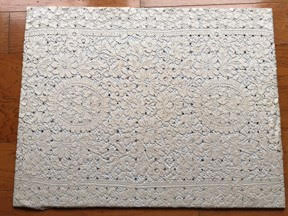
First you need to cut your pegboard to fit into the frame, measure the opening in the frame then mark your pegboard for the size you will need, if the frame came with a picture you can just trace it onto the pegboard, using a saw cut the pegboard, my husband cut mine on a table saw for me. After you have your pegboard cut lay your fabric or lace on top to see how you would like the print on the pegboard then cut the fabric all around the pegboard leaving enough fabric to bring around the back of the pegboard to staple, next add a line of hot glue to one vertical side and one horizontal side gluing down the fabric as you go, I did this to hold the fabric in place so I can flip the pegboard over while keeping the fabric where I wanted it, next flip your pegboard over, then place a piece of scrap wood under the pegboard, next start stapling one side of the lace or fabric to the back of the pegboard then move to the opposite side and pull the fabric tight and staple the fabric working your way down, next repeat the same steps to the top and bottom folding in the corners of the fabric, I stapled the fabric because the hot glue does not hold when you are trying to pull the fabric tight. After you have your fabric stapled using scissors trim off the excess fabric then hot glue the ends of the fabric to the pegboard.
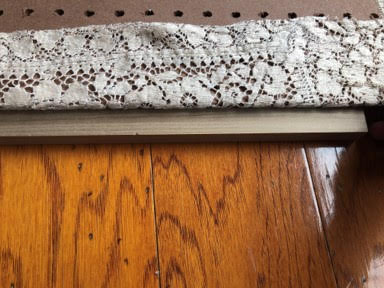
Attaching The Pegboard To The Frame
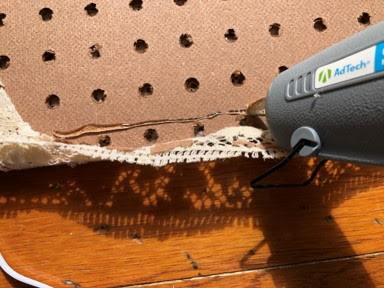
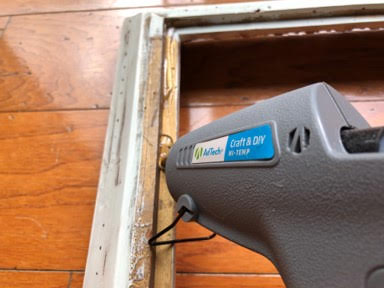
It has been so long since I made the thread holder I forgot how I attached the pegboard to the frame , I am here to tell you what doesn’t work before I tell you how I ended up attaching the pegboard. Ok first I tried hot gluing the pegboard to the frame well that worked until I started pushing the dowels into the pegboard holes the pegboard pulled away from the frame then I tried to nail the pegboard to the frame using a brad nailer well that didn’t’ work either the nail went through the front of the frame, my last idea was to add Gorilla Clear Grip Glue all around the frame then I add hot glue all around the frame next I attached the fabric covered pegboard to the frame and applied pressure all around the frame this was finally the answer, in the photo’s below you will not see a photo of me adding the Gorilla Glue because that was after the fact.
Adding The Hangers and Dowels
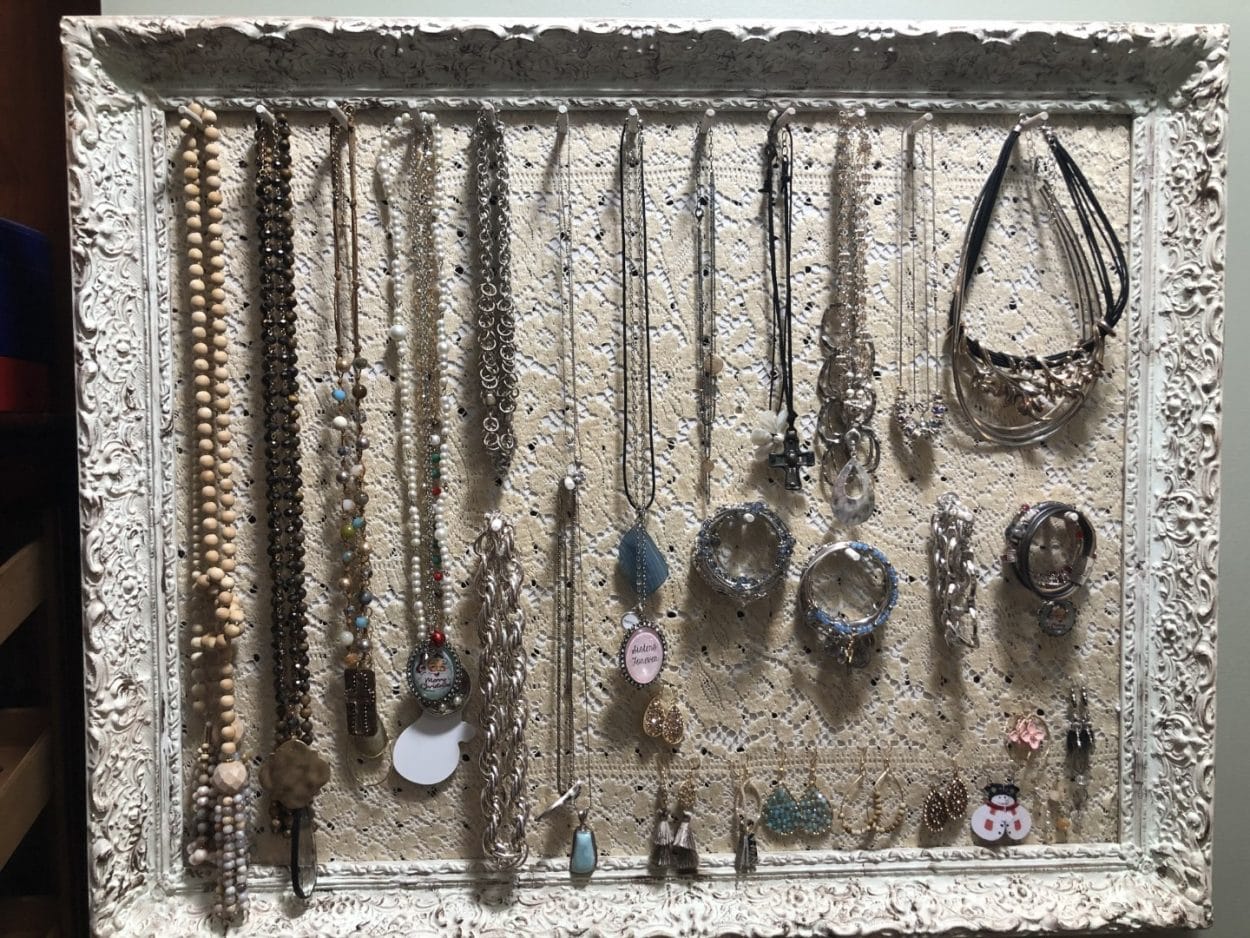
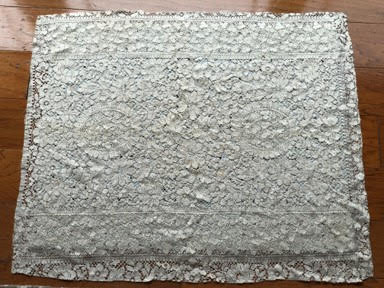
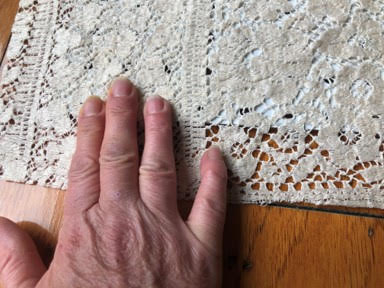
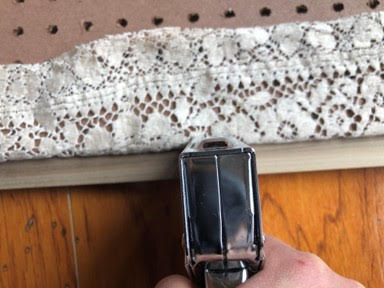
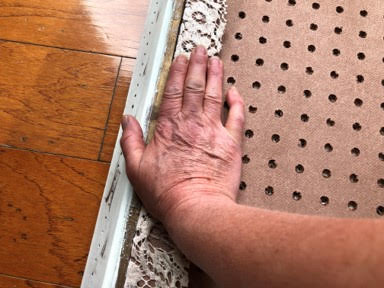
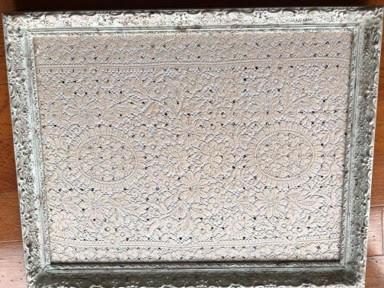
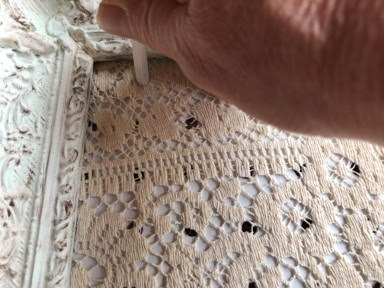
To add the hangers place one of the picture hangers on one of the back corners of the frame then hammer the hanger into the frame repeat this step to the opposite corner of the frame. If you used a fabric to cover the pegboard you will need to decide where you want to add the first dowel then feel for the hole in the pegboard and poke through the fabric with the tip of the scissors you will need to do this for each dowel added. I was going to use a printed fabric to cover the pegboard then I remembered the lace tablecloths I had and I decided to use a lace tablecloth instead, I loved the look of the lace with the frame and I am so glad I did because the lace has openings in it so I just stuck the dowels through the openings then if I decided to move the dowels I wont have any holes in the fabric, I just love how my jewelry looks on this frame. If you made the frame to hold spools of thread place your first dowel then put the spool of thread on the dowel to see how much space you need between the spools of thread, continue this step across and down the frame.


I hope you enjoyed this thrifty Thursday project and consider making one. This is such a wonderful gift to give someone, when I made the thread holder and gave them as Christmas gifts they loved them, there is nothing better then a home made gift.
True our family has a rule. Home made gifts or write a story about a memory with us. We dont need bought gifts. We have many homemade gifts our sons and grandchildren have made for us. Sherry you have really outdone yourself with this blog such detail and perfect instructions. Christmas = jewelry holders for all grand and great grand girls. Thanks so much.
Oh my goodness! I am going to make this and I have the perfect frame to use!! I’ve purchased so many necklaces from your sister Barb @ the Shabby Tree. I’m so happy to follow you too! Thank you so much for sharing your ideas!!
I enjoy all your projects. Thanks for all the good ideas!
I love your blog!
I’ve found a frame. I now need to get started on the jewelry holder.
ingredienti di reduslim
RodneyAculk
go to https://www.thecraftydecorator.com you can find the blog for the jewelry holder