Dollar Tree, Home Decor, Spring
DIY Butterfly
Apr
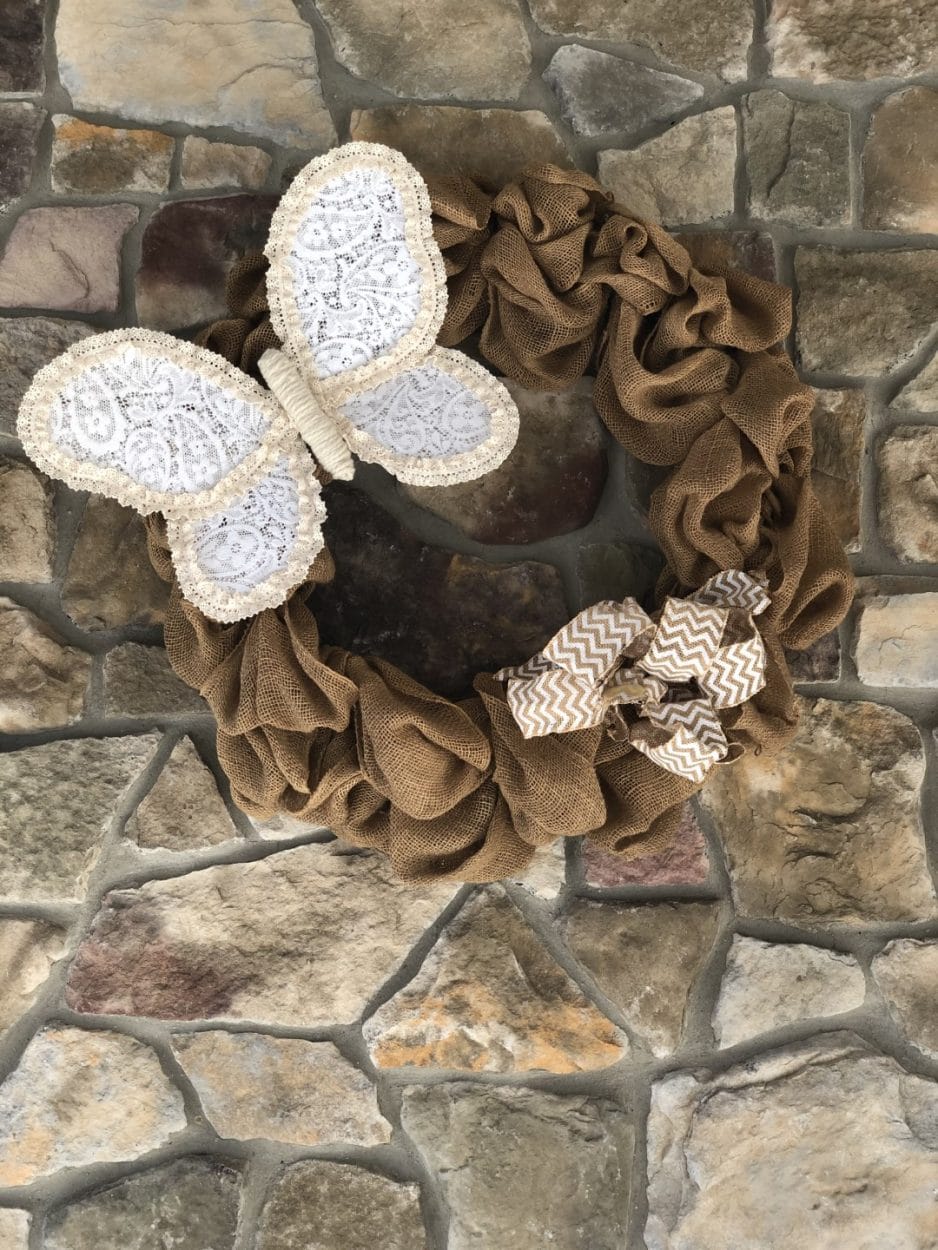
If you love butterflies you are just going to love this project.I read somewhere to use the children’s dress up wings from the Dollar Tree to create angel wings, but when I went to the store to buy them I wasn’t seeing angle wings in my mind I was seeing beautiful butterflies that I can use to decorate my home.I think the butterflies would be beautiful hanging on a wall in a little girls room.
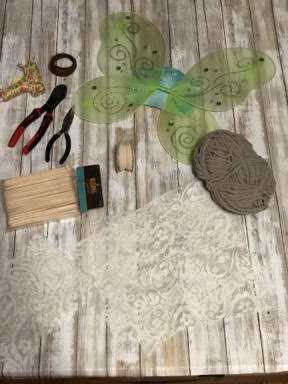
Here is a list of what you will need:
- 1 pair of children’s dress up wings (Dollar Store)
- Fabric of your choice
- Yarn (you can also use jute or twine)
- Ribbon of your choice
- 1 Wooden Jumbo Craft Stick
- 2 – 4” zip ties
- 22 gauge wire
- Wire cutters
- Scissors
- Razorblade
- Needle Nose Pliers
- Hot Glue Gun and Glue Sticks
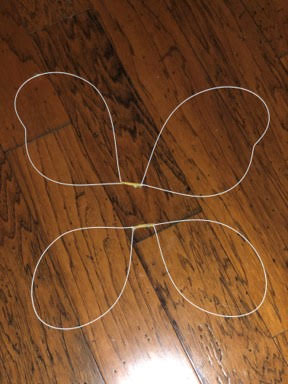
Preparing the butterfly form
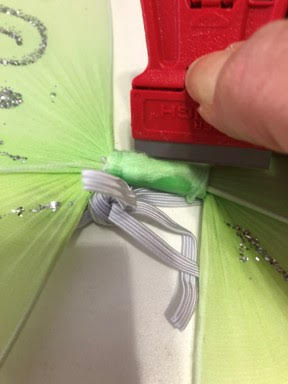
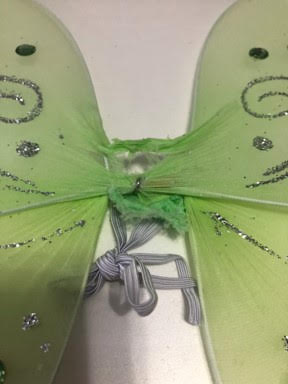
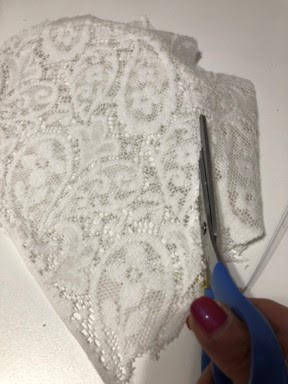
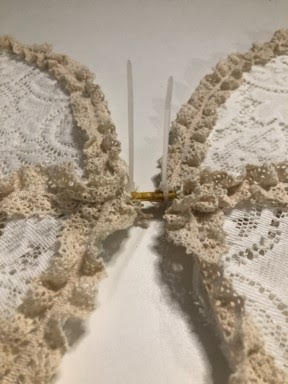
The first step is to remove the existing fabric from the butterfly form. Using a razorblade lightly cute the fabric in the middle where the wings are joined together layer by layer, there are rubber bands under the fabric holding the wings together and you do not want to cut them or your wings will come apart.
Adding the fabric and trim
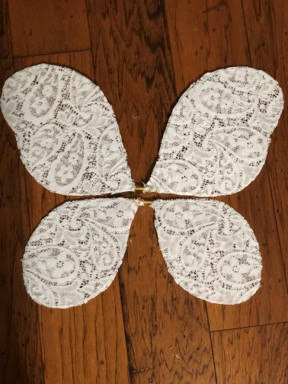
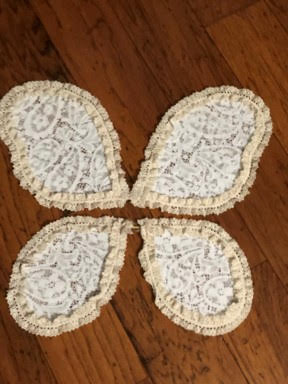
You will now need to cut your fabric pieces to cover the wings. You will need four pieces that measure 12” long by 8” wide and four pieces that measure 9” long by 6” wide. Once you have your fabric pieces cut take the top part of the butterfly, starting at the begging of one of the wings (just above the rubber bands you are not covering this section with fabric) add hot glue to a small section of the wing then place your 12”x8” piece of fabric on top covering the wing now continue to glue the fabric around the wing a small section at a time pulling on the fabric lightly to make sure the fabric will be tight and flat on the wing. Flip your form over and cover the back side of the wings the same way, now using your scissors trim off the excess fabric, repeat these steps to the other wing. Next cover the bottom section of your form using your four 9”x6” pieces of fabric and attaching them using the same directions as covering the top part of the form. Lastly hot glue your ribbon one wing at a time just like you did for the fabric, you only need to add ribbon to the front side of each wing.


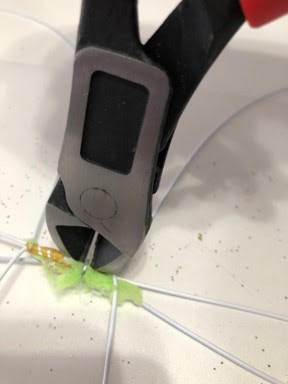
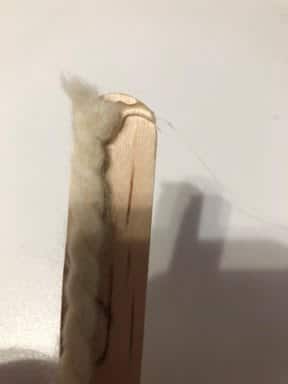
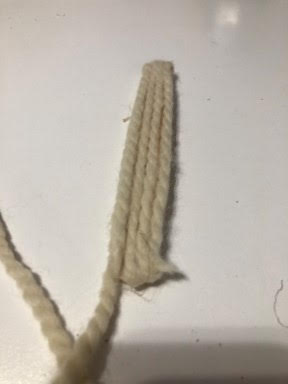
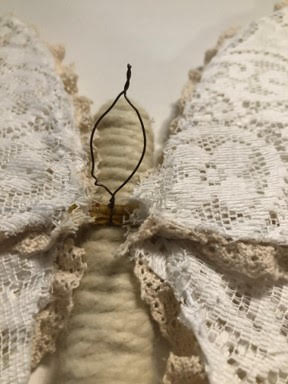
Making the body
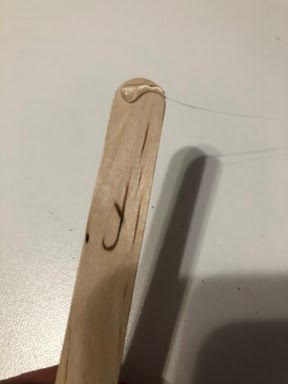
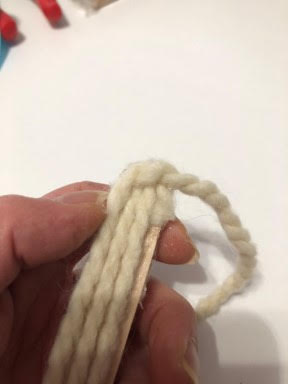
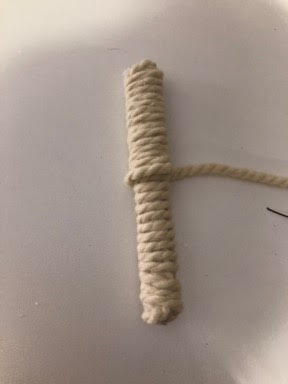
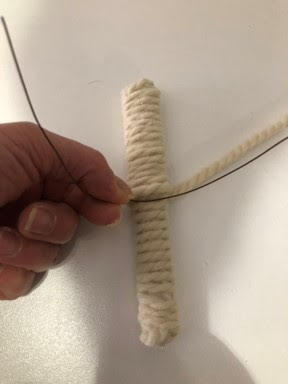
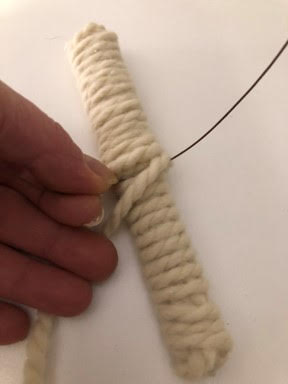
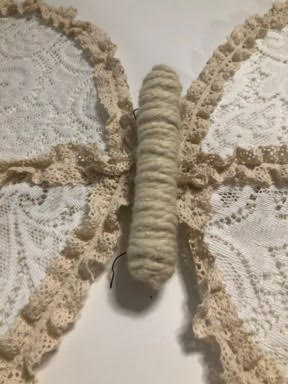
To make the body start by adding a drop of hot glue at the very top of your craft stick and glue down the beginning of your yarn now add a drop of hot glue to the bottom of the craft stick and bring down your yarn and glue to the bottom. Flip your craft stick over and add a drop of hot glue and bring your yarn over the top of the craft stick and glue to the back side, next add a drop of glue to the bottom and bring your yarn down and glue, repeat this step until both sides of your craft stick are covered, it should only be 3 or 4 rows depending how thick your yarn is. Next add a small line of glue across the end of your craft stick where you ended with your yarn and start wrapping around your stick, apply a line of hot glue to the other side and wrap, you only need to add the glue for the first three rows this is just to make sure your yarn doesn’t slide of the end of the stick, just before you reach the bottom start gluing a few rows again working your way back up and down again. Once you have covered your stick twice cut a 6” piece of wire and lay it across the middle of your craft stick. Start gluing and wrapping your yarn two more times up and down the craft stick, wrapping the middle of your wire as you go, when you reach the end cut your yarn and glue the end.

Assembling the butterfly
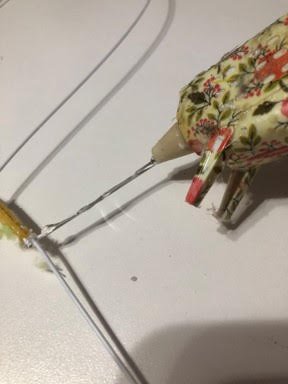
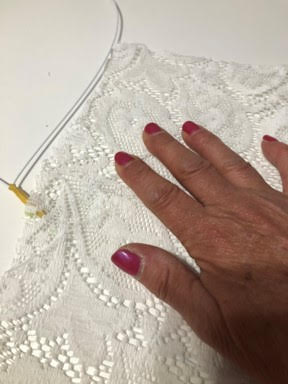
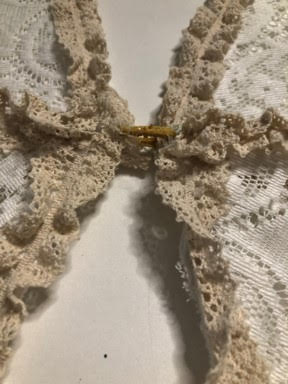
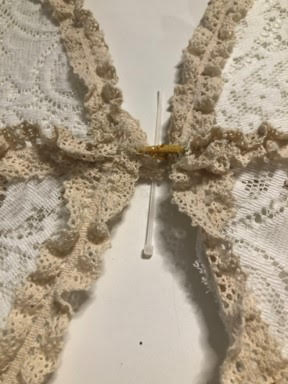
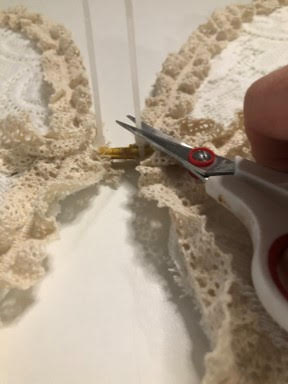
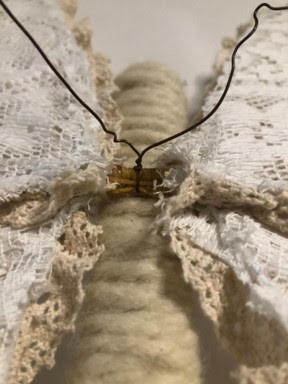
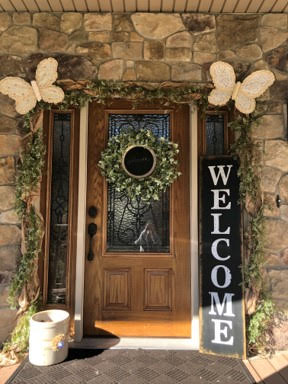
To assemble the butterfly first lay down the top of your butterfly form (front facing up) next lay the bottom part of the butterfly on top just overlapping so the rubber bands are on top of each other, next take your two zip ties and slid them under the middle where your wings are overlapping and zip tie the wings together and trim off excess. Now lay your body on top where you just zip tied your wings and flip your butterfly over holding your body so it stays in the middle, bring the ends of your wire to the back so one end is on either side of the connected middle section now twist them together tight using the needle nose pliers. If you are going to hang the butterfly on a wall you will not need the wire this long, make a hanger by twisting the two pieces of wire and cutting off the excess, if you are going to attach the butterfly to something like a wreath I would leave the wire and trim after attaching. I added two butterflies around my front door.
Love these so beautiful
They are so cute going to give it a try thank you sheri
These are absolutely gorgeous!!!!
I made this in a Americana theme and love it I gave it to my oldest daughter to put on her porch. I’m enjoying watching your crafts. Thayer all so interesting, new, and refreshing!
How did you do the Americana? Where did you put the red, white and blue?
I made this in a Americana theme and love it I gave it to my oldest daughter to put on her porch. I’m enjoying watching your crafts. They’re
all so interesting, new, and refreshing!
i made the butterfly but used a wooden dowel and wooden ball, and put antennas on mine
I am just in love with your butterfly 🦋 I wi add this to the list of things I want to make. Thank you Sherry!
Love butterflies 🦋 reminds me of my grandfather 🥲 ! Your amazing in your crafts love to try some of your Easter stuff my 5 quarter store only has Easter candy im soooo bummed happy crafting love watching you never seem to catch you live but always watch your replays xx really can’t go to hobby lobby and all those stores as there in a different state 30+ Miles and I have a fracture in spine so not moving so well so I get a little jealous that I can’t go pick up some crafts did buy your craft iron though ! Happy spring xx
Sending love and prayers you feel better soon. I got the little craft iron at Walmart.