Fall, Halloween, Home Decor, Thanksgiving
DIY Cornstalk Blog
Jul
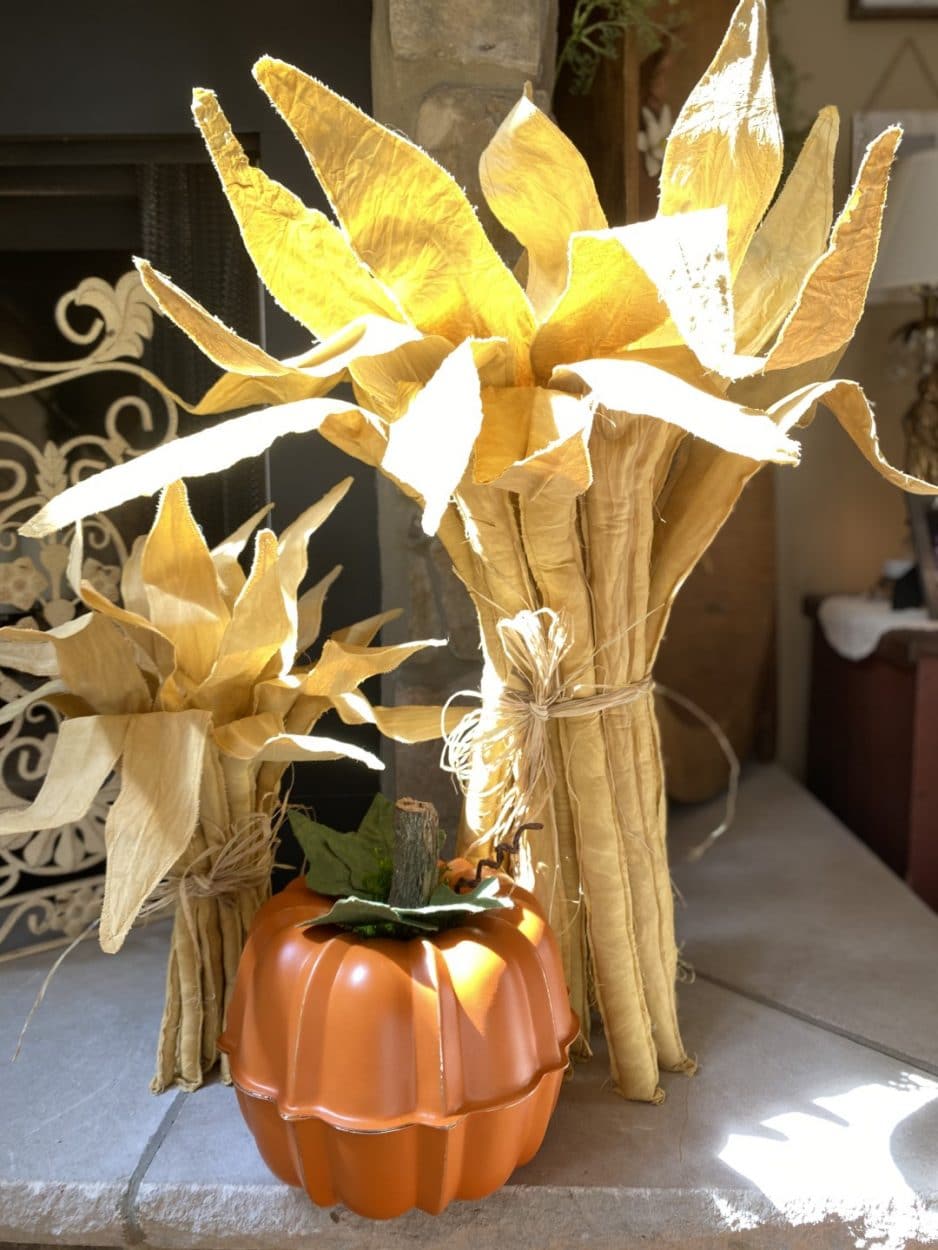
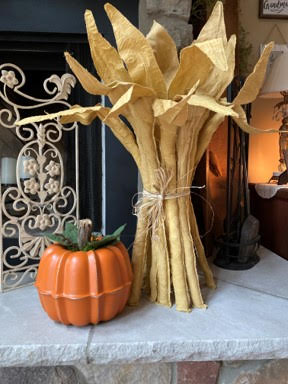
Fall is one of my favorite seasons, I just love the warm colors when the tree’s turn and the weather is perfect not to hot or cold it is a beautiful time to sit out by a fire. I remember seeing a cornstalk made from fabric one day when I was searching the web for something Fall that I could put on either side of my fireplace, I thought I would give it a try it wasn’t as simple as I thought I would be, after a few trial and errors I finally think it came out perfect. After I figured out how to achieve the large cornstalk I thought I would also make a table size version, I am going to let you know now it is a little time consuming stuffing all the stems but the result is well worth it.
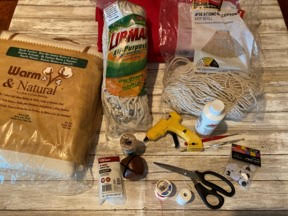
Here is a list of what you will need:
- Cornstalk Pattern
- 3 Yards of Colored Muslin (See My Blog On How To Color Fabric) or a Golden Straw colored fabric for large cornstalk 1 ½ ya4rds for the small cornstalk
- Deco Art Golden Straw Craft Paint if You Are Coloring Muslin Fabric (Hobby Lobby)
- Polyester Fiberfill (Hobby Lobby)
- 16 Gauge Wire For The Large Cornstalk
- 20 Gauge Wire For The Small Cornstalk
- Wirecutters
- Ruler
- Pencil
- Jute Twine
- Scissors
- Raffia
- Sewing Machine and Thread to Match Your Fabric (If you are choosing to sew your cornstalk piece)
- Surbonder Fabric Hot Glue (if you don’t sew you can glue your pieces together)
- Hot Glue Gun
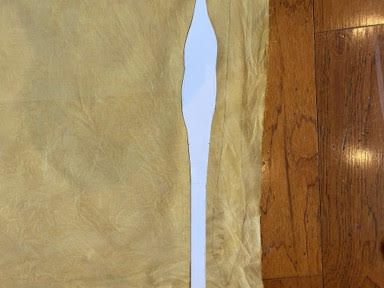
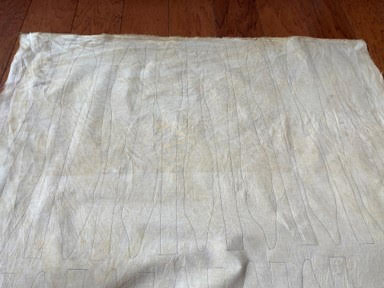
Print the Pattern
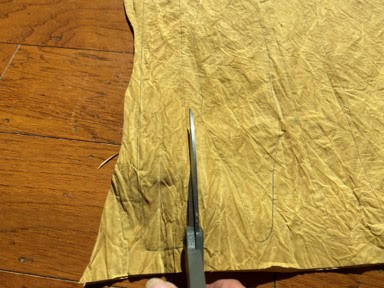
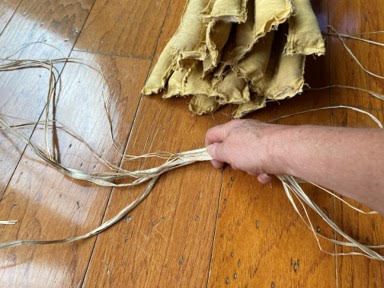
The first thing you will need to do is print out the cornstalk pattern then attach the pattern pieces where indicated. If you would like to color your own muslin you can see I how I do this on my blog on how I coffee stain and color my fabric, if you don’t want to color your own fabric you can certainly use fabric in a golden straw color. Once you have your pattern ready you will need to trace and cut out 20 cornstalk stems, on a double layer of fabric (both the small and large require 20 stems), if you rotate your pattern piece after each one you can get more stems per yard without wasting any fabric. Cut out your stem pieces on the traced line.
Sewing The Cornstalks
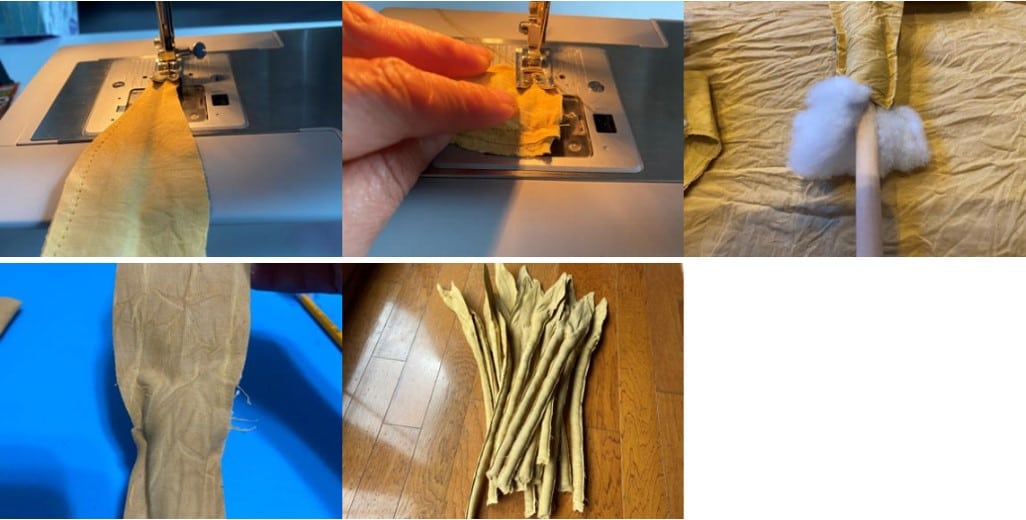
If you would like to sew your cornstalk stems the first thing you will need to do is cut 20 twelve inch pieces of the 16 gauge wire for the large cornstalk or 20 eight inch pieces of the 20 gauge wire for the small cornstalk. Take one of your cornstalk stems and separate it into two pieces now lay a piece of your 12 inch or 8 inch wire (depending on which size stalk you are making )in the middle of the stem, a little down from the very tip of the stem, next place the tip of your hot glue gun about a half inch up from the bottom of the wire then remove the wire and add a line of the surbonder hot fabric glue up the middle of the stem, you want to leave the half inch of wire at the bottom unglued, place the other piece of cornstalk stem on top and press down. Once you have the wire and stem glued together using the sewing machine start sewing upwards at one side on the bottom end and continue sewing all around the stem until you reach the bottom of the other side do not sew the bottom of the stem closed. Now that you have your stems sewed together you can start filling the stem with the fiberfill, I use the eraser end of a pencil to stuff the small stems and the end of wooden spoon to stuff the large stems, push your piece of fiberfill all the way up to the bottom of the leaf and around the piece of wire we did not glue down continue adding the fiberfill and pushing it up to the top of the stem until the stem is totally filed with the fiberfill, leave about a ½ inch unfilled at the bottom. Once you have your 20 stems stuffed you can now sew the bottom closed by sewing across the bottom of the stem.

Gluing The Cornstalks
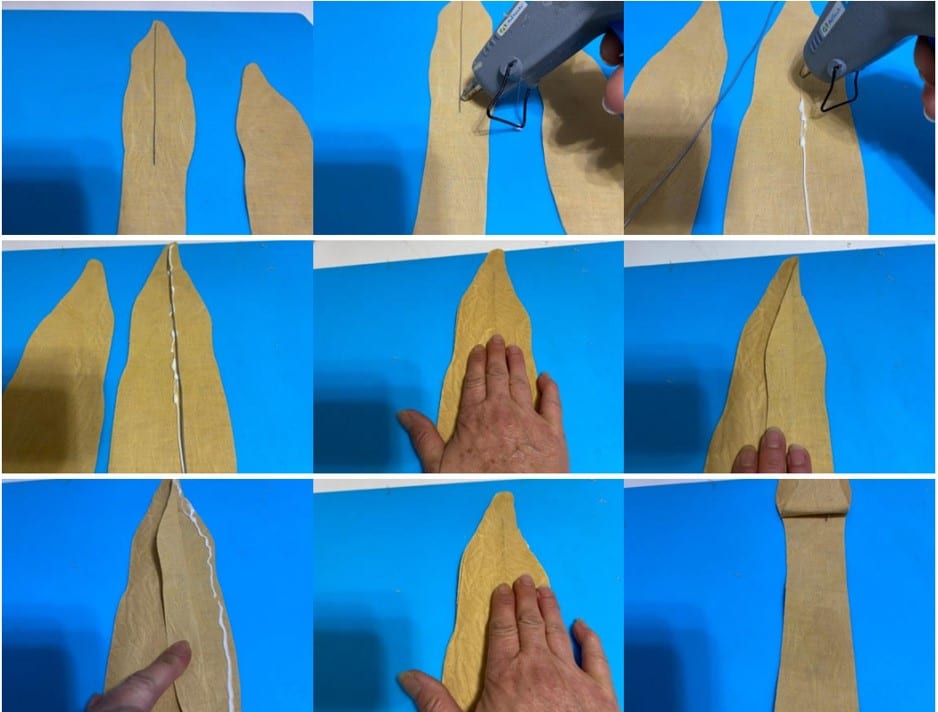
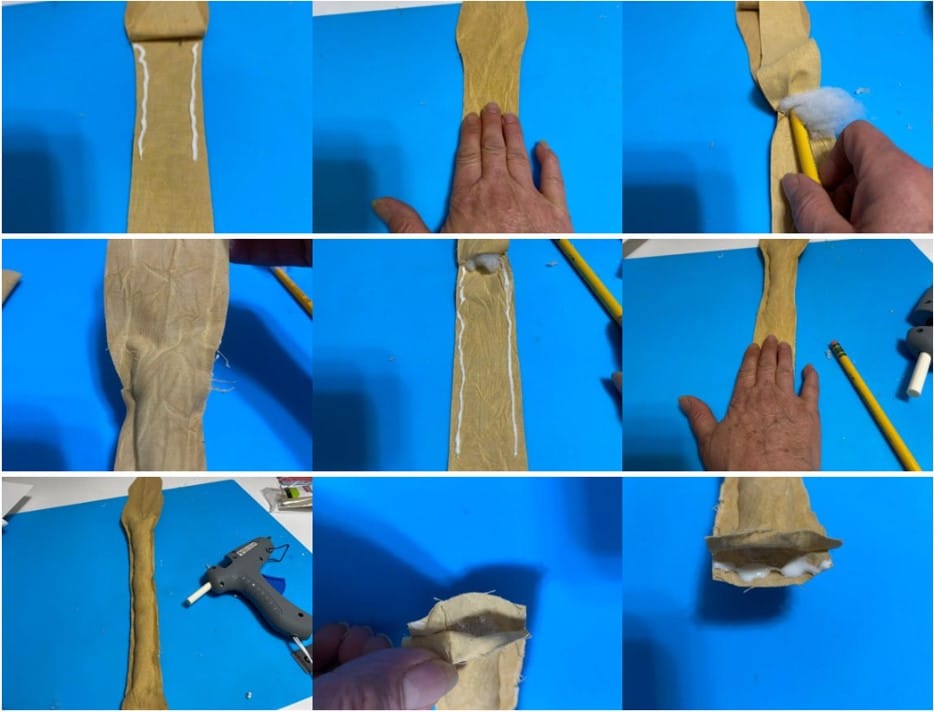
If you are going to glue your cornstalks you will need to add the wire as instructed in the directions above first, once you have added your wire and attached the second cornstalk piece you will now fold back one side of the cornstalk leaf, just the leaf not the stem part, add a small line of the surbonder hot fabric glue just inside the edge then glue your two leaf pieces together repeat this step to the other side of the leaf. Next lift up the top layer of the stem add about a 3 inches line of the surbonder hot glue to both sides of the stem then glue the top stem down, let the glue cool for a few seconds then take a piece of the fiberfill (I use the eraser end of a pencil to stuff the stem) push the fiberfill up to and around the end of the wire continue to fill the part of the stem you have just glued, you are going to continue gluing down and adding the fiberfill until you reach the bottom of the stem, leave about a ¼ inch unfilled at the bottom of the stem. Once you have you stem stuffed you can now close up the bottom of the stem by adding a small line of hot fabric glue to the inside and glue closed.
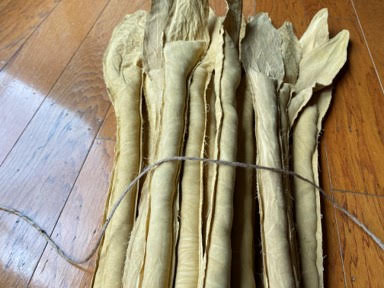
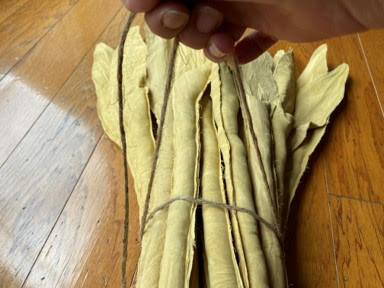
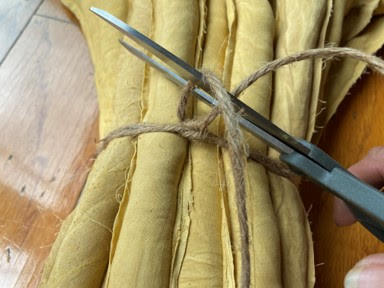
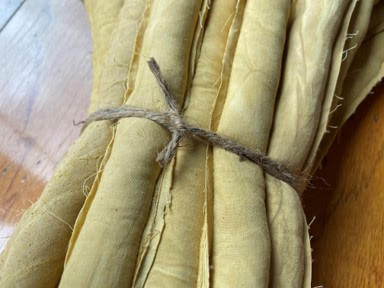
Attaching The Cornstalk Stems Together
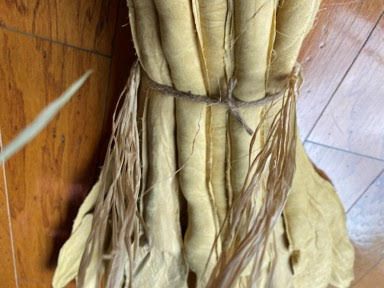
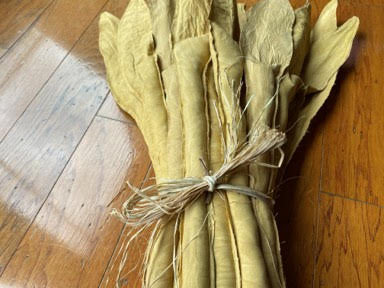
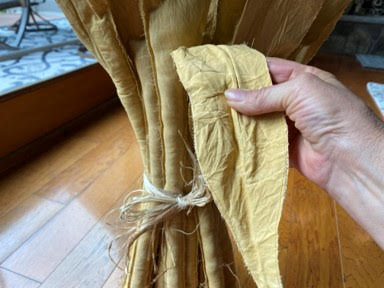
To form the cornstalk stack all 20 stems together try to make sure all the bottoms are even now lay your jute twine over the top middle of your stems wrap the twine around the back then back to the front, tie a double knot trim off the excess. Next take some raffia place under you cornstalk where you have the jute and wrap the raffia around the front and tie into a bow. The only thing left to do is bend and arrange the leaves the way you would like. Yay you are finished I hope you enjoyed making this cornstalk.
Absolutely love these. I don’t have a printer, so I was just wondering if you would share the width of the small stalk on the stem. I appreciate it very much and love all your crafts and your sister’s.
Sherry,
Just love your crafts. Is there a way that you can make the fonts larger, or that I can make the fonts larger by expanding it. I have a low vision problem.
Also, was there a pattern for the cornstalk?Chris Hara
Love the cornstalks and Bundt pumpkin. Will make this. Will go look for Bundt pan at goodwill. Love your crafts also your sisters page. Thanks! ❤️
❤️ it! How do I get patterns?
Still looking for instructions for the bundt pumpkins. Love all your crafts.
Where can I get the pattern for the cornstalks?