Home Decor, Thrifty Makeovers
DIY Lamp Earring Holder

Jul
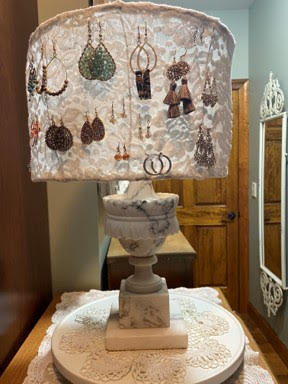
Welcome to Thirty Thursday! This for Thrifty Thursday I used a marble lamp at got at the salvation army for $4.99 and a wooden lazy susan that I purchased at goodwill for $2.99. I just love how it turned out I think it is the prettiest way to display your earrings and you can easily turn the lamp because it is on the lazy susan. I love to take my thrifty finds and turn them into something I love..
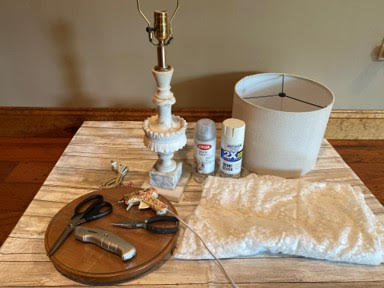
Here is a list of what you will need:
- Lamp (Salvation Army $4.99)
- Wooden Lazy Susan (Goodwill $2.99)
- Drum Lampshade (Walmart $4.00)
- Rust-Oleum Spray Paint in Ivory Bisque
- Krylon Matt Finish Sealer
- Lace Fabric (Walmart)
- Wire cutters
- 16 Gauge Wire
- Needle Nose Pliers
- Pliers
- Scissors
- Utility Knife
- Hot Glue Gun and Glue Sticks
- Ruler
- Doily
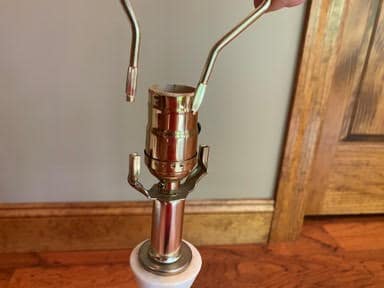
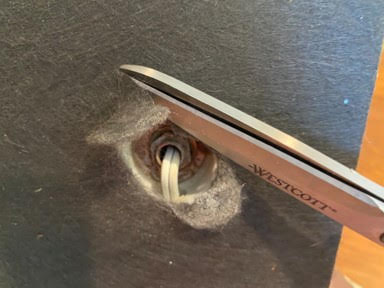
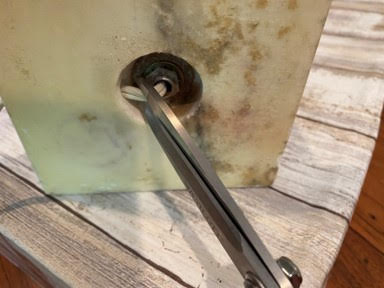
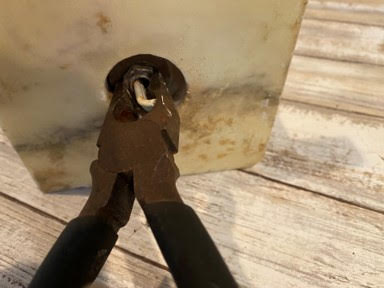
Preparing The Lamp
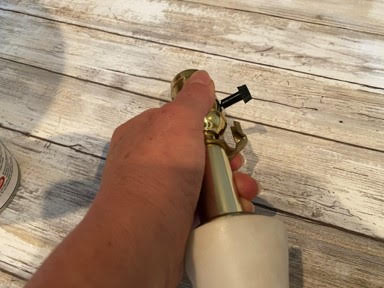
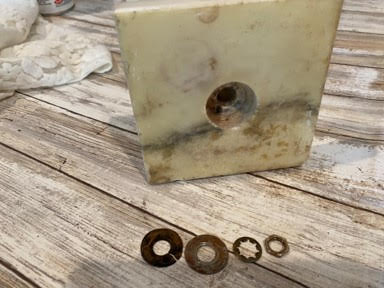
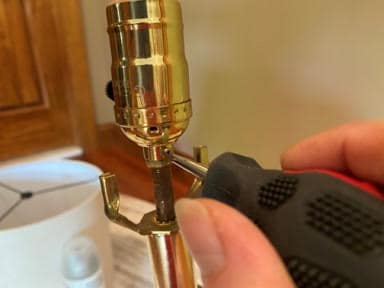
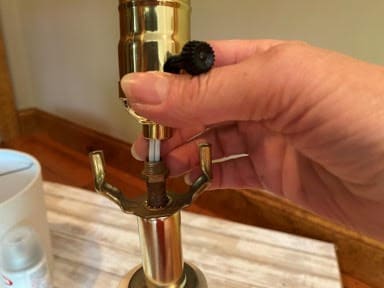
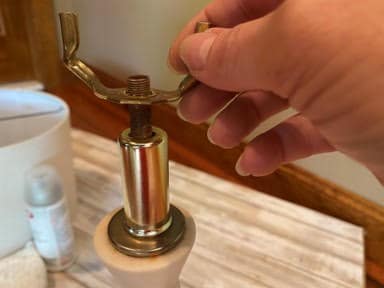
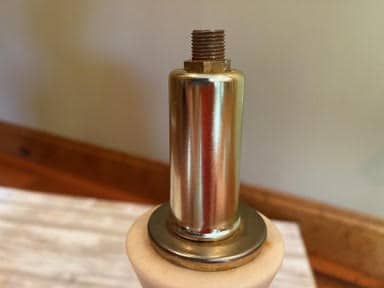
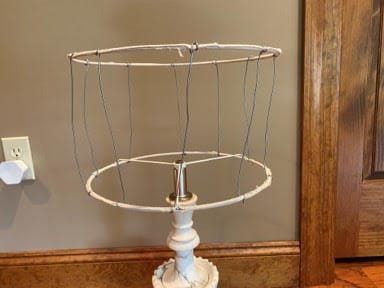
The first step is to remove the electrical components of the lamp, I started by removing the harp, then I turned the lamp over and removed the felt. The next step is to cut the cord at the bottom of the lamp then while holding the light bulb socket take your pliers and unscrew the nut at the base of the lamp then remove the nut and washer. Once you have removed the nut and washer, next using a screwdriver remove the screws from around the light bulb socket then unscrew the socket from the lamp poll and remove the additional harp piece, you can now pull the light socket and electrical cord out of the lamp, I then put the washer and nut back on the bottom and the top of the poll and tightened so I would be able to work on the shade.
Preparing The Lamp Shade
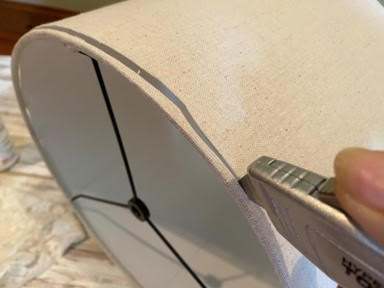
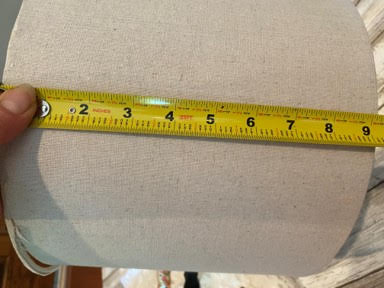
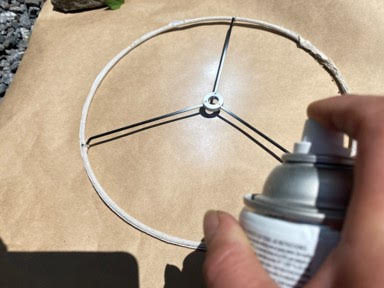
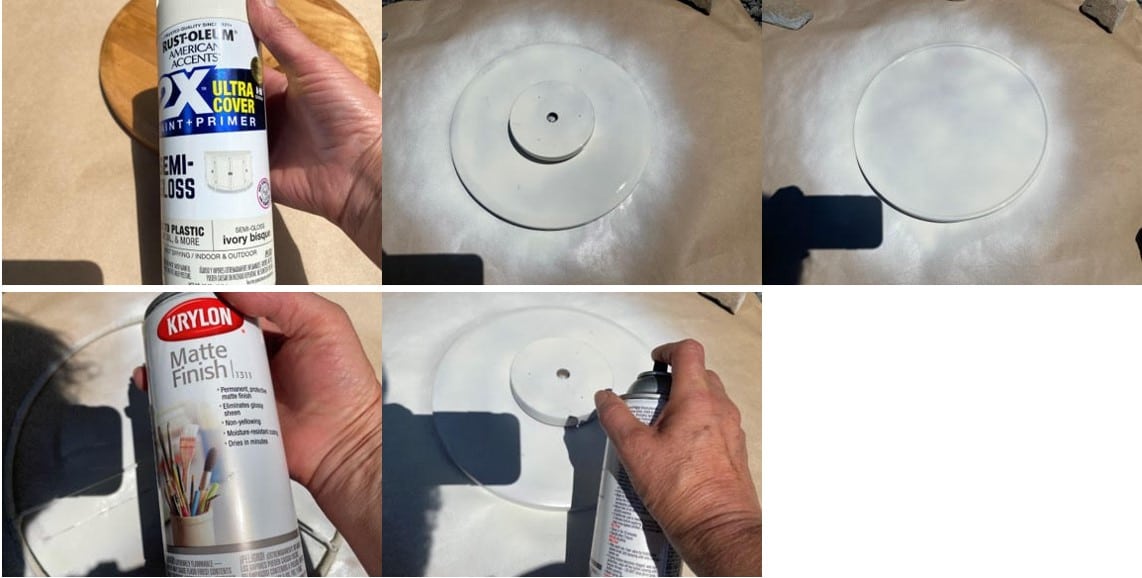
A funny thing about the lamp shade I knew I wanted to cover it with lace so I started to cut off the covering with the utility knife and as I was cutting I finally realized that when I cut all the covering off I am going to end up with the top and bottom rings of the shade not connected I measured the height of the shade before cutting any further so when I reconnect them I will know the measurement of the shade, I will explain how I fixed them further down in the instructions. Ok the first thing you will need to do is remove the covering from the shade by using a utility knife and cutting around the top and bottom rings of the shade then remove the covering, when I went to remove the shade covering from the rings I realized that I would have to scrub all the glue off so I decided to leave the shade covering on the rings. After removing the shade covering I took the two rings outside and sprayed both sides of the rings with Rust-Oleum paint in the color of Ivory bisque, I gave them two coats.
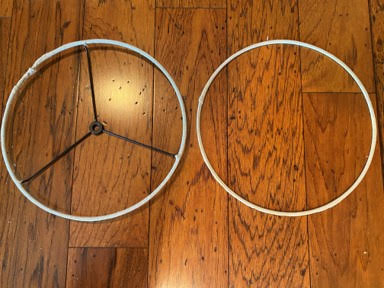
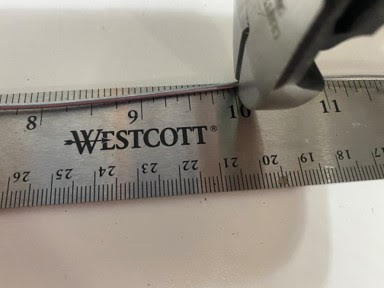
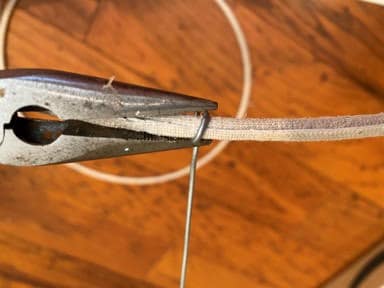
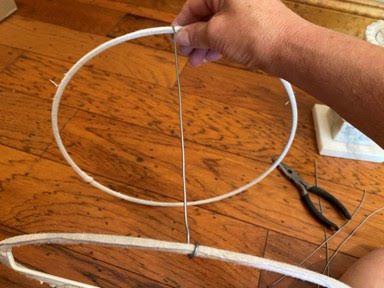
To reattach the shade rings I cut four ten inch pieces of 16 gauge wire, I attached the wire by bending the wire around the top ring with the needle nose pliers then I wrapped the wire around the bottom of the shade ring, I repeated this step with the other four wire placing them at different sides of the rings once I had the four pieces attached I removed the bolts and washers from the top and bottom of the lamp placed the shade onto the lamp and replaced the washers and nuts and re-tightened the lamp. I then continued adding wires and making sure the shade would be straight I used a total of ten 10 inch wires to reattach the two shade rings together.
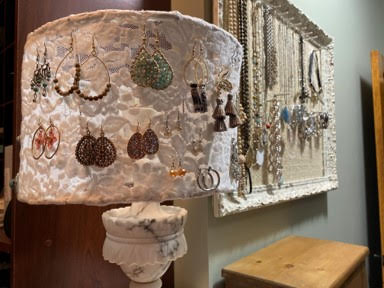
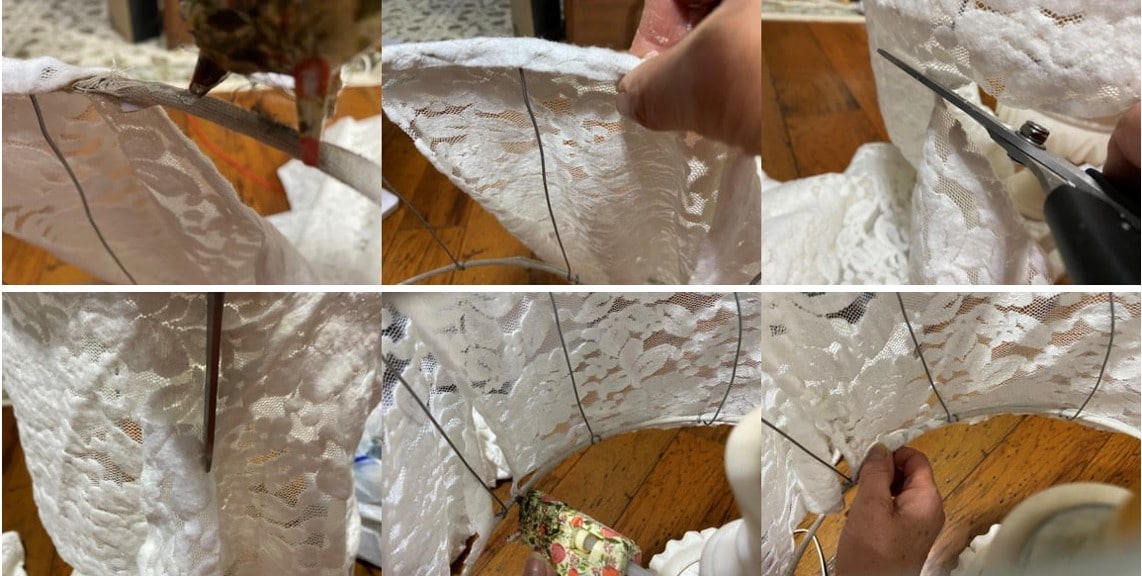
Covering The Lamp Shade With Lace
To cover the lampshade I used a lace that I purchased at Walmart for $3.00. I started by adding a small line of hot glue to top rim of the lampshade the I covered the rim with the lace tucking the end of the lace on the inside rim of the shade I continued glue the lace to the top rim until I reached the beginning of the lace then I cut off the excess lace across the bottom and down the side. Next I added small lines of hot glue to the bottom of the rim, pulling down on the lace to make sure it would be tight when I glued the lace to the bottom rim I continued gluing the lace around the bottom rim until I reached the end.
Painting The Lazy Susan
I wanted to incorporate a lazy susan I also purchased at the thrift store for $2.99 so I would be able to turn the lamp to be able see all my earrings, the first thing I did was wash the lazy susan to make sure it was clean before painting. I took it outside and painted the top and bottom with Rust-Oleum paint in the color Ivory Bisque, I gave it two coats of paint once the paint was dry I gave the top and bottom a coat of matt finish sealer by Krylon.
The Finishing Touches
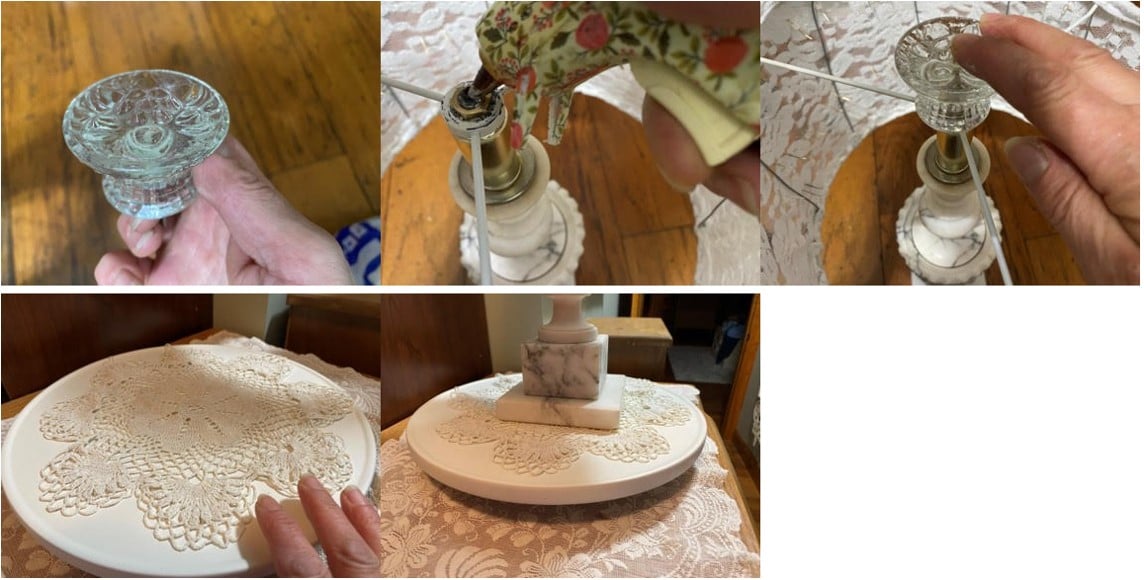
After I finished the lamp and the lazy susan I knew I needed something else, the lamp needed something on the top so I had a glass door pull I purchased a while back from Hobby Lobby so I added some hot glue to the top of the lamp where the old finial was then glued the glass door pull to the lamp. After placing the lamp on the lazy susan I felt it still needed something so I added a crochet doily to the top of the lazy susan then I placed the lamp on, it was perfect the only thing left to do was add my earrings.
I hope you have enjoyed this weeks Thrifty Thursday Project, it is such a beautiful way to display your earrings.