Home Decor, Thrifty Makeovers
DIY Jello Mold Wreath/Candle Centerpiece
Jul
If you have been fallowing The Crafty Decorator you know by now that I love to go to thrift stores, yard sales and estate sales looking for treasures that I can use in my home as is or turn them into something totally new and different, if you love re-purposing your thrift store finds you are going to love this simple way to turn a vintage jello mold into a wreath for your wall or a centerpiece for table, and the best part is I only paid $2.99 for it.There are so many ways you can turn a thrifty find into something amazing so don’t ever pass by an item that catches your eye just because you do not see a vision at that moment doesn’t mean you will not eventually have one, if something catches my eye I buy it I know sooner or later I will come up with an idea to turn into something amazing that I could use to decorate my home.
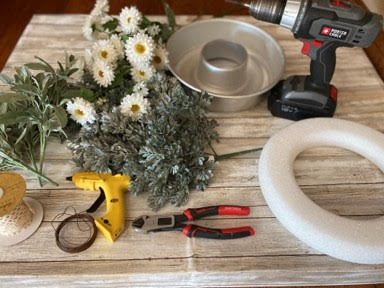
Here is a list of what you will need:
- Vintage Jello Mold
- Hot Glue and Glue Sticks
- Wire
- Wire Cutters
- Drill and Drill Bit
- Preserved Forrest Moss
- Artificial Greens
- Artificial Flowers
- 3” Ribbon
- Scissors
- Candle
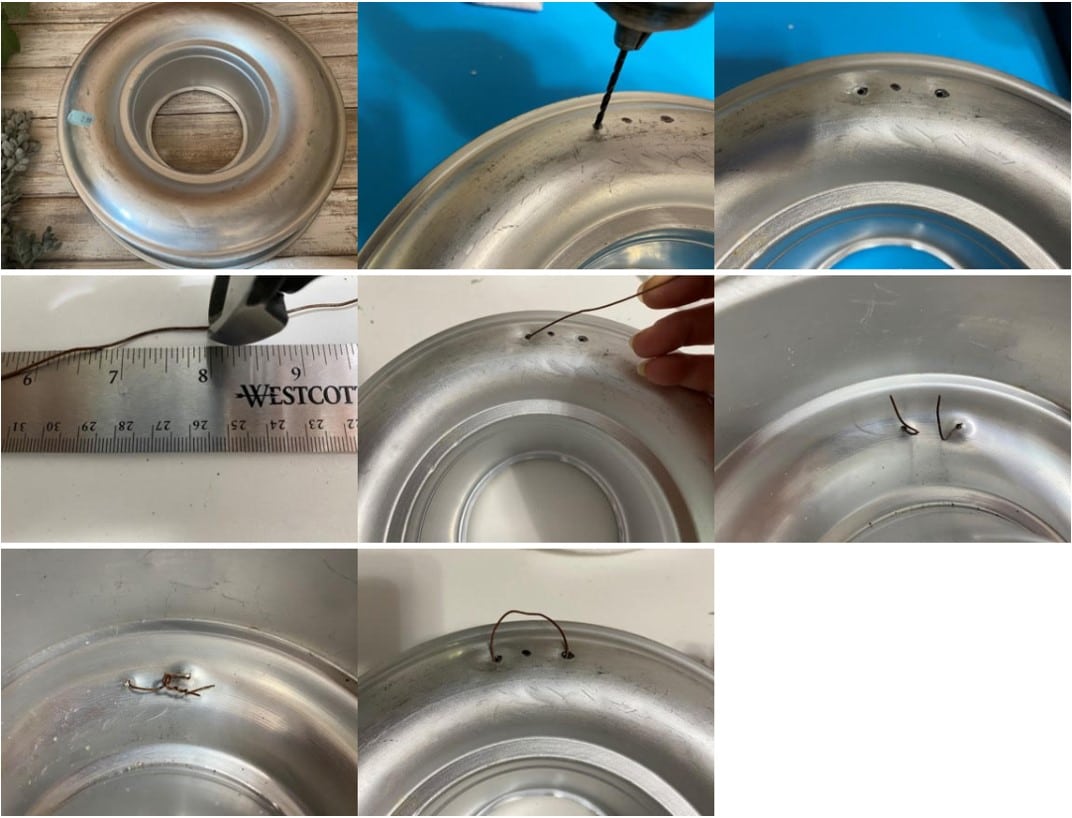
Adding The Hanger For The Wreath
The first thing you want to do is give the jello mold a good washing to make sure it is clean before you begin. Once you have cleaned the mold you will need to drill two holes on the back side at the top (as shown in the photo’s below) I drilled mine about an inch apart, the size of the drill bit will depend on the size of the wire you use I used a 22 gauge wire. Next cut a 8 inch piece of wire then insert the ends through the back of the mold to the inner front side of the jello mold just enough to be able to twist the ends together, now twist the ends together making sure you have a big enough loop on the back to be able to hang the wreath. I would like to suggest adding the wreath hanger even if you are planning on turning the jello mold into the table centerpiece because if you decide later you would like to use it as a wreath it will be hard to add the hanger.
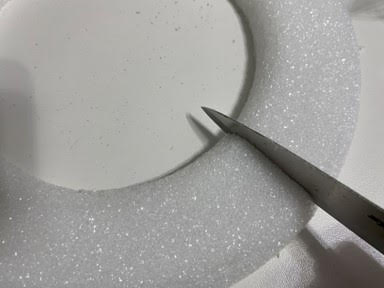
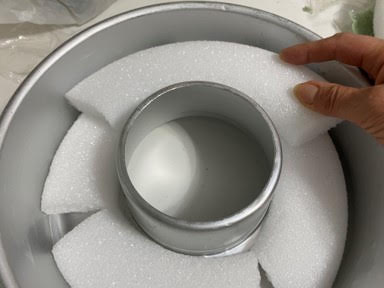
Adding The The Styrofoam Floral Ring
If you were able to find a 10” Styrofoam floral ring all you will need to do is add hot glue to the bottom of the jello mold and glue the Styrofoam ring into the jello mold. I should mention I used the flat edge Styrofoam floral ring not the rounded edge ring I don’t thing it will make a difference but I thought I would just mention it. If you were like me and could only find a 12” Styrofoam floral ring you will need to cut the Styrofoam ring to fit into the jello mold, I actually used two 12” thinner rings because that is all Michaels had when I went looking for the 10” ring. You will need to start by cutting about a ¼ piece of the ring off, I just used a kitchen knife to cut the Styrofoam, place the piece into the jello mold then cut the remainder piece in half and place on piece in mold then look to see how you will need to cut the last piece to finish the ring (see photo’s below). After you have your pieces cut and fitting into the jello mold remove them add hot glue to the bottom of the mold and replace the Styrofoam ring pieces gluing them in place.

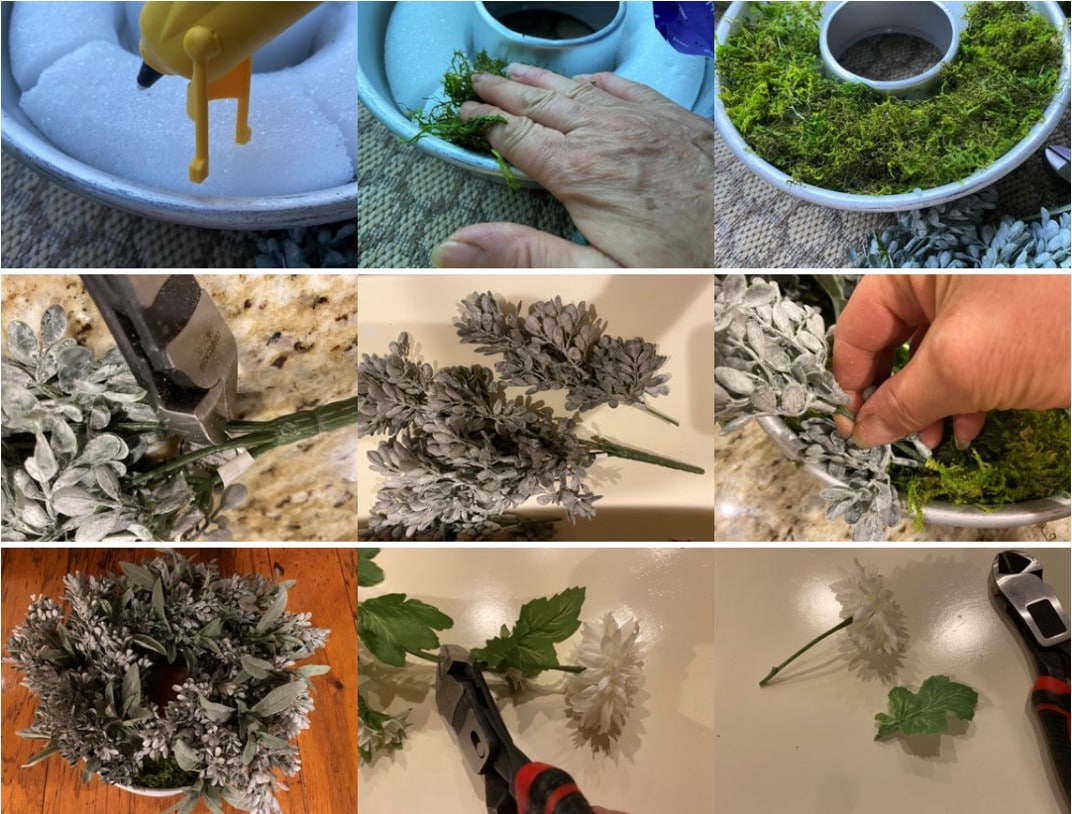
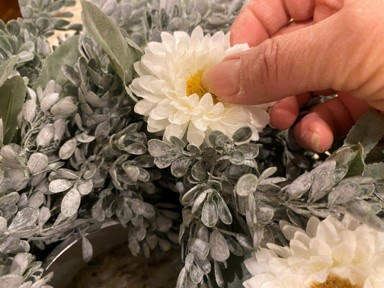
Adding The Greenery And Flowers
Before you start adding the greenery you need to cover the Styrofoam ring with preserved forest moss, just add some hot glue onto of part of the Styrofoam and glue down the moss continue gluing the moss around the Styrofoam ring until it is covered. The greenery I used was a mini sage bush, I used 2, and I believe the other mini bush was called boxwood leaf bush and I used 3 of them, you can use any greenery you would like. The first step is to cut your greenery branch’s from the stem, after you have them cut you can start inserting and arranging them in the Styrofoam floral ring the way you would like. After you have your greenery in place if you would like you can add flowers I cut six flowers from 2 floral stems I purchased at Michaels and added them into the greenery.
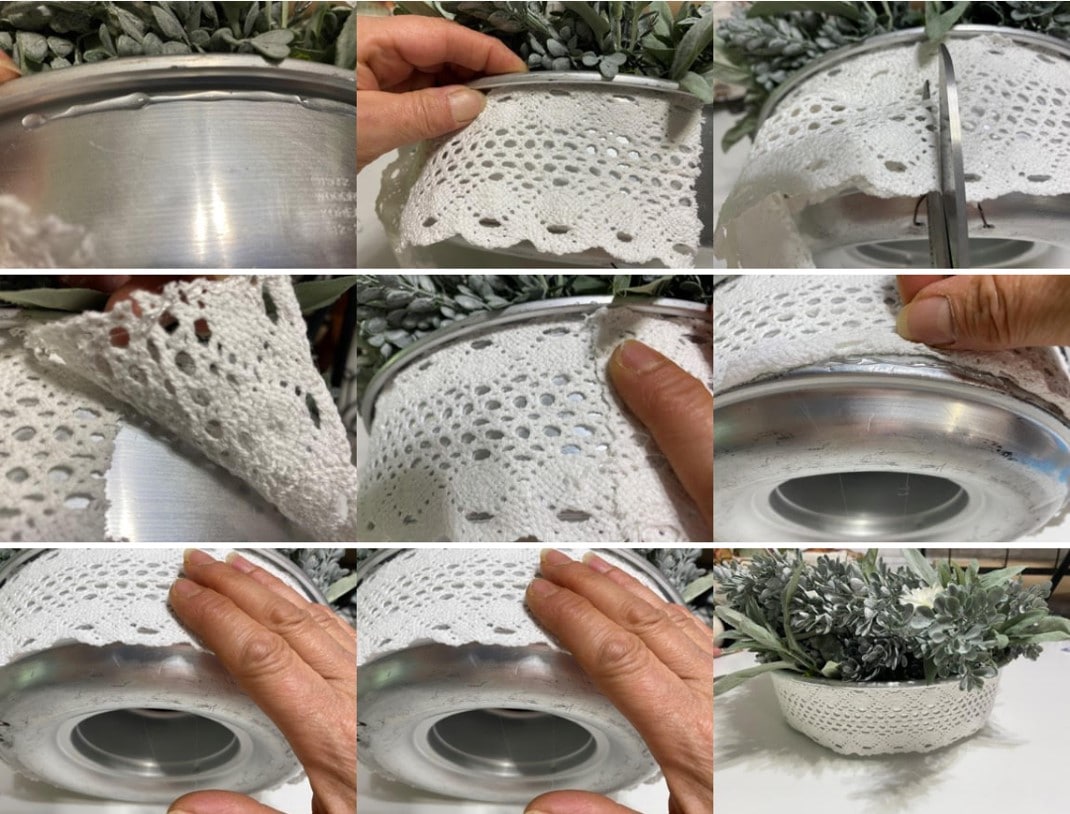
Adding The Lace Ribbon
After adding all the greenery and flowers I decided that I didn’t really care for the way the sides looked so I decided to add a 3” lace cotton ribbon I had on hand from Hobby Lobby, you can use any ribbon you would like or you can just leave the sides plain. Start by adding a small line of hot glue around the top edge just under rim and attach one side of the ribbon keep adding glue and attaching the ribbon until you reach the beginning then cut the ribbon so the end will overlap the beginning piece a little, next add a line of hot glue down the short side of the piece where you started then glue the end piece on top. After I had the ribbon glued on I decided to glue the bottom edge also you may not want to but if you do I just added small lines of hot glue and glued the bottom edge of the ribbon down. Your wreath is now ready to hang on the wall.
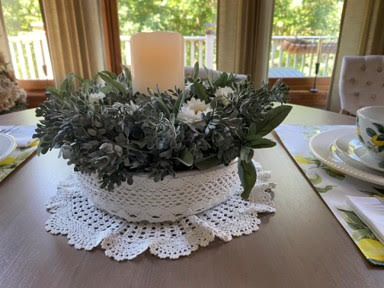
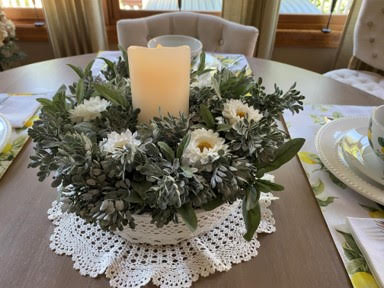
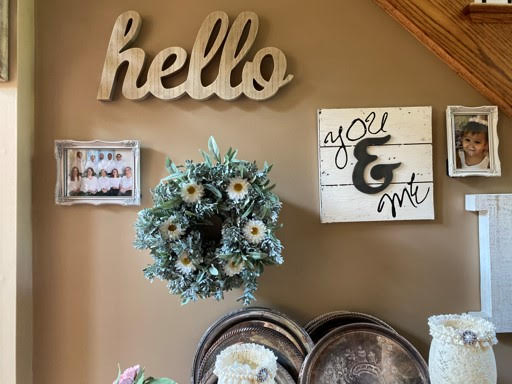
Jello Mold As A Centerpiece
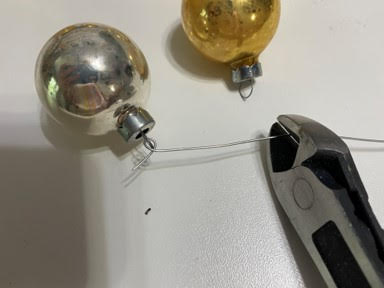
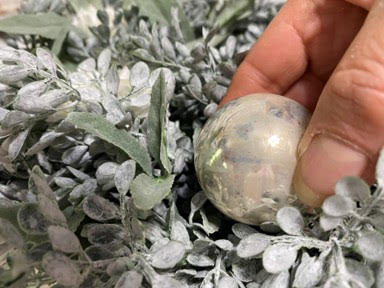
As much as I love the jello mold as a wreath I think I am loving it even more as a centerpiece for my kitchen table. If you would like to us it as a centerpiece all you need to do is set it in the middle of your table add a candle in the middle and look how beautiful it is. I had to add a small candle holder from the dollar tree under my battery operated candle because I did not have one tall enough. I just have to tell you this will be so easy to change out for the holidays, for Fall season just picture changing out the flowers with fall color flowers and adding some small pumpkins, for Christmas I image changing out the flowers with vintage ornaments all you would have to do is add a piece of wire to the top of the ornament and stick it into the Styrofoam and for Easter flowers and eggs would be adorable, let your imagination run wild.