Home Decor, Thrifty Makeovers
DIY Thrift Store Candle Sconce Makeover
Jul
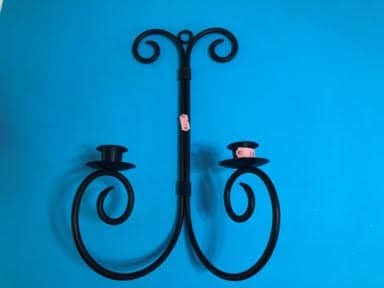
I just love thrift shopping and going to yard sales, when I was in our local goodwill looking for treasuresI came across two black rod iron candle sconces they were only $2.99 each so I knew I had to get them,I love when I find home decorating items that I know I can change into something I could use to decorate my home with.If you are new to my page on Thursday’s I try to take a thrifty item and give it a total different look or purpose and show how I can incorporate it into my home décor, sometimes I incorporate the item as is because I love the original look of it. The black rod iron candle sconce is my Thrifty Thursday project for this week I just love how it came out.
Here is a list of what you will need:
- Wooden Wall Art (on clearance at Hobby Lobby)
- Rod Iron Candle Sconce (Thrift Store )
- Peel and Stick Wallpaper (Left over from a past project)
- Chandelier Crystals (Amazon)
- Crystal Drawer Pull (Hobby Lobby)
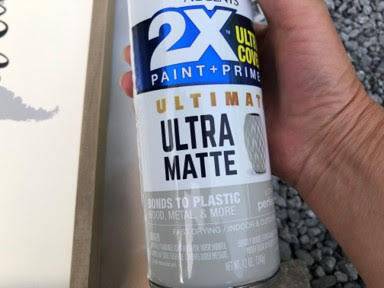
- Gray Spray Paints
- Drill and Drill Bit 3/32
- Screwdriver
- Piece of Scrap Wood
- Hacksaw
- Scotch Tape
- Piece of Chalk
- Wallpaper Smoother
- Scissors
- Ink Pen or Pencil

Preparing the Candle Sconce
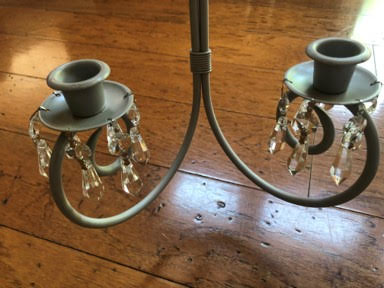
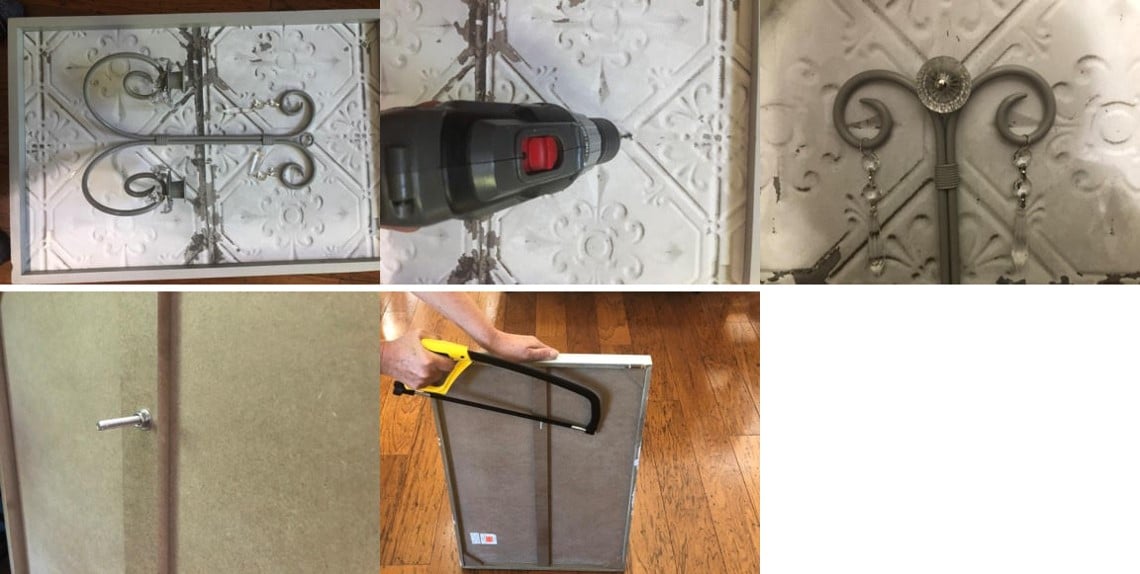
The first thing you will need to do is see where you need to drill your holes for the crystals, start by placing your crystals around the part that holds the candle and taping them in place using scotch tape next using a piece of chalk lift the tape of one crystal and mark the spot where you need to drill the hole work your way around until you have marked where all your crystals will go, once you have all your crystals marked using a 3/32 drill bit drill a hole at each marking, repeat this step to the candle holder on the opposite side.

Painting The Candle Sconce
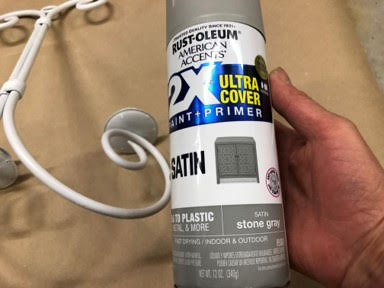
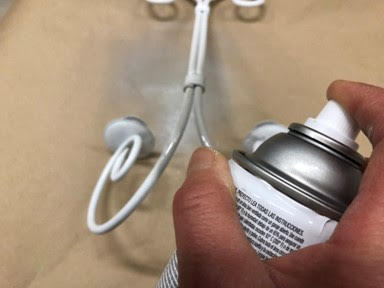
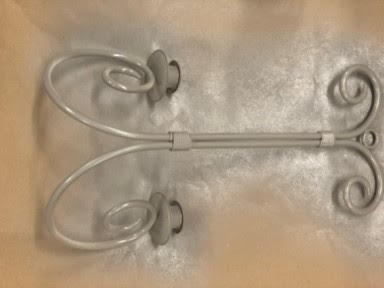
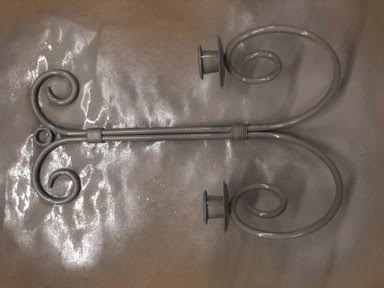
Before you start painting the sconce make sure you give it a good cleaning I washed mine with dawn dish liquid and water. Once you have your sconce clean in a well ventilated area give the sconce two coats of spray paint in the color of your choice, I used A Rust-Oleum Satin in the color stone gray, make sure you paint the front and back. I first painted the sconce white but I decided it needed to be a darker color so I decided on the stone gray which was perfect.
Preparing the Frame
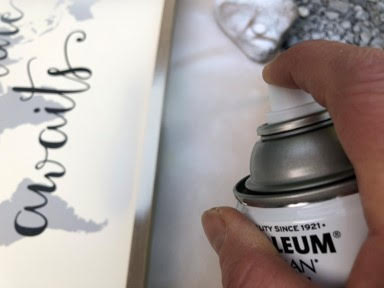
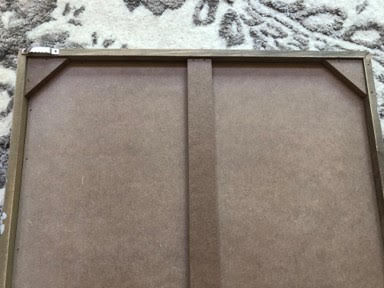
I knew I wanted to attach the sconce to a wood frame so I went to Hobby Lobby to try and find something I could use, I found the perfect frame on clearance for $8.74 in the wall décor section, yes it had a picture on the front but I new I could cover that up and I couldn’t pass up the price. I took the picture outside and gave the outer wood frame two coats and the center picture one coat of Rust-Oleum spray paint in the color perfect gray, you can us any color or paint you would like.

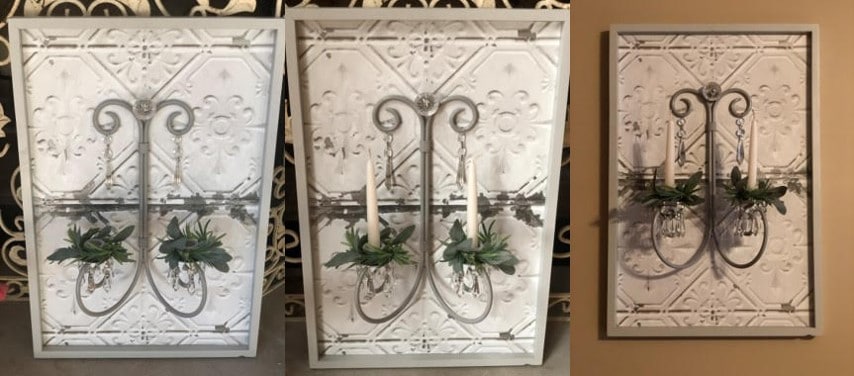
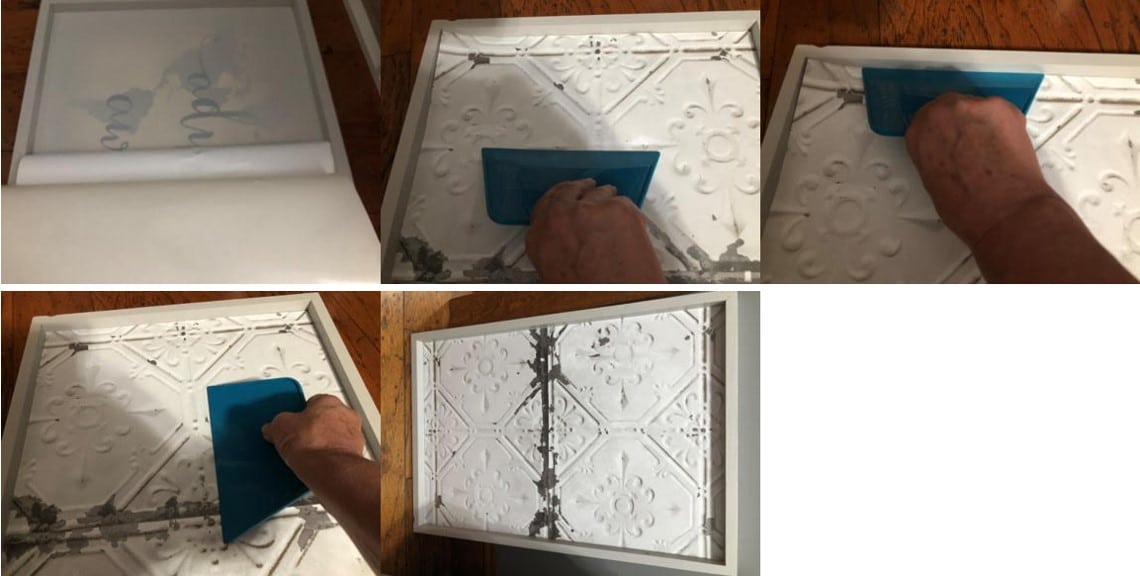
After I had the frame painted I used some leftover peel and stick wallpaper I had used in my craft room to cover the picture part of the frame. The first thing you will need to do is measure the space that you want to cover then mark the measurements onto the wallpaper, using a ruler draw lines from one mark to the next to help make sure you cut your piece of wallpaper straight. Next peel back the paper from the back of the wallpaper at one end about a ¼ of the way down then starting at one end of the frame place your paper at the top making sure your are right against the outer frame and that the wallpaper is straight next using the smoothing tool smooth down the wallpaper making sure you get all the bubbles out, continue to pull back the backing and smoothing out the wallpaper until you have all the wallpaper applied. I just loved how the tin tile peel and stick wallpaper looked when I was finished, if you would like to see what wallpaper I used you can find it on my recommended products page.
Adding The Crystals
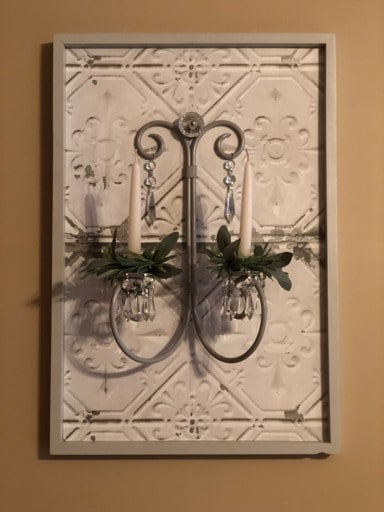
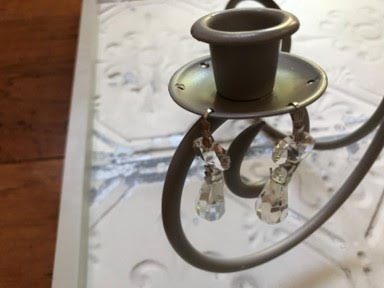
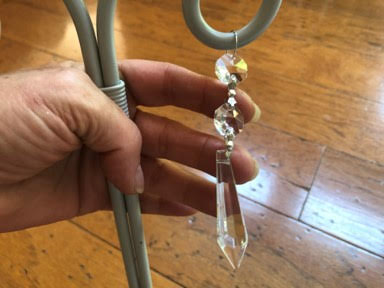
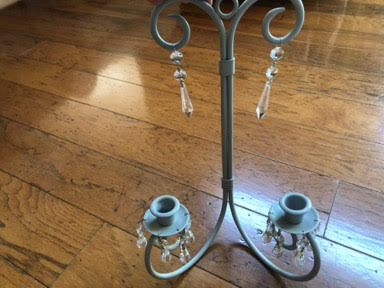
Now that you have the frame all done it is time to add the crystals to your candle sconce, I ordered my crystals from amazon you can see which crystals I used on my recommended products page, but you can certainly use any crystals you would like. Add a crystal to each of the holes you have drilled around each of the candle holders buy opening the crystal connector clip and inserting into the hole and squeezing the clip closed. I wanted to add a little something to the top two scroll parts of the sconce so I added crystals to each scroll, the crystals I used for this had small hope circle on the end so all I had to do was slid them onto the scroll.
Attaching And Finishing The Wall Sconce
The first thing to do is make sure the picture hanger is attached on the right side of the frame, I wanted my frame to hang vertical and the picture hangers were attached so it would hang horizontal so using my drill and screwdriver attachment I removed the hangers and reattached the hangers to the side of the frame that would allow me to hang the frame vertical.

Next lay the sconce onto the front of the frame placing it where you would like it to be, next mark the spot where you will be drilling the hole to attach the sconce with the drawer pull.
After you have marked the spot drill a hole, I placed a piece of scrap wood underneath the frame so I wouldn’t drill into my floor lol. Now that you have drilled the hole you can place the sconce back on the frame, remove the nut from the drawer pull and insert the drawer pull through the sconce and the frame, screw on the nut and tighten. Once I attached the sconce to the frame I realized the drawer pull screw was to long so I used a hand saw to cut off the excess screw.
To finish off the wall sconce I added two small napkin rings as candle rings and two 6 inch battery operated timer candles which I found on Amazon I couldn’t find 6 inch battery operated candles in the store. Now it is ready to hang on the wall in our spare bedroom but first I want to paint the room I just need to find the time there are not enough hours in the day I am sure you feel the same way. I hope this project will inspire you to look at items in a different way when you are out looking for your thrifty treasures.
[row_inner_3] [col_inner_3 span__sm=”12″]