Home Decor, How to Craft Idea's
DIY Craft Appliques
Apr
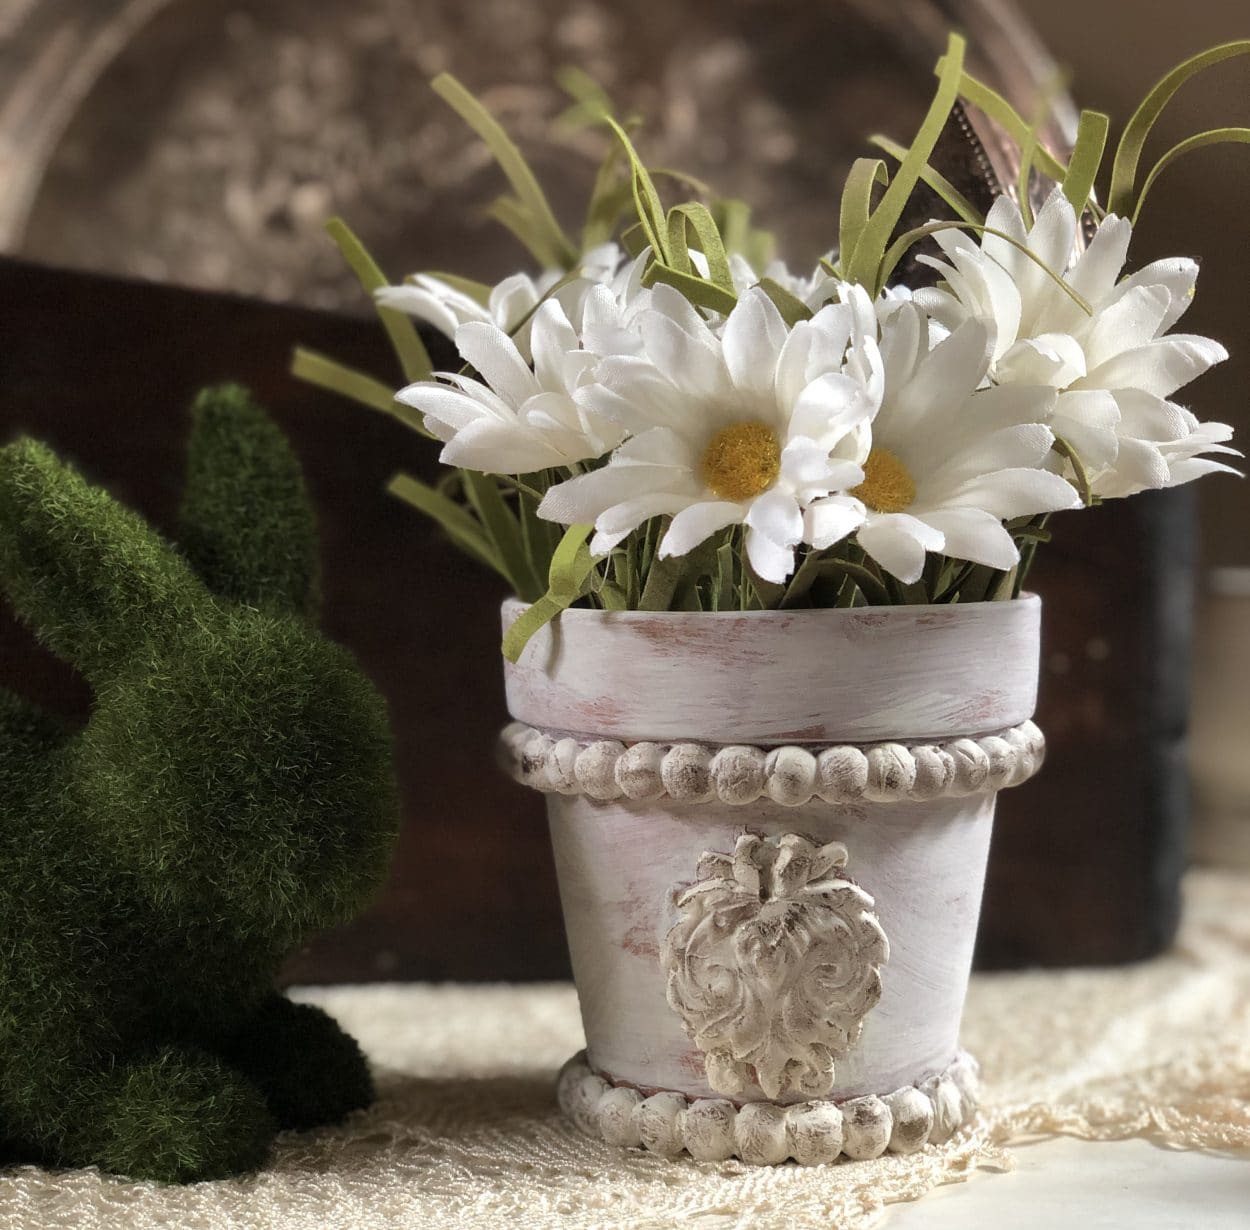
Creating your own appliques
I have been seeing all these DIY appliques on Pinterest so I thought I would give them a try.
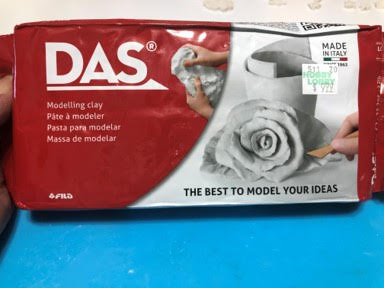
First I tried making them with Plaster of Paris it is $6.74 at Michaels then you can use a 40% off coupon making it only $4.74, you will be able to get a ton of appliques from this one bucket. Next I tried this DAS Molding clay I bought at Hobby Lobby it is $9.99 and was on sale for $6.99 you can also get a lot of appliques from this package.
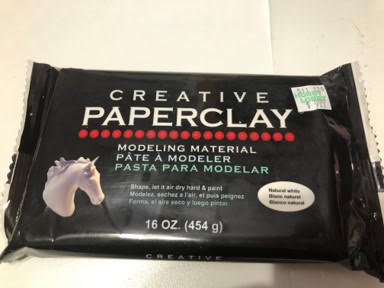
Finally I tried Creative Paperclay which I also purchased at Hobby Lobby regular $9.99 was on sale for $6.99.
I thought I would give you the pro’s and con’s of each of these products and how to use them to create your own appliques.

Here is a list of what you will need when using the Plaster of Paris:
- Plaster of Paris
- A bowl or cup to mix it in
- Stick to stir the mixture
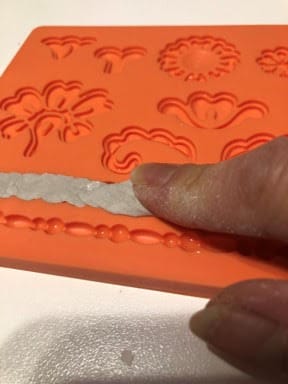
- Silicone molds
- Something to spread the plaster over the mold
- Water
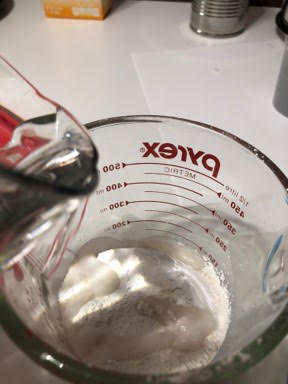
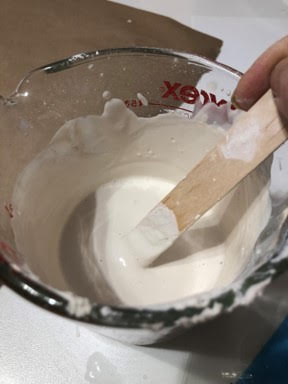
Mix your Plaster of Paris
I used a measuring cup to mix my Plaster of Paris it is much easier to pour into the mold. I started with a cup of Plaster of Paris then added a little water and mixed, keep adding water and mixing until you get it to the consistency of a pancake batter.
You don’t want to mix a big batch at once because it starts to thicken quick.
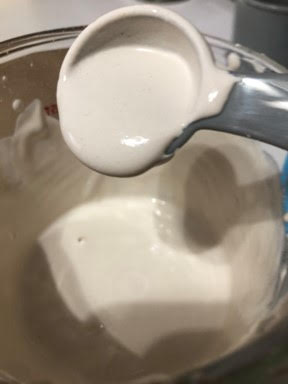
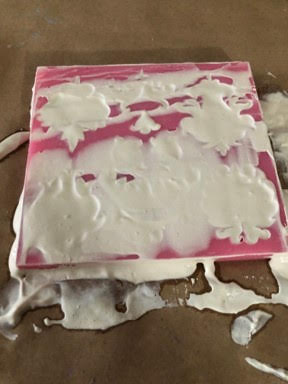
Pour the mixture into your silicone molds
Next pour the mixture into your silicone molds, I purchased these in Hobby Lobby, Michaels and on Amazon, next I used my icing spatula to run across the top of the mold to get the excess plaster off, you don’t want to press down to hard because you will take the plaster out of your mold just give it a few light swipes across the top.
Oh I forgot to mention to put down some paper first because it does get a little messy.
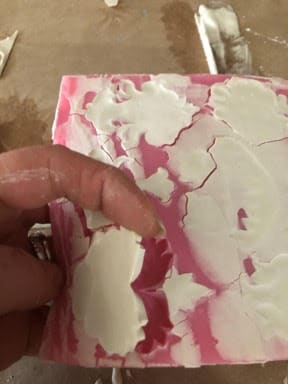
Let the molds dry
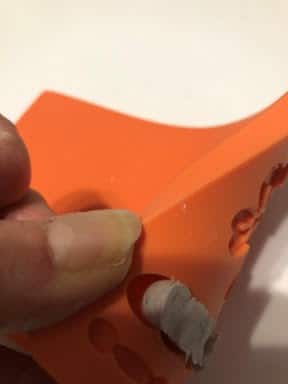
After you have filled your molds you need to let them dry I gave them an hour to dry. Once your molds are dry the appliques are very easy to remove all you need to do is bend back your silicone mold and the applique will lift up and you can remove it from the mold. If you have any excess around the ends of the applique that needs to be removed just take a craft knife and trim around it will break right off.
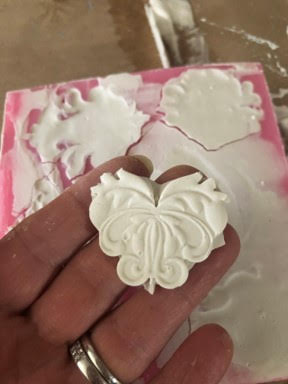
It’s time to glue
You are ready to glue them to your project and paint. I like to use Gorilla clear grip glue. My find on the Plaster of Paris , I love the drying time is so short and they turn out looking just like the mold the only downside is you will not be able to apply these to a curved surface.
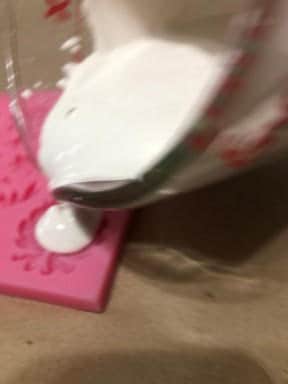
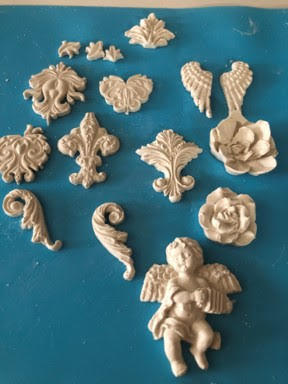
Molding clay & Paperclay
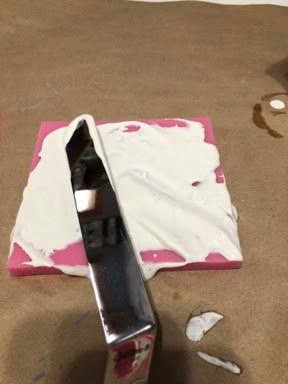
When using the Molding Clay or Paperclay all you need is the silicone mold, the clay and your fingers. Take a piece of the clay and work it in your hands to get it mixed and nice and soft. Take your piece of clay and push it into your mold adding just enough to fill the mold so you wont’ have to trim off to much excess clay. Once your mold is filled you can remove the applique
You don’t have to wait for the clay to dry in the mold before removing. Remove the applique by bending back the mold and removing the applique. You can trim off any excess clay with a craft knife, now you need to let them dry for 24 hours. If you are making the applique to use on a curved surface you will need to glue the applique on now or before it is fully dried so it will be bendable, if you need to hold the applique in place so it will not slide down just add a piece of painters tape to hold it in place.
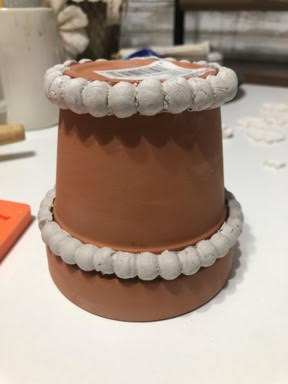
Both types of clay are great to make appliques and you can apply them to curved surfaces the only downside is you have to let them dry for 24 hours. Out of the two clays I prefer the DAS Molding Clay because it is a much softer clay and easy to work with. I am so excited that I can now make my own applique’s for my craft projects it is so much cheaper then purchasing wooden appliques. I hope you found this blog post helpful.
Which is more durable the plaster of Paris or the clay for outside .. love your crafts …