Dollar Tree, Home Decor, Outdoors, Spring
DIY Dollar Tree Arch Window Chandelier/Centerpiece
May
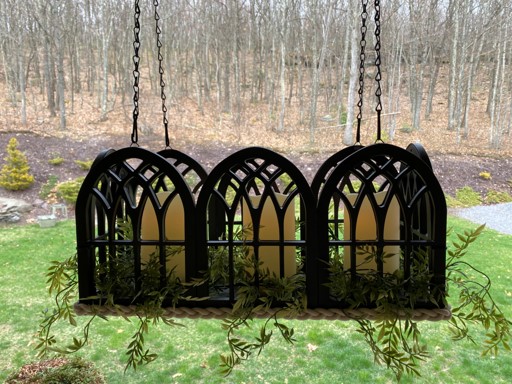
I have always done real flower hanging baskets on my porch but the summers have not been that good and they did not do well so I decided to do something different this year. I made two chandeliers out of the dollar tree garden fence but now I needed something else to also hang on the porch. I was shopping in Dollar Tree and came across these wall plaque arch windows and I just had to get them I knew I would come up with a way to use them. After looking at them for a few days I decided to make another chandelier for my porch using the arch windows and I just love how it turned out. After making the chandelier I also realized how beautiful it would uupbe as a dinning room table centerpiece.
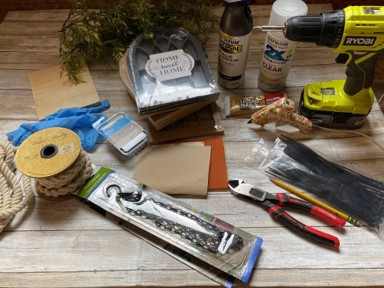
Supplies You Will Need
- 8 Wall Plaque Arch Windows (Dollar Tree)
- 2 Hanging Basket Plant Hangers (Dollar Tree)
- 1 – 3/8 Thick Piece of Plywood Cut to 6 ¼” Wide by 18 ¼” Long
- Spray Paint (your choice of color)
- Rust-Oleum Matt Sealer
- 4 – 8” Zip Ties
- Braided Rope Ribbon or Cording of Choice
- Artificial Greens
- 3 Outdoor Battery Operated Timer Candles
- Saw
- Drill and a 1/16 Drill Bit
- Phillips Screwdriver
- 16 – #6 ¾” metal screws
- Sandpaper
- Liquid Nail
- Ruler and Pencil
- Hot Glue Gun and Glue Sticks
- Piece of Scrap Wood
- Rubber Gloves
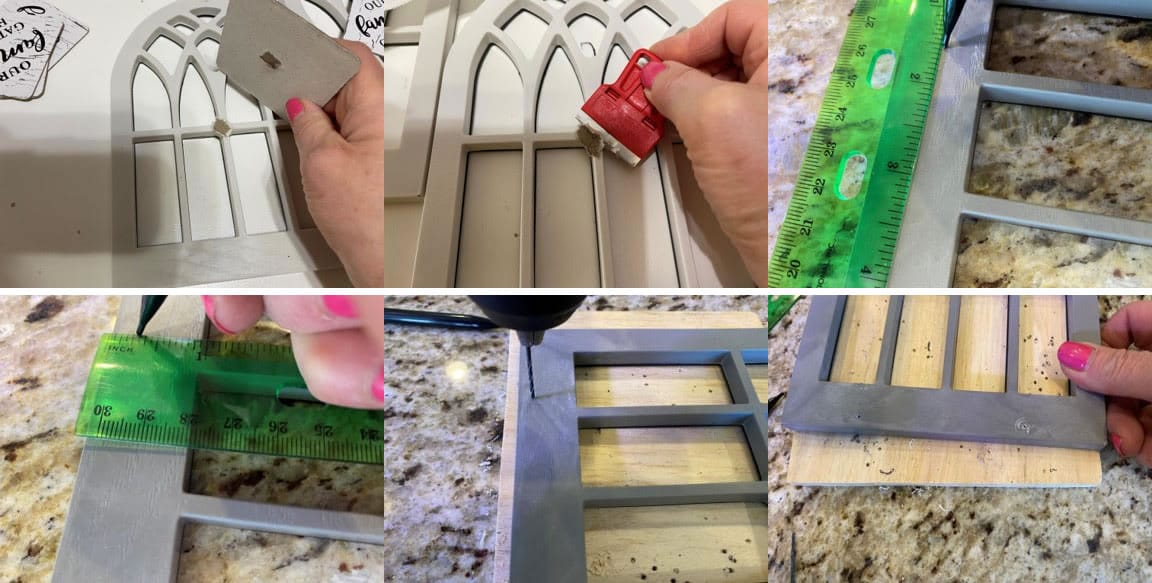
Preparing The Arch Windows
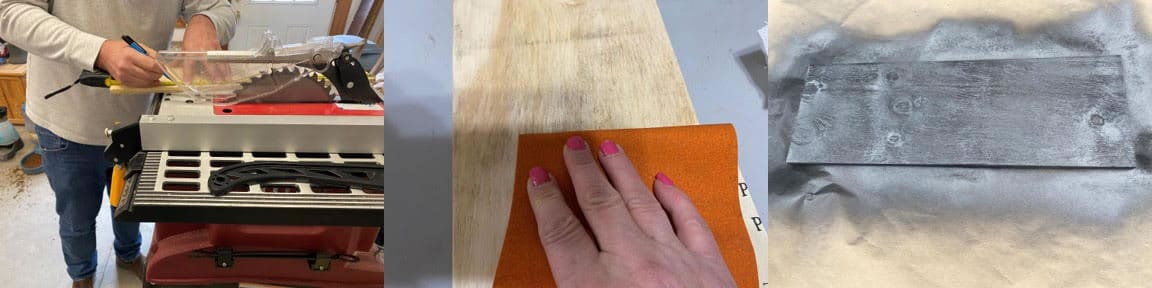
Remove the wrapping and the cardboard sign from all the arch windows. Make sure you also remove the glue. At the bottom of the arch window measure 1 ½” in from the side and a ¼” up from the bottom mark with a pencil. Place a piece of scrap wood under the window arch then using the drill and a 1/16 drill bit drill a hole. Now measure, mark and drill from the other side. Repeat these steps to the other 7 arch windows.
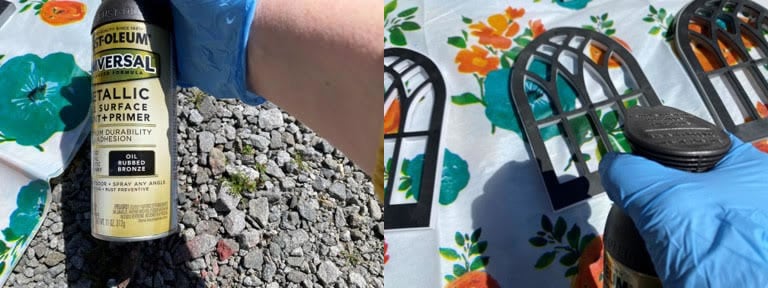
After drilling all the holes in a well ventilated area spray paint all the arch windows, front and back. I like to wear rubber gloves while painting so I do not get it all over my hands. I gave them three coats letting them dry in-between coats. Once they are all painted spray them with a sealer. I gave them a coat of Rust-Oleum matt sealer.
Preparing The Wood
Using a table saw or your saw or choice. Mark your wood 6 ¼” wide by 18 ¼” long then cut to size. Give the piece of wood a good sanding. In a well ventilated area spray paint the wood to match the arch windows. I gave the wood two coats of paint on all sides letting dry in-between coats. Then spray with a matt sealer.
Attaching The Arch Windows
You are going to attach two arch windows to the two ends of the wood first. Add a line of liquid nail to one of the 6 ¼” ends of the wood then place the arch against the wood making sure the bottom of the arch is even with the bottom of the wood. Using two screws screw the window arch to the wood. Repeat these steps to the other 6 ¼” side.
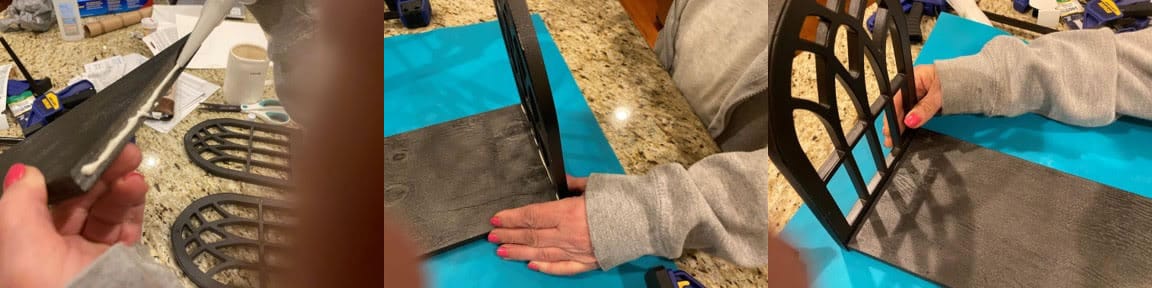
After you have the two end pieces attached you are now going to add 3 arch windows to the 18 ¼” side of the wood. Add liquid nail starting on the end of the attached arch then down the side of the wood. Place on the first arch with the side on top of the side of the arch already attached. Screw into place using two screws. Add the second arch window, adding the glue then screwing into place making sure the two arch windows are bumped up next to each other. Add the liquid nail to the wood then attach the third arch window with two screws. Repeat these steps to the other side of the wood with the last three arch windows. Next zip tie two of the arch windows together at a corner. Zip tie them together under the middle cross bar of each window arch. Repeat this step to the other three corners. Cut off the excess of the zip ties.
Adding the Ribbon and Plant Hangers
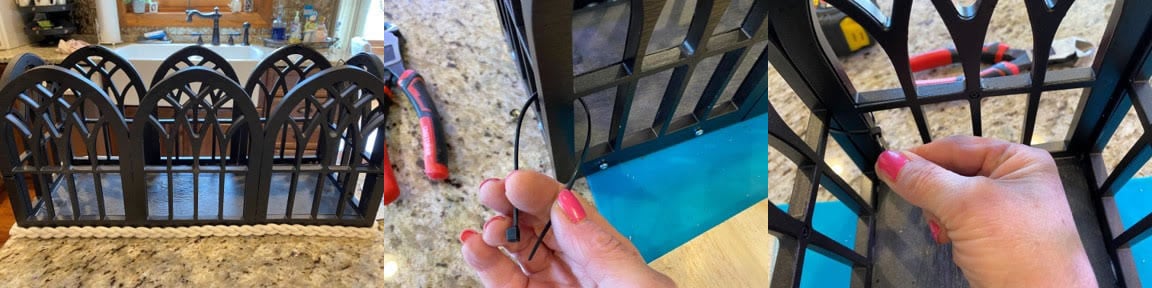
Starting at one end add a small line of hot glue on the bottom of the arch windows then start gluing on your rope ribbon. Continue adding hot glue and gluing on the rope ribbon until you are back to were you started. Cut and glue down the end.

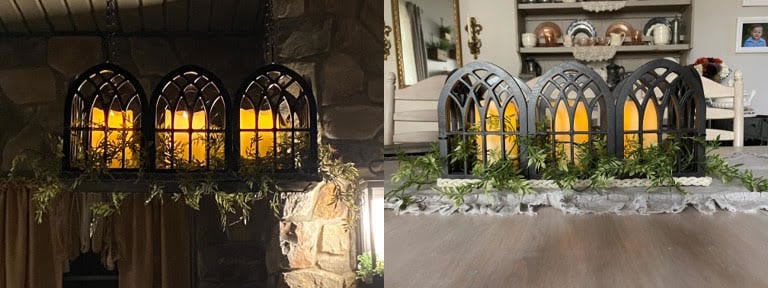
Open the two packages of plant hangers. You are going to need to remove one chain from each plant hanger. All you need to do is pull the chain and it will come out from the top hook. Now that you have removed the chains attach one of the plant hangers chains to the hanger on the window arch that is next to the arch on the end. Hook the other chain to the window arch on the opposite side. Attach the second hanger to the two arch windows on the other end. Add your greens and three candles.
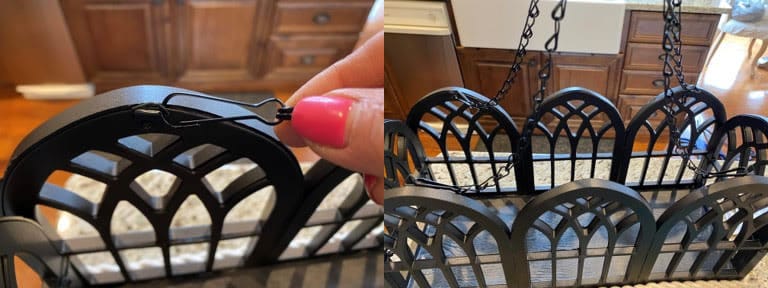
You are now ready to hang your chandelier on your porch. Look how beautiful the chandelier looks at knight. I hope you have enjoyed making the chandelier. I made four for my porch lol. If you would like to use this as a table centerpiece just leave off the plant hangers and remove the picture hangers from each of the arch windows.
this is just beautiful
Beautiful. This is the best use of those window plaques I’ve seen so far. I can never find them at my store. Do you have any idea what the Dollartree sku is for those items?
I have all the items needed for the chandelier even the remote control lights except the fencing. Which I ordered through Amazon back in May and still do not have them.
I just have to wait!
Oh my goodness that is taking a long time.
Just beautiful… 🤗
If I could find them arch windows in the dollar store 🥺
They were in my Dollar Tree today but if you can’t find them in your store they are now available on Dollar Tree.com
I would love your instructions for the original fencing chandelier. I finally have everything to make them I just can’t find the video.