Home Decor, Spring
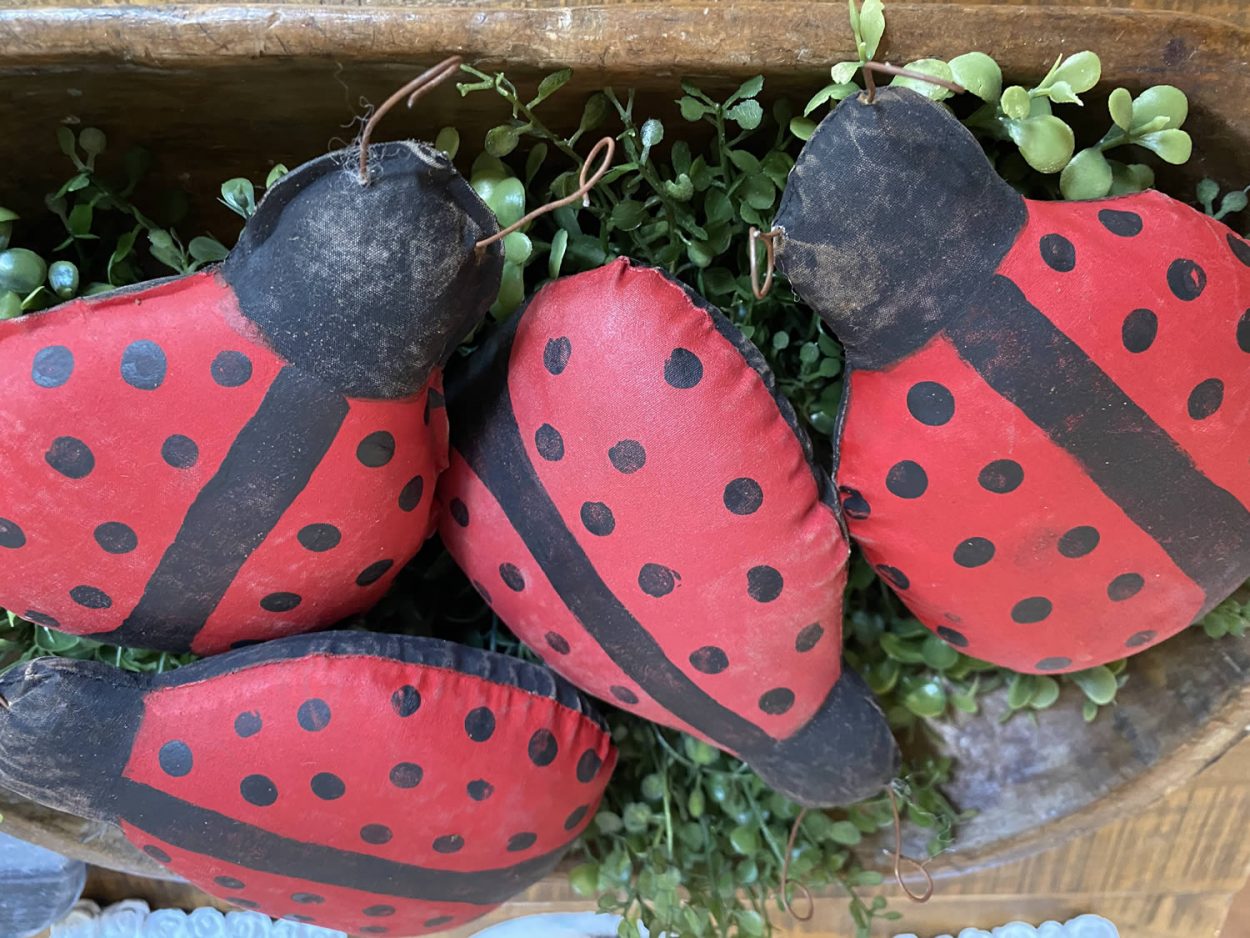
DIY Primitive Ladybug
May
I just love summer, the warm weather and all the beautiful flowers. I am decorating for summer and I wanted some new items to add to my décor. Who doesn’t like ladybugs I think they are just adorable so I decided to give my hand a try at creating some primitive ladybugs. After four attempts I think I finally got them right lol. I hope you think they came out as adorable as I do. If you don’t sew don’t worry I am including directions on how you can hot glue them.
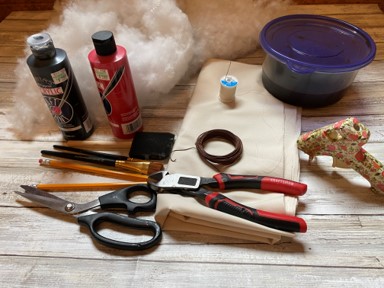
Materials You Will Need
- Primitive Ladybug Pattern
- Muslin
- Polyester Fiberfill
- Sewing Machine
- Cream Thread and Needle
- Black & Red Acrylic Craft Paint
- Paintbrushes
- Sponge Brush
- Coffee Stain Mixture
- 20 Gauge Rusty Wire
- Pencil
- Scissors
- Fine Grit Sandpaper
- Ruler
- Wire Cutters
- Hot Glue Gun and Glue Sticks
- Paper Plate
Sewing And Stuffing The Ladybug
The first thing you will need to do is print and cut out the ladybug pattern. Trace the pattern on a double layer of muslin. On your machine using the trace line as your sew line sew the ladybug all the way around. Make a slit through one layer of fabric in the middle of the ladybug. This will be for turning and stuffing. Cut out the ladybug about a ¼” from your sew line. Clip the both sides under the head as indicated on the pattern.
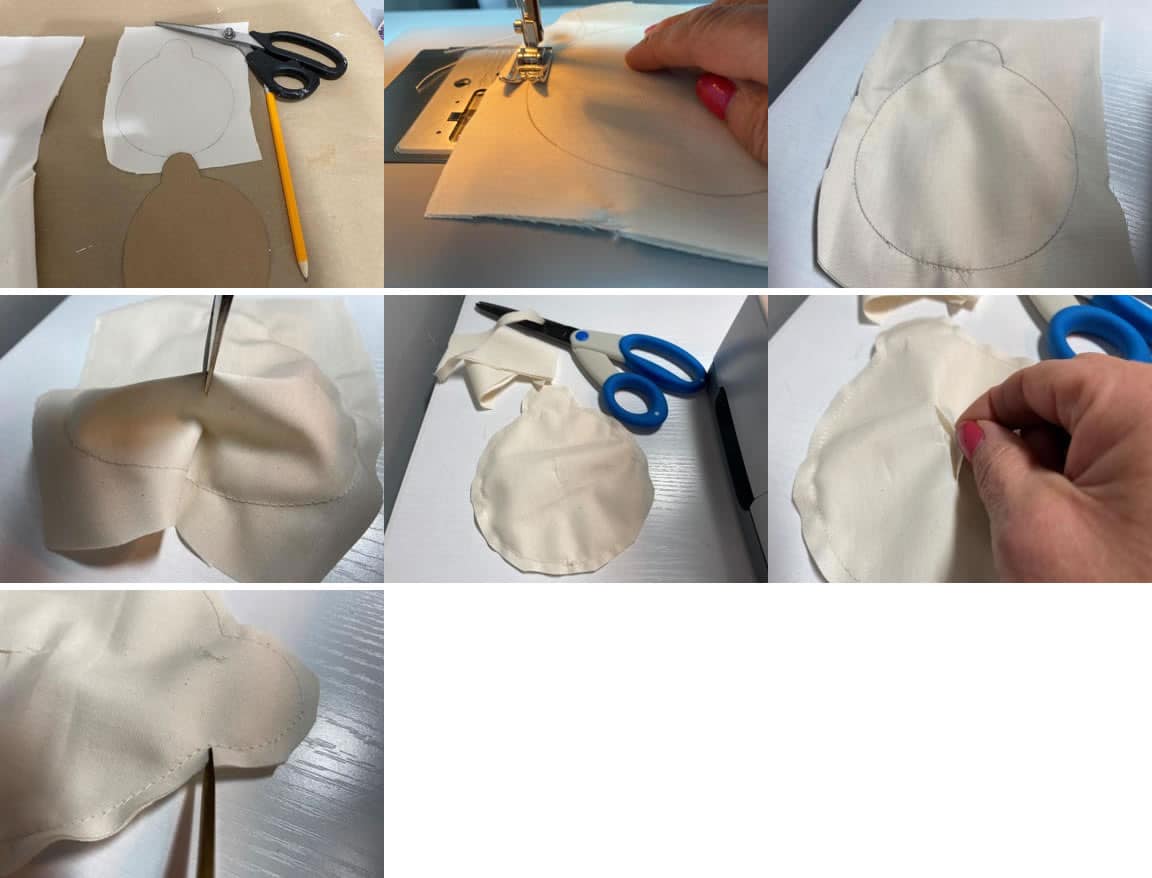
Turn the ladybug right side out. Starting with the head firmly stuff the ladybug with polyfill. Using cream thread and a needle sew the opening closed. This will be the back of the ladybug.
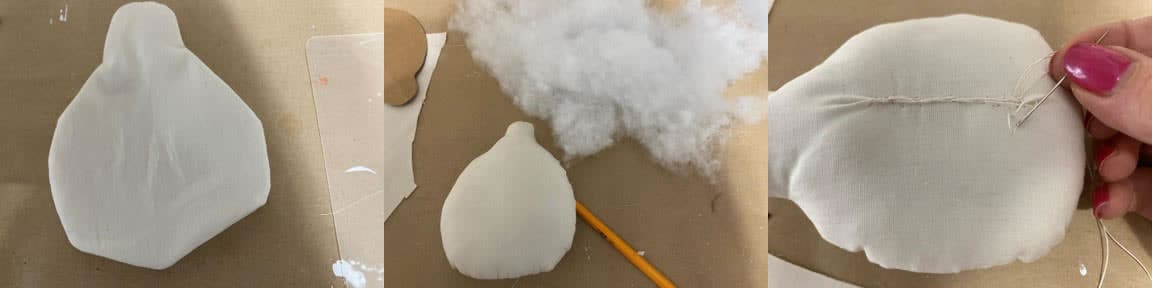
Gluing And Stuffing
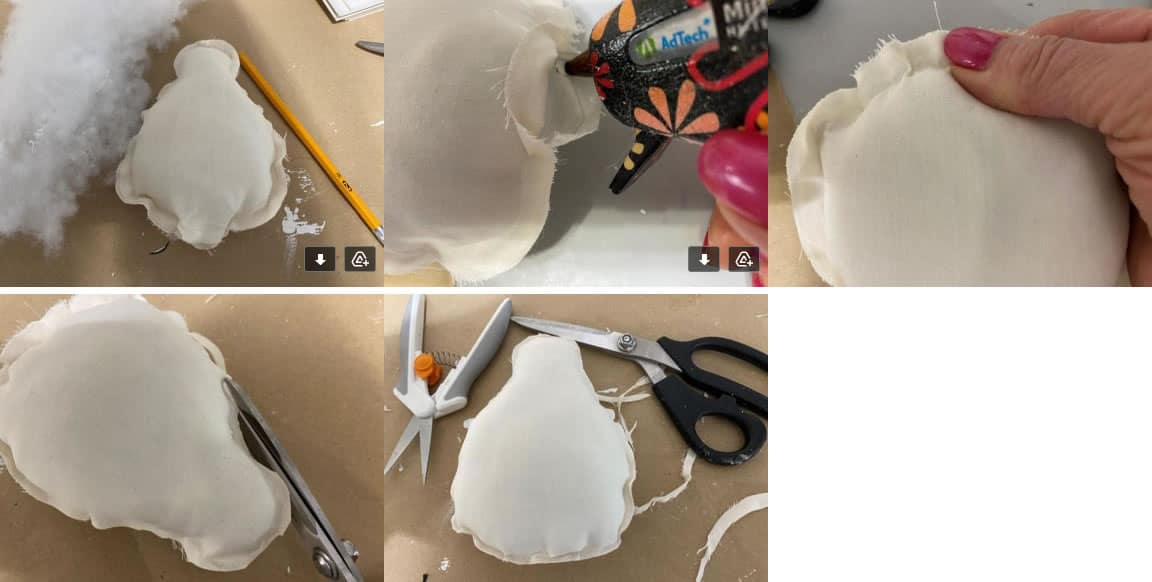
Trace the ladybug pattern onto a double layer of muslin. Cut out about a ¼” from the trace line. Separate the two pieces. With the trace line facing up add a line of hot glue on the trace line around the neck and head. Place your second ladybug piece on top and glue down. Fold up the top piece and continue adding hot glue and gluing down the top layer of fabric. Make sure you leave an opening at the bottom of the ladybug.
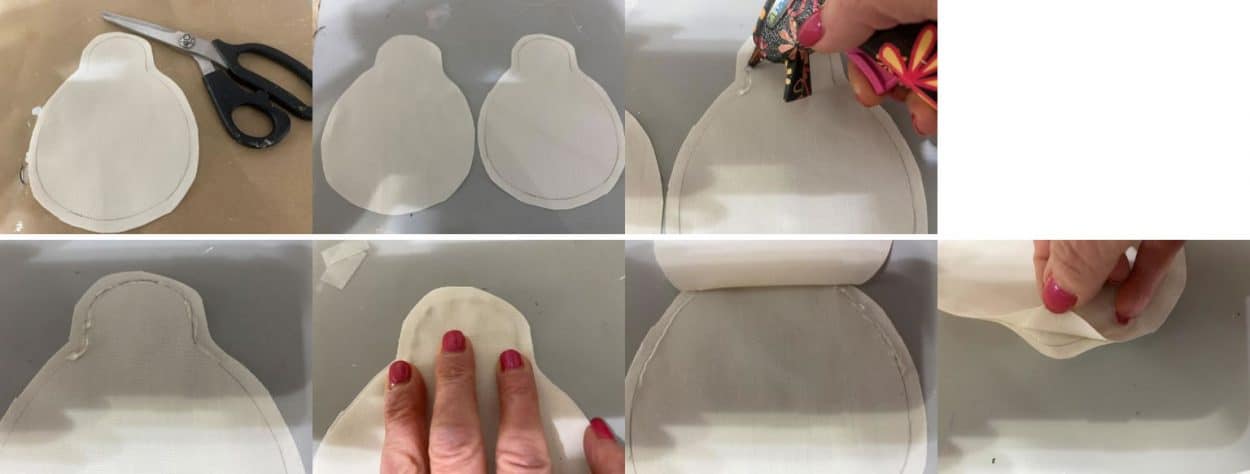
Carefully but firmly stuff the ladybug with polyfill. Do not push to hard or you will break through the glue. Once you have the ladybug stuffed add hot glue to the opening and glue closed. Using scissors trim the excess fabric from around the ladybug be careful not to cut the glue line.
Painting The Ladybug
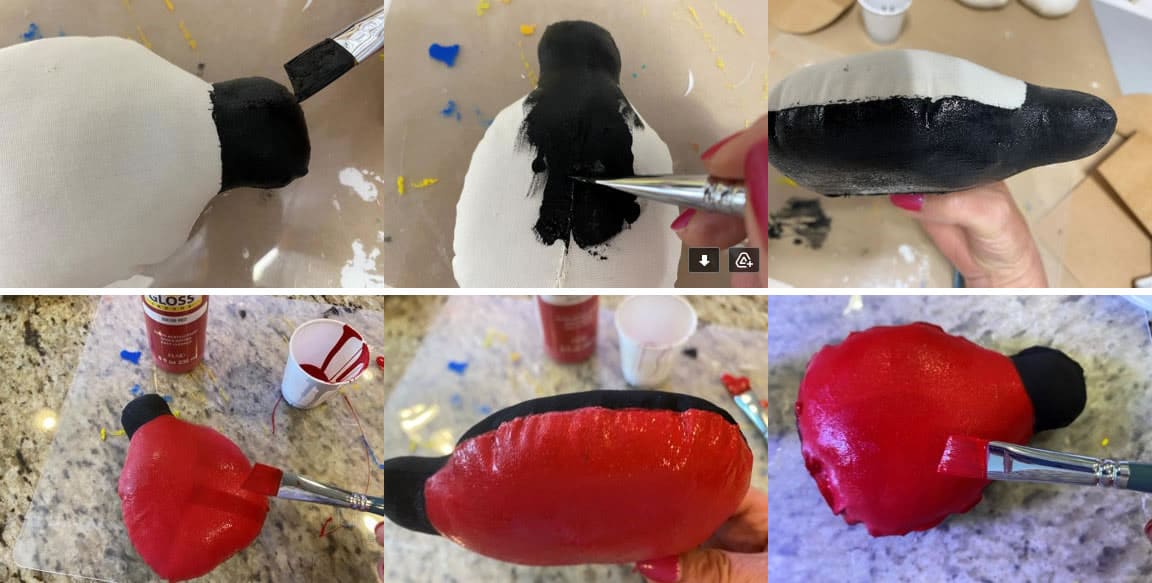
It is time to start painting your ladybug. Paint the head and back of the ladybug black. I paint the back up to the sew line and on the glued ladybug I paint the top of the fabric around the end of the ladybug on the back. Let dry. If you have sewn the ladybug you can dry him in a 210 degree oven on a parchment lined cookie sheet. Make sure you check him every 5 minutes or so he will not take long to dry. If you have glued him you will have to let him dry naturally or use a hairdryer. Once he has dried paint the front of the ladybug red. Let dry then paint a second coat of red and let dry.
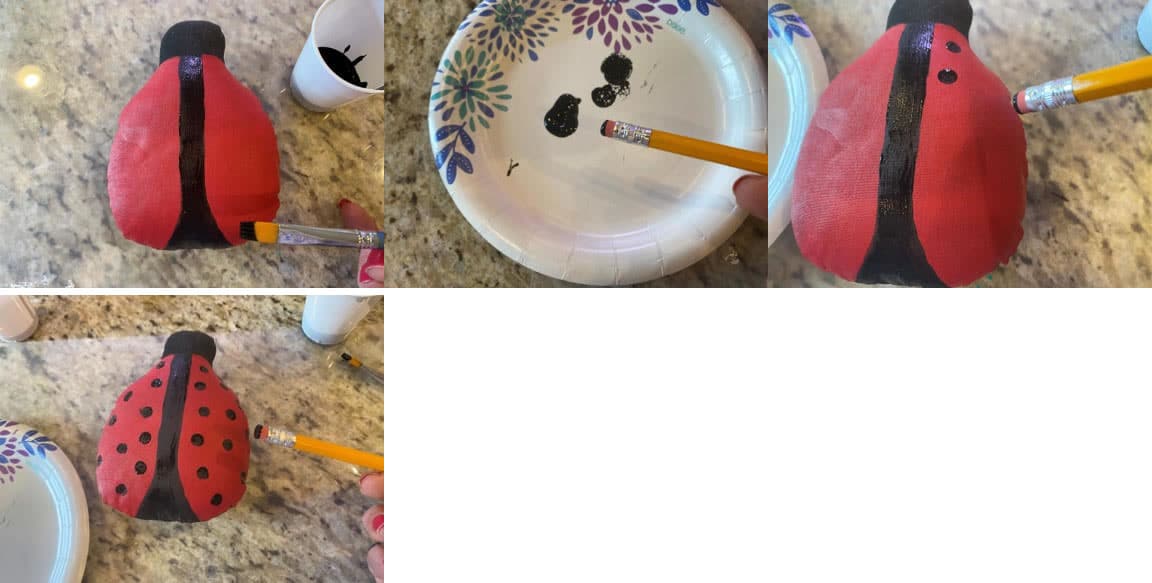
Now that your ladybug paint a black line down the middle of his back going wider towards the bottom. See pattern for visual. Place a small amount of black paint on a paper plate and using the eraser of a pencil (I used a #2 pencil) dip the eraser in the paint then make a spot on his back. Continue adding spots until you have the look you like. Let dry.
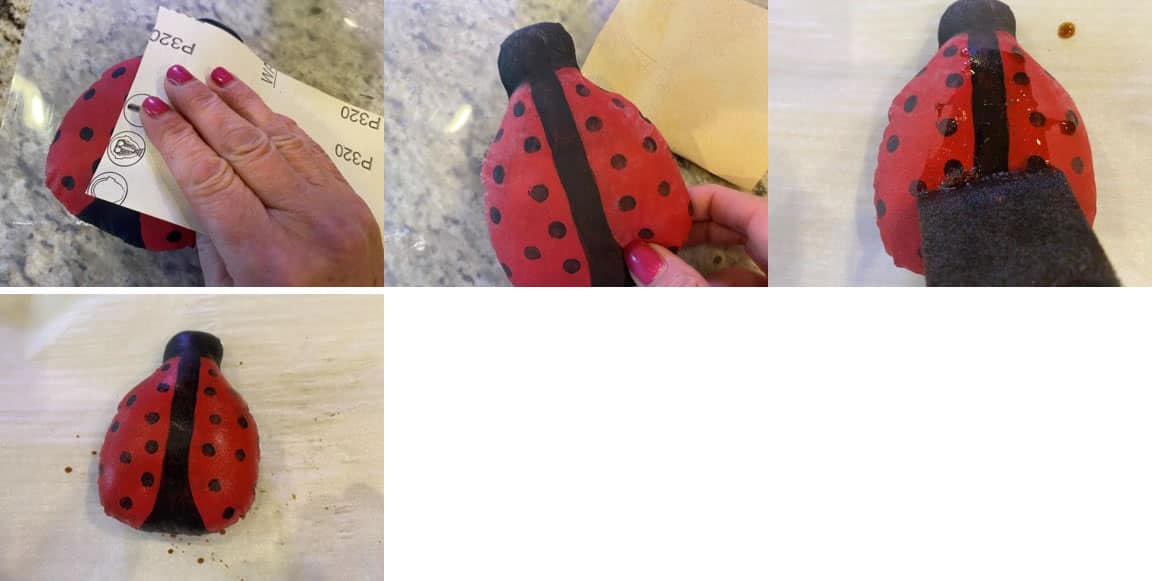
Sanding and Coffee Staining
Using a fine grit sandpaper sand the whole ladybug. Do not sand to hard or you will tear the fabric. Once you have the ladybug sanded using a sponge brush cover the whole ladybug with your coffee stain mixture. Let Dry. If you would like to know how I make my coffee stain mixture you can check out my blog titled how I coffee stain and color fabric.
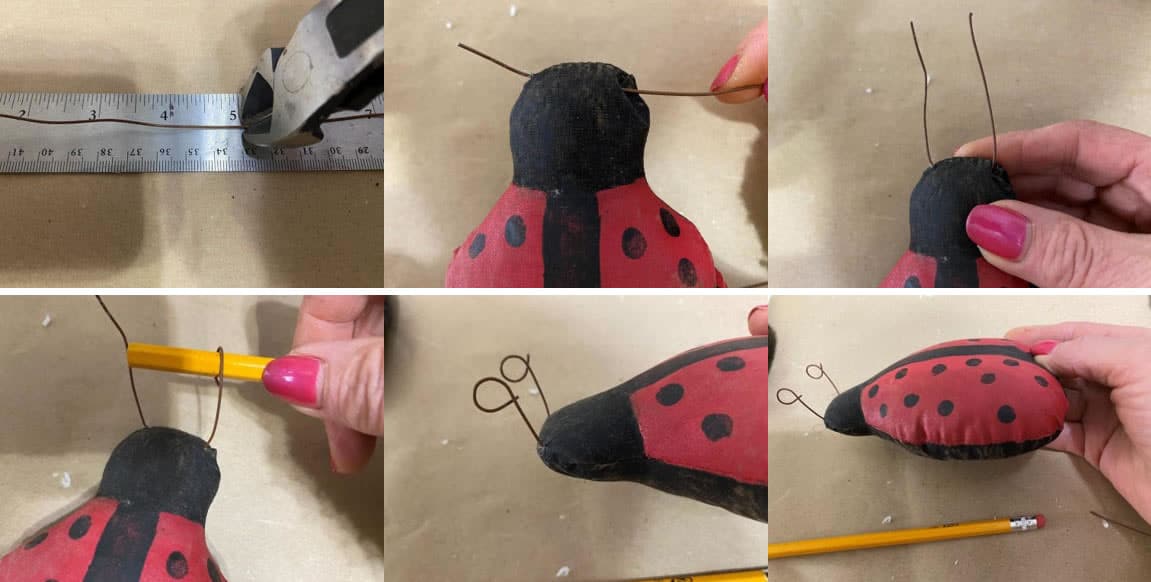
Adding The Antennas
To add the antennas cut a 5” piece of rusty wire. Insert one end of the wire at the top of his head pushing the end out the other side of the head. See pattern for placement. Make the two ends of the wire even. Wrap one end of the wire around a pencil to give the antenna a curl. Repeat to the other end of the wire. You now have his antennas done.
Your ladybug is now finished. I hope you enjoy making these adorable primitive ladybugs. If make them I would love to see photo’s of how they turned out and how you use them in your décor.
Love your ladybug
Thank you so much for your patterns and teaching us how to make some really wonderful crafts. I watch live whenever I can.
Thank you! I don’t sew , love ladybugs and can’t thank you enough for including the instructions to make them using hot glue as an alternative! It was very thoughtful & makes it possible for those of us who are “sewing- challenged” to make these adorable ladybugs & not feel disappointed & left out! I can’t wait to get started!
So beautiful wow!!! Gotta make these !!! Your amazing!!!