Dollar Tree, Home Decor, Spring, Table Settings
DIY Dollar Tree Placemats
May
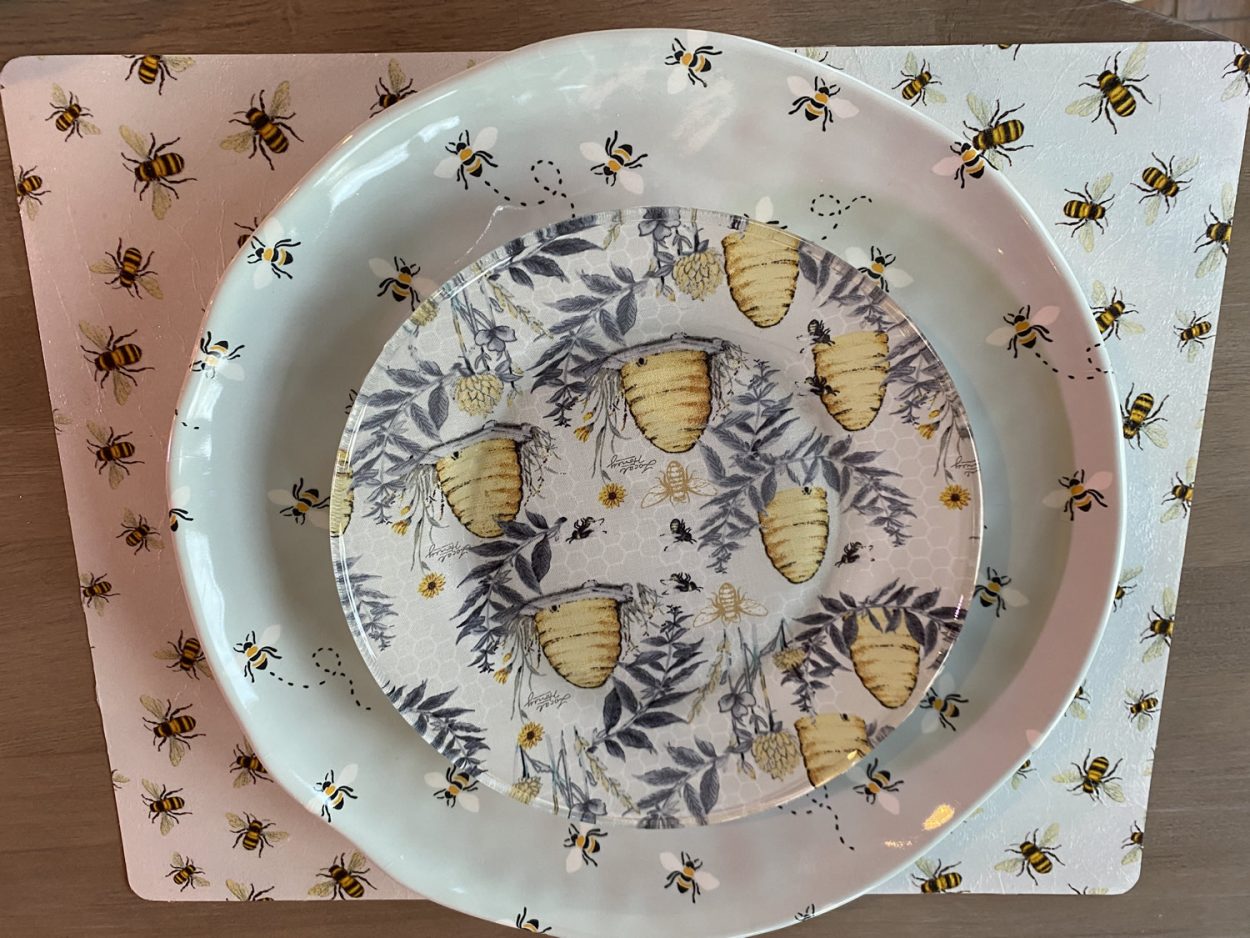
Have you ever searched for the perfect placemat to go with your dishes and just couldn’t find what you were looking for? I bought these adorable bee dinner plates and I could not find a placemat that I wanted to go with them then one day I remembered I had the chopping mats from the dollar tree and some bee napkins so I decided to try my hand at making my own placemats. I just love how they turned out and the best part is you can make them any print and style to go with your dinnerware. You do not have to use paper napkins you can also cover them with fabric.
Supplies You Will Need
- Chopping Mats From The Dollar Tree
- Guest Size Napkins
- Fabric Of Choice
- Dishwasher Safe Mod Podge
- Soft Bristle Paintbrush
- Rust-Oleum White Spray Paint
- Rust-Oleum Clear Gloss Sealer
- Emery Board or Fine Grit Sandpaper
- Pencil
- Scissors
Painting The Mat
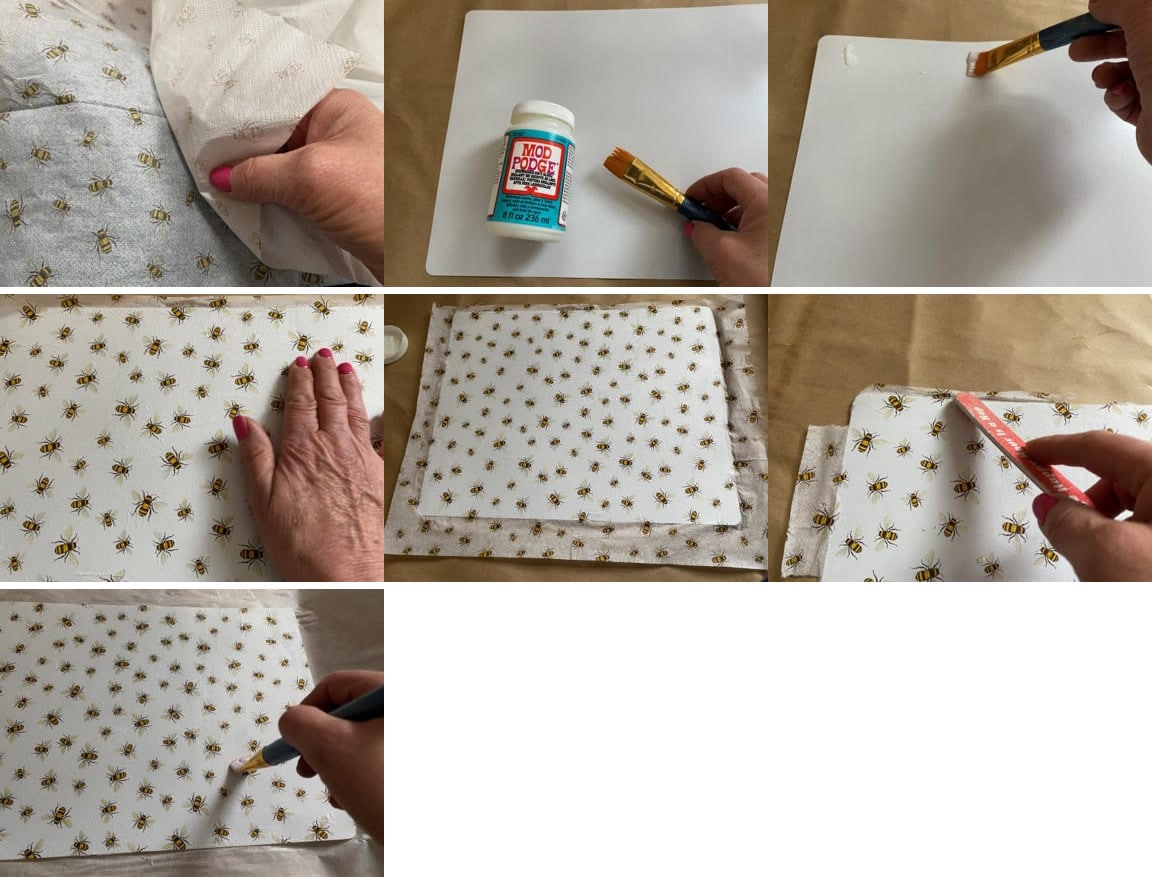
If you are using a light color napkin you should spray paint the textured side of the chopping mat with a white spray paint. I gave the mat two coats letting it dry in-between coats then I gave it a coat of Rust-Oleum clear gloss sealer. I did one mat without painting it and the white of the napkin became translucent which I did not like so I decided to paint the mat. If you are using a dark background napkin you may not have to paint the mat. If you are using fabric you do not have to paint the chopping mat.

Using A Napkin For The Placemat
It is best to use guest size napkins one napkin will cover the whole mat. Some napkins are 2ply and some are 3ply you will need to separate the top layer of the napkin from the back layers. Using a soft bristle paintbrush apply a coat of dishwasher safe Mod Podge to the side of the mat you have painted. Place your napkin on top of the mat smoothing out any wrinkles or bubbles. Let dry. Once the Mod Podge has dried use a emery board or a piece of fine grit sandpaper to sand the napkin off the edges of the mat. Apply a coat of the dishwasher safe Mod Podge on top of the napkin and let dry according to the directions then apply two more coats of Mod Podge letting dry in-between coats. You now have your placemat.
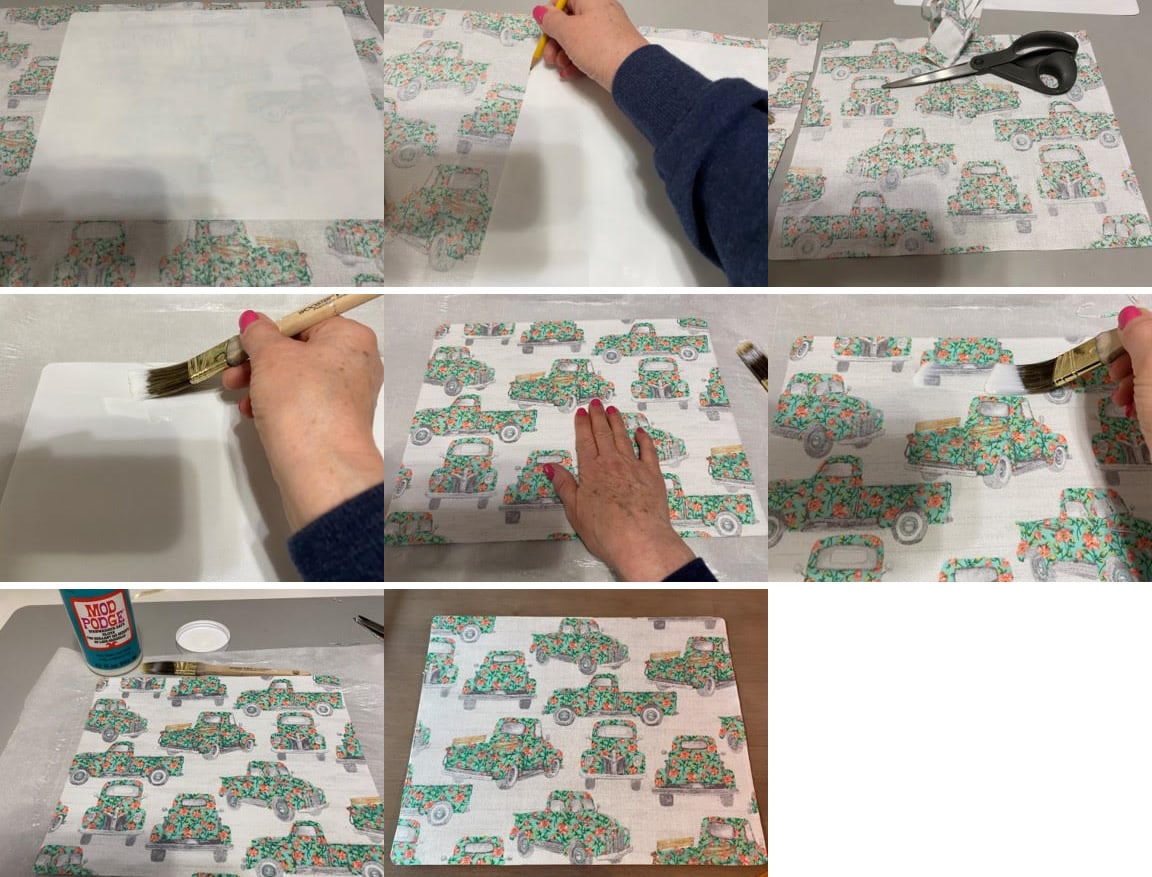
Using Fabric For The Placemat
Lay the chopping mat on top of your fabric to see what you want to see on top of your placemat. Using a pencil trace the mat onto the fabric then cut out. Apply a coat of Mod Podge to the textured side of the mat. Place the fabric onto the mat smoothing out any wrinkles or air bubbles. Apply another coat of Mod Podge to the top of the fabric and let dry according to the directions. Apply two more coats of Mod Podge to the top of the fabric leaving dry in-between coats. You now have your placemat.
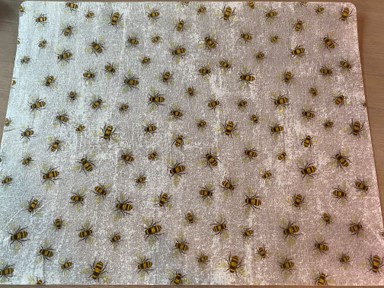
I hope you enjoy making the placemats. I would love to see photo’s if you make them. Below is a photo of the placemat that I didn’t paint first and used the white bee napkin. You may like the look without paint it first I will leave that up to you.
Made some with a lemon motif you make it look so easy, but I got too many wrinkles and bubbles. Going back for more chopping mats, want to try again and see if I can do it where they come out smooth.
Did you iron your mat…get a piece of thin cardboard and dry heat your iron …no steam. Lay the cardboard on whatever you mod podged and iron it…don’t leave it in one section too long, but feel your surface to make sure heat is penetrating the cardboard…it irons some of the wrinkles out
I think the wrinkles and bubbles give it a different kind of look…antique..not perfect❤️
Did the cutting mat need to be cut down before painting or adhering the napkin or fabric?
Beautiful 🐝
When decoupaging on anything I use plastic wrap to smooth out the wrinkles of the napkins after I’ve used the modge podge , when I use my hands , it seems to cause more wrinkles but with the plastic wrap you can work with it much better.
I love these …
where did you find the bee napkins?
Thank you I have had my blog page for over a year now. My web person Joe was just amazing. He passed away a few months ago I really miss him he was the sweetest. I have a new web guy now he is with the same company and he is doing a good job.