Dollar Tree, Home Decor, Outdoors, Spring
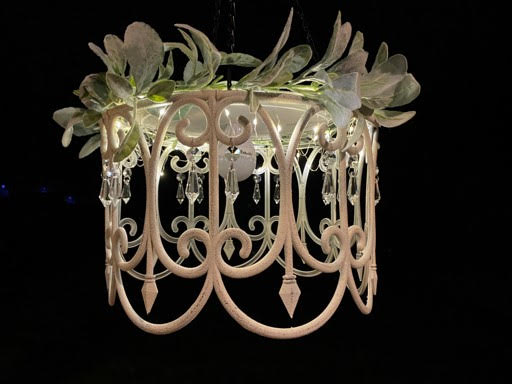
DIY Dollar Tree Shabby Chic Porch Chandelier
Apr
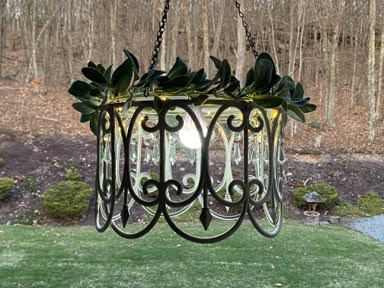
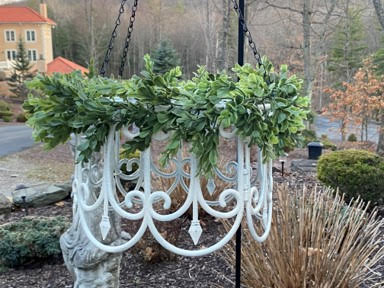
I been seeing everyone making a chandelier out of the dollar tree plastic fencing. I just loved it but I wanted to make it my own so I did mine Shabby Chic. I am just loving it and it looks so pretty hanging on my front porch. A lot of people are using it with solar lights I couldn’t do solar lights on my porch they won’t get the sun so I used a battery operated lightbulb along with battery fairy lights. The battery operated light bulb is amazing I have the bulbs in lamps on my porch and they work wonderful they even come with a remote control. I purchased the light bulbs and crystals from Amazon you can find them on my recommended products page.
Here is a list of what you will need:
- 2 -Pieces of Garden Fence (Dollar Tree)
- 1 -14” Wreath Ring (Dollar Tree)
- 1 – Splatter Screen (Dollar Tree)
- 1 – Plant Hanger (Dollar Tree)
- 1 – 36 fairy light set for outdoors (Walmart)
- 1 – Alltro Light Bulb (Amazon)
- 23 – 4” Zip Ties
- Utility Knife
- Scissors
- Hacksaw if your splatter screen has a handle
- Rustoleum Heirloom White Spray Paint
- Rustoleum Matte Sealer
- Fine Grit Sandpaper
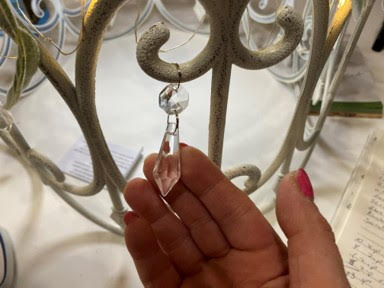
- 15 – Crystal Prisms (Amazon)
- Greenery of Choice
Forming the Chandelier
If your splatter screen has a handle you will need to cut the handle off with a hacksaw. If you have the splatter screen with the handle in the center use a screwdriver to remove the handle. After removing the handle place the splatter screen on top of the 14” wreath form. Using a utility knife make four small hole around the splatter screen then using 4 zip ties attach the splatter screen to the wreath form. Attach the screen to the second ring from the middle on the wreath form.
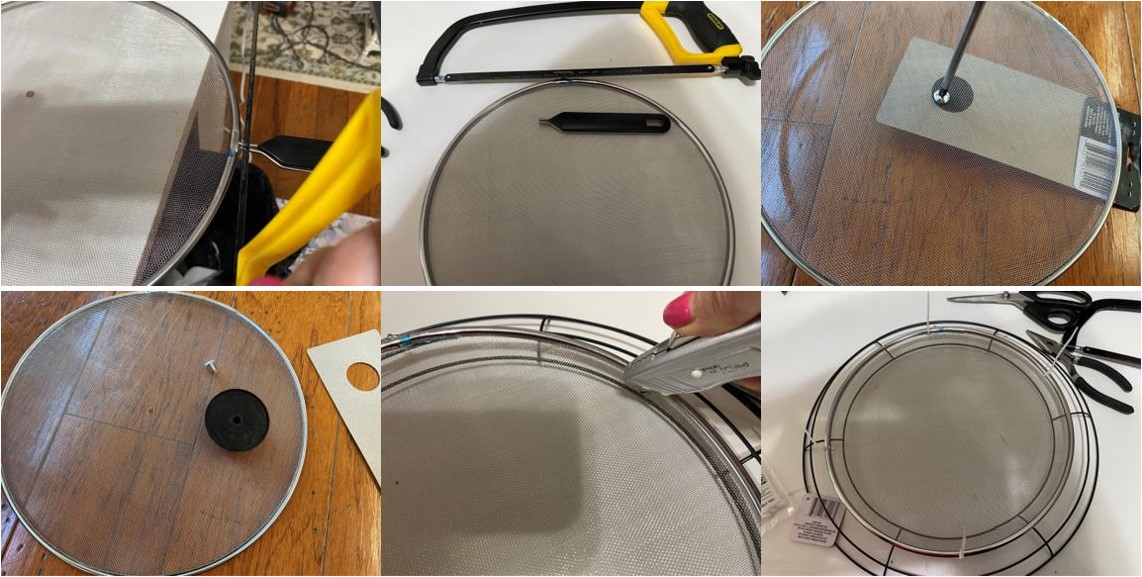
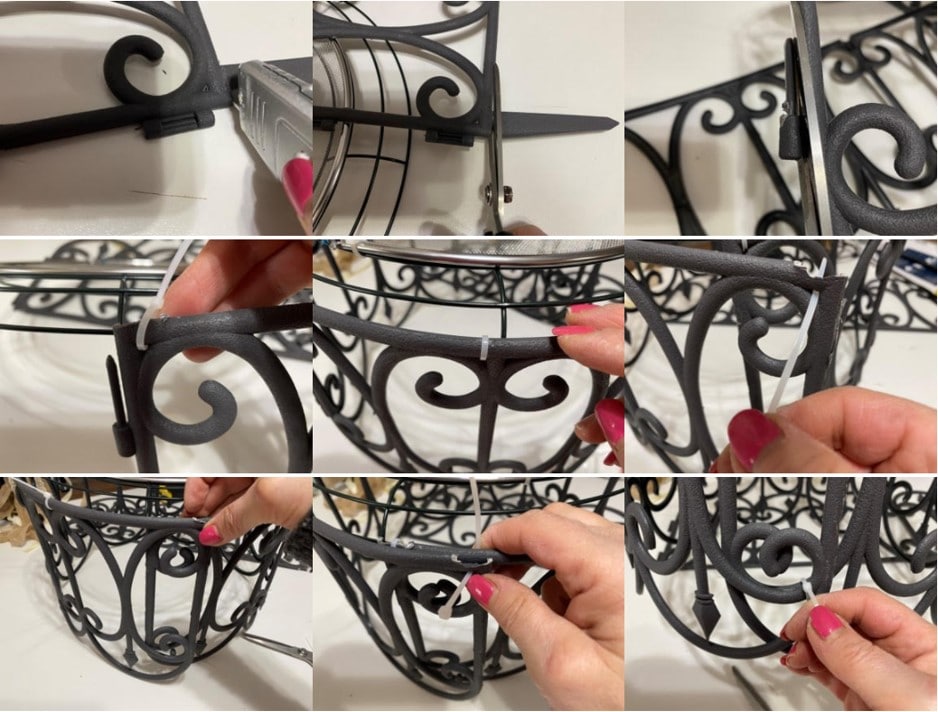
Using scissors or a utility knife remove the three stakes from both garden fence pieces. Remove the connectors with the prongs at the left side from one of the garden fence pieces. Hold the bottom of the garden fence piece up to the outer ring on the floral form. Feed a zip tie through the tiny hole in the garden fence and zip tie to the outer ring. Continue zip tying the garden fence around the wreath form. I put the zip ties through the tiny holes but you can put the zip tie around the whole bottom piece of the fence if you find that easier. I used five zip ties to connect the first fence piece. Connect the second fence piece to the first and zip tie around the wreath form. Before attaching the last zip tie cut off the connectors on the end of the garden fence. Pull the end of the garden fence over and on top of the other fence. Zip tie the to the wreath form add another zip tie at the bottom of the garden fences connecting them together. I used a total of 11 zip ties to attach both fencing pieces.
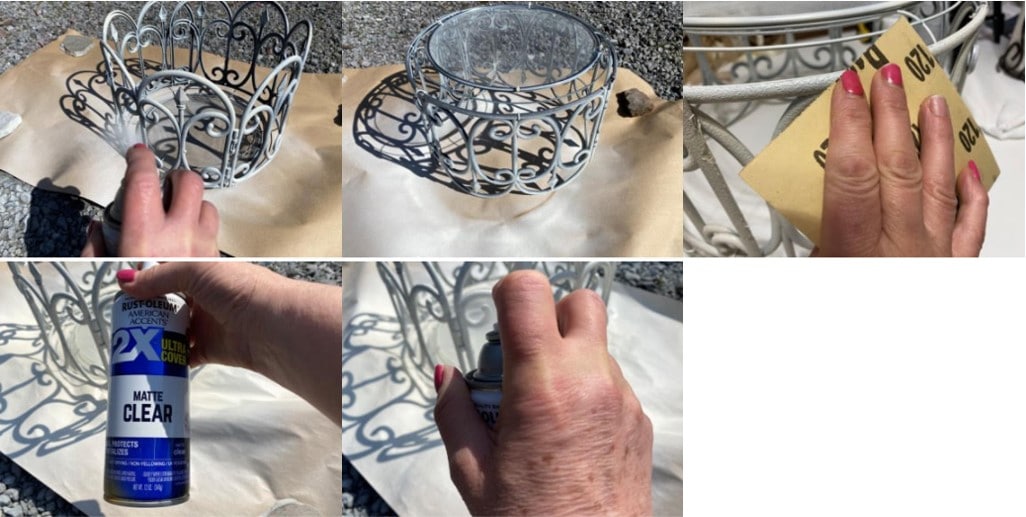
Painting the Chandelier
In a well ventilated area spray paint the whole chandelier. Let dry then apply a second coat let dry. Using a fine grit sandpaper sand the chandelier giving it a worn chippy look. After you are don sanding spray the chandelier with Rustoleum matte sealer.
Adding the Lights & Greenery
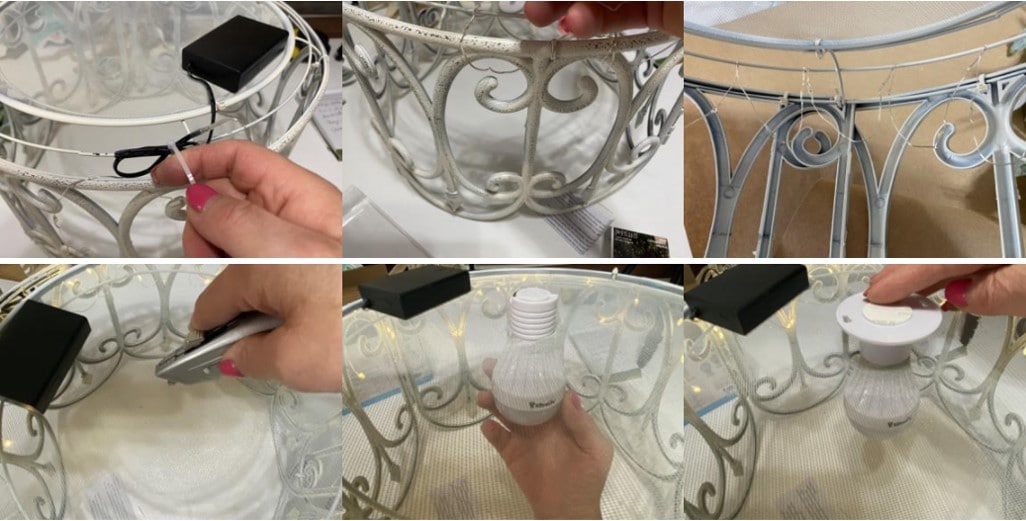
To add the fairy lights place the battery pack on top of the screen fold up the wire and zip tie to the middle ring of the wreath form. Start wrapping the light string around the middle wreath ring once form a loop on the inside of the chandelier then wrap the lights around again. Continue making loops and wrapping the lights all the way around the chandelier. If you are using the battery operated bulb using the utility cut a hole in the middle of the screen do not make the hole to big start of small then insert the bulb from the inside up through the screen to see how it fits. If the bulb fits add the magnetic piece on top of the bulb.
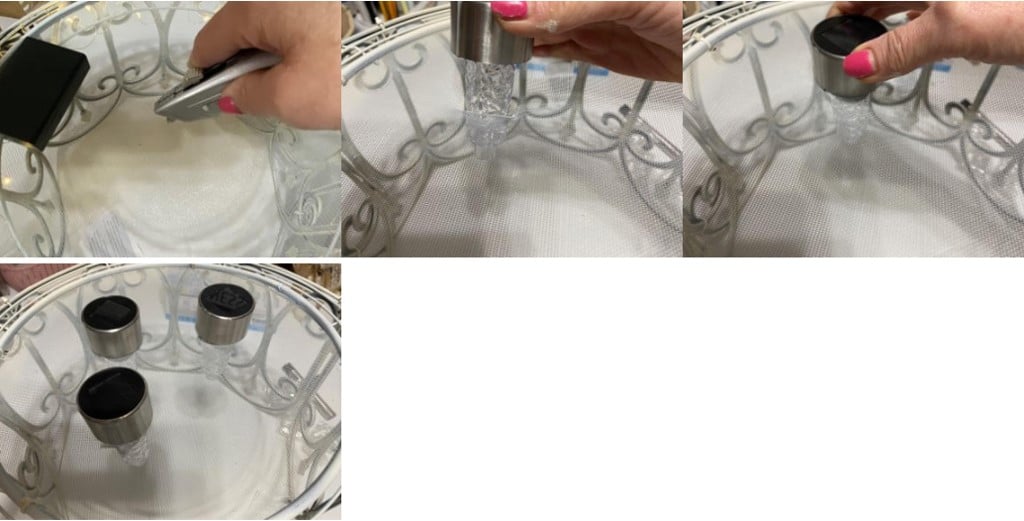
If you would like to use the solar lights I suggest using four solar lights. Make one small hole at a time, remove the bottom of the solar light then insert the light into the top of the screen. Repeat this step to the other 3 solar lights.
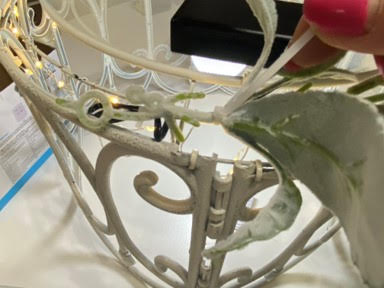
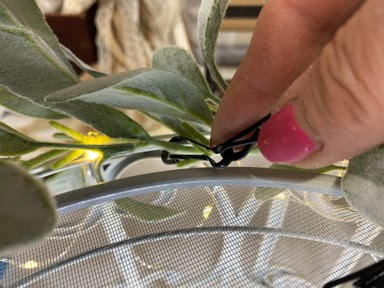
To add the greenery zip tie one end to the middle ring of the wreath form this is the same ring you attached the lights to. Continue to zip tie the greenery all around the chandelier trim off any extra greenery. I used 8 zip ties to attach the greenery. If you are adding the crystals add one crystal to each curl around the top of the garden fence. The last thing you will need to do is add the plant hanger. Attach each clip of the plant hanger to the middle ring of the wreath form.
Your chandelier is now ready to hang on your porch. If you used the battery operated light bulb do not hang the chandelier out in the weather.
I hope you enjoyed this blog and make a chandelier. Make it your own style, just like I made them my own.
I love this one in white, better than the black. Watched live how to put it together. Great job!
Very elegant looking. It would be great for weddings.
Sherry, this is the prettiest little light. It’s amazing how you take dollar tree items & make them look so high end. Love this one!
what kind of crystals did you get from amazon
Sherri, I love this chandelier! I have been wanting a light over our table on our covered deck. This is it! So excited to make this! Thank you so much! I so enjoy your crafting site. I ordered the mahaleb for your bagel recipe & plan to make it very soon. Thank you for all your ideas.
This is the best looking diy chandelier I have seen. I am going to try and get the items to make two of these.
One for my back porch and one for under my canopy over my outside table.
Thank you
This idea is so beautiful and I’m about ready to spray mine. Did you spray the splatter screen too?
This idea is absolutely stunning. I just finished putting one together and ready to spray. Did you spray splatter screen?
Love love love this chandelier! Can’t wait to make one. I’m having trouble finding everything I need 😞
I love your crafts and you explain everything very well, Im
waiting for a couple items and I will be making the lovely
light , I might try using a flowed wrap on top
Hi sherri love love this chandelier!!! It turned out so pretty . I made three altogether because it was so easy and planning on giving one to my daughter and one for my sister for their porches. Made the amazing bunny for Easter and my daughter in law just had to have one for her front door too. Many compliments. Love watching you and your instructions are easy to follow. Keep coming up with your creative ideas. Next making the sunflower wreath for my door which my daughter in law wants to make one too. You’re keeping me busy but loving it. Thanks for sharing lady .
Do you have a link to the light bulb outdoor lights? Thanks
I still have not made this. I can not get the splatter screens. DT does not have any. I have been to 5-6 DT. I can buy a splatter screen for over $10 or a set of three but they are not 14 inches. I was thinking about getting plastic screening at Home Depot what do you think?
Love this idea! I made one using the hanging basket from Dollar Tree, but only used one large solar light at the top. It works but doesn’t give off enough light to show off the sparkle of all the crystals and beads I put on it. Going to try doing one like yours with the fairy lights. Thank-you for the post.
I’m putting mine in my apartment dinning room