Flowers, Home Decor, Spring
DIY Fabric Roses
Apr
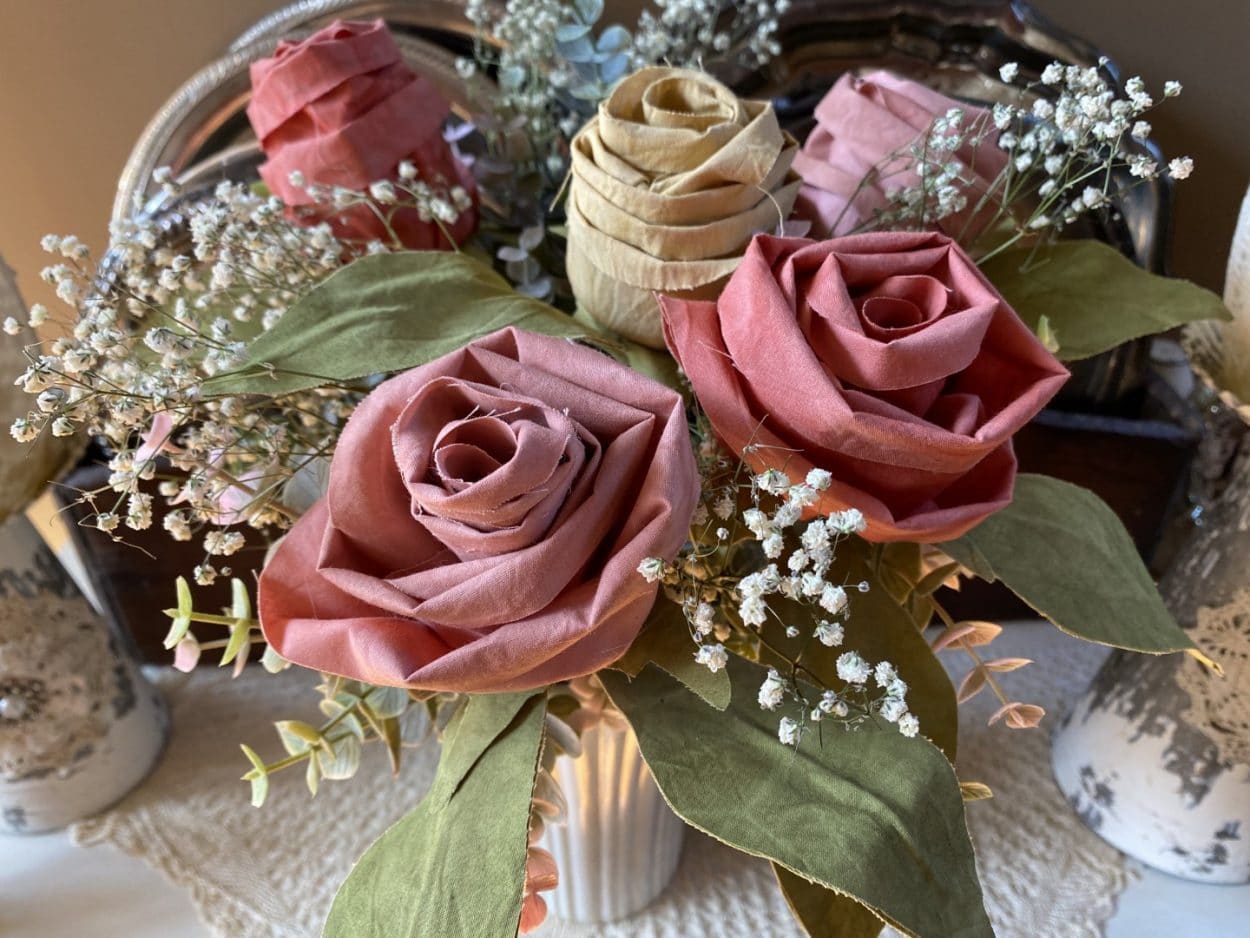
Can you believe it is already April Mother’s Day will be here before we know it. If you are looking for something special to give you Mother you have to give these roses a try. I made the roses out of Muslin that I colored in a Valentine pink, bright red and golden straw yellow. The leaves are also muslin that I colored in a clover green. If you would like to color the muslin fabric like I did you can see how on Sherry’s shortcuts. The blog for coloring the fabric is called how I color and coffee stain fabric. You can also just use regular fabric if you don not want to color the muslin.
Here is a list of what you will need:
- Rose Leaf Pattern
- Green Fabric for Leaves
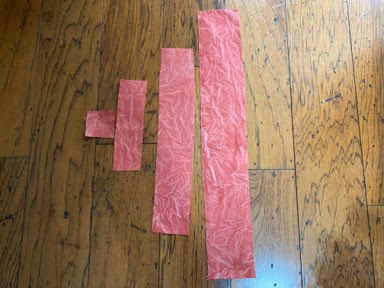
- ½”x30” Strip of Green Fabric
- 2”x2” Piece of Fabric of Choice
- 7”x2” Piece of Fabric of Choice
- 14”x2 ½” Piece of Fabric of Choice
- 20”x3” Piece of Fabric of Choice
- 1 – 18” Piece of Floral Wire
- 1 – 12” Dowel
- Thread and Needle
- Hot Glue Gun and Glue Sticks
- Scissors
- Measuring Tape or Ruler
Making the Rose
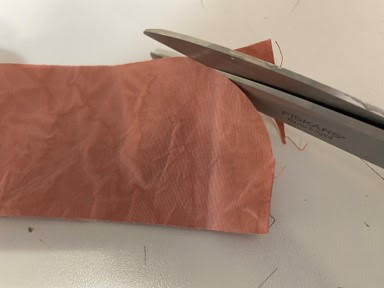
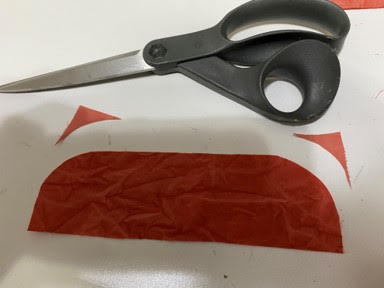
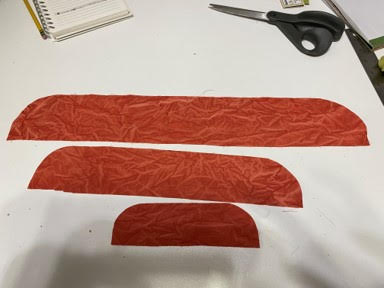
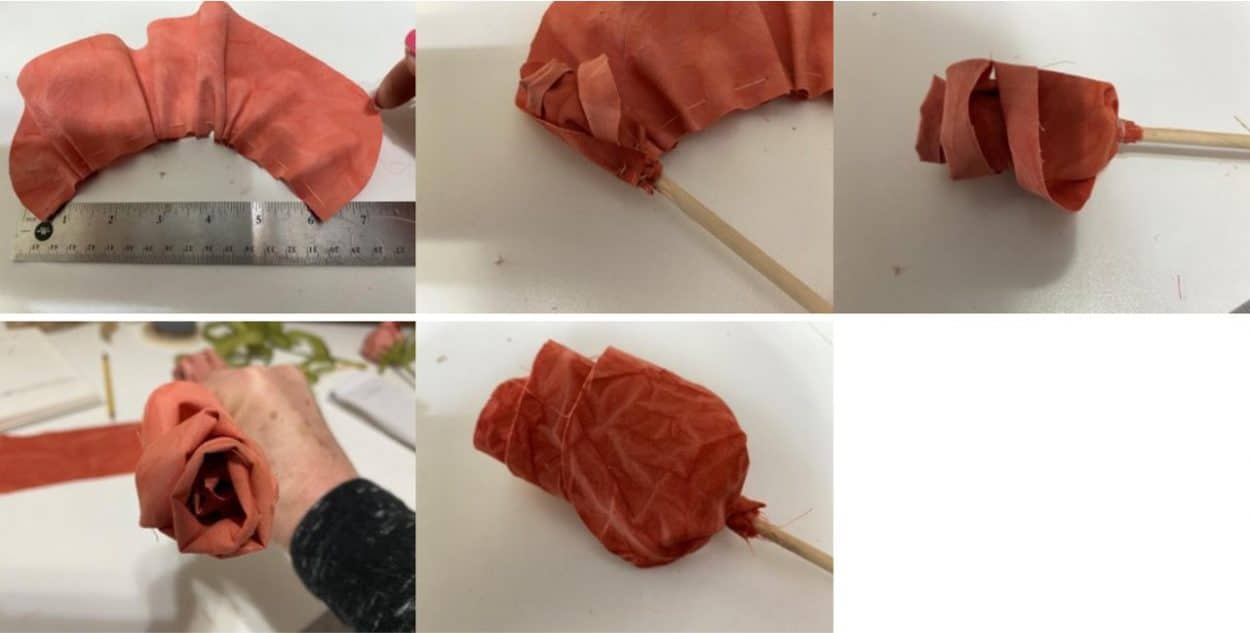
The first thing you will need to do is round the top two corners on the 7”, 14” and 20” pieces of fabric, see photo’s below.
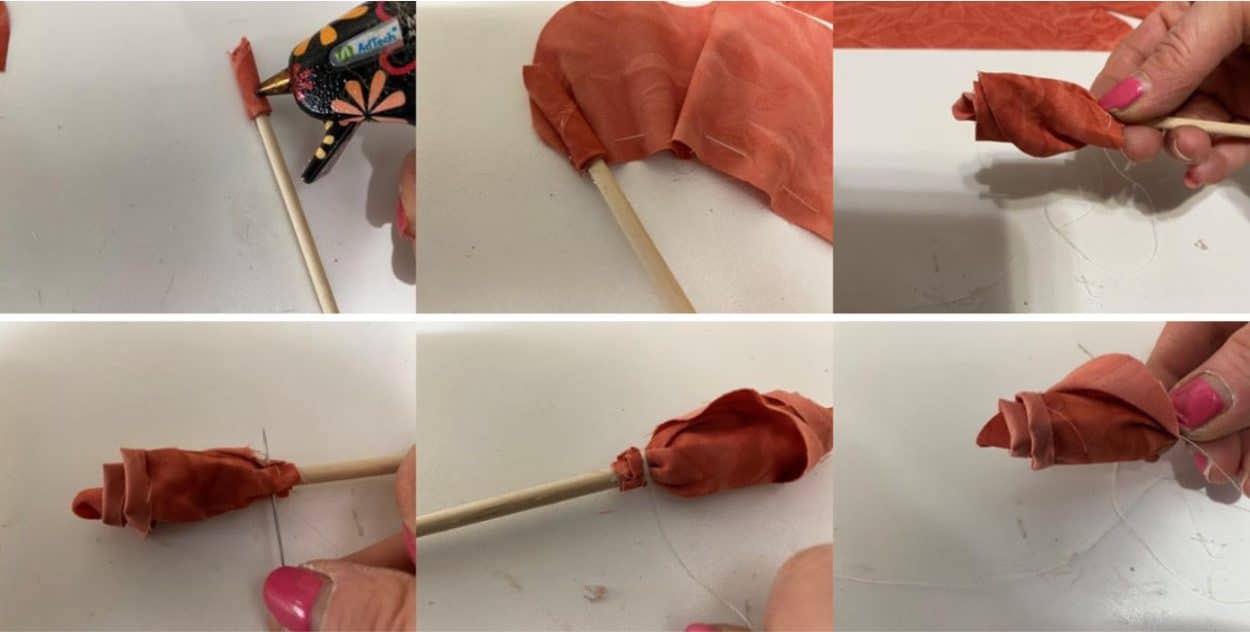
Fold the 2”x2” piece of fabric diagonally into a triangle. Add a line of hot glue across the bottom place the dowel about a ¼” from the bottom on the left side then roll the dowel across the fabric, see photo’s below. Next you will be adding the 7” piece of fabric. Do a running stitch about a ¼” inch up from the bottom, make the stitches about ½” or so, make sure you have enough extra thread to do a second running stitch and to wrap around the bottom of flower about 6 times or so. When you get to the end pull the thread to make the 7” fabric down to 4”. Tie a knot at the end leave the thread and needle attached.

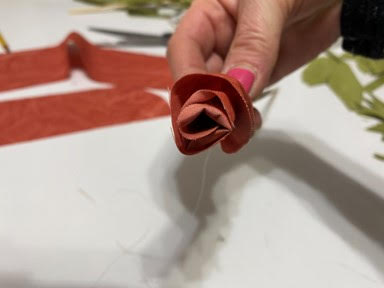
Flip the piece of fabric over so the needle and thread are on the right side. Add a dab of hot glue to the first fabric on the dowel and attach the left side of the fabric. Start rolling the fabric around the dowel. Do not roll tight roll it loosely on the top the bottom could be a little tighter but you want the top a little lose. When you come to the end do a running stitch around the fabric again making sure you grab some of the fabric layers underneath. Pull tight then wrap the thread around the base about 6 times or so, pull tight and secure off. Fold petals down about ¼”.
Repeat these steps with the 14” and 20” pieces of fabric gathering up to 6” instead of 4”.
Making and Attaching the Leaves
The first thing you will need to do is print and cut out the leaves pattern. Trace and cut out two leaves from a double layer of green fabric. You will have leaves you will need to leaves to make one leaf. Trace and cut one calyx (this is the green for the bottom of the rose) from a single layer of green fabric.
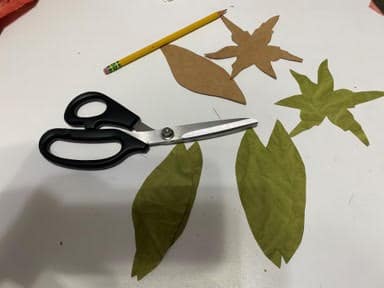
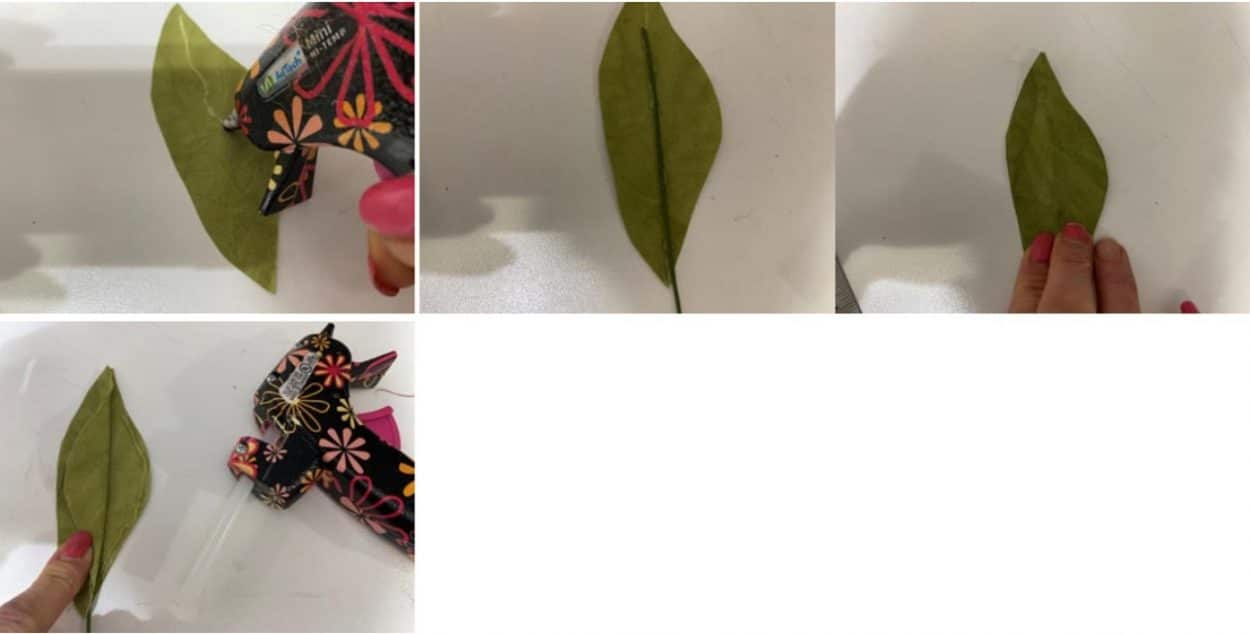
Cut the 18” floral wire in half so you have two 9” pieces. Lay one of the leaves down add a line of hot glue down the middle of leaf place the wire on top of the glue then place the second leaf on top and glue down. Fold back one side of the top leaf add a line of hot glue down repeat to the other side. Repeat these steps to the other two leaf pieces.
Clip the center of the leaf for the bottom of the rose making a small hole. Clip the hole a little larger but not to large, slide the dowel through the hole and slide the leaf up the dowel to the bottom of the rose. Push the leaf up pushing the tied bottom of the rose through the hole. Fold back part of the leaf add hot glue and glue to the bottom of the rose continue to glue all the way around the bottom of the rose.
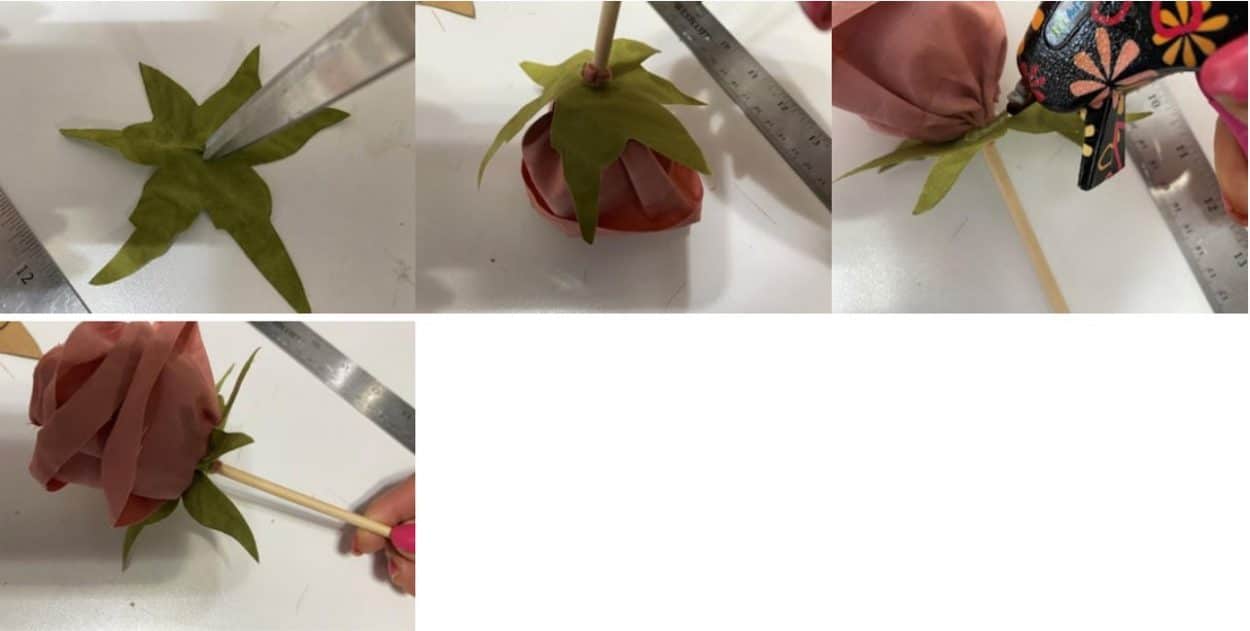
Add hot glue to the bottom of the rose glue down the end of the 2”x30” strip and wrap around the bottom of the rose. Place the two leaves were you would like them on the stem. Continue wrapping the strip of fabric wrapping around the two wires of the leaves. I moved my leaves up further then what is in the photo I put them more to the top of the rose but you can place them where you would like them. When you reach the bottom of the dowel add hot glue to the end of the strip of the fabric and glue down.

I hope you like making the roses. Each rose will be a little different due to the wrapping but that is ok no two real roses are the same. Place the roses in a vase add some greens and baby’s breath. Your Mom is going to love them and I am thinking after making them you are going to want to make more for yourself lol.
Hi Sherri i love how you go threw your crafting ideas step by step they are very easy to follow .your an amazeing crafter .Ienjoy watching you an all the crafting ideals you come up with you dont only show crafting you also show us how to decorate build an flower arrangeing i love your porch an all that you do .thank you for shareing with us .
Love your flowers you made. Great detail but I can learn faster if I see you make them.
I am new to your channel, I absolutely love watching you and your sisters ,I have 7 sisters counting myself. You are so talented .The roses are beautiful, I’m going to make some for my daughter and 2 daughter in laws .oh and my sisters .
I love them but need to see you do it step by step on a video/your page!!