Dollar Tree, Home Decor, Outdoors, Spring
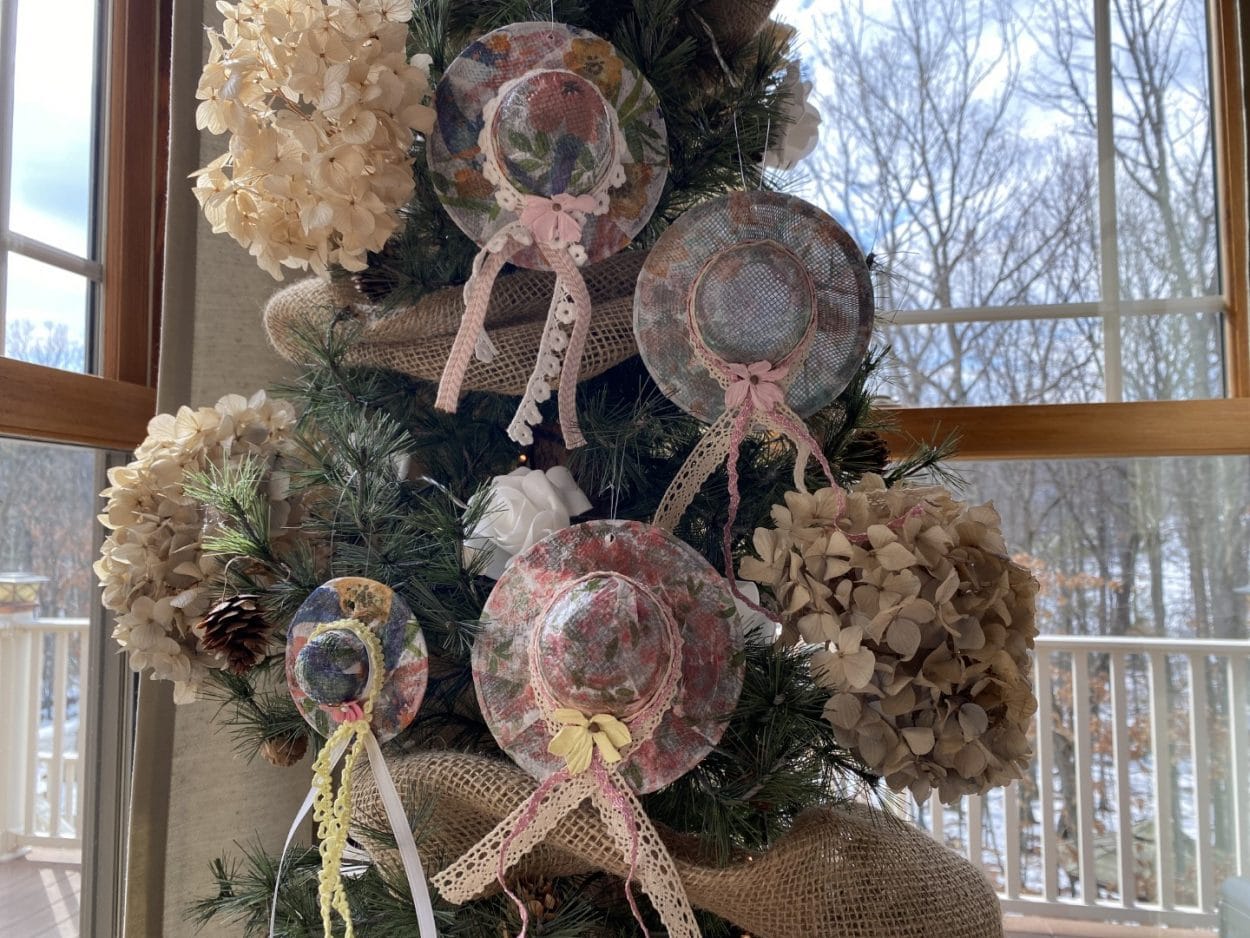
DIY Dollar Tree Spring Strainer Hats
Mar
Do you keep trees up all year long in your home? If you have been following The Crafty Decorator you know I keep trees up all year long in my home and out on my porch. I just love decorating the tree’s for all holidays and season’s. I am always trying to think of new items I can create to use in my home decorating. I have seen where someone painted the sink strainers from the dollar tree and made cute little hats out of them. Well if you know me I couldn’t just paint them lol. I wanted cute printed spring hats so I decided to decoupage napkins onto the strainers and I just love how they turned out. I am sure you can also decoupage Fabric onto the strainers also.
Here is a list of what you will need:
- Metal Mesh Sink Strainer Set (Dollar Tree)
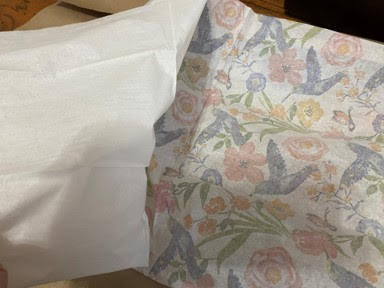
- Paper Napkins of your choice
- Mod Podge
- Paintbrush
- Ribbons
- Flower Embellishments
- Fishing Line
- Hot Glue Gun and Glue Sticks
- Scissors
- Something to punch a small hole into the mesh for the hanger I used a large nail.
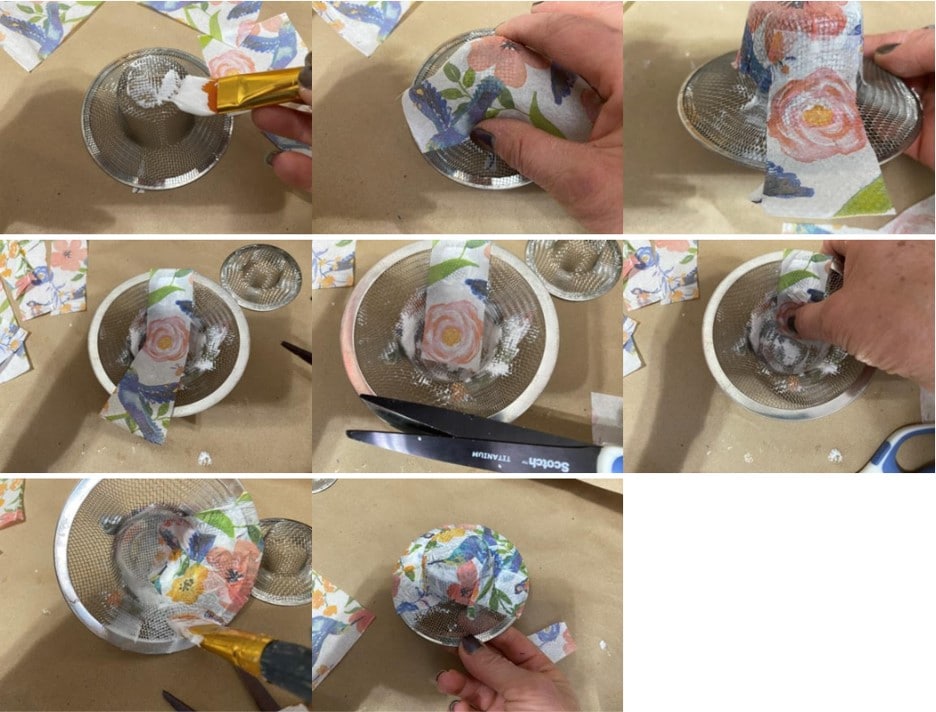
Covering the Strainers
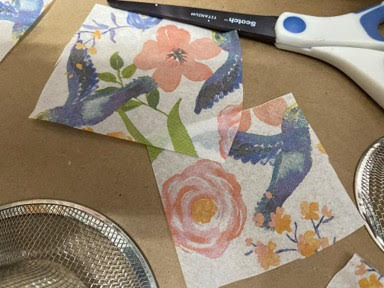
You are going to start by separating the napkin layers. Some napkins are 2ply and some are 3ply make sure you end up with just the single printed layer of the napkin. Cut a square big enough to cover the top of the hat. Next cut your napkin into strips it doesn’t matter how wide and they don’t have to be all the same.
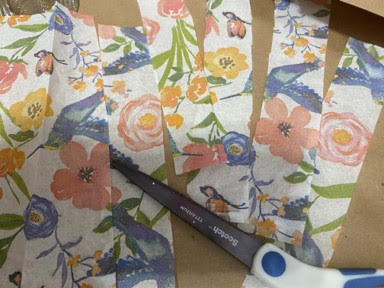
Using a paintbrush cover the top of the hat with mod podge then cover with the square piece of the napkin. The napkin will not cover the whole top of the hat but don’t worry the strips of napkin will help cover this. Next you are going to start to mod podge the strips of napkins onto the hat. Start by adding mod podge at the base of the napkin you just add to the top of the hat then add mod podge to the brim of the hat. Place a napkin strip on bringing it around to the underneath of the hat and tuck into the middle. Continue add mod podge and napkins strips around the hat and covering the bare spots on top of the hat that the square napkin didn’t cover. Let the hat dry then apply a top coat of mod podge. If you would like to use the hats outside I suggest using the mod podge for outdoors.
Adding the Embellishments and Hanger
I added two different ribbons around my hat but you can use anything you would like. I added a drop of hot glue to what I want to be the back of the hat. Add a drop of hot at the base of the top of the hat glue the middle of the piece of the ribbon down. Bring the two ends to the front criss-cross the ribbon and hot glue into place. Repeat this step with a thinner layering over the ribbon you just attached. I hot glued a flower in the middle you can add anything you would like.
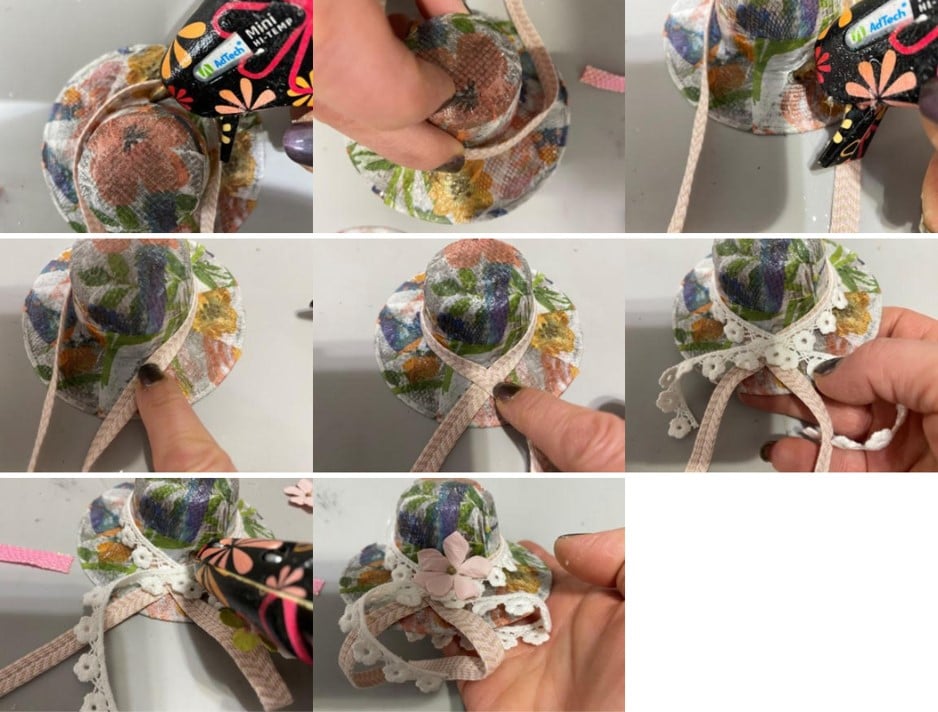
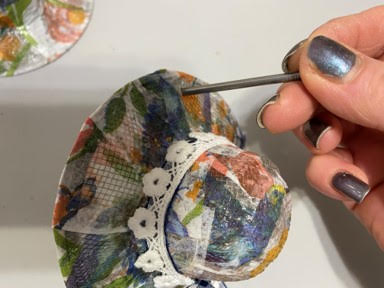
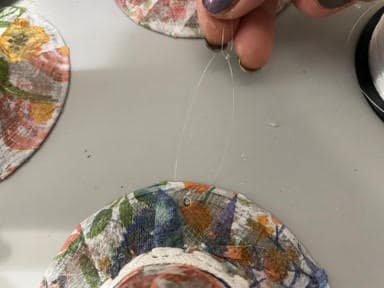
To make the hole for the hanger you will need something sharp to poke a hole through the screen at the end of the hat. I used a large nail to make the hole. You are going to poke through the screen next to the rim at the back of the hat. Cut a piece of fishing line. Feed the fishing line through the hole tie a double knot and trim off excess.
I hope you enjoy making these adorable hats. How cute would these be for Christmas if you used Christmas napkins or fabric. I am definitely going to make some Christmas hats to hang on my tree.
I tried these and they turned out cute, I love your crafts, and you explain things very well, keep up the good work
The hats are adorable.
These are so pretty. I can’t wait to make them and add them to my tree after Easter.
These are wonderful!
I love hats!
Thank you for sharing!
Love watching you.
I love all of your crafts they are all beautiful!
These are beautiful. I have not tried these yet. You are creative. I love to watch you craft. Most of the time it is on #Replay but that is OK. I still get to see your creations.
is there any where on your website that you have the instructions that I can print them out for making the tiny sink strainer hats? I got the little strainers already and have some decopauge napkins and Mod podge…though I will need ribbon, but is there a way I can print out the how too’s , I am getting forgetfully in my age. Thanks if you can advise and help. 🙂