Dollar Tree, Home Decor
DIY Dollar Tree Textured Vas Transformed Three Ways
Apr
If you have been following The Crafty Decorator you know I just love creating and making items to decorate my home. If you are not following me on Facebook be sure to check out my Facebook page to see all the beautiful items we create to decorate our homes. I have seen so many post of people changing up the glass vases from Dollar Tree but when I seen these plastic textured vases I knew I needed to transform them. I started with just using the gold for my dining room table but as always I have to try more then one way to transform something lol. Below you will see how you can transform a plastic textured vase from Dollar Tree into a stunning gold vase, a beautiful aged gold vase, and a antique copper vase with patina!
Materials I Used:
- Plastic textured vases from the Dollar Tree
- Ace brand gold plate spray paint
- Rust-Oleum matt hammered copper spray paint
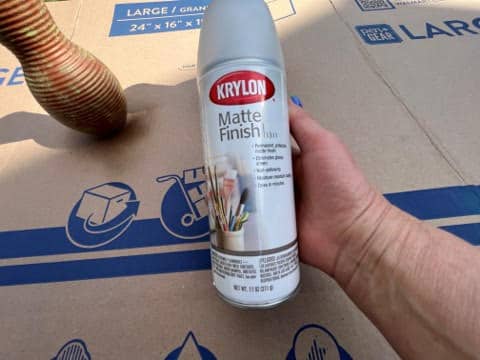
- Krylon matte finish sealer or Rust-Oleum matte sealer
- Waverly Antique wax
- Deco Art Hauser light green craft paint
- A bag of pebbles or stones from the Dollar Tree
- Rubbing alcohol and paper towel
- Paintbrush
- Small piece of sponge I used a small sea sponge
- Paper Plate
- Baby wipes
- A little cup or bowl of water
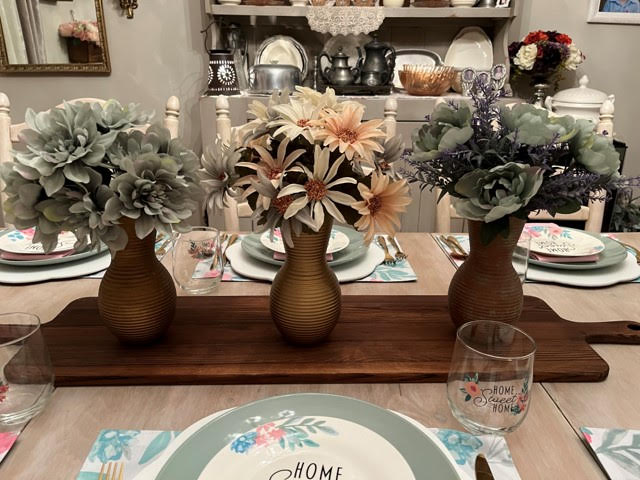
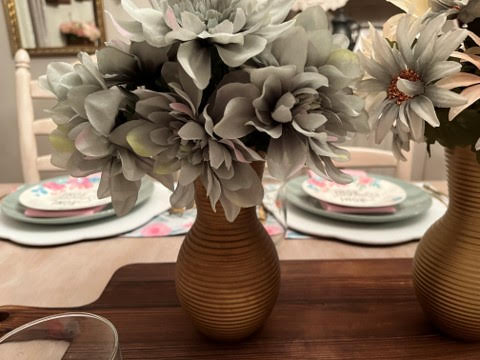
Creating the Gold and the Vintage Gold Vase
The first thing you will need to do is remove any stickers from the vase then wipe down the vase with rubbing alcohol, this will remove any dirt or oils from the vase. In a well vented area give the vase a few light coats of the Ace gold plate spray paint make sure you spray the inside a few inches down also. Let dry between coats then flip the vase over and spray a light coats of the gold plate spray paint for full coverage. Once the vase is fully covered and dried you are going to add the Krylon matte finish sealer. I gave the vase one coat but you can do more then one if you prefer. Spray on one coat let dry then flip over and spray again to make sure you have full coverage.
![]()
![]()
![]()
![]()
![]()
Your vase is now ready for flower! I hope you love the gold as much as I do.

To create the antique gold vase you are going to follow the directions above for the gold vase but once the paint is dry you are not going to spray the vase with the sealer yet, you are going to add the antiquing first. To give the gold vase an antique look you are going to dip a paintbrush into water then into the Waverly Antique Wax. Next start painting the vase with the wax, keep spreading the wax then dip the paintbrush back into the antiquing wax and continue to spread the wax onto the vase. You can work your way from bottom up or from the top down and I did not dip my brush into the water each time, I only dipped the brush in the water again when I felt like the wax was becoming to hard to spread. After you have the vase covered in the antique wax you can use a baby wipe to remove any wax you would like. I left some darker spots and brush strokes to give the vase a more aged look.
![]()
![]()
![]()
![]()
Your vase is now ready for flowers!
Creating the Copper Vase with a Patina Finish
The first thing you will need to do is remove any stickers and wipe down the vase with a paper towel and rubbing alcohol, this will remove any dirt or oils. In a well ventilated are spray the vase with the Rust-Oleum matt hammered copper spray paint. Spray light coats to prevent any drips and let dry in-between coats. Make sure you spray the inside of the vase a few inches. Next flip the vase over and repeat the painting process.
![]()
![]()
To give the vase a patina squirt a small amount of the Hauser light green paint onto a paper plate. Dip your sponge into the paint then dab the sponge onto the paper plate. Next start dabbing the sponge onto the vase. Keep dipping the sponge into the paint and dabbing onto the vase until you achieve the look you like. I also pulled the sponge across in some areas to give it a different look. Apply the paint darker in some areas for a more patina look.
![]()
![]()
![]()
![]()
Once you are happy with how your vase looks in a well ventilated area spray the vase with the sealer making sure you flip the vase over and spray again for a full coverage of the sealer.
Your vase is now ready for flowers!
![]()
I hope you give this Dollar Tree vase transformation a try I know you will just love how all three transformations turn out!
I have missed watching you craft. Are you going to be videoing as you craft soon.